Page is loading ...

Page 1
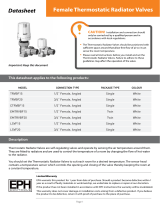
Thermostatic Radiator Valves
Datasheet
Important: Keep this document
CAUTION! Installation and connection should
accordance with local regulations.
The Thermostatic Radiator Valves should be positioned with
sense the room temperature.
Please read all instructions before you install and set the
Thermostatic Radiator Valves. Failure to adhere to these
MODEL CONNECTION TYPE PACKAGE TYPE COLOUR
CTRV10 10mm Compression, Angled Single White
CTRV15 15mm Compression, Angled Single White
CTRV15C 15mm Compression, Angled Single Chrome
EMTRV10 10mm Compression, Angled Twin White
EMTRV15 15mm Compression, Angled Twin White
EMTRV15C 15mm Compression, Angled Twin Chrome
This datasheet applies to the following products:
Description
Thermostatic Radiator Valves are self-regulating valves and operate by sensing the air temperature around them.
to the radiator.
You should set the Thermostatic Radiator Valves to suit each room for a desired temperature. The sensor head
contains a temperature sensor which controls the opening and closing of the valve thereby keeping the room at
a constant temperature.
Limited Warranty
EPH warrants this product for 1 year from date of purchase. Should a product become defective within 1
year as a result of faulty materials or workmanship, we undertake to replace or repair at our discretion.
If the product has not been installed in accordance with EPH instructions the warranty will be invalidated.
This warranty does not cover damage or installation costs arising from a defective product. If you believe
the product to be defective, return it with proof of purchase to the place of purchase.
designed for use in domestic applications only.

Page 2
Technical Data
Application
1. Setting the temperature
The calibration marks present on the sensor head, correspond to the following temperatures:
Select the desired room temperature from the table above and rotate the sensor head so that the black
indicator points to the appropriate number. Allow at least one hour for the temperature to stabilise.
heats up depend on your boiler size and setting.
2. Frost protection
If heating is not required but there is a risk of freezing, the sensor head may be rotated so that the black
indicator points to . This will allow the valve to open if the temperature falls below 7°C. The boiler must
remain operational, controlled by a frost thermostat.
3. Radiator removal
To remove a radiator it is necessary to use the manual closing cap supplied with the valve. Remove the sensor
to close the valve there is a risk of water damage if the temperature falls and the valve opens unexpectedly.
4. Summer operation
valves are set to the fully open position (position “5”).
TEMPERATURE
RANGE
MAXIMUM
DIFFERENTIAL PRESSURE
MAXIMUM
STATIC PRESSURE
MAXIMUM
FLOW TEMPERATURE
KVS VALUE
@ 1 BAR
7 ... 28˚C 0.6 Bar 10 Bar 90˚C 1 M3/H
0 12345
0˚C 7˚C 12˚C 16˚C 20˚C 24˚C 28˚C
NOTE
quickly your room heats up depend on your boiler size and setting.
Store the manual closing cap (provided) in a safe place for future use.
*
*

Page 3
Installation Options
Installation Instructions
The thermostatic radiator valve can be installed on either side of the radiator, in a vertical or horizontal position.
If a lockshield valve is also used on the same radiator, install it on the opposite side of the radiator. See Figure 1.0:
WARNING!
The sensor head must not be shielded by any object or come in contact with direct sunlight.
accordance with good plumbing practice. Use the manual closing cap (provided) to protect the valve during
installation.
Thermostatic
Radiator
Valve
Vavle
(Optional)
Thermostatic
Radiator
Valve
Thermostatic
Radiator
Valve
Thermostatic
Radiator
Valve
OUT
(return)
IN IN
OUT
(return)
IN
OUT
(return)
IN OUT
(return)
1. Fit the manual closing cap and screw clockwise to close the valve. Do not over-tighten.
2. Apply PTFE tape to the 1/2” BSP tail and screw it into the radiator.
3. Connect the valve body by sliding the nut and olive onto the tail. A jointing compound should be applied to
the olive. The valve may be used with the sensor head in the vertical or horizontal postion. Do not over-tighten.
4.
Use an appropriate reducing set for 8mm and 10mm pipe sizes.
5. Undo the valve body from the tail piece. Slide nut and olive onto the supply pipe. Apply a suitable jointing
6. Fill the system, bleed the radiator and check for leaks. After commisioning, remove the manual closing cap and
store it in a safe place for future use.
7. Turn the sensor head to the fully open position (position “5”)
8. Mount the sensor head to the valve body ensuring that the indicator can be seen. Hand tighten the securing
ring - do not over-tighten or use tools.
Figure 1.0 Installation Options

Sensor head Installation
Valve
Thermostatic
Sensor Head
Do not
use tools
Valve Installation
Connecting to hot water pipe
Connecting to radiator
Valve
Valve
Cap
NOTE
Bar under all operation conditions.
1. Turn the Thermostatic sensor head to the fully open position
2. Hand tighten the securing ring,
do not over tighten or use tools.
1. Removing the manual closing cap
(provided) and undo the valve body
from the tail piece.
2. Screw the tail piece onto the radiator, slide on the
Figure 2.0 Valve Installation
Figure 3.0 Sensor head Installation
20221013_AW1077_TRV_DS_PK
EPH Controls Ireland
technical@ephcontrols.com www.ephcontrols.com
EPH Controls UK
technical@ephcontrols.com www.ephcontrols.co.uk
/