Page is loading ...

LN Series Compact VAV Controllers Installation Instructions 1
Application
The LN Series Compact Variable Air Volume (VAV)
controller line is designed to meet the requirements of
single duct VAV or Variable Volume according to
Temperature (VVT) applications. You can directly
control a combination of up to two pieces of equipment
such as baseboards, duct heating/cooling, multi-stage
heaters, fans, valves, and lights. The LN Series
Compact VAV controllers are compatible with a wide
range of sensors and peripheral equipment.
The controllers are based on L
ONWORKS® technology
for peer-to-peer communication between controllers
and are L
ONMARK® network certified.
North American Emissions Compliance
United States
Canada
Installation
For proper installation and subsequent operation of the
LN Compact VAV/VVT controllers, follow these
recommendations:
• Upon unpacking your controller, inspect the
contents of the carton for shipping damage. Do not
install damaged devices.
• Allow for proper clearance of device casing, wiring
terminals, and service pin for easy access,
hardware configuration, and maintenance. Record
the Neuron® ID located on top of the device; you
need it for commissioning the device.
• Operate the controllers under the following
conditions:
- Ambient temperature between 32 to 158°F
(0 to 70°C)
- Relative humidity from 0 to 95%,
noncondensing
• Ensure proper ventilation of devices, and avoid
areas where corroding, deteriorating, or explosive
vapors, fumes, or gasses may be present.
Compliance Statement (Part 15.19)
This device complies with Part 15 of the FCC Rules.
Operation is subject to the following two conditions:
1. This device may not cause harmful interference, and
2. This device must accept any interference received,
including interference that may cause undesired
operation.
Warning (Part 15.21)
Changes or modifications not expressly approved by the
party responsible for compliance could void the user’s
authority to operate the equipment.
This Class (A) digital apparatus meets all the
requirements of the Canadian Interference-Causing
Equipment Regulations.
Industry Canada Statement
Le terme « IC » précédant le numéro d'accréditation/
inscription signifie simplement que le produit est conforme
aux spécifications techniques d'Industry Canada.
IMPORTANT: Work in a static-free area. Discharge
any static electricity you may have accumulated.
Discharge static electricity by touching a known,
securely grounded object. Do not handle the
controller without proper protection against static
discharge. Use a wrist strap when handling the
controller. Secure the wrist strap clamp to earth
ground.
LN Series Compact VAV Controllers
Installation Instructions
LN-VAVLFS-1, LN-VVTLFS-1, LN-VAVCFS-1
Code No. LIT-12011318
Release 4.1
Issued October 6, 2008
Supersedes November 9, 2007

LN Series Compact VAV Controllers Installation Instructions2
Dimensions
Mounting
Location Considerations
The LN Compact VAV/VVT controllers are designed for
easy installation. The integrated mounting brackets on
each controller have a diameter of 0.2 in. (5 mm) and
are designed to oppose the shaft torque.
Note: Units with a damper actuator only have one
screw.
To mount the controller:
1. Mount the device directly on an air duct or in a
panel by using the integrated damper brackets and
screws.
2. Remove the terminal blocks, and use the controller
mounting slots to mark the location of any holes to
drill.
3. Remove the device and drill holes.
4. Clean the perforated surface, and fasten the
device using the appropriate screw types.
5. Ensure the damper shaft is at least 1.5 in. (40 mm)
so the damper bracket can fit securely around the
damper shaft. If required, limit the maximum
damper shaft rotation by modifying the position of
the stroke end-stops in 5° increments.
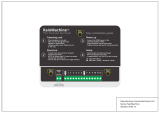
Figure 1: LN Series Compact VAV Controller
Dimensions
Figure 2: Controller Components

LN Series Compact VAV Controllers Installation Instructions 3
Note: To connect the high- and low-pressure sensors
(see Figure 3), use flexible tubes with a 1/4 in.
(6.4 mm) external diameter and 5/32 in. (4 mm) internal
diameter.
Wiring
Recommendations
• Use the removable terminal connectors to make all
wiring connections.
• Disconnect the terminal connectors from the
device for wiring.
• Use a small, flat screwdriver to tighten the terminal
connector screws after inserting the wires.
• Keep analog type cables (for power, voltage,
current inputs, or triac outputs) apart from other
types of wiring to avoid any ambient noise
transmission among wires; however, unswitched
power wiring can be in the same conduit as the
L
ONWORKS communication cable.
The board connectors accept wires or flat cables
ranging from 22 to 12 AWG (0.645 to 2.052 mm
diameter) per pole; however, power cables must
remain between 18 and 14 AWG (1.024 to 1.628 mm
diameter).
Note: The transformer powering the controller must
be configured as a floating transformer. Do not ground
the transformer.
Power Wiring
Device power requirements: 24 VAC ±15%, Class 2
Note: To conform to Class 2 requirements in the
United States, use transformers of 100 VA or less to
power the controller.
For power and ground wiring, use the heaviest gauge
wire based on a maximum of 14 AWG and a minimum
of 18 AWG.
If powering more than one device, use the following
methods to calculate the power requirements of the
required transformer:
1. Add up the maximum power consumption of all
devices, and multiply this sum by 1.3.
2. If the resulting number is higher than 100 VA,
consider using multiple transformers.
Use an external fuse on the 24 VAC side (secondary
side) of the transformer to protect all devices against
power line spikes (Figure 4).
Maintain consistent polarity when connecting
controllers and devices to the transformer. Connect the
COM of each controller and each peripheral to the
same terminal on the secondary side of the
transformer.
IMPORTANT: Make all wiring connections in
accordance with the National Electrical Code and all
local regulations. User copper conductors only. Do
not exceed the control’s electrical rating.
!
CAUTION: Risk of Electric Shock.
Disconnect power supply before making
electrical connections to avoid electric
shock.
min. 40 mm (1.5")
Figure 3: Mounting a VAV or VVT Device on a
Damper Shaft
IMPORTANT: Do not connect the analog/digital
inputs or common terminals to the ground (only if
otherwise stated).

LN Series Compact VAV Controllers Installation Instructions4
Note: The LN Series Compact VAV/VVT controllers
are half wave rectified. Connecting two half wave power
supplies to the same transformer without maintaining
polarity causes a short circuit. The controller uses
24 VAC ±15%.
Note: Ensure the transformer is floating and not
grounded.
The triac outputs of the LN Series Compact VAV/VVT
controllers are protected against power surges and
short circuits by a standard 3 A removable glass fuse
(5 x 20 mm).
Input Wiring
The LN Series Compact VAV/VVT controllers have
physical connections for four inputs. The controller
inputs are software configurable from within the
device’s LNS® plug-in. Each input can be configured
for digital, resistive, current, or voltage signals. You
must configure the input types properly in the software
plug-in or wizard to ensure proper input readings.
Wiring Digital and Resistive 10k ohm Inputs
Use this input configuration to monitor digital dry
contracts and 10k ohm NTC thermistors.
Resistive 1k ohm Inputs
Use this input configuration to monitor 1k ohm platinum
Resistance Temperature Devices (RTDs).
Resistive PT100 Inputs
Use this configuration to monitor PT100 platinum
RTDs.
Wiring Current Inputs
Current inputs can have a range of 4 to 20 mA. Connect
the current input if the transducer is externally powered.
Use a transducer with 2-wire, 4-20 mA. See Figure 10.
IMPORTANT: The COM terminals of the controller
are internally wired to the 24 V COM terminal of the
power supply; therefore, if powering peripherals and
controllers with the same transformer, it is essential
to maintain polarity. Failure to do so results in a
short circuit and/or a damaged device.
Figure 4: Power Wiring
Fuse
24VAC
Transformer
Controller 2
Controller 1
24VAC
COM
AC
24VAC
COM
Figure 5: 10k ohm NTC Thermistor Input
UIx
COM
NTC Thermistor
10kΩ
Figure 6: 10k ohm Potentiometer Input
UIx
COM
Potentiometer
10kΩ
Figure 7: Digital Dry Contact (Normally Open
[NO] and Normally Closed [NC])
UIx
COM
Digital Dry Contact
NO-NC
UIx
COM
Platinum RTD
1kΩ
Figure 8: 1k ohm Platinum RTD Input
UIx
COM
Platinum RTD
PT100
Figure 9: PT100 Platinum RTD Input
Figure 10: Current Input - 2-Wire Transducer
UIx
COM
24VDC
Resistor - 249Ω / ¼W
4-20mA
Transducer
+
-

LN Series Compact VAV Controllers Installation Instructions 5
Connect the current input if the transducer is powered
by its own power source. See Figure 11.
Wiring Voltage Inputs
Voltage inputs have a range of 0 to 10 VDC, with +/-
0.5% accuracy. Connect the voltage input according to
Figure 11.
LN Series LN-VSTAT-1 Sensor Wiring
Each VAV controller is compatible with the LN Series
line of standard room sensors. Each controller is also
compatible with the LN-VSTAT Sensor, an advanced
sensor with an a Liquid Crystal Display (LCD) and VAV
balancing capabilities.
Output Wiring
The LN VAV/VVT controllers have physical
connections for four digital outputs and two universal
analog outputs. The digital outputs are all hardware
configurable and must be configured by changing the
jumper settings on the printed circuit board.
Wiring Digital Outputs
You can configure the digital outputs as either powered
outputs or non-powered outputs. When wiring digital
outputs:
• the non-powered output type does not have any
voltage on the output terminals when the output is
active. Power must be supplied externally.
• the powered output type has 24 VAC on the output
terminals when the output is active. Power is,
therefore, supplied internally by the controller.
Note: The LN VAV/VVT controllers are shipped with
all digital outputs configured as powered outputs.
Maximum output current for all digital outputs (powered
or non-powered) is 1A.
DO1 and DO2 are controlled by a single jumper and
must be set identically. Similarly, DO3 and D04 are
controlled by a single jumper and must be set
identically. The jumpers specify whether an internal or
external power source is in use. The C terminal
between DO1 and DO2 is common to DO1 and DO2
only. Similarly, the C terminal between DO3 and DO4
is common to DO3 and DO4 only.
Note: You must connect an external load to measure
the state of a digital output (TRIAC). See Figure 12 and
Figure 13.
When you control an external floating actuator, wire the
controller to the actuator (Figure 14).
Figure 11: Current Input with Internal Power
Source
UIx
COM
Resistor - 249Ω / ¼W
4-20mA
Transducer
+
-
Figure 12: Voltage Input
UIx
COM
0-10V
Transducer
+
-
Figure 13: Digital Output with External Power
DOx
Cx-x
JUMPER
SETTINGS
AC
Relay
A2
A1
Figure 14: Digital Output with Internal
Power Supply
DOx
Cx-x
JUMPER
SETTINGS
Relay
A2
A1
Figure 15: Digital Output with Internal Power
Supply (for Floating Actuators)
DOx
Cx-x
Actuator
~
DOx ~
JUMPER
SETTINGS

LN Series Compact VAV Controllers Installation Instructions6
Wiring Universal Outputs
Universal outputs can be configured to provide either a
linear signal ranging from 0 to 10 VDC or a discrete
signal of 0 or 12 VDC. The discrete signal can be used
to generate a Pulse Wave Modulation (PWM) signal or
a simple two-state signal. These outputs are protected
by an auto-reset fuse.
When controlling a relay with a universal output, a
diode must be connected in parallel to protect the
controller from back-emf current that occurs when the
relay is turned off. It is recommended to use diodes
that are part of the 1N400x family; they should be
placed closer to the relay.
When controlling an analog actuator, wire the controller
to the actuator in Figure 18
Communications Wiring
Approved cable types for LONWORKS communications
are Level 4 22 AWG (0.65 mm), UNSHIELDED. You
can use both one pair and two pair wires. The
L
ONWORKS communication wire is polarity insensitive
and can be laid out in a bus, star, loop, or free
topology.
Note: The Bus topology network configuration allows
for easy network troubleshooting for L
ONWORKS
communication wiring.
Connect both wires to the L
ONWORKS Terminals 1 and
2 of the controller. If you are inserting multiple wires in
the terminals, make sure to properly twist the wires
together prior to inserting them in the terminal
connectors (Figure 18).
For additional information and detailed explanations on
network topology and wire length restrictions, refer to
the Echelon® Junction Box and Wiring Guideline for
Twisted Pair L
ONWORKS Networks
(Part No. 005-0023-01).
Note: Use proper network terminators depending on
the type of network topology used. Failure to do so may
result in communication errors between controllers. Do
not use multiple gauges of cable on the same
communication bus, as this may also result in
communication errors.
Selecting Network Terminators
For bus topology, two network terminators are required
(one at each end of the bus topology channel). For a
free topology, one network terminator is required. You
can put it anywhere on the channel.
Networking Guide
To commission a device and add it to a LONWORKS
network, you need to use the device plug-in as well as
the .xif and.apb files. To obtain the files:
Note: These commissioning steps only apply when
you are using an LNS network management tool, such
as LN-Builder 3.
1. Visit the Johnson Controls® intranet site
(www.my.johnsoncontrols.com) and download the
latest version of the plug-in installation setup. You
can also contact your Johnson Controls
representative to obtain the file.
2. Run the installation setup to install the device
plug-in and latest version of the .xif and.apb files.
The.xif and.apb files install in the
C:\L
ONWORKS\Import\JCI folder.
0-10VDC
Common
UOx
COM
Figure 16: 0 to 10VDC Analog Output
12VDC Relay
A2
A1
UOx
COM
Figure 17: 0 or 12 VDC Discrete Output
+
Actuator
24VAC
UOx
COM
~
-
0-10VDC
Figure 18: Connecting to an
External Analog Actuator
Figure 19: Communications WIring
Controller 2
Controller 1
LON1
LON2
LON Network
LON1
LON2

LN Series Compact VAV Controllers Installation Instructions 7
3. Register the plug-in in the network database. This
step creates a new device template that you use to
commission your device.
4. Add and commission the device with LN-Builder 3
using the proper device template and .apb file.
Neuron ID and Service Pin
To commission a device and add it to a L
ONWORKS
network, you need the Neuron ID of the device. To
obtain the Neuron ID:
• manual entry: the Neuron ID address and bar code
are located on a sticker on the device.
• service pin: pressing the service pin on the device
broadcasts the Neuron ID on the L
ONWORKS
network.
Memory Erase Jumper
The LN VAV/VVT controllers feature a memory erase
jumper which can be used to erase the Neuron chip. If
you load an incorrect .apb file into the controller, the
Neuron chip’s memory becomes corrupt. Use the
E-Blank jumper to correct the problem by returning the
chip to an application-less state. The E-Blank jumper is
labelled J9 on the PCB board.
To erase the Neuron chip’s memory using the E-Blank
jumper:
1. Disconnect the power to the controller.
2. Place a jumper on the pins labelled J9 on the board
(Figure 20).
3. Reconnect power to the controller.The orange-
colored service Light-Emitting Diode (LED) blinks
rapidly, indicating that it is erasing the Neuron
chip’s memory. When the light becomes solid (and
stops blinking), the erase procedure is complete.
4. Disconnect the power to the controller and remove
the jumper.
5. Reconnect the power. The service LED blinks
twice and becomes solid indicating the controller is
application-less.
6. Load the proper .apb file into the controller.
Note: If the device already exists in the LNS
database, you must use the Load or Commission
option in LN-Builder 3 to download the .apb file. Do not
use the Replace option.
Disposal
The Waste Electrical and Electronic Equipment
(WEEE) Directive sets out regulations for the recycling
and disposal of products. The WEEE2002/96/EG
Directive applies to stand-alone products. This
represents products that can function entirely on their
own and are not a part of another system or piece of
equipment.
For this reason, Johnson Controls products are exempt
from the WEEE Directive. Nevertheless,
Johnson Controls products are marked with the WEEE
symbol (Figure 21), indicating that disposal of the
devices shall not be done with municipal waste.
Products must be disposed of at the end of their useful
life according to local regulations and the WEEE
Directive.
IMPORTANT: Downloading an improper .apb file
into the device may damage the Neuron chip in your
controller. The controller may become unusable.
Figure 20: E-Blank Jumper (J9) Location
Figure 21:
WEEE
Symbol

LN Series Compact VAV Controllers Installation Instructions8
Troubleshooting
Table 1: Troubleshooting (Part 1 of 2)
Problem Possible Cause Solution
Device is powered but does
not turn on.
Fuse is blown. Check the fuse integrity; also ensure the green power LED
next to the service pin is on.
Power supply polarity Verify consistent polarity is maintained between all
controllers and the transformer.
Device cannot
communicate on a Free
Topology Transceiver (FTT)
network.
Absent or incorrect supply
voltage
Check power supply voltage between 24 VAC and COM
pins to ensure it is within acceptable limits. Check for a
tripped fuse or circuit breaker.
Overloaded power
transformer
Verify the transformer used is powerful enough to supply all
controlled devices.
Network not wired property Double-check the wire connections are correct.
Absent or incorrect network
terminators
Check the network terminators.
Device communicates well
over a short network but
does not communicate on a
large network.
Network length Check that the total wire length does not exceed the
specifications of the FTT User’s Guide.
Wire type Check that the wire type agrees with the specification of the
FTT User’s Guide. Verify your wire is UNSHIELDED.
Network wiring problem Verify the wire connections are correct.
Absent or incorrect network
terminators
Check the network terminators. Incorrect or broken
terminators make the communication integrity dependent
upon a device’s location on the network.
Extra capacitance Verify that no extra capacitances are connected to the
network other than the standard FTT circuit, and a
maximum of 3 meter stub (in bus topology).
Number of devices on
network segment exceeded
Use a router or a repeater in accordance to the FTT User’s
Guide. The number of devices on a channel should never
exceed 64.
Network traffic Query node statistics to check for errors. Use a LON
protocol analyzer to check network traffic.
Hardware Input is not
reading the correct value.
Input wiring problem Check that the wiring is correct according to this manual
and according to the peripheral device’s manufacturer.
Open circuit or short circuit Using a voltmeter, check the voltage on the input terminal.
Short circuit (0 V) and open circuit (10 V).
Configuration problem Using a device configuration plug-in or wizard, check the
configuration of the input. Refer to the device’s user guide
for additional information.
Hardware output is not
operating correctly.
Output wiring problem Check that the wiring is correct according to this manual
and according to the peripheral device’s manufacturer.
Configuration problem Using the device configuration plug-in, check the
configuration of the output. Refer to the device user’s guide
for more information.
0-10 V output, 24 VAC
powered actuator is not
moving.
Check the polarity of the 24 VAC power supply connected
to the actuator while connect to the device. Reverse the 24
VAC wire if necessary. Check the jumper setting for the
external power supply as shown in Figure 15.

Published in U.S.A. www.johnsoncontrols.com
LN Series Compact VAV Controllers Installation Instructions 9
Metasys® and Johnson Controls® are registered trademarks of Johnson Controls, Inc.
All other marks herein are the marks of their respective owners. © 2008 Johnson Controls, Inc.
Building Efficiency
507 E. Michigan Street, Milwaukee, WI 53202
Service LED
Flow sensor is not giving
proper readings.
Tubing connection problem Verify the tubing is installed properly and that the tubing is
not bent. Ensure the high and low pressure sensors are not
inverted.
Device is not calibrated
properly.
Recalibrate the VAV controller. Refer to the controller user
guide for more information about VAV controller calibration.
Damper is not opening or
closing properly.
Mechanical stops not in
proper position.
The two mechanical stops must be positioned to stop the
damper motion when it is completely closed and
completely opened. The mechanical stops can be moved
by increments of 5°.
Rotation time not set up
correctly for external
damper.
Ensure the external damper drive time is set to the correct
value (in the plug-in or wizard).
VAV still in Calibration mode Complete the calibration process in LN-Builder 3.
Controller in Override Set the Override OFF in the object manage screen in
LN-Builder 3.
Table 1: Troubleshooting (Part 2 of 2)
Problem Possible Cause Solution
Table 2: Service LED (Amber Color)
Service LED Operation Status
OFF (does not apply to LN-VAVCF-1) The device is in normal operation.
Repeated Blink (LN-VAVCF-1 only) The device is in normal operation. The LED blinks according to the device
code execution time.
On The device is application-less. Reload the application file (.apb).
Slow Blink
(1 second On, 1 second Off)
The device is unconfigured. Commission the device.
Fast Blink
(0.3 second On, 1 second Off)
Watchdog time out. Application corrupted. Use the E-Blank jumper to
wipe the Neuron chip’s memory. Then load the proper .apb into the
device using a LN-Builder 3.
/