Page is loading ...

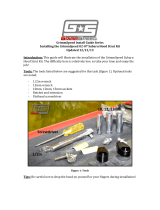
GrimmSpeed Installation Guide Series
Installing the Mitsubishi Evo 8/9 Master Cylinder Brace
Updated 7/17/12
Introduction: This guide will illustrate how to install the GrimmSpeed Evo8/9
Master Cylinder Brace. Expect this installation to take 30min at a leisurely pace.
Tools: The tools listed below are suggested for this task. Optional tools are noted.
- 3/8 in Ratchet
- 10mm Deep well socket
- 12mm Deep well socket
- 14mm Deep well socket
- 3in extension
Procedure:
1. Start by popping your hood and familiarizing yourself with the area we’ll be
working with. Remove your negative battery terminal.
Ratchet,
Extension, deep
10mm, 12mm,
14mm sockets

2. Next, remove your factory strut tower bar. This will be three (3) 14mm nuts
on each side plus two (2) 14mm bolts in the center. Set it aside when you’re
done.
Remove six (6)
14mm Nuts
Remove Negative
Battery Terminal

3. The brace mounts to the top of the strut tower and straddles an existing stud
further down towards the ground. Locate that stud and remove the 12mm
nut that’s on it. It’s a reach, but a deep well socket should help.
4. Now, remove the bolt that’s grounding your battery cable to the strut tower.
You’ll need to flip it 180 degrees and bolt it back down to make room for the
brace.
Remove two (2)
14mm Bolts
Remove 12mm
Nut

5. Now, there should be plenty of room to slip the brace down so that the tab on
the bottom straddles the stud and the three studs at the top of the strut
tower sit nicely in the brace. Reinstall the 12mm nut towards the bottom of
the brace.
Remove bolt
and flip this tab
Grounding tab
after flipping

6. Now set your strut tower bar back in place. Before moving forward, you’ll
want to reinstall the two 14mm bolts attaching it to the firewall. If you’re
having any trouble an extra set of hands to push down on the brace a bit can
make the job much easier.
Install Brace

7. Reinstall the three (3) 14mm nuts on each strut tower, six total.
8. Now you’re ready to install the stud, nuts and red cap. See the figure below to
identify where each piece goes, noting that the allen key will fit into the end
nearest the battery. Get this in there loosely at first.
Install Two
14mm Bolts
Install Three
14mm Nuts on
each tower

9. The next step is to pre-tension the brace assembly. Make sure you keep the
nut closest to the battery loose. Sometimes, I’ll remove it all-together until
I’m done tensioning the brace. You’ll use a 5mm allen wrench to keep the
stud from spinning. Use a 15mm box end wrench to spin the nut nearest the
master cylinder counter-clockwise. After the assembly is snug, continue
spinning that same nut 1-1.5 rotations. After that, tighten the other nut to
lock the setting in place.
10. Now, re-attach your negative battery terminal, double check that you’ve
tightened all fasteners and removed tools from your engine bay, then take it
for a spin! Braking at the bottom of the pedal travel should feel more firm
and responsive.
Install loosely as
shown

/