Page is loading ...

GrimmSpeed Install Guide Series
Installing the GrimmSpeed Subaru Alternator Cover
Updated 11/20/13
Introduction: This guide will illustrate the installation of the GrimmSpeed
Alternator Cover. The difficulty here is super low, so take your time and enjoy the
job!
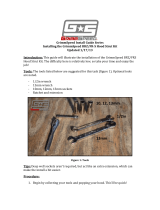
Tools: The tools listed below are suggested for this task (figure 1). Optional tools
are noted.
- 10mm socket and accompanying ratchet
- 12mm socket (if you need to install the OEM bracket)
- 5mm Allen Wrench
Figure 1: Tools
Tips: Use care to not drop the anodized spacers into your engine bay, but if you do,
don’t burn yourself while you reach for them!
Procedure:
1. Begin by collecting your tools and popping your hood. This’ll be quick!
10mm socket/ratchet
5mm Allen

2. Now, remove your factory alternator cover if you still have it in place. This
will require a 10mm socket to remove the two fasteners securing it. Set the
nuts and the cover aside, you will not be needing them.
Figure 2: Remove 10mm nuts on each side
3. Next, remove the small rubber grommet from the driver’s side bracket. Yours
may pop right out, ours was a bit stubborn.
Figure 3: Remove Bushing
4. Rock on! Now, we’ll install the GrimmSpeed unit. Start my carefully placing
one of the larger washers onto the driver’s side as shown. Then, you’ll use the
parts shown in Figure 5 to assemble the driver’s side of the cover.
Remove Bushing
Remove 10mm nuts

Short Bolt Small Washer Cover Short Standoff Large Washer Factory Bracket Nut
Get the nut started, but do not tighten all the way, you’ll want to be able to
move it around. If your vehicle doesn’t have this bracket, you’ll need to install
it at this time!
Figure 4: Place larger washer
Figure 5: Assemble Driver’s Side
Place Large Washer
Short Standoff
Short Bolt
Large Washer
10mm Nut
Large Washer
Small Washer

5. Next, use the longer bolt and the smaller washer to assemble the passenger
side as shown.
Bolt Small Washer Cover Long Standoff Factory Bracket
Figure 5: Assemble Passenger Side
6. Lastly, go ahead and snug up both sides using the 5mm Allen wrench and
your 10mm socket. Just past snug will do fine.
That’s it! You should be all set to go. Check the assembly periodically to make
sure everything is still snug.
Long Bolt
Small Washer
Tall Standoff
/


