
WARNING
READ ALL INSTRUCTIONS THOROUGHLY BEFORE ATTEMPTING TO
INSTALL THIS EQUIPMENT.
INSTALLATION INSTRUCTIONS
F
LOOR
S
LEEVES
No. 770, 772, 773, 790, 792, 870, 872, 873
iThis sleeve must be installed with the top of the sleeve exactly
1/2" below the FINISHED FLOOR elevation. See Detail "A".
iContact the architect or flooring contractor, if necessary, to determine the total finished floor thickness and the height that the sleeve should
extend above (for wood floors) or below (for synthetic-type floors) the top of the concrete slab.
iSleeves for end uprights should be installed with a 3° tilt, away from the court. Use a digital level to measure the 3° tilt. All sleeves for center
uprights must be installed plumb. See Detail "A".
iThe center-to-center of the sleeves must be held to the dimensions shown in the chart in Detail "A", so that standard game nets can be used.
iExisting floors – before coring holes in existing floor slabs, check with owner, architect or contractor for locations of any electrical wiring,
conduit, etc. that may be concealed in the floor at the sleeve locations. Locate sleeves as required.
iNOTE – Before beginning sleeve installation, inspect the inside diameter of this sleeve for damage (dents or out-of-round) and check fit over
game standard upright (3-1/2", 3", or 2-3/8" diameter) to ensure proper fit, before allowing to set-up in grout or concrete footing.
INST 00018 036
¤ 2015 PORTER ATHLETIC INC. ALL RIGHTS RESERVED. 12-3-2014
PARTS LIST
Item No. Qty. Description
1 1 Cover Plate Assembly
2 1 Floor Sleeve Weldment
3 1 Inside Pipe Cap
4 3 #8 x 3/4" Lg. Flat Head Wood Screw
5 1 Cover Removal Ke
y
SLEEVE FOR
END UPRIGHT SLEEVE FOR
END UPRIGHT
SLEEVE FOR
CENTER UPRIGHT(S)
3°
See Detail "B" on opposite side for
critical volleyball court dimensions.
CENTER-TO-CENTER
"A"
--
22'-0"
42'-0"
OF SLEEVES
TENNIS
BADMINTON
GAME NET
VOLLEYBALL
3°
"A""A"
FINISHED
FLOOR
Detail "A"
12"12"
12"

2
Detail "B"
29'-6"
9m
37'-6"
NOTE - Verify court size before locating floor
sleeves. Regulation and recommended court size
for Volleyball is 29'-6" x 59' [9m x 18m]. However,
high schools also allow a 30' x 60' court.
NOTE - Verify location of floor sleeves. Regulation recommends a
distance of 3'-3" [1m] from outside of court line to first obstruction. For
Porter volleyball equipment, 4'-0" from edge of court to the center of
the standard is recommended. However, high schools also allow a
distance of 3'-0" outside of court line.
4'-0" 4'-0"
Porter Athletic Equipment Company
601 Mercury Drive, Champaign, IL U.S.A., 61822
Toll Free: (888) 277-7778 x Phone: (217) 367-8438 x Fax: (217) 239-2255
www.porterathletic.com
WARNING: This product can expose you to Titanium Dioxide,
which is known to the State of California to cause cancer.
For more information go to www.p65warnings.ca.gov.
E
-
 1
1
-
 2
2
Ask a question and I''ll find the answer in the document
Finding information in a document is now easier with AI
Related papers
-
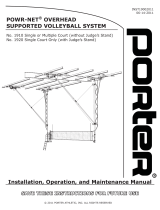 Porter POWR-NET TRIPLE COURT OVERHEAD SUPPORTED FOLD-UP VOLLEYBALL SYSTEM Operating instructions
-
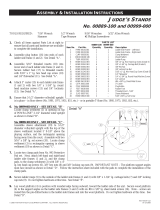 Porter FITTED JUDGES STAND Operating instructions
-
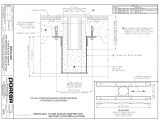 Porter SECOND FLOOR INSTALLATION SLEEVE Operating instructions
-
 Porter POWR COURT PORTABLE VOLLEYBALL SYSTEM Operating instructions
-
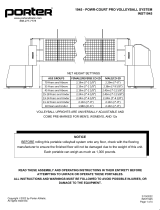 Porter POWR COURT PORTABLE VOLLEYBALL SYSTEM Operating instructions
-
 Porter FOLD-UP DIVIDER CURTAIN Operating instructions
-
 Porter UP-FOLD WALL MOUNT BACKSTOPS Operating instructions
-
 Porter SHOT CLOCK SUPPORTS Operating instructions
-
 Porter POWR LINE TELESCOPING CENTER STANDARDS Operating instructions
-
 Porter CUSTOM CEILING SUSPENDED THROWING CAGE Operating instructions
Other documents
-
Bison VB1000 User manual
-
Triumph Sports USA 35-7510-2 User manual
-
MD Sports NET320_057D User manual
-
Triumph Sports USA 35-7142 Operating instructions
-
Triumph Sports USA 35-7136 Installation guide
-
MD Sports NE300Y19003 User manual
-
MD Sports NET320_197D User manual
-
Daktronics RC-100 Operating instructions
-
 EastPoint 1-1-50558-DS Operating instructions
-
MD Sports NE100Y19003 User manual


