Page is loading ...

BASKETBALL BACKSTOPS
219, 220 AND 312 SERIES
Installation, Operation, and Maintenance Manual
© 2012 PORTER ATHLETIC, INC. ALL RIGHTS RESERVED
INST00370102
07-15-2013

2
INSTRUCTIONS: Dealer and/or Installation Supervisor,
Please give this book to the Owner/Customer
NAME OF PROJECT:
NAME OF DEALER: NAME OF INSTALLATION COMPANY:
PHONE #: PHONE #:
Porter Order Number _________________________
Date of Scheduled Shipment _________________________
Date of Substantial Completion _________________________
The gymnasium equipment for this project has been custom fabricated according to the
Owner’s/Architect’s specification. Care has been taken to fabricate and install this
equipment to provide years of safe, satisfactory use and trouble free service.
The key to satisfactory service is proper operation and care. Should any malfunctions
occur, please notify your supervisor and call your local Porter Dealer or Representative.

3
INSTALLATION, OPERATION AND MAINTENANCE MANUAL
TABLE OF CONTENTS
Page No. Item No. / Description
4-5 . . . . . . . . - Warranty Information
6 . . . . . . . . - Liability
7 . . . . . . . . - Manual Overview
8 . . . . . . . . - Operational Instructions
8-12 . . . . . . . . - Maintenance and Inspection Checklist
13 . . . . . . . . - Tools
INSTALLATION INSTRUCTIONS
14-15 . . . . . . . . - Structural Requirements
16-18 . . . . . . . . - Methods of Anchoring
19-21 . . . . . . . . - General Anchoring Guidelines
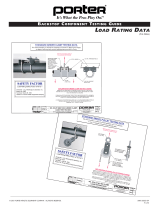
22-25 . . . . . . . . - Anchoring Details and Loading
26-32 . . . . . . . . - Step-By-Step Guidelines for Installation
33 . . . . . . . . - 219 Pulley Assembly Installation
34-37 . . . . . . . . - Folding Dimensions
38 . . . . . . . . - Wall Mounted Electric Winch
39-40 . . . . . . . . - Saf-Strap Installation
41-47 . . . . . . . . - Height Adjuster Installation
WALL-MOUNTED BACKSTOPS

4
Product Line: Wall Mounted Basketball Backstops (the “Equipment”)
Porter Athletic (“Porter”) provides the below limited warranty (the “Limited Warranty”) to the original purchaser of the Equipment and only
as to the facility in which the Equipment was originally installed. The Limited Warranty extends from the time the Equipment is installed by
qualified installers and continues based on the timeline listed below under the terms and conditions stated below.
Limited Warranty Terms and Conditions
Porter warrants the Equipment against defects in material or factory workmanship which cause failure of the Equipment within the applica-
ble Limited Warranty period and provided that notification of defects, together with proof of purchase, is given to Porter at Por-
[email protected] within thirty (30) days of discovery of such defect. Porter, once it confirms the existence of a covered defect will, at
its sole discretion, repair or replace the defective Equipment with comparable Equipment or will provide a refund of the purchase price pro-
rated over the remaining Limited Warranty period. In the event of repair or replacement, the Limited Warranty includes labor, materials, and
freight during the first year of the Limited Warranty and then materials only for the balance of the Limited Warranty period based on the
Limited Warranty coverage time period shown below for each category. All other costs, expenses or losses are excluded, including, but not
limited to, costs for maintenance of the Equipment. The manner of fulfillment of the Limited Warranty (including investigation, timing of
response, labor, and manner of shipment, if applicable) is at the sole discretion of Porter.
Standard Limited Warranty Coverage Time Period
10 years – Structural Components (Pipes, Brackets, Braces)
1 year – Mechanical (Saf Straps, Height Adjuster, Pulleys, Hinges)
1 year -- Electrical Components (Winches, Height Adjuster Motors, Control Systems)
Backboard/Goal/Rim – Covered by separate warranty, please see product information sheets
Exclusions and Conditions: This limited warranty excludes and does not apply to:
x Damage, whether natural or manmade, including, but not limited to fire, flood, wind, lightening or other acts of nature or God.
x Normal maintenance items such as fuses and belts.
x Normal wear and tear
x Use for other than intended purpose or use not in accord with generally approved practices
x Abuse, neglect, vandalism, alterations, modifications or misuse – as determined by Porter
x Equipment not installed by Porter Athletic Approved Installers
x Natural variations occurring in product finishes are not considered defects.
x User attached accessories
x Damage caused by operation of Equipment by persons not properly trained to operate it
x Equipment not routinely inspected and maintained by facility personnel or operators in accordance with the Porter Operation and
Maintenance Manual.
In cases where repair or replacement of Equipment is deemed necessary, color or texture shall be in accord with that offered by Porter at the then current
time.
Porter’s liability under this Limited Warranty is limited to repair or replacement of defective Equipment or a prorated refund as described above. The sole
and exclusive remedy against Porter, or its parent, affiliates, subsidiaries, or distributors shall be for the repair, replacement or prorated refund, at Porter’s
sole discretion, of any defective Equipment as provided herein. IN NO EVENT SHALL PORTER OR ITS PARENT, AFFILIATES, SUBSIDIARIES, OR
DISTRIBUTORS BE LIABLE FOR ANY INCIDENTAL OR CONSEQUENTIAL DAMAGES RELATING TO, ARISING OUT OF OR IN CONNEC-
TION WITH THE USE OR PERFORMANCE OF THE EQUIPMENT, INCLUDING WITHOUT LIMITTION, ANY LABOR AND /OR OTHER IN-
STALLATION EXPENSES INCURRED IN CONNECTION WITH THE REPLACEMENT OR REPAIR OF DEFECTIVE EQUIPMENT, EXCEPT TO
THE EXTENT OTHERWISE SET FORTH HEREIN, OR ANY OTHER INDIRECT OR CONSEQUENTIAL DAMAGES OF ANY NATURE WHATSO-
EVER, INCLUDING, BUT NOT LIMITED TO, LOSS OF REVENUE, PROFITS OR OPPORTUNITY.
This document constitutes Porter’s Limited Warranty in its entirety and no other provisions express or implied exist. This Limited Warranty excludes, with-
out limitation, any implied warranties of merchantability or fitness for a particular purpose. Any modifications of this Limited Warranty must be in writing
and signed by an officer of Porter. No other person, agent or representative of Porter or any distributor or dealer has any authority to change or modify this
Limited Warranty, either verbally or in writing.
Porter reserves the right to change required inspection and maintenance provisions for the Equipment from time to time and upon notification of such
change, Customer must abide by those revised provisions or this limited warranty is void.
Various states may have laws affecting your rights under this Limited Warranty.
PORTER LIMITED PRODUCT WARRANTY

5
PORTER EXTENDED LIMITED PRODUCT WARRANTY
Product Line: Wall Mounted Basketball Backstops (the “Equipment”)
Porter Athletic (“Porter”) provides the below extended limited warranty (the “Extended Limited Warranty”) to the original purchaser of the
Equipment and only as to the facility in which the Equipment was originally installed. The Extended Limited Warranty extends from the
time the Equipment is installed by qualified installers and continues based on the timeline listed below under the terms and conditions stated
below, including, but not limited to, the required inspections and maintenance referenced below (the “Maintenance Program”).
Extended Limited Warranty Terms and Conditions
Porter warrants the Equipment against defects in material or factory workmanship which cause failure of the Equipment within the applica-
ble Extended Limited Warranty period and provided that notification of defects, together with proof of purchase, is given to Porter at
[email protected] within thirty (30) days of discovery of such defect. Porter, once it confirms the existence of a covered defect and
compliance with the Maintenance Program, will, at its sole discretion, repair or replace the defective Equipment with comparable Equipment
or will provide a refund of the purchase price prorated over the remaining Extended Limited Warranty period. In the event of repair or re-
placement, the Extended Limited Warranty includes labor, materials, and freight during the first year of the Extended Limited Warranty and
then materials only for the balance of the applicable Extended Limited Warranty based on the Extended Limited Warranty coverage time
period shown below for each category. All other costs, expenses or losses are excluded, including, but not limited to, costs for maintenance
of the Equipment. The manner of fulfillment of the Extended Limited Warranty (including investigation, timing of response, labor, and man-
ner of shipment, if applicable) is at the sole discretion of Porter.
Extended Limited Warranty Coverage Time Period
15 years – Structural Components (Pipes, Brackets, Braces)
10 years – Mechanical (Height Adjuster, Pulleys, Hinges, Chains)
5 years—Saf Straps
5 years -- Electrical Components (Electric Winch, Height Adjuster Motors, Control Systems)
Backboard/Goal/Rim – Covered by separate warranty, please see product information sheets
Exclusions and Conditions: This Extended Limited Warranty excludes and does not apply to
x Equipment not properly inspected or maintained by a Porter certified inspector at least annually in accordance with the Maintenance
Program set forth in the current Porter Installation, Operation and Maintenance Manual for Basketball Backstops of the series covering the
involved Equipment which is delivered with the product, is available on line at www.porterathletic.com, or which may be ordered from Por-
ter.
x Damage, whether natural or manmade, including, but not limited to fire, flood, wind, lightening or other acts of nature or God.
x Normal maintenance items such as fuses and belts.
x Normal wear and tear
x Use for other than intended purpose or use not in accord with generally approved practices
x Abuse, neglect, vandalism, alterations, modifications or misuse – as determined by Porter
x Equipment not installed by Porter Athletic Approved Installers
x Natural variations occurring in product finishes are not considered defects.
x User attached accessories
x Damage caused by operation of Equipment by persons not properly trained to operate it
x Equipment not routinely inspected and maintained by facility personnel or operators in accordance with the Porter Operation and
Maintenance Manual.
In cases where repair or replacement of Equipment is deemed necessary, color or texture shall be in accord with that offered by Porter at the then current
time.
Porter’s liability under this Extended Limited Warranty is limited to repair or replacement of defective Equipment or a prorated refund as described above.
The sole and exclusive remedy against Porter, or its parent, affiliates subsidiaries, or distributors shall be for the repair, replacement or prorated refund, at
Porter’s sole discretion, of any defective Equipment as provided herein. IN NO EVENT SHALL PORTER OR ITS PARENT, AFFILIATES, SUBSIDIAR-
IES, OR DISTRIBUTORS BE LIABLE FOR ANY INCIDENTAL OR CONSEQUENTIAL DAMAGES RELATING TO, ARISING OUT OF OR IN
CONNECTION WITH THE USE OR PERFORMANCE OF THE EQUIPMENT, INCLUDING WITHOUT LIMITTION, ANY LABOR AND /OR OTH-
ER INSTALLATION EXPENSES INCURRED IN CONNECTION WITH THE REPLACEMENT OR REPAIR OF DEFECTIVE EQUIPMENT, EX-
CEPT TO THE EXTENT OTHERWISE SET FORTH HEREIN, OR ANY OTHER INDIRECT OR CONSEQUENTIAL DAMAGES OF ANY NATURE
WHATSOEVER, INCLUDING, BUT NOT LIMITED TO, LOSS OF REVENUE, PROFITS OR OPPORTUNITY.
This document constitutes Porter’s Extended Limited Warranty in its entirety and no other provisions express or implied exist. This Extended Limited War-
ranty excludes, without limitation, any implied warranties of merchantability or fitness for a particular purpose. Any modifications of this Extended Limited
Warranty must be in writing and signed by an officer of Porter. No other person, agent or representative of Porter or any distributor or dealer has any author-
ity to change or modify this Extended Limited Warranty, either verbally or in writing.
Porter reserves the right to change required inspection and maintenance provisions for the Equipment from time to time and upon notification of such
change, Customer must abide by those revised provisions or this Extended Limited Warranty is void.
Various states may have laws affecting your rights under this Extended Limited Warranty.

6
LIABILITY
Liability is not only an issue with the installation and maintenance of this product, but it al-
so extends to the proper operation by the end user. The operational instructions must be
read and understood before operating this equipment!
This Wallmounted Backstop Manual, which provides explicit examples of a variation of
wall attachments, is meant to serve as a general guideline only for the safe installation of
this product. Variables must be taken into consideration which are outside of Porter's con-
trol, including, but not limited to, cure time of the concert wall, non-grouted cells of block or
acoustical walls, spacing and frequency of wall ties, appropriate selection of wall anchors
for the given wall composition, proper installation of said anchors, embed depth of the an-
chors, etc. It is Porter's explicit requirement that this product be installed in a safe and se-
cure manner; therefore, a thru-bolt requirement is mandatory of each wood pad, as illus-
trated in this manual, combined with auxiliary anchor attachments. Should thru-bolting not
be allowed on any given project, the project architect must specify the anchoring method.
Porter’s suggestion of adhesive anchors in lieu of thru-bolting is not an approved Porter
substitution, but that we have observed architects’ recommending on specific projects.
Any structural deviation from Porter installation drawings without written authorization will
void all warranties. Contact the factory immediately should such a condition exist, necessi-
tating a design revision. All anchor methodology is to comply with the International Confer-
ence of Building Officials (ICBO), the Uniform Building Code (UBC), the Industrial Fasten-
er Institute (IFI), and all state regulatory agencies, such as The Division of the State Archi-
tect (DSA) in California.
General Hardware Guidelines
x Do not substitute hardware without written authorization from the factory.
x Minimum Grade 5 hardware is to be utilized at all attachments, unless specified other-
wise. Refer to the specific part drawing in this manual for the proper grade of hard-
ware.
x On eyebolt applications, a turned eye is not acceptable. Utilize forged eyebolts or, if
necessary, a turned eye that is welded closed.
x On all chain (or cable) attachments, a “S” hook is not acceptable. Utilize a repair link,
threaded master link, or forged shackle only.

7
INTRODUCTION
This manual has been prepared to assist you with the installation, operation and mainte-
nance of your basketball backstops.
Enclosed in this manual is an inspection list for your equipment, including replacement
parts lists and operational information.
We recommend that you read this manual to become familiar with the style and operation
of the backstop unit you have, and then assign it to the person responsible for the mainte-
nance and inspection program. If you need additional copies of this manual, please let us
know.
The safest equipment can be damaged when used by the untrained. We suggest that on-
ly qualified personnel supervise all utilized equipment.
For ease of administering this maintenance program, we suggest that your equipment be
numbered, and a file maintained on its location, name of manufacturer, original item num-
ber, date of purchase, and maintenance performed. This will be useful when ordering re-
placement parts and keeping track of maintenance. We suggest that you use the inspec-
tion chart as a checklist and indicate with an “S” when satisfactory, and mark “R” when re-
placement or repair is necessary. Defective equipment must be marked "DO NOT USE",
and the circuit breaker must be turned off and also tagged "DO NOT USE", until replace-
ment or repairs are completed.
Inspections should be performed annually. When the equipment is exposed to heavy use,
special inspections should be made in addition to the normal maintenance program.
Any structural deviation from the Porter installation drawings without written au-
thorization will void all warranties, and could cause an unsafe condition of the
equipment.
READ ALL INSTRUCTIONS THOROUGHLY BEFORE ATTEMPTING TO OPERATE THIS EQUIPMENT.
FAILURE TO COMPLY WITH THE FOLLOWING INSTRUCTIONS AND WARNINGS MAY RESULT IN
SERIOUS INJURIES AND/OR PROPERTY DAMAGE.
WARNING

8
OPERATIONAL INSTRUCTION OVERVIEW
Operation – Both manual and electrically powered winches develop tremendous forces; therefore,
all backstops must be operated by qualified personnel only to avoid structural damage or possible
personal injury. Authorized personnel is defined as an individual (or individuals) who is at least 21
years of age, has been trained for the proper operation of the unit, and is sanctioned by the facility
as being responsible for the operation of the equipment.
Should your backstop be a stationary model (non-folding), supervision of its’ use is still required.
Wall mounted units must have all components attached securely. This includes all chain supports,
cross flats, extension pipes, etc. Should your backstop be altered in any way from the “as-built”
drawing(s), contact Porter immediately, and DO NOT USE the equipment. Improperly installed
or altered wall mounted backstops have the potential to cause serious personal injury, or
even death.
Electrically Operated Equipment – The wall mounted key switch must be flush-mounted on the
wall and located in full view of the gymnasium equipment so that the operator may stop the opera-
tion of the equipment should there be any malfunction during the raising and lowering cycles. At
no time should the key switch or reversing switch on the portable electric operator be reversed
quickly, as this may cause damage to gears and may cause the electrical circuitry to override the
up-and-down limits. On the up cycle, the backstop operation must halt before any portion of it
strikes the building structure.
Manually Operated Equipment – Limit switches or mechanical stops may not be used. There-
fore, it is the responsibility of the operator to stop the hoisting operation before the backstop strikes
an obstruction. As a visual aid, a piece of tape may be placed on the hoist cable to align with the
top of winch when the backstop is in the up position.
Important Note – These units can be dangerous if operated carelessly by inexperienced person-
nel; therefore, the keys or handles of the manual winches must be in the possession of responsi-
ble, trained personnel only. Proper operation and maintenance will promote longevity to the equip-
ment and avoid the possibility of accidents.
MAINTENANCE CHECKLIST
This inspection checklist is to assist you with your maintenance program. As you are making the
inspection, enter an “S” for satisfactory, or an “R” for repair or replacement.
Porter recommends a maintenance inspection take place at least once a year by a Porter Certified
Inspector, using the attached check list. Porter recommends the same check list be used as a
guide for additional inspections by facility personnel or operators every 6 months. Any abnormal
movement or sound during operation is cause for an immediate and thorough inspection. The an-
nual inspection by a Porter Certified Inspector is required to maintain the extended limited warran-
ty.
1. Wall Anchors – Inspect all anchors to ensure they are tight. Check all wood pads for splits;
replace as necessary. Be certain all wood pads tight to the wall; sight from each edge of the
pad to ensure there is no gap between the wall and wood pad. Inspect wall for cracks, which
may indicate a support problem.
2. Chain Supports – Carefully examine the entire chain support. Make certain no turned eyes,
“S” hooks, etc. were substituted (refer to “General Hardware Guidelines”). Replace with appro-
priate hardware, as indicated. The chain support at the wall (or overhead support) must be se-
curely anchored as noted in this manual. Chain to be secured to upper structure by a repair
link, threaded “Quick” link, or minimum Grade 5 bolt only. The clamp securing the chain at the
extension pipe must be either backed be a second clamp, or secured with a rivet through the
wall of the pipe. Inspect the chain for any fatigues links. Replace entire chain if any link is sus-
pect.

9
3. Inspect Backstop Fittings – Visually inspect backstop clamps and support fittings for hairline
cracks, loose bolts and corrosion, replacing defective parts as required. All backstop fittings
should be tightened occasionally to keep backstop rigid. Vibration may cause fittings to loosen
causing undue “rattling” of backstops. To stiffen backstops with cross tension type flats, drive
the bottom clamps downward on pipe to put flats in tension. Check all hinge fittings, tightening
and lubricating hinge bolt as required. Replace worn bolts as required, utilizing the proper
grade bolt and nut type as listed in the Fittings Parts List in this manual. Be certain the back-
stop has not been altered from the “as-built) drawings, and that all chain supports, cross flats,
extension pipes, etc., are still securely in place.
4. Check Backstop Accessories – Such as the height adjuster unit (see height adjuster section
in this manual for general maintenance).
5. Inspect Telescoping Diagonal Braces – (Model 220 side fold unit only) Clean inside telescop-
ing brace and lubricate periodically to prevent binding on the side-fold cycle. Binding of the tel-
escoping brace could cause damage to backstop if not properly lubricated. A dry silicon lubri-
cant is recommended on the telescoping brace so as not to collect dirt and dust which cause
binding of the operation.
Note: No.’s 6 through 9 pertain to the 219 Fold-Up unit.
6. Inspect All Winches – The winch, either manual or electric, is the most important part to
maintain on a folding-type- basketball backstop.
A. For the manual winches, periodically check the winch every three to four months, lubri-
cating as required. Use Pyroshield No. 5182 Grease (or equal).
Check gears for excessive wear, replacing them if signs of wear are apparent. To properly
check manual winches, the metal cover may be removed. If the teeth of either the bronze
or steel gear show signs of becoming pointed or tapering to a point, they should be re-
placed. Steel or bronze shavings (a sign of improper lubrication) will usually be present if
the teeth have worn this severely. Normally the teeth will appear to be blunt and show
signs of slight wear only on the sides. If this is the case, lubricate the gears with the rec-
ommended open gear lubricant.
B. Electric winches should also be periodically inspected for proper operation of the limit
switch assembly and key switch. Faulty electrical components could create serious
hazards.
The winches should also be inspected for possible hairline cracks in the cable drum. If
cracks are visible, do not use until unit is replaced or repaired. If winch is belt driven, In-
spect the small and large belt drive pulleys, making certain they are properly secured to
each shaft, and rotate concentrically. Also, check anchorage of winch to either the support
pipe or wall; and loose anchorage should be repaired immediately. If the winch is gear
driven, make sure the gear is not showing excessive signs of wear. Note any excessive
noise as well as checking the limits are properly set to ensure complete stop before back-
stop comes within a safe distance of any obstructions. Make sure cable is properly spool-
ing to ensure the limits will properly engage. The cable should evenly wrap the cable drum
until the entire cable drum is wrapped or the limits are reached before the cable wraps on
top of itself.

10
7. Inspect Hoisting Cable – Check cable for kinking and fraying. The best method is to take an
oily or grease-filled rag and rub along the cable. The rag may hit broken strands of cable and
snag. If the snags appear approximately ten times in a ten (10) foot length of cable, the cable
should be replaced. This procedure not only checks the cable, but lubricates it for longer wear.
Also, make certain the cable wraps evenly on the drum. Refer to the instructions in this manu-
al for correcting an uneven cable wrap.
Note – The grinding noise of the hoist cable against the strands already wrapped on the winch
-hoisting drum is normal with this hoist system.
8. Inspect All Pulleys – It is advisable to check all pulleys, checking the sheave bearing and
shaft for excessive wear, replacing if necessary. Lubricate bearing at assembly.
9. Safety Straps – Check Saf-Strap to make sure it retracts properly into the housing unit. Also
inspect strap tie-off on the equipment, ensuring it is securely attached, and all bolts. It is rec-
ommended that a safety lock be used on any backstop which folds over a spectator bleacher.
Consult factory for details if this unit was not included on the original installation.
10. Structure Tubes and braces - Ensure all support tubes are free of bends, dents, or other damage.
Inspect structure welds for any sign of abnormal wear.

11
WALLMOUNT BACKSTOP INSPECTION REPORT
The following page should be copied and returned to Porter Athletic by a Porter Certified Inspector after
each inspection.
Porter Order Number _________________________
Project Name _________________________
Name of Selling Dealer _________________________
Date of Scheduled Shipment _________________________
Date of Substantial Completion _________________________
(Information should be found on the first page of Installation manual)
Inspecting Company Name ___________________________________________
Porter Certified Inspector Name ____________________________________________
Inspection Date ____________________________________________
Summary of Inspected Equipment, Include any replaced, repaired, damaged, or worn
parts.___________________________________________________________________
_______________________________________________________________________
_______________________________________________________________________
_______________________________________________________________________
_______________________________________________________________________
_______________________________________________________________________
_______________________________________________________________________
_______________________________________________________________________
_______________________________________________________________________
_______________________________________________________________________
_______________________________________________________________________
_______________________________________________________________________
_______________________________________________________________________
Please attach the checklist of each equipment inspected

12
WALL MOUNTED BASKETBALL BACKSTOP
INSPECTION CHECKLIST
Please refer to previous pages for details on inspections.
This checklist is to assist you in your inspection program.
As you are making the inspection, enter “S” for satisfactory, or “R” for repair and replace.
INSPECT ALL ITEMS FOR EACH BACKSTOP
WALL ANCHORS
#1 #2 #3 #4 #5 #6 #7 #8 #9 #10 #11 #12
CHAIN SUPPORTS
#1 #2 #3 #4 #5 #6 #7 #8 #9 #10 #11 #12
BACKSTOP FITTINGS
#1 #2 #3 #4 #5 #6 #7 #8 #9 #10 #11 #12
HEIGHT ADJUSTER (IF APPLICABLE)
#1 #2 #3 #4 #5 #6 #7 #8 #9 #10 #11 #12
TELESCOPING/SLIDING BRACES (IF APPLICABLE)
#1 #2 #3 #4 #5 #6 #7 #8 #9 #10 #11 #12
WINCH (IF APPLICABLE)
#1 #2 #3 #4 #5 #6 #7 #8 #9 #10 #11 #12
CABLE (219 ONLY)
#1 #2 #3 #4 #5 #6 #7 #8 #9 #10 #11 #12
PULLEYS (219 ONLY)
#1 #2 #3 #4 #5 #6 #7 #8 #9 #10 #11 #12
SAFTEY STRAPS (219 ONLY)
#1 #2 #3 #4 #5 #6 #7 #8 #9 #10 #11 #12
STRUCTURE TUBES AND BRACES
#1 #2 #3 #4 #5 #6 #7 #8 #9 #10 #11 #12

13
To Be Provided by the installer:
Ƒ Scissor lift or scaffolding.
Ƒ Plumb bob with 12’ Gammon Reel ® or laser plumbing device
Ƒ Tape Measure (100’ preferable for measuring court lengths)
Ƒ Pencil
Ƒ Speed Square
Ƒ Drill
Ƒ Drill Bits (varies per installation)
3/8” Dia. for Hammer Hit Rivet on Extension Tubes
13/32” Dia. for 3/8” carriage bolts
17/32” Dia. for Wood Pads
9/16” Dia. x 18” Lg. for Thru-Bolting 12” Walls
11/16” Dia. x 18” Lg. for Typical 1/2” Dia. Adhesive Anchors
1” Dia. x 18” Lg. for Typical 3/4” Dia. Adhesive Anchors
Ƒ Wire Brush (for cleaning out 9/16” dia. bored holes)
Ƒ Air compressor
Ƒ Hammer (for rivet application)
Ƒ Level
Ƒ Plumb bob with 12’ Gammon Reel ® or laser plumbing device
Ƒ Sockets (1/2” and 3/4”)
Ƒ Open or box wrench (1/2” and 3/4”)
TOOLS and EQUIPMENT REQUIRED
OPTIONAL EQUIPMENT
ELEC00201000 - “Cheater” box for powering of
equipment during installation
Vice-Grips for a variety of special
Bolt Cutter
SAFETY ATTIRE TO BE WORN AT ALL TIMES DURING THE
INSTALLATION AND MAINTENANCE OF THE EQUIPMENT
Ƒ Remove all jewelry before commencing with installation or maintenance.
Ƒ Hard hat.
Ƒ Long jeans (no shorts).
Ƒ Steel toe work boots.
Ƒ Safety glasses.
Ƒ Leather gloves.
Ƒ OSHA approved harness (properly tethered).
Ƒ Nothing which may be caught by moving equipment such as long hair or baggy clothing.
Inventory parts listed on the packing list to ensure parts required are accounted for. Inspect all components
for possible shipping damage. Report any shortages to Porter's Customer Service Department immediately.
On visible freight damage, sign as damaged, and file a freight damage claim with the carrier immediately.
Failure to report shortages or hidden freight damage directly to Porter's Customer Service Department within
three working days will place the financial burden for the missing or replacement parts with the installer or
INVENTORY and INSPECTION

14
STRUCTURAL AND ANCHORING REQUIREMENTS
NECESSARY FOR A WALL MOUNTED BACKSTOP
Long considered the most utilitarian of basketball backstop and, allegedly, easiest to in-
stall, the Wall Mounted Backstop is not always appropriate for the given building parame-
ters. Safety continues to be Porter’s primary objective with the installation of this product.
The evaluation of building conditions, along with the methodology of anchoring, is para-
mount. The assessment of whether or not the wall is adequate for this type of instal-
lation is the responsibility of the architect of structural engineer. If an architect is
not presently involved with the project, it is strongly recommended the general con-
tractor secure an architect for this purpose.
Before choosing a Wall Mounted style backstop, it is absolutely critical the structural integ-
rity of the wall, itself, be appropriate for the load and impact which will be applied at the
attachment points. Not only does the static load of the backstop need to be accounted for,
but the dynamic loads introduced during the course of play - such as “slam-dunking” -
must be evaluated by the architect or structural engineer. The extension of the backboard
out from the wall creates a lever arm on the wall anchors, increasing the pull-out force on
the anchors as the backstop extension increases. Refer to the load diagrams in this manu-
al for general parameters in loading at the backstop attachment points. For specific loads
and custom applications, please contact the factory.
Wall Structure Requirements
Ideally, a bearing wall comprised of concrete masonry units (CMU) is well suited for a wall
mounted backstop application. Tilt-up concrete panels may also be utilized for wall mount-
ed backstops, provided that the recommendation of the architect/structural engineer ap-
proves all building attachments.
Wood and metal stud construction, however, pose an integrity issue for this style of back-
stop. Even if the wood stud construction is considered a bearing wall, this type of wall is
not well suited for the weight of a backstop. Variables such as the overall length of stud
from sole plate to top plate, locations of ties (if any) to the outside wall structure, interior
wall blocking, and inside face material all contribute to the feasibility of this type of attach-
ment. It is recommended an overhead supported unit or portable backstop is specified in
lieu of a wall mounted backstop with this type of construction. The load of the backstop,
even without “slam-dunking,” may cause the studs (at the anchor points) to “belly out,” not
only compromising the integrity of the wall, but causing interior wall cracks on finishes
such as gypsum wallboard tape joints. Should the architect approve the wall-mounted
backstop style for a stud wall with gypsum face, it is recommended the support wood pads
be secured directly to the studs and blocking. Mounting the wood pad over gypsum board
will compress the face of the board, and not yield a secure attachment. Blocking of the
wall for this type of attachment is mandatory.
Porter does not furnish either the blocking material, or design requirements of the block-
ing. Due to the myriad variables in construction of the supporting wall, the architect/
structural engineer must make the blocking recommendation. Please note, however, re-
gardless of blocking, use of wood lag screws as a method of anchoring is prohibited. This
must be a positive connection. Please refer to Detail “A”.

15
STRUCTURAL AND ANCHORING REQUIREMENTS
NECESSARY FOR A WALL MOUNTED BACKSTOP
PORTER DOES NOT RECOMMEND A WALL-
MOUNTED STYLE BACKSTOP TO STUD WALL
CONSTRUCTION WITHOUT A SPECIFIC SUPPORT
BLOCKING DETAIL BY THE PROJECT ARCHITECT.
BLOCKING IS TO BE
DESIGNED BY THE
ARCHITECT, WITH
MATERIAL PROVIDED
AND INSTALLED BY
THE GENERAL
CONTRACTOR
POSITIVE THRU-BOLT
CONNECTION WITH MINIMUM
1/2" DIAMETER RODS
CHAIN ATTACHMENT TO OVERHEAD STRUCTURE
WHEN POSSIBLE IS PREFERRED
DETAIL “A”

16
METHODS OF ANCHORING
WARNING
The installer must match the correct type of wall fastener with composite material the wall
is constructed of for a safe and permanent connection. Failure to do so could result in a
catastrophic failure, causing serious injury, or even death.
THRU-BOLTING
The only approved Porter methodology of attachment of Wall Mounted Backstops is to
thru-bolt a minimum of two anchor points at the backstop extension structure, and a mini-
mum of two thru-bolts at the chain support (should your backstop be provided with such),
in conjunction with the appropriate anchors, as indicated on your project specific installa-
tion drawings. Detail “B” is for illustration only, and may not relect your projects’ anchoring
requirements. Do not drill less than 9” from any door or window opening, and never attach
to the top course of a block wall. Please also refer to the General Anchoring layout ex-
amples in this manual.
DETAIL “B”
A MINIMUM OF ONE THRU-BOLT AND TWO
ANCHORS AT EACH CHAIN SUPPORT IS
REQUIRED. IF ONE HORIZONTAL WOOD PAD
IS USED A MINIMUM OF TWO THRU-BOLTS
AND FOUR ANCHORS ARE REQUIRED.
MINIMUM OF TWO THRU-BOLTS PLUS
AUXILIARY ANCHORS THE UPPER
EXTENSION TUBE SUPPORT
STRUCTURE IS REQUIRED. IF THE
WOOD PADS ARE PLACED
VERTICALLY, EACH WOOD
PAD IS TO HAVE ONE
THRU-BOLT ABOVE THE
UPPER EXTENSION TUBES,
PLUS AUXILIARY
ANCHORS.

17
METHODS OF ANCHORING
Penetration of the buildings exterior must be made with weather-treated hardware such as
galvanized threaded rods, building washers and hardware. Care must be taken when drill-
ing through the block/brick, so as not to spall the outside surface. Use of the hammer op-
tion on drills is not permitted for this reason.
The Ideal Anchoring Methodology
The ideal anchoring methodology is at the time of wall construction, utilizing 1/2” diameter
(galvanized) “J” bolts of 1/2” diameter rods cast in place as shown on the left side detail in
Detail “C,” which negates the penetration of the outside wall. Porter can provide such
weather-treated hardware for the general contractor to pre-cast in the wall at the time od
construction. Simply order Part no. 00100000 for the hardware, and specify the backstop
model number with extension, type of backboard, and whether or not the optional height
adjuster is specified, for a planograph detailing the anchor locations.
DETAIL “C”
EXISTING WALL (THRU-BOLT) DURING CONSTRUCTION
NOTE - ALL HARDWARE FOR ATTACHING WOOD PADS TO WALL ARE BY OTHERS. VERIFY MATERIAL AND
THICKNESS OF WALL, AND USE APPROPRIATE HARDWARE/ANCHOR COMBINATION (MINIMUM 1/2" DIA. HARDWARE).
FOR AN OPTIONAL THROUGH-BOLT HARDWARE PACKAGE, ORDER PART No. 00100000.

18
METHODS OF ANCHORING
The Remaining Anchorage to Augment
Thru-Bolting or Pre-Cast Rods
Should 1/2” diameter rods or “J” bolts not be pre-cast in place, but thru-bolting is available
in the locations shown in Detail “B,” the remaining anchors must be a minimum of 1/2” di-
ameter, with sufficient embedment length (see general anchoring guidelines), and appro-
priate for the composite material of the wall. Double expansion, four-way expansion,
wedge, and fiber plug anchors, etc., may or may not be suitable for you application. Follow
the manufacturer’s instructions for the suitable type of anchor, with associated loading ap-
plication for you installation. Porter prohibits the use of toggles, and also expressly
prohibits anchoring through only one wall of hollow block.
CMU and Concrete Wall Anchoring Guidelines
Concrete masonry units (CMU), commonly called concrete block, are available in a variety
of shapes and sizes. Acoustical CMU, which literally has exposed cavities on the inside
face, can pose additional attachment restrictions on the installer. Ideally, standard CMU
should be utilized at the backstop attachment location, with t solid grout fill. If this is not
the case, contact the architect or structural engineer of record. It may be necessary for
fasteners to be located at the mortar lines only.
Holding power of the fasteners will also be governed by the cure time of the wall. If you
are installing in a new installation, the anchoring of fasteners is significantly weaker when
made in green concrete. Do not anchor in any concrete which has cured for less than sev-
en days. Generally, the load rating by anchor manufacturers is provided in concrete that
has cured for approximately 28 days. If anchors are installed in green concrete, the
strength of the anchor is considered diminished, unless the loading of the anchors takes
place after the cure time of the concrete.
When drilling concrete masonry units with hollow cavities, restraint must be exercised to
avoid spalling on the inside wall of the cavity. This will significantly reduce the integrity of
the CMU, leading to diminished holding capacity of the anchor. Drilling CMU is to be ac-
complished by using rotation drilling only, with absolutely no hammering action.
TYPICAL CMU

19
GENERAL ANCHORING GUIDELINES
The most critical factors in choosing the auxiliary anchors to be used in conjunction with
the thru-bolt or cast-in-place anchors is the wall material matched with the appropriate
style and size of anchor, with the size referring to both diameter and embedment depth.
The following are general guidelines only, and do not necessarily constitute what is correct
for your specific project.
The embedment depth of the anchor is defined as the face of the wall (not including the
wood pad) to the bottom of the anchor. Refer to the anchor manufacturer’s specifications
for the correct embedment depth for the approximate load and appropriate safety factor on
the anchor, and thickness of the wall to which it is being attached. A general rule for em-
bedment depth is the wall thickness (for concrete tilt-up panels or concrete block with solid
grout fill) should be 125% of the anchor embedment. For example, on a 5” concrete tilt-up
panel, the embedment can be up to 4” deep. Increasing the embedment will also increase
the occurrence of the concrete panel to spall at the anchor location, reducing the effective-
ness of the anchor.
The edge distance of the anchor to an opening (window, doorway, top of wall, etc.) is also
a critical factor. Again, refer to the anchor manufacturer for minimum edge distance per
type of anchor and embedment depth chosen. A general guideline on backstop installa-
tions is to maintain a minimum 9” edge distance.
Clearance holes for anchors will be provided by the manufacturer. A general guideline for
anchors under 1” is diameter is to drill the hole 1/16” oversized from the anchor diameter.
Wire brush the hole, and clean out the compressed air before inserting the anchor.
Application examples that follow are advisory only. Porter is not responsible for claims or
damage arising from not properly selecting and installing anchors for your specific project.
These anchors must be used in conjunction with a positive thru-bolt application, as
previously described.
Concrete or Solid Fill-Block Wall: Wedge-type anchor, minimum 1/2” diameter.
Double or four-way expansion shield anchors are suitable for this application.
Mortar Joint (or concrete) Wall: Lag shield anchors. When installing in a mortar
joint, make certain the anchor expands against the block, and not to the open cell.
Adhesive Anchors for either Hollow CMU Blocks or Concrete: The hollow CMU
will require a different adhesive anchor than one for a concrete wall. These anchors
also have a limited shelf life, se be certain to check the expiration date.

20
WHEN YOU ABSOLUTELY CANNOT THRU-BOLT
Porter’s only approved anchoring methodology is a positive connection, i.e. thru-bolting a
wall, augmented with a minimum 1/2” diameter anchors with the proper embed length per
the anchor manufacturer, or chain support secured to the overhead structure. Should such
a condition not be available (thru-bolting), it is recommended the architect or structural en-
gineer be contacted for and anchoring specification. The project specific installation draw-
ings indicate the attachment locations for your particular backstop. Detail “B” gives the rec-
ommendation for thru-bolting locations, with the remaining attachment points approved as
anchors only.
There is a multitude of new anchor technology being brought to market each year, but
none are substitute for a positive connection. Although newer and heavy-duty toggle bolts
are now available, Porter will not allow the use of toggles! The diameter and strength
of the toggle pin, plus the fact the toggle is expanded (typically) in the cavity of the CMU,
yields the toggle application suspect, at best. Should there be any spalling of the CMU
cavity wall, the wall thickness and strength of that wall are significantly diminished.
An alternative to thru-bolting sometimes specified by architects is the use of adhesive an-
chors. It is imperative the when selecting and installing an adhesive anchoring system, the
anchor manufacturer’s instructions are explicitly followed. Failure to do so will provide an
unsafe installation. Following is only a brief, general guideline of installing adhesive an-
chors. Each manufacturer of adhesive anchors provides detailed selection and installation
instructions. Companies such as Hilti® provide technical assistance and information re-
garding these products.
ADHESIVE ANCHOR INSTALLATION GUIDELINES
(Follow Anchor Manufacturer’s Specific Instructions)
x Wear safety glasses, gloves, and have a rag ready to wipe off excess adhesive.
x Follow the manufacturer’s edge distance guidelines before drilling holes near windows,
doors, etc.
x For hollow CMU, Porter requires both walls of the block to be drilled, utilizing the integ-
rity of both walls for anchoring.
x Select the proper size bit per the manufacturer’s instructions. Caution: Porter recom-
mends a minimum 1/2” diameter anchor. The depth of the block may dictate a 3/4” di-
ameter anchor per the adhesive anchor supplier. Typically, an 8” deep block requires
and 10” screen and 1/2” diameter rod, while a 12” deep block requires a 13” screen
and a 3/4” diameter rod.
x Do not use a hammer drill (to reduce the risk of spalling the CMU walls).
/