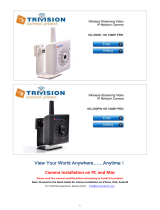
TriVision NC-316PW User manual

Category
Security cameras
Type
User manual
1
View Your World Anywhere……Anytime
Camera Installation for PC Only
Note: Proceed to the Quick Guide for iPhone, iPad iOS device and Android OS Smartphone, Tablet.
For advanced features, proceed to the User manual for PC only
2
Introduction ----------------------------------------------------------------------------------------------------------------3
Pre-requisites and Initial Connection--------------------------------------------------------------------------------- 5
PC Quickstart-------------------------------------------------------------------------------------------------------------- 6
Install “Camera Setup” and “Camera Live” Utilities on a PC------------------------------------------------------7
Install “Camera Live” Utilities & View Multiple Cameras on a PC---------------------------------------------10
Wi-Fi Wireless Setup ---------------------------------------------------------------------------------------------------- 11
Wi-Fi Troubleshooting--------------------------------------------------------------------------------------------------- 15
Is the Remote Access Setup already done? ----------------------------------------------------------------------- 16
Enabling UPNP for Automatic Remote Access Setup ------------------------------------------------------------ 17
Overview of Manual IP address setup (Without UPNP) -------------------------------------------------------- 18
Manual Setup step 1 (Without UPNP) ------------------------------------------------------------------------------ 19
Manual Setup step2 (Without UPNP) ------------------------------------------------------------------------------- 21
Choosing a Name for your Camera on the Internet-------------------------------------------------------------- 22
Automatic Updating of your Camera’s Internet IP address----------------------------------------------------- 23
Positioning and Mounting---------------------------------------------------------------------------------------------- 25
I see Pink and Purple ---------------------------------------------------------------------------------------------------- 26
Night Vision Settings ----------------------------------------------------------------------------------------------------28
Motion Detection ---------------------------------------------------------------------------------------------------------30
Task Management-----------------------------------------------------------------------------------------32
1. Email Alarm Sending/Email Periodic Sending ----------------------------------------------------------------33
2. FTP Alarm Sending/FTP Periodic Sending------------ --------------------------------------------------------35
3. Snapshot to Storage on Alarm/ Snapshot to Storage Periodically---------------------------------------37
4. Record to Storage on Alarm/ Record to Storage Continuously------------------------------------------41
5. Send files in storage to FTP Sever-------------------------------------------------------------------------42
Audio/Video Stream Summary----------------------------------------------------------------------------------------43
Resetting the Camera back to Factory Settings-------------------------------------------------------------------48
Glossary: A quick review of networking Terminology------------------------------------------------------------49
Appendix A: Wireless setup instructions without Cat5----------------------------------------------------------50
Appendix B: Setup instructions for ATT (2Wire) Router------------------------------------------------------51
Appendix C: Recording on a Mac using VLC Media Player-------------------------------------------------------52
Appendix D: Motion Detection Adjustment------------------------------------------------------------------------53
Appendix E: Known issues-----------------------------------------------------------------------------------------------54
Burglar Alarm system integration with digital I/O-----------------------------------------------------------------55
Specification --------------------------------------------------------------------------------------------------------------56
Contact us -----------------------------------------------------------------------------------------------------------------57
3
Introduction
Congratulations! You have just purchased one of the finest IP network cameras currently available, and this new
version can record to Micro-SD card.
Using a Mac or PC you can view very high quality live streaming video direct from the camera. It is excellent for
applications such as a baby monitor, nanny cam, pet cam, party cam, security & surveillance, remote observation,
elder and patient care as well as limited video conferencing or event broadcasting.
An exciting new feature is the ability to turn your iPhone, iPad iOS device and Android OS smartphone, Tablet
into a baby monitor without professional installer, Extra wires, IP address setting, DDNS address setting or
router setting needed, just plug and play. (For detail, Please check the Quick Guide).
With Trivision P2P enabled cameras, the whole camera installation doesn't take more than 5 minutes for a
tech-slavery people. Its completely different with traditional ip camera.
After you are familiar with the basic functionality of the camera you can enjoy many additional advanced features,
just follow up our instruction step by step.
For instance, you can enable the automatic sending of motion detection email alerts or automatic uploading of
pictures to online servers using the FTP protocol.
Setup of the camera is mostly automatic if you have a current, industry standard router with the “Universal Plug
and Play” feature (UPNP). Older routers and some models provided by internet service providers may require a
few manual setup steps to enable remote viewing. Apple Airport routers are fully supported by TriVision with our
detailed, step by step setup instructions.
4
Another exciting new feature is the ability to turn the camera into a DVR (Digital Video Recorder) by recording
video or pictures to a Micro SD memory card.
After you are familiar with the basic functionality of the camera you can enjoy many additional advanced features.
For instance, you can enable the automatic sending of motion detection email alerts or automatic uploading of
pictures to online servers using the FTP protocol.
An exciting new feature is the ability to turn the camera into a DVR (Digital Video Recorder) by recording video or
pictures to a Micro SD memory card.
You can also turn the camera into a standalone NVR (Network Video Recorder) by enabling functionality to save
recorded video files to a network server.
This could be a commercial server on the internet or your own standalone NAS (Network attached Storage) hard
drive with built-in FTP server. These features do not require a computer. If you wish to use a PC for recording video,
we also include free windows software for recording multiple cameras at once.
In our experience, we find that our customers get comfortable with advanced features quickly and then start using
the camera on a daily basis to keep in touch with their home or loved ones.
This requires reliable internet service. If you have an older router that is not up to the task, we highly recommend
upgrading to one of the current models before you proceed with the camera setup.
It is important to note that you do not need an expensive router. Even current $40-$60 units from NetGear ,
LInkSys or Dlink are perfectly fine as long as your router is upgraded with the latest firmware available from the
manufacturer. In fact, expensive routers that have too many nonstandard enhancements can often be less
desirable than the basic 802.11b/g/n models.
With an up to date router you’ll enjoy faster overall performance, better wireless transmission range, and
improved network security.
5
Pre-requisites and Initial Connection
1. TriVision indoor models, bullets and Dome cameras
2. PC or Linux computer with internet browser
Computer is only required for initial setup, later the camera can work by itself without any computer present
at the camera location
3. A local area network with a router / gateway and an available Cat5 wired network jack on your router (not
on your computer)
The wired network connection is only needed for initial setup, later the camera can be used wireless with
802.11b/g/n. If no Cat5 jack is available, please see Appendix B for alternative setup procedure.
You can start using the camera on your own network almost as soon as you plug it in. Just connect the included
blue Cat5 cable to the network jack on the camera and connection the other end to one of the LAN jacks of your
router, then connect the power supply to the camera and to a wall plug. If your camera has a removable antenna,
you may want to attach it now.
IMPORTANT: Make sure camera is plugged into your router, not the computer, even if your computer has an
available Cat5 LAN jack.
On the NC-217W, NC-218W, NC-217WF, NC-218WF you may want to remove the clear plastic film that is
protecting the lens cover. For clearest video be careful not to touch the lens.
On indoor models the power light will come on within a few seconds. Later you should also see it blinking red
occasionally. This means your camera is ready to use. To get started, you need to know the IP address that your
router assigned to the camera. By adding http:// in front of the IP address you get a web link to the camera’s
built-in web server.
Until you setup a name for your camera as shown in later sections of this manual, you typically access the camera
by typing the numbers into your browser or by using a bookmark.
Proceed to PC Quickstart if you have a PC running Windows XP, Vista, or Windows 7
6
PC Quickstart
This Quickstart section applies to the most common configuration for PC users: You have a current generation
router such as NetGear, LinkSys, or Dlink connected to a standard, non-routing DSL or cable modem, or you have a
combination modem and router which has all functions in one box.
Some of our customers have more complicated networks because they have added a wireless router to a wired
router, or have business firewalls or VoIP routers in front of the main router. In those situations we recommend
that you consult an expert to simplify your network by eliminating redundant routers or placing all but one router
into bridge mode.
With your camera powered up and connected to the router, some PCs will automatically discover the camera and
show a pop up window or icon to let you know that a new device has been found. The popup window shows the
complete local IP address for the camera. Or, it could be that your camera is automatically discovered by your
computer and is shown in the list of attached network devices. On Windows XP this list is called “My network
places”. On Vista and Windows 7 it is just called “Network”
However, some PCs and routers do not have the “UPnPUniversal Plug-and-Play feature enabled. In following we
will show alternate ways to find the address that your router has assigned to the camera.
If you are familiar with your routers menus you can log in to your router and see the IP address for the IP network
camera in one of your routers LAN status screens. By the way, in this document we’re using the words “router
and gateway interchangeably.
7
Install “Camera Setup” and “Camera Live” Utilities on a PC
For PC users, we also supply a program on the CD called “Camera Setup” utility. If you install this program on your
PC with Windows7, XP or Vista, it will tell you the addresses of all current generation IP cameras on your network.
If this is the first time you are running the program you may need to click “Refresh” several times.
Insert provided Software CD into computer’s CD-ROM drive. If the software installation program does not
start automatically, open CD-ROM Drive and double click on “Auto Run”.
Install “Camera Setup” applications on your computer using “Install Software” option.
The following icons will appear on the desktop after software installation is completed:
8
You can use this program to set up cameras but we recommend that you use this program only to find your IP
address. Then do all setup by going directly to the camera using the IP address, either by double-clicking on the
address or by typing the number into your browser(with http:// in front)
If no camera is found it could be that your Antivirus or Firewall program is blocking the Camera Setup program.
In that case you should either disable your Firewall program or use the alternate method of finding the IP address
by checking the menus in your router as described below.
Regardless of the method you used to find your camera’s IP address, once you’ve clicked on the icon or entered
the IP address manually into your browser” (with http:// in front), you get to the main login screen for the camera:
To see video, click on “Enter,
The default setting:
Username: admin
Password: admin.
9
When using the camera for the first time on a PC with Internet Explorer, your PC will ask you for permission to
install the viewing software (called ActiveX). This ActiveX is needed to decode the H.264 or MPEG4 video stream
and control the camera. Click to “OK” this at the top of your screen, then again click on “OK” on the install menu
that will pop up in the middle of your screen.
If you have a popup blocker like Google Toolbar you will need to disable it. Within a few seconds you can then see
live video from the camera.
NOTE: If the camera shows video but also displays the message connecting, waiting…”, close Internet Explorer
and wait a couple of minutes for the camera to obtain current time from a internet time server and restart
itself.
To complete the camera setup, it is easier if you close all video windows and go to the main login screen again,
then instead of clicking on “Enter you would just click on “Setting.
The previous Quickstart showed you how to obtain the initial IP address of the camera if you have a PC with
typical configuration.
In other cases it may be easiest to log into your routers web based setup menu. For the exact details you may
need to refer to your router’s manual, which is usually available for download on the router manufacturers
support web site.
Typically you access your routers web menu by typing the router’s IP address into a browser window. Common IP
addresses are : http://192.168.0.1, http://192.168.1.1, http://192.168.10.1, or http://192.168.1.254.
Once you’re logged into your router, you would look for a status screen or menu that mentions LAN or DHCP
client list (LAN = local area network).
Typically there is a list of attached devices, and among these it is easy to pick out the IP camera since the name
starts with IP, or there will be a 12 digital number that matches the number on the back of the camera.
Regardless of the method you used to find your camera’s IP address, once you’ve clicked on the icon or entered
the IP address manually into your browser(with http://), you get to the main login screen for the camera.
To see video, click on” Enter, then username: admin and password: admin.
To complete the camera setup, it is easier if you close all video windows and go to the main login screen again,
then instead of clicking on “Enteryou would just click on “Setting. Now proceed to the next section titled Wi-Fi
wireless Setup.
10
Install “Camera Live” Utilities & View Multiple Cameras on a PC
Insert provided Software CD into computer’s CD-ROM drive. If the software installation program does not
start automatically, open CD-ROM Drive and double click on “Auto Run”.
Install “Camera Live” applications on your computer using “Install Software” option.
The following icons will appear on the desktop after software installation is completed:
Double Click icon on the desktop to start application
Click on to add camera
Enter “Camera UID
Enter default “User Name”: admin and “Password”: admin
“Confirm” Password
Assign a “Name” to the camera to help identify this camera if more than one camera is in use.
Click on “OK” to save the Camera
Click on to change camera settings
Click on to delete camera from Camera List
Click on to view saved snapshots
Click on to view that camera.
Play and Pause Show or Remove camera Framerate and Bitrate from the display
Take a snapshot Mute or Listen to Voice
Go back to camera list
11
Wi-Fi Wireless Setup
In the Quick Guide we showed how to setup Wireless connection via Smartphone. If your camera wireless
connection worked, please skip ahead to “Choosing a name for your camera”.
Most likely your wireless network was set up with a password (also known as wireless key). If you don’t remember
it, you can check your routers wireless setup menu or ask the person who set up your wireless network.
Without your password you cannot proceed with your camera’s wireless setup, so you can either continue to use
your camera in wired mode or set up a new password in your router. Another possibility is to disable passwords in
your router but an unsecured wireless network is not recommended.
After assigned the fixed ip address for your ip camera, now you can start using your camera immediately using the
IP address. Just add http:// in front of it and open it in a browser, such as http://10.0.1.3
Clicking on setting from the main camera login screen will get you to this:
12
Click on “Network”, then click on Wireless setup, and you’ll get to this screen :
Do NOT type anything in the SSID field. Instead, just clicking on the “Search button, your camera can tell you
which networks can see:
You may see a whole list of networks in your neighborhood. Select your network from this list, then click on
Apply tab, and check if your network name has now been filled into the SSID field. If nothing shows up, try
“Search” again, or un-hide your network name if your router is configured as a closed system.
Do NOT change any of the settings (SSID, Mode, security mode, Encryption type)
Type in “WPA key” (password, also known as wireless key), please note that both WPA and WPA2 keys, which are
setup on the wireless router, are case sensitive
Retype the WPA Key
13
Please remember that both WPA and WPA2 keys are case sensitive and need to be between 8 and 63 characters.
When you have entered the key, click on Apply, you’ll get a message about “Wireless setup accepted
successfully, but that only means that the information was stored in the camera. Now you should use the Test”
feature to check if you typed it correctly.
If the test reports “Success!” you can remove the network cable and it should work wireless after a short delay. If
the test reports no wireless connection”, please double check your WPA key (password” and refer both to the
Wi-Fi troubleshooting and “Known issues” section of this User Guide.
Congratulations! At this point you should be able to use your camera wired or wireless on your local network using
the same local IP address.
If it doesn’t connect, we recommend that you temporarily remove wireless security from your router for a quick
experiment to see if the setup succeeds with no passwords. Then put the password back in and try again. Many
times this will refresh your memory about the exact spelling of your password.
Also, it could be either that the camera is too closer to or too far from your router, or that your router was set up
with the tightest possible security which allows only known devices to connect to your network. In this case, do
not forget to add the MAC address of this camera to your allowed list. In this context, MAC refers to a hardware
network address and is unrelated to Macintosh computers. The Mac address is printed on the back of the camera.
During setup it is best to have the camera at least a couple of feet away from the antenna of the wireless router.
The maximum distance is dependent on the kinds of walls and objects that are between your wireless router
antenna and your camera.
14
One easy test for determining the maximum recommended distance is by using a laptop at the camera location. If
your laptop shows at least 70% signal strength at that exact same location then the camera should be ok too. Any
less than that may be unreliable, so you may want to move your router or the camera, or adjust the angle of your
routers antennas.
Keep in mind that the wireless signal travels easily through common building materials such as wood, glass, sheet
rock, and vinyl siding, but does not go at all through metal.
If there are any big metal objects such as a fridge, filling cabinet, or HVAC ducting in between the Wi-Fi router and
the camera, try to reposition either the camera or the router so that the metal object doesn’t block the signal.
Also, many microwave ovens and older 2.4GHz cordless phones may interfere with all Wi-Fi networking while in
operation. Using a laptop you may not notice a pause, but with a camera that transmits or records video
continuously any interruption will be much more obvious. Nearby Bluetooth devices such as cell phone headsets,
Playstation game controllers, or a wireless keyboard and mouse can also interfere with wireless networks if the
devices are too close.
The best placement for a wireless router is in an area that is higher up and free of nearby clutter, for example on
top of a wooden book shelf .
In the previous section we showed how to tell if your camera was able to automatically configure itself using
your routers UPnP feature. If UPnP worked, please proceed to “Step 3: Choosing a name for your camera”.
15
Wi-Fi Troubleshooting
If the camera does not connect and you’ve already checked the settings mentioned on the previous page, please
log in to your router and double check the setting for wireless channel selection. On an Apple airport you would
use the Airport Utility.
If the “Search” function of the wireless setup page found your Wi-Fi network it means that the wireless
networking hardware is working. If it then doesn’t connect it means that there is a password or IP address related
issue.
You can temporarily turn off passwords on your Wi-Fi router, and if you then set “Security mode” to off” in the
camera, it should connect unless you have set your router to reject connection attempts from unknown devices.
Assuming that you are now at least connecting without passwords, you can proceed to add wireless security to
your router and try again. We recommend WPA2 if available, otherwise WPA. The older WEP mode is obsolete and
may not work correctly on Apple Airport. If you have trouble, switch to WPA2.
Since each password type can have 2 variations, this means you could have 4 possible combinations: WPA-TKIP,
WPA-AES, WPA2-TKIP, and WPA2-AES.
Some routers like Apple Airport series do not show clearly which one of these settings is being used, so if you have
difficulty you should try all 4 possible combinations. On a laptop you typically do not need to specify the exact
password type since the laptop will try everything automatically. The camera is picky, it needs to know exactly
what type of password you are using and does not try anything other than the exact type that you entered.
Remember to Apply first, then Test”. If it says “Connected!” at the end of the test, you can remove the cable.
However, as long as the cable is still attached, the cameras “System” menu will show “No wireless connection”.
If you still have trouble, be sure to check the Appendix for known issues.
16
Is the Remote Access Setup already done?
If your computer had automatically discovered the camera earlier, this is good news because it means that the
“Universal Plug and Playfeature is available on your network and most of the setup may already be done. Your
camera would be visible from the internet to anyone who knows the exact IP address and usernames and
passwords that you choose.
Keep in mind that there is a distinction between local (intranet) IP addresses, meaning IP addresses on your own
network, and external (internet) IP addresses, which are unique in the entire world. With the UPnP feature
enabled in your router, the camera’s “System” menu can show you both:
1) The link(URL) for accessing the camera from your own network, often something like http://192.168.0.100
2) The automatically configured link(URL) for access from a remote location, often something like
http://183.37.136.55:8150
A quick comment about ports: In general, IP addresses can have many different ports associated with them. When
browsing to ordinary web sites there is usually no need to specify a port and thats why you may have never heard
about ports at all. However, when different devices share a single IP address they are distinguished with a port.
Basically a port has a similar function for an IP address as an extension on a telephone number.
Ports are specified by including the port number in the web address with a colon and the number after the .com
or .net domain name. In the example show above the port number is 8150.
If UPnP was available on your network, the camera has already set up the correct ports for remote access. A quick
way to see the complete external IP address (URL) is to go to the System menu at the top of the Setting screen.
Scrolling down to the UPnP section you will see the Internet URL (IP address).
Then all you need to do is to type either your internal (Intranet) or external (Internet) IP address in your browser,
depending whether you’re accessing the camera locally or over the internet. If UPnP worked, you should skip the
manual IP address setup and proceed to selecting a name for your camera.
Note: if the system menu shows you an internet URL (external IP address) that starts with 192.168 or 10.0, your
DSL or Cable Modem has a built in router. In this case, contact us with the model number of your modem for
assistance.
17
Enabling UPnP for Automatic Remote Access Setup
If UPnP did not work, and if you have an up to date router other than Apple Airport, it is worth double checking if
UPnP is enabled in your router. Some Routers like the ActionTec and Westell units distributed for free with Verizon
and Qwest DSL service have the feature initially disabled.
Usually it is very simple to enable UPnP. You just need to log in to your routers setup screen and find the UPnP
menu. Then you click on enable, save the setting and restart both the router and the camera (in that order).
Many routers may need a firmware update for UPnP to be available or work properly. You should look up your
routers model number on your router manufacturers support web page to see if updates are available.
The camera comes from the factory with the UPnP enabled. You can double check by selecting the “UPnP Setup”
tab under the camera’s “Network” menu:
If UPnP works, clicking on the camera’s “system” menu at the top of the setting screen will show something like
the following in the UPnP section:
18
Overview of Manual IP address setup (without UPnP)
In the previous section we showed how to tell if your camera was able to automatically configure itself using
your routers UPnP feature. If UPnP worked, please skip ahead to “Step 3: Choosing a name for your camera”.
In this section we provide an overview of the manual IP address setup procedure. You would only need to do this
if UPnP is not available on your network, for example if you have an older router.
Most routers come pre-configured to protect your own network devices from external access. This means that in
order to view your camera remotely over the internet your router needs to be configured to open ports and allow
access. If this sounds difficult, you may want to consider upgrading your router to a newer NetGear, LinkSys, or
DLink model as they are very inexpensive now (we’ve seen sales prices under $40). Either way our tech support
can help you.
The terminology for opening up ports can be different based on the manufacturer of the router. Typically this
setting is called “Web access”, “DMZ, “Virtual Server, Virtual Service” , “User Defined Service”, “Port
Forwarding” or “ Port Mapping” . There are 2 main steps involved in port forwarding:
1. Reserving a DHCP address or assigning a permanent (static) IP address for your camera on your local network.
2. Configuring your router to allow access from the internet to the camera’s IP address on your local network.
Strictly speaking, step 1 above is optional, but some routers (especially LinkSys and Belkin models) tend to
reassign all the IP addresses on your home network after a power failure or based on the order in which you use
them. Therefore your setup is only reliable if you reserve a DHCP address or assign a permanent IP address to your
camera and then do the actual port forwarding.
Some residential internet service providers want to charge more for business service and therefore deliberately
block all internet access that looks like it might involve a web server at the standard port 80. Thats why we always
recommend using port 8150, which in our experience is never blocked.
19
Manual Setup Step 1: Assigning a permanent IP address for your camera
on your local network (Without UPnP)
Please note that if your router has UPnP, you already have an internet IP address for your camera and you
should skip over this setup step.
On your home network (LAN) all your computers, printers and other network connected devices have an IP
address. In every IP address there are 4 groups of digits that can each vary from 1 to 255. For your home network
the first 3 numbers are already determined by your routers address, which is typically something like 192.168.0.1
or 192.168.1.1 or 10.0.1
To pick a permanent address for your camera you first need to know your routers IP address. It is shown in your
camera’s system” menu (at the top of the setting screen) if you scroll down to “Default Gateway”. The router’s IP
address determines the first 3 groups of digits for your camera’s IP address.
Now we need to select a valid number for the last group of digits. We don’t simply pick a random number because
we have to avoid numbers that are already taken or could be used by your router.
The router uses addresses in a range set aside for this purpose (called the DHCP range). For many routers, this
DHCP range is from 2 to 100 but you’ll have to check your specific routers DHCP menu. Sometimes this is shown
as start and end address, or start address plus number of available addresses.
Why is this important? We want to select an address outside this range to make sure that your router would never
pick this address for another device.
For example, if your router uses the DHCP range from 192.168.0.2 to 100, You could choose 192.168.0.101 as a
permanent IP address. Conversely, if your router uses DHCP addresses from 100 to 255, you could use
192.168.0.50 to be outside the range. Never use addresses that end in .0 or .1, since that is reserved for your
router, and never use addresses that end in a number higher than 255 since that is the highest possible limit.
Now that you have picked a local IP address for your camera, you need some more information from your router.
Look in your router’s broadband (WAN) status or connection menu for a pair of IP addresses called DNS1 and
DNS2, or Primary DNS and secondary DNS. If your router has a third one, don’t worry about it.
Typically all network devices get this information direct from your router. However, many routers only supply this
info to network devices that ask for an IP address so in this case we need to copy and paste these numbers.
Once you have these pieces of information, go to the Camera Settings menu, then select “Network” and TCP/IP
Setup” :
20
Click on “use the following IP address”. Then enter the IP address you picked that is outside your routers DHCP
range. Do not change the subnet mask. The default setting of 255.255.255.0 is correct unless you have a very
unusual home network.
Then enter your own routers address in the “Default Gateway” box. Note that the first 3 groups of digits should
be the same as your camera’s IP address. Usually the last digit is 1, sometimes it is 254.
Then click on “Use the following DNS serverand enter both the primary and secondary DNS addresses that you
obtained from your router menu or from your computers network connection menu.
Note: It is very important to add both the “Default Gateway and at least the “Primary DNS” address when
assigning static local IP. While the camera gets this information automatically from the router when using DHCP,
the camera will not obtain this information if a local IP address is assigned manually.
The HTTP port is usually 80. The RTP port range should start at 30000 for your first camera. For all additional
cameras the start of the range increase by 2, for example your 2
nd
camera would have a starting RTP port of 30002,
the 3
rd
camera would have 30004, 4
th
camera at 30006 etc.
After you click on Apply, you need to log in to the camera at the address you just picked. Remember to add the
http:// in front of the IP address, as in http://192.168.0.101. If your port is not 80 you need to add the port too .
From now on , regardless of what computers or other devices you have on your own network and regardless of
the order that you turn them on or off, you camera’s IP address will always be the same.
On some routers, for example some older models of Leviton or NetGear, you may also need to tell your router
about the network camera’s IP address, so that it shows up as a known device on your network.
  • Page 1 1
  • Page 2 2
  • Page 3 3
  • Page 4 4
  • Page 5 5
  • Page 6 6
  • Page 7 7
  • Page 8 8
  • Page 9 9
  • Page 10 10
  • Page 11 11
  • Page 12 12
  • Page 13 13
  • Page 14 14
  • Page 15 15
  • Page 16 16
  • Page 17 17
  • Page 18 18
  • Page 19 19
  • Page 20 20
  • Page 21 21
  • Page 22 22
  • Page 23 23
  • Page 24 24
  • Page 25 25
  • Page 26 26
  • Page 27 27
  • Page 28 28
  • Page 29 29
  • Page 30 30
  • Page 31 31
  • Page 32 32
  • Page 33 33
  • Page 34 34
  • Page 35 35
  • Page 36 36
  • Page 37 37
  • Page 38 38
  • Page 39 39
  • Page 40 40
  • Page 41 41
  • Page 42 42
  • Page 43 43
  • Page 44 44
  • Page 45 45
  • Page 46 46
  • Page 47 47
  • Page 48 48
  • Page 49 49
  • Page 50 50
  • Page 51 51
  • Page 52 52
  • Page 53 53
  • Page 54 54
  • Page 55 55
  • Page 56 56

TriVision NC-316PW User manual

Category
Security cameras
Type
User manual

Ask a question and I''ll find the answer in the document

Finding information in a document is now easier with AI