Page is loading ...

PFD00-15788
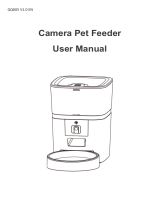
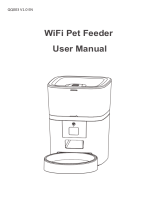
Smart Feed
Works with iPhone or iPod
devices iOS 9 or later and most
Andriod smartphones 5.0 or later
Operating Guide
Please read this entire guide before beginning.
For more information, visit our support section on petsafe.com.

Customer Care Center +1 (800) 732-2677
2
Welcome.
You and your pet were made for each other. Our aim is to help you have the best companionship and
the most memorable moments together. Your new feeder is designed to help you automate your pet’s
healthy eating routine, so you can care for your pet even when you can’t be there.
We know that safe pets make happy owners. Before getting started, please take a moment to read
through the important safety information. If you have any questions, please don’t hesitate to contact us.
IMPORTANT SAFETY INFORMATION
Explanation of Attention Words and Symbols used in this guide
WARNING indicates a hazardous situation which, if not avoided, could result in
death or serious injury.
CAUTION, used without the safety alert symbol, indicates a hazardous situation
which, if not avoided, could result in harm to your pet.
NOTICE is used to address safe use practices not related to personal injury.
• Do NOT immerse control panel in water. Base unit should NOT be submerged in water at any
time, as this may damage electronic components.
• Do NOT place anything on top of the pet feeder. The unit starts automatically. Keep clear.
• Dispose of all packaging materials properly. Some items may be packed in polybags; these
bags could cause suffocation; keep away from children and pets.
• Do NOT allow small children to play with, in or around pet feeder.
• To reduce the risk of injury, close supervision is necessary when an appliance is used by or near
children.
• Intended for use with dogs or cats only.
• Do NOT use this pet feeder with puppies, kittens, dogs or cats not able to reach the food tray or
with any physical disability.
• Do NOT use outdoors. FOR INDOOR HOUSEHOLD USE ONLY. Check operation frequently to
be sure the pet feeder is dispensing properly.
• For dry food use only.
• DO NOT use wet, canned or moist food.
• Pet feeder should be placed on a level surface.
• Before leaving for extended time, always replace batteries with new batteries.
• Do NOT place any foreign object in the pet feeder.
• Do NOT disassemble the pet feeder other than components as instructed in the operating guide.
• To protect against electric shock, if using power cord do not place power cord or plug in water
or other liquids.
• Only use attachments recommended or sold by the manufacturer.
• Do not unplug by pulling on power cord. To unplug, grasp the plug, not the power cord.
• Do not operate any appliance if it has a damaged power cord or plug, or if it is malfunctioning
or has been damaged. Call the Customer Care Center immediately for further instructions.
• For a portable appliance - To reduce the risk of electrical shock, do not place or store an
appliance where it can fall or be pulled into a tub or sink.
• Always unplug any appliance when not in use, before putting on or taking off parts and before
cleaning. Never pull on the electrical power cord to remove the plug from the wall outlet.
• Do not use an appliance for anything other than its intended use.

petsafe.com
3
• If the plug of this device gets wet, turn off the electricity to that wall outlet. Do not attempt
to unplug.
• Examine this appliance after installation. Do not plug in if there is water on the Power Cord
or plug.
• To avoid tripping, always position power cord out of the way of foot traffic.
• Do not allow pets to chew on or swallow any parts. If you are concerned about the power cord,
purchase a cord conduit (a hard plastic protector) at any hardware store to protect the
power cord.
• Do not attempt repairs on the pet feeder yourself.
• If an extension cord is necessary, an extension cord with a proper rating should be used.
• Do not use pet feeder for anything other than intended use. The use of attachments not
recommended or sold by the manufacturer may cause an unsafe condition. Do not modify the
pet feeder.
• Do not install or store pet feeder where it will be exposed to weather or temperatures below 40° F.
• Do not lift pet feeder by lid, hopper, bowl or bowl holder. Lift and carry feeder using both hands
and hopper base, while keeping unit in upright position.
• Read and observe all important notices listed on the pet feeder and in the packaging.
SAVE THESE INSTRUCTIONS
Table of Contents
Components and Features. . . . . . . . . . . . . . . . . . . . . . . . . . . . . . . . . . . . . . . . . . . . . . . . . . . . . . . . . . . . . . 4
System Requirements . . . . . . . . . . . . . . . . . . . . . . . . . . . . . . . . . . . . . . . . . . . . . . . . . . . . . . . . . . . . . . . . . . 5
How the System Works . . . . . . . . . . . . . . . . . . . . . . . . . . . . . . . . . . . . . . . . . . . . . . . . . . . . . . . . . . . . . . . . 5
Setup and Assemble Feeder . . . . . . . . . . . . . . . . . . . . . . . . . . . . . . . . . . . . . . . . . . . . . . . . . . . . . . . . . . . . 5
LED Indicator. . . . . . . . . . . . . . . . . . . . . . . . . . . . . . . . . . . . . . . . . . . . . . . . . . . . . . . . . . . . . . . . . . . . . . . . . 7
The Smart Feed App. . . . . . . . . . . . . . . . . . . . . . . . . . . . . . . . . . . . . . . . . . . . . . . . . . . . . . . . . . . . . . . . . . . 7
CLEANING THE FEEDER. . . . . . . . . . . . . . . . . . . . . . . . . . . . . . . . . . . . . . . . . . . . . . . . . . . . . . . . . . . . . . . 7
Disassemble the Feeder: . . . . . . . . . . . . . . . . . . . . . . . . . . . . . . . . . . . . . . . . . . . . . . . . . . . . . . . . . . . . . . . 8
Reassemble the Feeder . . . . . . . . . . . . . . . . . . . . . . . . . . . . . . . . . . . . . . . . . . . . . . . . . . . . . . . . . . . . . . . . 8
TROUBLESHOOTING . . . . . . . . . . . . . . . . . . . . . . . . . . . . . . . . . . . . . . . . . . . . . . . . . . . . . . . . . . . . . . . . . 9
Customer Care International. . . . . . . . . . . . . . . . . . . . . . . . . . . . . . . . . . . . . . . . . . . . . . . . . . . . . . . . . . . 11

Customer Care Center +1 (800) 732-2677
4
Thank you for choosing PetSafe
®
brand. You and your pet deserve a companionship that includes
memorable moments and a shared understanding. Our products and training tools enhance the
relationship between pets and their owners. If you have any questions about our products or training
your pet, please visit our website at petsafe.com or contact our Customer Care Center at
+1(800) 732-2677.
To get the most protection out of your warranty, please register your product within 30 days at
petsafe.com. By registering, and keeping your receipt, you will enjoy the product’s full warranty
and should you ever need to call the Customer Care Center we will be able to help you faster. Most
importantly, PetSafe
®
brand will never give or sell your valuable information to anyone. Complete
warranty information is available online at petsafe.com.
Components and Features
Food Hopper
Lid
Lid Latch
Manual Feed
Button/LED
Battery
Compartment
Bowl
Holder
Stainless Steel
Bowl
Power
Adapter
Power
Switch
Power
Connection
Hopper
Latch
Reset Button
Feeder
Base
Conveyor
Feeder
Base
Agitator

petsafe.com
5
System Requirements
• iPhone or iPod with iOS 9 or later or compatible Android smartphone 5.0 or later
• Wireless router 2.4GHz (802.11b/g/n)
• High-speed internet connection
How the System Works
The PetSafe
®
Smart Feed connects to your home’s wireless router and allows you to program and
monitor your pet’s meals from anywhere, right from your smartphone with the Smart Feed App.
Use the app to schedule your pet’s meal times and portion sizes, view the last two weeks of feeder
activity, and even dispense a meal or snack remotely. Smartphone alerts let you know when your
pet has been fed for added peace of mind. Offering ultimate pet feeding convenience, the PetSafe
®
Smart Feed keeps you connected to your pet’s feeding routine wherever you are!
Setup and Assemble Feeder
1. Remove the components located inside the
food hopper.
2. If you want, wash and rinse the bowl, bowl
holder, food hopper, lid and conveyor. Once
parts are dry, replace the conveyor and food
hopper ensuring conveyor is aligned and
installed correctly.
3. Plug in the power adapter. If you want, install (4)
D-Cell batteries in case of a power outage. Turn
on the power switch on the bottom of the feeder.
The LED will blink white indicating the feeder is
on but not yet connected to Wi-Fi.
1
2
3

Customer Care Center +1 (800) 732-2677
6
4. Place the bowl into the bowl holder. Lift feeder
and slide the holder notch into the groove on the
bottom of the feeder.
5. Search for “Smart Feed” in your phone’s app
store and download the app. Locate and open
the app on your smartphone, and follow the
onscreen instructions. Complete all instructions
and app setup before filling with food.
6. Fill the hopper with your pet’s favorite dry or
semi-moist food. Level the food, and replace
the lid.
7. Prime the feeder by pressing and holding the
manual feed button until food starts to dispense.
It must be primed anytime the food gets low to
ensure correct meal sizes are dispensed.
Your Smart Feed is now ready for use! Use the
Smart Feed app to schedule meals and
setup notifications.
4
5
6
7

petsafe.com
7
LED Indicator
Light Color and Function: What It Means:
Solid White Connected to Wi-Fi and fully operational.
Blinking White Disconnected from Wi-Fi, but feeder is functioning and will
dispense meals previously scheduled.
Solid Red Mechanical error such as a jam, but connected to Wi-Fi.
Blinking Red Mechanical error such as a jam, and disconnected
from Wi-Fi.
The Smart Feed App
Main App Screen Icon Description
MAIN SCREEN - Where you program your pet’s
meal schedule, see the next scheduled meal time
with amount, set Slow Feed mode and dispense
food immediately with the Feed Now button.
ACTIVITY LOG - Shows the last 2 weeks of the
feeder’s activities, including when a meal was
dispensed and any errors with the feeder.
SETTINGS - Allows the feeder name,
smartphone notifications, feeder time zone, Wi-Fi
network, child lock on the manual feed button,
and the time format to be set. Shows the power
status, online status, and the firmware and app
versions. Also this is where the feeder can be
deleted from the app.
FEED NOW - Push to select a meal portion to
dispense immediately as an extra meal or snack.
MEAL SCHEDULE - Where you program your
pet’s meal times and meal portion sizes. Also
where the meal schedule can be turned off to
keep the feeder from dispensing any food while
keeping the programmed meal schedule. The
feeder returns to the programmed meal schedule
when the schedule is turned back on.
SLOW FEED MODE - Slowly dispenses all
scheduled meals over 1/8 cup slowly over a
15-minute period when turned on. This helps
slow down fast eaters to help prevent gulping
and vomiting.
CLEANING THE FEEDER
Do NOT immerse control panel in water. Base unit should NOT be submerged
in water at any time, as this may damage electronic components.

Customer Care Center +1 (800) 732-2677
8
Disassemble the Feeder:
1. If any food is in the feeder, use the Feed Now
button in the app or the manual feed button on
the feeder to remove any food from the conveyor
and food hopper.
2. Remove the stainless steel bowl and bowl holder.
3. Turn off the power switch and unplug the feeder.
4. Remove the lid by pulling the lid latch then
lifting up.
5. Unlock the food hopper latches on each side of
the feeder and remove the hopper.
6. Pull back the red conveyor latch inside the
bottom of the feeder to unlock the conveyor. Lift
the conveyor to remove.
7. Remove the conveyor crumb catcher by gently
pressing in sides and pulling down.
8. The stainless steel bowl is dishwasher safe.
The bowl holder, lid, and hopper are top-shelf
dishwasher safe. The conveyor and crumb
catcher must be washed by hand. Submerge
conveyor and crumb catcher in warm soapy
water and use a cleaning brush or toothbrush to
clean food pieces from the conveyor belt. Rinse
both parts and stand conveyor upright on a flat
surface to air dry.
Reassemble the Feeder
1. Make sure all parts are completely dry before
reassembling the feeder.
2. Replace the crumb catcher on the conveyor.
Align a conveyor belt lip with the arrows on the
side of the conveyor housing.
6
7
2

petsafe.com
9
3. Replace the conveyor inside the feeder and lock
the red latch to hold the conveyor in place.
4. Replace the food hopper making sure the
conveyor agitator is inside the hopper opening.
Lock both hopper latches.
5. Plug in the power adapter and turn on the
power switch.
6. Reinstall the bowl holder and the stainless
steel bowl.
7. Refill the feeder with dry or semi-moist pet food
and level the food. Replace the lid.
8. Prime the conveyor by pressing the manual feed
button on the feeder until food starts to dispense
or use the Feed Now option in the app and
select 5/8 cups.
9. The feeder should automatically reconnect to
your Wi-Fi within a few minutes. If it does not,
please see “Troubleshooting” below for help.
TROUBLESHOOTING
The answers to these questions should help you solve most problems you may have with the pet
feeder. If they do not, please contact our Customer Care Center at +1 (800) 732-2677.
TROUBLESHOOTING
PROBLEM SOLUTION
The Smart Feed app is not
in the app store or will not
install.
• Make sure you search for PetSafe
®
Smart Feed in the app store
and spell as listed here.
• Make sure your smartphone operating system is compatible:
• iPhone or iPod with iOS 9.0 or later
• Android 5.0 or later
During initial setup the
feeder will not connect to my
wireless router.
• Make sure to try any instructions listed within the app.
• Check your home’s wireless router and internet are working
properly and your phone or computer is connected. If the
router or internet is not working, try resetting the router or
contact your internet provider.
• Place your feeder near your router during initial setup.
3
4

Customer Care Center +1 (800) 732-2677
10
During initial setup the
feeder will not connect to my
wireless router. (continued)
• Make sure the feeder LED is blinking white which shows it is
functioning and searching for Wi-Fi.
• Look at your Wi-Fi settings and make sure you are using a
2.4gHz network.
• Check if any firewalls are activated on your router to keeping it
from connecting.
• Power cycle the feeder by turning off the power switch. Wait
10 seconds and turn the power switch back on.
• If the problem continues after trying what is listed above, reset
the feeder to factory settings. Please note any settings or meals
will have to be reprogrammed. To reset the feeder, use a paper
clip to press and hold the button (you should hear a click) until
the LED turns off for about 3 seconds then starts blinking again.
Follow the on screen setup instructions in the app.
• If you continue to experience issues, please contact our
Customer Care Center.
The feeder is not
automatically reconnecting
or is not connected to my
Wi-Fi.
• If your internet provider has changed, router has changed or
password has changed, go into the settings screen in the app
and select Wi-Fi Network. Select Reset WiFi and follow the
onscreen instructions.
• Check to make sure the feeder LED is blinking white and
searching for Wi-Fi.
• Check your home’s wireless router and internet are working
properly and your phone or computer is connected. If the
router or internet is not working, try resetting the router or
contact your internet provider.
• Power cycle the feeder by turning off the power switch. Wait
10 seconds and turn the power switch back on.
• Check for other devices near the feeder that use the internet
or other wireless signals (such as a microwave). Either move
the object away from the feeder or move the feeder to a new
location closer to your home’s wireless router.
• If the problem continues, reset the feeder to factory
settings. Please note any settings or meals will have to be
reprogrammed. To reset the feeder, use a paper clip to press
and hold the button (you should hear a click) until the LED turns
off for about 3 seconds then starts blinking again.
• If you continue to experience issues, please contact our
Customer Care Center.
The manual feed button is
not working
• Check if the Child Lock is turned on in the app.
The lid or hopper is not
fitting properly.
• Check the conveyor is installed inside the feeder base correctly
and the conveyor latch is locked in place.
The feeder is not dispensing
the programmed meal
amount or any food at all.
• Make sure hopper is filled with food.
• Make sure the schedule is turned on in the app.
• Check for any errors by checking if the LED light is red or for
any error messages on the activity screen in the app.
• Ensure you are only using dry or semi-moist food.
• Make sure the conveyor agitator is positioned inside the food
hopper opening (see “Reassemble the Feeder” on page 8 for
detailed instructions).

petsafe.com
11
The feeder is not dispensing
the programmed meal
amount or any food at all.
(continued)
• If the conveyor was removed for cleaning, it may not have
been aligned properly before being installed (see “Reassemble
the Feeder” on page 8 for detailed instructions.)
• Make sure the conveyor is primed anytime the food gets low
or you refill with food for correct meal sizes to dispense (see
“Setup and Assemble Feeder” on page 5 or “Reassemble the
Feeder” on page 8 for detailed instructions).
The food is dispensing
slowly.
• Check if Slow Feed mode is turned on in the app. Slow Feed
applies to all meals.
Customer Care International
USA & Canada - Tel: 800-732-2677 – Monday - Friday 8 AM - 8 PM / Saturday 9 AM – 5 PM
Australia - Tel: 1800 786 608 – Monday - Friday 8:30 AM - 5 PM
New Zealand - Tel: 0800 543 054 – Monday - Friday 10:30 AM - 7 PM
Terms of Use and Limitation of Liability
1) Terms of Use: This Product is offered to you conditioned upon your acceptance without modification of the
terms, conditions and notices contained herein. Usage of this Product implies acceptance of all such terms,
conditions, and notices.
2) Proper Use: This Product is designed as a system for automatic dispensing of dry pet food. The specific
temperament of your pet may not work with this Product. If you are unsure whether this is appropriate for your
pet, please consult your veterinarian, certified trainer or contact our Customer Care Center or visit our website at
www.petsafe.com. Proper use includes reviewing the entire Operating Guide for your product and any specific
Caution statements.
3) No Unlawful or Prohibited Use: This Product is designed for use with pets only. This device is not intended
to harm, injure, or provoke. Using this product in a way that is not intended could result in violation of Federal,
State or local laws.
4) Limitation of Liability: In no event shall Radio Systems Corporation be liable for any direct, indirect, punitive,
incidental, special or consequential damages, or any damages whatsoever arising out of or connected with the
use or misuse of this Product. Buyer assumes all risks and liability from the use of this Product.
5) Modification of Terms and Conditions: Radio Systems Corporation reserves the right to change the terms,
conditions and notices under which this Product is offered.
Compliance
FCC/Canada
This Class B digital apparatus complies with Canadian ICES-003. This equipment has been tested and found to
comply with the limits for a Class B digital device, pursuant to Part 15 of the FCC Rules. These limits are designed
to provide reasonable protection against harmful interference when the equipment is operated in a residential
environment. This equipment generates, uses, and can radiate radio frequency energy and, if not installed and
used in accordance with the instruction guide, may cause harmful interference to radio communications. However,
there is no guarantee that interference will not occur in a practical installation. If this equipment causes harmful
interference to radio or television reception, which can be determined by turning the equipment off and on, the user
is encouraged to try to correct the interference by one or more of the following measures:
• Relocate the interfered receiving antenna.
• Increase the separation between the equipment and receiver.
• Connect the equipment into an outlet on a circuit different to that to which the receiver is connected.
• Contact the Customer Care Center +1 (800) 732-2677.
This device complies with Industry Canada Rules. This device complies with part 15 of the FCC Rules. Operation is
subject to the following two conditions: (1) This device may not cause harmful interference, and (2) this device must
accept any interference received, including interference that may cause undesired operation.
Unauthorized changes or modifications to the equipment, not approved by Radio Systems Corporation, could result
in not meeting compliance with FCC regulations and could void the user’s authority to operate the equipment.
Australia - This device complies with the applicable EMC requirements specified by the ACMA (Australian
Communications and Media Authority).
CE - This equipment has been tested and found to comply with relevant EU Electromagnetic Compatibility, Low
Voltage and R&TTE Directives. Before using this equipment outside the EU countries, check with the relevant local
R&TTE authority. Unauthorized changes or modifications to the equipment that are not approved by Radio Systems
Corporation are in violation of EU R&TTE regulations, could void the user’s authority to operate the equipment, and
void the warranty. The Declaration of Conformity can be found at: http://www.petsafe.net/customercare/eu_docs.php.

Apple, the Apple logo, iPhone, iPad, and iPod touch are trademarks of Apple Inc., registered in the U.S. and
other countries. App Store is a service mark of Apple Inc.
Android, Google Play and the Google Play logo are trademarks of Google Inc.
Radio Systems Corporation
10427 PetSafe Way, Knoxville, TN 37932
+1 (800) 732-2677
petsafe.com
©2017 Radio Systems Corporation
400-2047
Hereinafter Radio Systems Corporation and any other affiliate or Brand of Radio Systems Corporation may be
referred to collectively as “We” or “Us”.
Warranty and Registration
Warranty
One Year Non-Transferrable Limited Warranty
This product has the benefit of a limited manufacturer’s warranty. Complete details of the warranty applicable to this
product and its terms can be found at www.petsafe.com and/or are available by contacting your local Customer
Care Center: Radio Systems Corporation, 10427 PetSafe Way, Knoxville, TN 37932 USA
Australia/New Zealand – In compliance with the Australian Consumer Law, Warranties Against
Defects, effective January 1, 2012, warranty details of this Product are as follows:
One year Non-Transferrable Limited Warranty
What is covered: Radio Systems Australia Pty Ltd (hereinafter referred to as “Radio Systems”) warrants to the
original retail purchaser, and not any other purchaser or subsequent owner, that its product, when subject to normal
and proper residential use, will be free from defects in material or workmanship for a period of one (1) year from the
purchase date. An “original retail consumer purchaser” is a person or entity who originally purchases the product, or a
gift recipient of a new product that is unopened and in its original packaging. When serviced by Radio Systems Customer
Service, Radio Systems covers labor and parts for one year of ownership; after the first year, a service or upgrade
charge will apply relative to replacement of the product with new or refurbished items at Radio Systems’ sole discretion.
The limited warranty is non-transferrable and shall automatically terminate if the original retail consumer purchaser
resells the Radio Systems Product or transfers the property on which the Radio Systems Product is installed. This
limited warranty excludes accidental damage due to dog chews; lightning damage; or neglect, alteration, and
misuse. Consumers who purchase products outside of Australia, New Zealand, or from an unauthorized dealer will
need to return the product to the original place of purchase for any warranty issues.
Please note that Radio Systems does not provide refunds, replacements, or upgrades for change of mind, or for any
other reason outside of these warranty terms.
Claims Procedure: Any claim made under this warranty should be made directly to Radio Systems Australia Pty
Ltd Customer Care Centre at:
Radio Systems Australia Pty Ltd., PO Box 7266, Gold Coast Mail Centre QLD 9726, Australia
Australia Residents: 1800 786 608
New Zealand Residents: 0800 543 054
Email: [email protected]
To file a claim, a proof of purchase must be provided. Without a proof of purchase, Radio Systems will not repair
or replace faulty components. Radio Systems requests the Consumer to contact the Radio Systems Customer Care
Centre to obtain a Warranty Return number, prior to sending the product. Failure to do so may delay in the repair or
replacement of the product.
If the product is deemed to be faulty within 30 days from date of original purchase, Radio Systems will organize for
a replacement to be sent in advance of returning the faulty product. A Post Bag will be included with the replacement
product for the return of the faulty product. The product must be returned within 7 days of receiving the replacement.
If the product is deemed to be faulty after 30 days from the date of original purchase, the consumer will be required
to return the product to Radio Systems at the consumer’s own expense. Radio Systems will test and replace the faulty
unit or its components and return to the consumer free of charge provided the product is within its said warranty
period. This warranty is in addition to other rights and remedies available to you under the law. Radio Systems goods
come with guarantees that cannot be excluded under the Australia Consumer Law. You are entitled to a replacement
or refund for a major failure and for compensation for any other reasonably foreseeable loss or damage. You are
also entitled to have the goods repaired or replaced if the goods fail to be of acceptable quality and the failure does
not amount to a major failure.
Should you have any queries or require any further information, please contact our Customer Care Centre on 1800
786 608 (Australia) or 0800 543 054 (New Zealand).
/