Page is loading ...

GMQ 16” Adapter Set
Assembly Instructions
Copyright November, 2003 GraceWood, Inc.
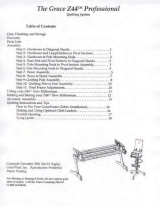
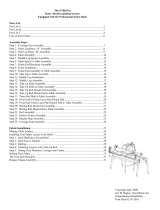
Table of Contents
Parts List
. . . . . . . . . . . . . . . . . . . . . . . . . . . . . . . . . . . . . . . . . . . . . . . . . . . . . . . . . . . . . . . . . . 1
Assembly Instructions
. . . . . . . . . . . . . . . . . . . . . . . . . . . . . . . . . . . . . . . . . . . . . . . . . . . . . . .3
Step One: Preparing Your Grace Machine Quilter. . . . . . . . . . . . . . . . . . . . . . . . . . 3
Step Two: Table-Top Hardware Removal. . . . . . . . . . . . . . . . . . . . . . . . . . . . . . . . . .3
Step Three: Back Table Overlay Assembly. . . . . . . . . . . . . . . . . . . . . . . . . . . . . . . . . 4
Step Four: Front Table Overlay Assembly . . . . . . . . . . . . . . . . . . . . . . . . . . . . . . . . 5
Step Five: Inserting Track. . . . . . . . . . . . . . . . . . . . . . . . . . . . . . . . . . . . . . . . . . . . . . 6
Step Six: Track Stop Assembly. . . . . . . . . . . . . . . . . . . . . . . . . . . . . . . . . . . . . . . . . . 6
Step Seven: Bottom Plate Sub-Assembly. . . . . . . . . . . . . . . . . . . . . . . . . . . . . . . . . . 7
Step Eight: Bottom Plate and Wheel Sub-Assembly. . . . . . . . . . . . . . . . . . . . . . . . . 7
Step Nine: Plates to Carriage and Overlay Adjustments. . . . . . . . . . . . . . . . . . . . . . 8
Step Ten: New Pole Mount End Assembly. . . . . . . . . . . . . . . . . . . . . . . . . . . . . . . . 8
Step Eleven: Pole Mount Ends to Frame Assembly. . . . . . . . . . . . . . . . . . . . . . . . . 9
Step Twelve: Rails to Frame Assembly. . . . . . . . . . . . . . . . . . . . . . . . . . . . . . . . . . .10
Step Thirteen: EdgeMaster Assembly . . . . . . . . . . . . . . . . . . . . . . . . . . . . . . . . . . . .10
10- 1/4" X 60mm
Connector Bolt
18- 1/4" X 40mm
Connector Bolt
6- 1/4" X 30mm
Connector Bolt
6- 1/4"
Cap Nut
4- Wheels
10- 1/4"
Jamb Nut
18- 1/4"
Wing Nut
34- 1/4"
Flat Washer
6- 1/4" X 35mm
Connector Bolts
6- 1/4"
Nylock Nut
2-4mm Allen Wrench
Hardware Parts List
***Drawings Display Hardware in Actual Size***
1

2
1- Right Edgemaster
Clamp
1- Left Edgemaster
Clamp
1- Right
Cam Lever
1- Left
Cam Lever
Parts List
1- Right 16" Pole Mount End
1- Left 16" Pole Mount End
1- Bottom Plate
1- Middle Front
Table Overlay
1- Right Back
Table Overlay
1- Left Back
Table Overlay
1- Back
Stop
2- Front
Stop
1- Left Front
Table Overlay
1- Right Front
Table Overlay
1- Middle Back
Table Overlay
1- Right Edgemaster
Base
1- Left Edgemaster
Base
2- Leader
Cloth
2-5/16"
Dowel

Before You Begin:
¾ Tools Needed: Allen Wrench (provided) and 7/16” & ½” wrench.
Step One: Preparing Your Grace Machine Quilter
¾ Before you begin, you will
need to remove the following
parts from your Grace
Machine Quilter:
1. All aluminum rails (leave
the end caps in place)
2. Right and Left Pole
Mount Ends (unscrew
the wing nuts and slip the
mount ends off the Left
and Right End pieces.
Remove the bolts and nuts
from these pieces
completely. You will reuse
this hardware on the new
Pole Mount Ends (Step 10).
3. Carriage Assembly (You may leave the wooden handles assembled on the top carriage, but if
your longer arm sewing machine has speed control and handles built in, you will want to remove
the handles and store them assembled in a safe place, or disassemble, if preferred. NOTE! If
your machine is wider than the top platform allows, contact The Grace Company for assistance in
making your platform compatible).
4. All Track pieces (you will reuse these in the new table overlays).
5. Front and back track stops (you will reuse the hex bolts for the new track stops).
6. Both Carriage Stops (these will not be used on the 16” Adapter Set).
7. Pattern Perfect Accessory (if you have the Pattern Perfect accessory, remove the support
platforms with templates from the GMQ).
¾ Your frame should now look like the one pictured above if set up in queen size (or without the middle
table if set up in crib).
Step Two: Table-Top Hardware Removal
3
Remove these 45mm Connector Bolts
¾ NOTE: The following steps show
the 16” Adapter Set assembly for
queen size. If you are assembling in
crib size, simply omit the middle
table pieces and the appropriate
hardware.
¾ First, remove six (6) 45mm
connector bolts pictured below
(leave the rectangle nuts in place for
use in the next step.

Step Three: Back Table Overlay Assembly
Parts Needed: 1 – Left Back Table Overlay
1 – Middle Back Table Overlay
1 – Right Back Table Overlay
6 – ¼” x 60 mm Connector Bolt
9 – ¼” x 40 mm Connector Bolt
9 – ¼” Wing Nut
9 – ¼” Flat Washer
¾ Connect the Left, Middle (if assembling in queen size) and Right Back Overlays to the GMQ table tops by
first putting in the ¼” x 60 mm connector bolts in the row of holes furthest away from the track
groove of the overlay.
¾ These 60 mm bolts go through the same GMQ table top holes the 45mm bolts were removed from in
the prior step. Use the rectangle nuts from the prior step to fasten the 60 mm bolts in place.
1/4" X 60mm
Connector Bolt
1/4" X 40mm
Connector Bolt
1/4" Flat
Washer
1/4" Wing
Nut
¾ Next, in the row of holes closest to the track groove, place ¼” 40mm bolts. These will connect in the
small slots on the edge of the GMQ table top. (The same slots the pattern perfect attached to).
¾ After placing these bolts through the overlay holes and table top slots, place a ¼” flat washer and ¼”
wing nut onto the end of each bolt.
4

Step Four: Front Table Overlay Assembly
Parts Needed: 1 – Left Front Table Overlay
1 – Middle Front Table Overlay
1 – Right Front Table Overlay
9 – ¼” x 40 mm Connector Bolt
9 – ¼” Wing Nut
9 – ¼” Flat Washer
¾ Place the Front Table Overlays onto the front (rail side) of the GMQ table top.
¾ Place a ¼” x 40mm connector bolt through each long slot of the overlays and into the long horizontal
slots of the table tops as pictured below.
¾ Thread a ¼” flat washer and ¼” wing nut onto the ends of each bolt, BUT DO NOT
COMPLETELY TIGHTEN AT THIS TIME.
1/4" X 40mm
Connector Bolt
1/4" Flat
Washer
1/4" Wing
Nut
5

Step Five: Inserting Track
Parts Needed: 1 – 72” Track
1 – 80” Track
1 – 106” Track (If Queen Size is Assembled. )
1 – 114” Track (If Queen Size is Assembled.)
¾ Lay the track from your original GMQ assembly into the grooves of the overlay.
¾ Place track in the grooves of the Back Table Overlays, and in the grooves furthest away in the Front Table
Overlays.
¾ If you want to use a regular, non-long arm sewing machine on this frame again, you may do so without
removing the 16” Adapter Set. Simply move the front track to the back slots of the Front Table Overlays.
You may use the regular black top and bottom platforms or the 16” set bottom platform.
Slot for Track
for 16" Overlay
Bottom Plate
Slot for Track
for Standard GMQ
Bottom Plate
6

Step Six: Bottom Plate Sub-Assembly
1/4" X 30mm
Connector Bolt
Cap Nut
Bottom Plate Long Arm
Top View
Parts Needed: 1 – Bottom Plate
1 – Back Stop
2 – Front Stop
6 – ¼” x 30mm Connector Bolt
6 – Cap Nut
4 – 17” Track
¾ Assemble the new Bottom Plate by fastening the
two Front Stops. This will be done by placing two
¼” x 30mm connector bolts through the stop
holes and through the corresponding holes in the
Bottom Plate.
¾ Place to cap nuts into the holes of the underside of
the Bottom Plate. Thread these cap nuts onto the
bolts.
¾ To fully tighten, hold the cap nut still on the
underside of the Bottom Plate, and tighten the
connector bolt using the allen wrench (provided).
¾ Follow the same steps to fasten the Back Stop to
the Bottom Plate.
¾ As you see pictured, the four 17” track pieces fit into the grooves of the Bottom Plate. You will put these
into place following the next step.
Step Seven: Bottom Plate and Wheel Sub-Assembly
Parts Needed: 1 – Bottom Plate
4 – Wheel
Wheel
1/4" X 60mm
Connector Bolt
1/4" Flat
Washer
1/4" Jamb
Nut
Bottom Plate Long Arm
Bottom View
4 – ¼” x 60mm Connector Bolt
4 – ¼” Jamb Nut
4 – ¼” Flat Washer
¾ Place a wheel in the slot, as pictured,
centering the hole of the wheel with the
hole in the wood.
¾ Put a 60mm connector bolt into the
wood hole and through the hold of the
wheel, until it comes through the wood
hole on the other side.
¾ Fasten the bolt in place by putting a flat
washer and ¼” jamb nut onto the end
of the bolt.
¾ Tighten these jamb nuts using a 7/16”
wrench.
7

Step Eight: Plates to Carriage and Overlay Adjustments
¾ This step will enable you to
adjust the Front Table Overlays,
making sure they are properly
aligned.
¾ Place the Bottom Plate onto the
tracked grooves and the Top
Plate on the Bottom Plate.
¾ It is also recommended that you
temporarily place your sewing
machine onto the Top Plate for
added weight.
¾ Roll your carriages back and
forth the entire length of the
table a couple of times.
¾ After doing this, your Front Table Overlays should be straightened in relation to the Back Overlays. The
Front Overlays are now ready to be secured in place. Do this by tightening each wing nut underneath the
Overlays, being careful not to move the Tables out of place.
Step Nine: New Pole Mount End Assembly
Parts Needed: 1 – Left 16” Pole Mount End
5/16" X 2"
Carriage Bolt
1/4" Flat
Washer
5/16" Jamb
Nut
Left Pole Mount End Long Arm
Inside View
1 – Right 16” Pole Mount End
(Hardware below is from your original frame assembly)
4 – 5/16” x 2” Carriage Bolt
4 – 5/16” Jamb Nut
4 – ¼” Flat Washer
¾ Next, assemble the new 16” Pole Mount
Ends using the hardware you removed
from your existing Pole Mount Ends.
¾ This is done in the same manner as the
original assembly.
5/16" X 2"
Carriage Bolt
5/16" Jamb
Nut
1/4" Flat
Washer
Right Pole Mount End Long Arm
Inside View
¾ Be sure to place the bolts in the same holes in relation to
their position (see above: both bolts go through the
third hole from the front).
¾ Be sure to completely tighten the 5/16” jamb nuts onto
the bolts so that there is no movement in the bolts or
washers.
8

StepTen: Pole Mount Ends to Frame Assembly
Parts Needed: 1 – Left 16” Pole Mount End
1 – Right 16” Pole Mount End
(Hardware below is from your original frame assembly)
4 – Roller Bushing
4 – 1 ¼” Fender Washer
4 – 5/16” Wing Nut
3 – Ratchet Stops
3 – ¼” x 1 ½” Truss Bolts
1/4" X 1 1/2"
Truss Bolt
Ratchet Stop
Roller Bushing
1 1/4" Fender
Washer
5/16" Wing
Nut
¾ You will now fasten the 16” Pole Mount Ends to your existing frame. Again, this is done in the exact
manner as the original assembly.
¾ Fasten the left Pole Mount End to the Left End piece, placing it on the inside with the carriage bolts
facing toward the outside.
¾ Place the carriage bolts through the long slots of the Left End.
¾ Slide a roller bushing onto each bolt, followed by a 1 ¼” fender washer.
¾ Now thread a 5/16” wing nut onto each bolt and tigthen.
¾ Repeat these steps for the Right Pole Mount End and Right End piece.
¾ NOTE: If the carriage bolts do not properly align with the slots in the Left or Right End piece, the bolts
were not put in the corresponding holes (see lower diagrams on page 8).
¾ Fasten the Ratchet Stops to the Right Pole Mount End using the three truss bolts. NOTE! DO NOT
OVERTIGHTEN THE TRUSS BOLTS! FINGER-TIGHTEN ONLY.
9

Step Eleven: Rails to Frame Assembly
Parts Needed: 3 – 70” Rails
3 – 34” Rails (queen size assembly)
¾ Place the three rails into the Mount Ends in the same manner as with the original frame. Notice you now
have 16” of space between the front and middle rail.
Step Twelve: EdgeMaster™ Assembly
Parts Needed: 1 – Left EdgeMaster Base
1/4" X 35mm
Connector Bolt
1/4" Flat
Washer
1/4" Jamb
Nut
1 – Right EdgeMaster Base
1 – Left EdgeMaster Clamp
1 – Right EdeMaster Clamp
1 – Left Cam Lever
1 – Right Cam Lever
2 – 5/16” Dowel
2 – Cloth Leader
6 – 1/4” x 35mm Connector Bolts
10 – 1/4” Jamb Nuts
2 – 1/4” Nylock Nuts
12 – 1/4” Flatwasher
¾ First, place three 35mm connector bolts through the three holes in the top of the Right EdgeMaster Base.
¾ Fasten these bolts in place by placing a ¼” flat washer and ¼” jamb nut onto the ends of each bolt.
¾ Completely tighten each jamb nut until there is no movement with the bolts or flat washers.
¾ Repeat these steps for the Left EdgeMaster Base.
10

¾ Next, slide the 5/16” dowel through the Cloth Leader.
¾ Insert the cloth sleeve (end opposite the dowel) through the slot
of the EdgeMaster Base and pull through until the dowel comes
up against the Base.
1/4" Flat
Washer
1/4" Nylock
Nut
¾ Now, attach the Right EdgeMaster Clamp
to the base, as pictured. This will keep
the cloth sleeve with dowel in place.
¾ Fasten the Clamp and Base together by
placing a flat washer and nylock nut onto
the ends of each bolt.
¾ IMPORTANT: Do not completely tighten the nylock nuts. Leave them just loose enough so the flat
washer moves freely on the bolt.
¾ Repeat this step for the Left EdgeMaster.
1/4" Flat
Washer
1/4" Nylock
Nut
¾ Next, fasten the Right Clamp Lever to the
Right Base by placing the Clamp onto the
remaining middle bolt.
¾ Place a flat washer and nylock nut onto the end
of the bolt.
¾ Again, do not completely tighten the nylock
nut. Keep it just loose enough to still allow the
flatwasher to spin on the bolt.
¾ Repeat these steps for the Left Cam Lever.
11
/