Page is loading ...

3
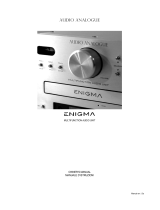
Audio Analogue goes on in its research to solve the enigma:
“Is it possible to create a multifunction audio unit, also known as an “all in one system”, with such high sound quality that makes it
comparable to the best audiophile systems?”
With Enigma Rev2.0 the answer is yes!
The audio chain design was chosen starting from the selection of a new Vacuum Tube Preamplifier section based on the Rossini CD
Player REV2.0 output stage that gave us surprising results. The other parts were then matched to the preamplifier stage. Important
changes have been implemented in every part, but especially in the power stage and DAC section. The resulting audio quality is
astonishing!
The Enigma Rev2.0 has a new more essential design with a line input on the front to be connected to a line output of an MP3 Player
such as the iPod
®
to meet the growing interest in that kind of audio source, even in the audiophile field. Also a Mono-Out has been
added to connect a passive subwoofer along with the implementation of some extremely efficient new software.
Enigma Rev.2.0 solve the enigma. It is a unique product because there are certainly no other “all-in-one” systems on the market with
similar audio quality. We can assert with absolute certainty that The Enigma Rev2.0 can be favourably compared in terms of its
warm soft sound with even higher more expensive true audiophile systems.
Visit: www.audioanalogue.com for further technical information about the product.
iPod is a trademark of Apple Computer Inc.
Audio Analogue continua la sua ricerca per risolvere l’enigma:
“E’ possibile creare un apparecchio multifunzione, indicato anche come sistema “all in one”, avente qualità audio così elevate da
potersi paragonare con i migliori impianti Hi-Fi?”
Con Enigma Rev2.0 la risposta è si!
La catena di elaborazione del segnale audio è stata disegnata a partire dalla scelta di una nuova sezione di preamplificazione
valvolare basata sullo stadio di uscita del Rossini CD Player Rev2.0. Le altri parti sono state quindi accordate con il nuovo pre.
Modifiche importanti sono state apportate in tutte le sezioni, in particolare nei finali di potenza e nella sezione DAC. La qualità audio
risultante è strabiliante!
L’Enigma Rev2.0 è caratterizzato da un design essenziale, con un ingresso linea sul frontale da connettere all’uscita linea di un
lettore MP3 quale ad esempio l’iPod
®
, così da incontrare il crescente interesse che si è creato per questo tipo di sorgenti audio
anche nel campo degli audiophili. Inoltre è stata aggiunta una uscita MonoOut per pilotare direttamente un subwoofer attivo.
L’Enigma Rev2.0 risolve l’enigma. E’ un prodotto unico! Sul mercato non esistono sistemi “all in one” con simile qualità audio.
Possiamo affermare con certezza che l’Enigma Rev2.0 con il suo suono caldo e morbido può essere a ragione comparato con
sistemi Hi-Fi anche molto più costosi.
Visitate: www.audioanalogue.com per ulteriori informazioni sul prodotto.
iPod è un marchio registrato di Apple Computer Inc.

5
INTRODUCTION
AUDIO FUTURA spa, AUDIO ANALOGUE producer and distributor, does not take any responsibility in the following cases:
Whenever the operational procedures related to the use and the maintenance of the equipment as described in this manual are not
respected.
Whenever damage to the equipment occurs because of repairs and modifications made form non-authorized staff or because of
normal deterioration of the system.
No part of this manual can be reproduced by any means, transmitted or copied for private or public use without private authorization
from AUDIO FUTURA spa.
The information contained in this manual is related to the data kept by AUDIO FUTURA spa at the moment of the issue of this
publication; AUDIO FUTURA spa has the right to make changes to this document without prior notice.
The equipment has been projected and manufactured according to the Regulations of the Community 89/336/CEE and is marked CE.
This equipment cannot be used for different purposes other than those for which it has been manufactured.
AUDIO FUTURA spa does not take any responsibility for accidents or damage due to improper use of the equipment.
WARNING
Please respect the safety standards contained in this manual before starting to operate the equipment.
Do not open the equipment. No further interventions than those described in this manual should be made. For technical assistance,
please consult a qualified technician or an AUDIO ANALOGUE dealer.
Not respecting the instructions contained in this manual will invalidate the terms and conditions of the guarantee.
NECESSARY PRECAUTIONS FOR SAFETY AND MAINTENANCE
ATTENTION: before starting any operation, using or maintaining the equipment, it is strictly necessary to understand the following
manual.
To avoid any accidents or hazards it is necessary to follow the following regulations.
Activate the equipment only prior to checking that the installation has been done properly, and conforms to the instructions contained
in this manual.
Avoid installing the equipment in places subjected to extremely high temperatures or humidity.
Check that the labels containing information about safety are always visible and in good condition.
Ensure not to obstruct ventilation and to avoid excessive overheating. The equipment should be kept to a minimal distance of 15 cm
from any object and not to be placed on carpet or other soft surfaces. Also installation close to radiators or in closed spaces without
ventilation should be avoided.
Do not switch on the equipment until it has been correctly and completely installed.
Only supply the equipment with the kind of the electric supply as stated on the appropriate label. If in doubt about the kind of supply
available, please consult an expert technician for technical assistance.
The equipment needs to be wired to an earth terminal. The external case is made of metal; a defective connection with the earth
may be dangerous.
In case damage occurs to the supply cable, it should be replaced immediately with the same kind of cable. This operation should be
only made prior to disconnecting the mains supply.
Do not place objects on the supply cable and check that this is not positioned lying across a walk way. The cable should not be
knotted or curly.
Always replace the fuses with others of the same type.
Do not use the equipment close to water or other liquids. If liquid enters the equipment, the plug should be disconnected from the
socket avoiding any contact with the metal parts. Competent technical staff should be asked to check the equipment before
operating it again.
Do not place receptacles containing liquid on the equipment, even when it is switched off.
Keep the equipment far from sources of heat such as solar light, kitchens, radiators etc…
Always unplug the supply cable during rainy weather.
Always switch off and unplug the supply cable before cleaning the equipment externally: this operation should be made using a dry
and soft cloth. Never use alcohol based cleaning material.
If the amplifier was carried from an extremely cold environment to and extremely hot one, it could create internal condensation,
causing possible malfunction.
If this occurs, please wait for at least an hour before using it again, to allow it to gradually reach room temperature.
When not used for long periods, please unplug the equipment.
INSTRUCTIONS TO PUT IT OUT OF SERVICE
Consult qualified staff
Follow the regulations of the current legislation regarding recycling and waste disposal.

7
Front panel
(All the switches in the top part of the front panel perform different functions depending on whether the Cd Player source or Tuner
source is selected, whereas they are inactive when a Line Input is selected):
1) / STORE:
• Source selected: CD Player → STOP/OPEN. Multifunctional button. When in play mode, by pressing this button disc
playback is stopped; when in stop mode, by pressing this button disc tray is opened/closed.
• Source selected: Tuner → STORE. Pressing this button puts the unit in “Storage” mode and it is possible to store the
current radio station in the unit’s memory permanently. It is possible to store up to 18 AM and 18 FM stations. Please
refer to “Radio stations storage” paragraph for further details about storage procedure.
• Source selected: Line Input → inactive.
2) / MEMORY (-):
• Source selected: CD Player → PREV/REW. By pressing this button during playback, you move to the previous CD
track or, holding it down for a few seconds, activate fast rewind search. When playback is stopped, you may choose
the CD track to resume playback from or search CD tracks backward.
• Source selected: Tuner → MEMORY-. By pressing this button when the unit is in normal mode, the radio tuner is
tuned on the station stored in the memory allocation that precedes the last selected allocation. When the unit exits the
Standby mode and when changing modulation type, pressing this button tunes the radio tuner on the station stored in
the 18th memory allocation. Pressing the button again tunes the radio tuner on the station n° 17, 16,…, 1 then back to
n° 18. If no radio station is stored into the selected allocation, an EMPTY indication shows on the display and the
radio tuner switches back to the previous station. When in “Storage” mode, pressing this button allows you to choose
a memory allocation where the selected radio station is to be stored. Please refer to the “Radio station storage”
paragraph for further details about storage procedures and refer to the “tuning Stored Radio stations” paragraph for
further details about memorized radio station tuning.
• Source selected: Line Input → inactive.
3) / MEMORY (+):
• Source selected: CD Player → NEXT/FFW. By pressing this button during playback, you move to the next CD track
or, holding it down for a few seconds, activate fast forward search. When playback is stopped, you may choose the
CD track from which resuming playback or search CD tracks forward.
• Source selected: Tuner → MEMORY+. By pressing this button when the unit is in normal mode, the radio is tuned on the
station stored in the memory allocation that follows the last selected one. When the unit exits the Standby mode and when
changing modulation type, pressing this button tunes the radio on the station stored in the 1st memory allocation. Pressing
the button again tunes the radio on the station n° 2, 3,…, 18 then back to n° 1. If no radio station is stored into the selected
2
2
1
1
3
3
4
4
7
7
6
6
8
8
9
9
5
5
1
1
0
0
1
1
1
1
1
1
2
2
1
1
3
3

8
allocation, an EMPTY signal shows on the display and the radio switches back to the previous station. When in “Storage”
mode, pressing this button allows you to choose a memory allocation where the selected radio station is to be stored.
Please refer to the “Radio station storage” paragraph for further details about storage procedures and refer to the “tuning
Stored Radio stations” paragraph for further details about memorized radio station tuning.
• Source selected: Line Input → Inactive.
4) / AM/FM:
• Source selected: CD Player → PLAY/PAUSE. By pressing this button, you start CD playback or pause/resume CD
playback.
• Source selected: Tuner → FM/AM. Pressing this button changes modulation type. It is possible to switch between AM
and FM.
• Source selected: Line Input → inactive.
5) VOLUME KNOB. Volume knob, see the notes for further details.
6) REPEAT / SEARCH (-):
• Source selected: CD Player → (RPT) REPEAT: This key has different functions according to the functioning state of
the CD player:
[RPT] When the CD player is stopped it is possible to choose to repeat a track or the entire disc by pressing the
key once or twice. To choose to repeat a track you press the keys PREV and NEXT to select the track to repeat
or select the track directly by its number using the numeric keys on the remote.
[RPT ALL] When the CD player is playing, pressing this key in two different moments determines the initial
instant (A) and final (B) of an arbitrary section to repeat. When this option is active, you can de-activate it by
pressing the key again, and the normal playback of the CD is re-established.
[RPT MIX] SHUFFLE function, this playing mode is enabled with the unit in STOP state and permits random
playback of the tracks. While playing you can randomly change the played track with the switches NEXT and
PREV on the front panel or on the remote while you can reproduce an established track using the numeric keys
on the remote.
• Source selected: Tuner → SEARCH-. When this button is pressed and immediately released, the frequency level is
decreased by one step (SEARCH function). When pressed and released after one second, the frequency level is
decreased until a lower-frequency radio station is reached (SCAN function): if this is not possible, the whole
bandwidth is scanned backward until the initial frequency level is reached.
• Source selected: Line Input → inactive.
7) TIME / SEARCH (+):
• Source selected: CD Player → TIME: by pressing this key it is possible to visualize the playback information
differently on the time counter. The alternative modalities are:
The time that is left until the end of the song, “end of track” mode (“_” appears on the display between the
indication of the minutes and the seconds).
The time that is left until the end of the CD, “end of disc” mode (“-“ appears on the display between the indication
of the minutes and the seconds).
The time that has gone by since the beginning of the CD, “total time” mode (“.“ appears on the display between
the indication of the minutes and the seconds).
• Source selected: Tuner → SEARCH +: When this button is pressed and immediately released, the frequency level is
increased by one step (SEARCH function). When held for one second, the frequency level is increased until a higher-
frequency radio station is reached (SCAN function): if this is not possible, the whole bandwidth is scanned forward
until the initial frequency level is reached.
• Source selected: Line Input → inactive.
8) PHONE : Headphone connector. See the notes for further details.
9) FRONT IN: Front Line Input. See the notes for further details.
10) STANDBY: Source selected: any → STANDBY. Turns unit In or Out of Standby mode. To avoid inadvertently turning off the
unit while entering into standby mode, it is necessary to keep the STANDBY switch pushed for about three seconds on the
front panel. When the STANDBY switch is used to turn on the unit from standby mode, after the vacuum tube procedure,
the audio source which was present at the previous standby is selected.
11) TUNED LED: Source selected: Tuner → TUNED LED. Tuned LED turns on when there is a radio station on the selected
frequency. The LED is active only when the radio tuner is selected as sound source. Inactive for any other source.

12
Description of the remote controller
CD PLAYER functions
• STANDBY CD: turns-on and turns-off the device. If you make the unit exit from the
standby mode using the remote standby CD switch, after the vacuum tube heating
procedure has ended, the CD Player will be selected as the source.
• PLAY / PAUSE : for the description of the function refer to the front panel description.
• STOP / OPEN: for the description of the function refer to the front panel description.
• PREV / REW: for the description of the function refer to the front panel description.
• NEXT / FFW: for the description of the function refer to the front panel description.
• 0123456789 (NUMERIC KEYS): According to the functioning state of the CD player you
have two different actions:
when the CD player is stopped it is possible to select a track pressing the number of
the corresponding song (the apparatus waits for PLAY to be pressed).
When the CD player is playing, pressing the number of the desired song it
immediately skips to the indicated track.
• TIME: for the description of the function refer to the front panel description.
• RPT (REPEAT): for the description of the function refer to the front panel description
Note: the above mentioned keys are active only when the device is in “CD Player” mode.
TUNER Functions
• STANDBY TUNER: switches-on and switches-off of the device. If you make the unit exit
from the standby mode using the remote standby tuner switch, after the vacuum tube heating
procedure has ended, the tuner will be selected as the source.
• SEARCH+: a single press of this button increases the tuning frequency by one step, a
continuous pressure of a few seconds activates a fast research increasing the tuning
frequency by 5 steps.
• SEARCH-: a single press of this button decreases the tuning frequency by one step, a
continuous pressure of a few seconds activates a fast research decreasing the tuning
frequency by 5 steps.
• SCAN+: the tuning frequency is increased to reach the first radio station which has a higher
frequency than the one it started from; if this is not possible a complete scansion of the
band is carried out and the frequency present at the time the switch was pressed is tuned
again.
• SCAN-: the tuning frequency is decreased to reach the first radio station which has a lower frequency than the one it started
from; if this is not possible a complete scansion of the band is carried out and the frequency present at the time the switch
was pressed is tuned again.
• 0123456789 (NUMERIC KEYS): according to the functioning state of the Tuner you have two different actions:
When the tuner is in STORE mode, it is possible to select, using the numeric keys, the position in which you want to
memorize the station, and after it is possible to save it by pressing the STORE key.
When the tuner is not in STORE mode it is possible to select, using the numeric keys, the preset number in order to
recall a station that has been previously memorized.
• AM / FM: permits you to select between AM and FM.
• MEMORY+: MEMORY+ function, for the description of the function refer to the front panel description.
• MEMORY-: MEMORY- function, for the description of this function refer to the front panel description.
• STORE: for the description of the function refer to the front panel description.
• MONO: Pressing this button forces the unit into monophonic playback. When this option is enabled, the STEREO LED turns
off. To return to normal mode, just press this button once. When the unit is in stereophonic mode, the STEREO LED turns
on when the incoming signal is stereophonic, otherwise it stays off.
Note: the above mentioned keys are active only when the device is in “Tuner” mode.
AMPLIFIER functions
• STANDBY AMP: switches-on and switches-off the device. If you make the unit exit from standby mode using the
remote standby AMP switch, after the vacuum tube heating procedure has ended the LINE IN1 will be selected as the
source.
• IN+: it changes the selected source.
• VOLUME+: it increases the volume of the unit.
• IN- : it changes the selected source.
•
VOLUME-: it decreases the volume of the unit.
• MUTE: it activates/de-activates the mute function.
• AMP SETUP: pushing the Amp Setup button the unit enters into setup mode. See the “Setup Menu” paragraph for further
details.

14
• IN+: cambia la sorgente selezionata.
• VOLUME+: aumenta il volume dell’apparecchio.
• IN-: cambia la sorgente selezionata.
• VOLUME-: diminuisce il volume dell’apparecchio.
• MUTE: attiva/disattiva la funzione mute.
• AMP SETUP: la pressione del tasto Amp Setup sul telecomando permette di entrare in modalità setup, si veda la sezione
Menu di Setup per ulteriori informazioni.
Unpacking and checking Enigma package
Carefully open the package to avoid damaging the contents. The package should contain:
• 1 Enigma
• 1 remote controller
• 2 AAA batteries
• 1 instruction manual
• 1 FM antenna 75 Ohm
• 1 AM antenna 300 Ohm
If one of the items listed above is missing, please contact your Audio Analogue retailer. After removing the smaller items from the
package, pull out the unit carefully. Separate the package from the anti-shock expanded-foam protections. If batteries are not
already placed in the remote controller battery slot, open the slot; insert batteries according to the indicated polarity, then close the
battery slot.
Apertura e ispezione dell’imballo
Aprire la scatola di cartone con cautela per non danneggiare il contenuto. L’imballo deve contenere:
• Un Enigma.
• Un telecomando
• Due batterie AAA
• Questo manuale
• Un’antenna FM da 75Ohm.
• Un’antenna AM 300Ohm.
Se qualcuno degli oggetti sopra elencati dovesse mancare, contattate il Vostro rivenditore Audio Analogue di fiducia.
Dopo avere estratto le parti di minori dimensioni, estrarre con cautela l’apparecchio dall’imballo. Separare l’imballo dalle imbottiture
antiurto in schiuma espansa. Se le batterie non si trovano già all’interno del telecomando, aprire il coperchio del vano portapile del
telecomando ed inserirle nelle posizioni corrette; quindi chiudere il coperchio del vano portapile.
Where to place Enigma
Enigma is a unit that generates heat. Please position it in a well-ventilated place. In particular, you should leave at least 5cm around
and above the unit and placing it close to heat sources (radiators, heaters, amplifiers, television sets) should also be avoided.
Scelta del luogo in cui posizionare Enigma
Enigma è un apparecchio che genera calore in misura non trascurabile. Per questo motivo è consigliabile posizionarlo laddove sia
garantita una corretta circolazione d’aria. In particolare, è opportuno garantire uno spazio sufficiente attorno e sopra l’apparecchio
(almeno 5cm), ed evitare posizionamenti vicino a fonti di calore (termosifoni o stufe, amplificatori di potenza, televisori).
Plugging in and connecting Enigma
Before connecting Enigma to any source, please be sure that they are both unplugged from wall outlets. First of all, connect the
audio source outputs to Enigma inputs. As a second step, connect the active subwoofer (if any) into MONOOUT. Please use only
high-quality cables with gold-plated connectors. As a third step, connect the Enigma Loudspeaker outputs to the speakers. At last,
after checking that the mains power switch on the rear panel is in the “0” position, plug the power cable into the Enigma inlet and into
the wall outlet and select the “1” position on the mains power switch.
Collegamento di Enigma
Prima di collegare Enigma alle sorgenti, verificare che tutti gli apparecchi siano scollegati dalla rete elettrica.
Per prima cosa, collegare le uscite delle sorgenti audio agli ingressi di Enigma. Collegare l’ingresso del subwoofer attivo (se lo si
possiede) all’uscita MONOOUT. Utilizzare possibilmente cavi della migliore qualità, terminati con connettori dorati. Quindi collegare
le uscite casse ai diffusori e, dopo aver verificato che l’interruttore posteriore di rete sia nella posizione “0”, collegare il cavo di
alimentazione all’apparecchio e ad una presa di rete e portare l’interruttore posteriore in posizione “1”.

15
SUBWOOFER
settanta
A) Loudspeakers and Active SUBWOOFER Connection
A) Collegamento dei diffusori e di un SUBWOOFER Attivo
B) Front In Use: iPod
®
Connection
B) Utilizzo dell’Ingresso Frontale: Collegamento di un iPod
®
iPod is a trademark of Apple Computer Inc.
iPod è un marchio registrato di Apple Computer Inc.
L
R
Mono Line IN
Out 1 2
ENIGMA
PUCCINI
settanta
PLeft Channel
settanta
PRight Channel
settanta
Back View / Visuale Posteriore
Front View / Visuale Frontale
E N I G M A
IN
PLeft Channel
settanta
PRight Channel
settanta
Connect the iPod
®
LineOut to
the
Enigma Front IN
Collegare il LineOut dell’iPod
®
al Front IN dell’Enigma

17
1. Tune the radio station you’re interested in.
2. Enter in “memorizing” mode by pressing and leaving the STORE button on the remote controller or by pushing the
“STORE” switch on the front panel. Then on the display you can visualize the content of the first location along with two
dots “:” before the location number that will be flashing. If no radio station has been memorized in this location, you can see
the “EMPTY” notice on the display, otherwise you can visualize the frequency of the radio station memorized, and if
possible the relative RDS message which indicates the Station Name.
3. Pressing and leaving the keys MEM+ and MEM- on the remote controller or the MEMORY+ and MEMORY- switches on
the front panel, run over the various locations and stop on the position where you want to memorize the radio station; it is
possible to select the position directly using the numeric keys. For each location the display will indicate, both the location
number and the indication EMPTY if the location doesn’t contain any memorized station or the frequency and eventual
RDS message (if available) of the memorized station.
4. Press and Leave the STORE button on the remote control or the STORE switch on the front panel to memorize the station
in the selected location and exit from “memorizing” mode; at this point the number of the memorized location will flash for a
few seconds on the display and after the message “Stored” will appear, to indicate that the memorizing procedure has
been completed and normal functioning has been restored.
Memorizzazione delle stazioni radio
Si possono memorizzare fino a 18 stazioni radio FM e 18 per la AM. Per la memorizzazione selezionare come sorgente la radio e
seguire la seguente procedura:
1. Sintonizzare la stazione radio di interesse.
2. Entrare in modalità “memorizzazione” premendo e rilasciando il tasto STORE sul telecomando o il tasto Store sul pannello
frontale. Sul display viene visualizzato il contenuto della prima locazione e i due punti “:” prima del numero della locazione
iniziano a lampeggiare. Se in tale locazione non è stata memorizzata alcuna stazione radio viene visualizzata sul display la
scritta “EMPTY”, altrimenti viene visualizzata la frequenza della stazione memorizzata e, se disponibile, il relativo
messaggio RDS indicante il Name Station.
3. Premendo e rilasciando i tasti MEM+ e MEM- sul telecomando oppure i tasti MEMORY+ e MEMORY- sul pannello
frontale, scorrere le varie locazioni di memoria e fermarsi nella posizione dove si intende memorizzare la stazione radio,
oppure è possibile selezionare direttamente la posizione utilizzando i tasti numerici del telecomando. Per ogni locazione il
display indicherà, oltre al numero della locazione, l’indicazione EMPTY se nella locazione non è stata memorizzata alcuna
stazione o la frequenza e l’eventuale messaggio RDS (se disponibile ) della stazione memorizzata.
4. Premere e rilasciare il tasto STORE sul telecomando o il tasto STORE sul frontale, per memorizzare la stazione nella
locazione selezionata e uscire dalla modalità “memorizzazione”; a questo punto sul display il numero della locazione
memorizzata lampeggerà per alcuni secondi e successivamente verrà visualizzato il messaggio “Stored”, ad indicare la
avvenuta procedura di memorizzazione ritornando alla normale esecuzione di funzionamento.
Stored radio Station tuning
When the Tuner is selected as the audio source, it is possible to easily access to the memorized radio stations using the MEMORY+,
MEMORY- switches on the Front or using the MEM+ and MEM- buttons on the remote. When in AM mode is possible to tune the
stations memorized in the AM reserved memory location while in FM mode is possible to select the stations memorized in the FM
reserved locations. After the unit has been turned on or after the tuner has been selected as the source or after having changed the
modulation mode the memory access will start from the first memory location of the selected modulation mode. Then pressing the
MEMORY+ and MEMORY- on the front panel and pressing the MEM+ and MEM- switches on the remote is possible to select all the
other memory locations. To access the memory location more quickly it is possible to use the numeric keys on the remote directly. If
the selected location is empty the display will show “EMPTY” and then the previously tuned frequency is tuned.
Sintonia delle stazioni radio memorizzate
Una volta selezionata come sorgente la radio è possibile accedere velocemente alle stazioni radio memorizzate mediante l’uso dei
pulsanti MEMORY+ e MEMORY- sul frontale o premendo i tasti MEM+, MEM- sul telecomando. In modalità AM si possono
sintonizzare le stazioni radio AM memorizzate nelle 18 locazioni di memoria riservate alla AM e analogamente per la modalità FM.
Alla accensione e appena selezionata come sorgente la radio o in seguito ad una pressione e rilascio del pulsante AM/FM sul
frontale o alla pressione del tasto AM/FM del telecomando, l’accesso alla memoria ripartirà dalla prima locazione della banda
selezionata. Mediante i pulsanti MEMORY+, MEMORY- sul frontale o i tasti MEM+, MEM- sul telecomando sarà possibile
selezionare le varie locazioni di memoria. E’ possibile accedere ancora più velocemente alle stazioni memorizzate mediante il
tastierino numerico del telecomando. Se la locazione di memoria selezionata risulta vuota, il display mostrerà la scritta “EMPTY” e
l’apparecchio sintonizzerà nuovamente la frequenza presente prima della selezione della locazione.
Notes on LINE IN1 and Front IN
The LINE IN1 and Front IN inputs are multiplexed giving a higher priority to the Front IN. This means that if you select LINE IN1 as
the source when nothing is plugged in to the Front IN connector, you will listen to what is connected to the rear LINE IN1 RCA. In this
case you will see “LINE IN1” on the display. If instead there is a jack connected to Front IN you will see “FRONT IN” on the display
and you will listen to the source connected to Front IN. When you select LINE IN1 and you connect a cable to Front IN the display
shows it with the writing “Front IN” and the unit automatically selects the FRONT IN as the source.

18
Note su LINE IN1 e FRONT IN
Gli ingressi LINE IN1 e FRONT IN sono multiplexati con FRONT IN a priorità più elevata. Questo vuol dire che se si seleziona la
sorgente LINE IN1 e al FRONT IN non è connesso niente, allora si ascolterà la sorgente collegata al connettore RCA LINE IN1 nel
pannello posteriore e iI display mostrerà la scritta “LINE IN1”. Se invece si è collegato un jack all’ingresso FRONT IN sul display
verrà mostrata la scritta “FRONT IN” e si andrà ad ascoltare la sorgente collegata all’ingresso FRONT IN. Quando viene selezionata
LINE IN1 e si connette un jack all’ingresso sul frontale il display lo segnala presentando la scritta “Front IN” sul display e
l’apparecchio seleziona automaticamente il FRONT IN come sorgente.
Note on Headphones output
When a jack is inserted in the front headphone connector the power stages are muted so there is no sound coming from them. If the
Headphones are removed the power stages are driven out from mute mode and the music is reproduced by the loudspeakers again.
The headphone stage gain has been chosen to give about the same sound level of the loudspeakers for an equal volume level, but it
depends of course on the sensitivity of the loudspeakers and headphones used.
Nota sull’uscita cuffie
Quando viene inserito un jack nel connettore cuffie i finali di potenza vengono messi in mute per cui non si ha più suono dalle casse.
Quando il jack cuffie viene rimosso i finali di potenza escono dal mute e i diffusori tornano a riprodurre la musica. Il guadagno dello
stadio di uscita cuffie è stato scelto in modo da avere circa lo stesso livello sonoro che si ha con le casse a parità di volume,
ovviamente tutto dipende dalla sensibilità delle casse e della cuffia usate.
SETUP MENU
The Enigma REV2.0 has a lot of very useful functions which can be enabled in to the setup menu, to enter these simply push the
AMP SETUP button on the remote. Use the switches: “2”, “4”, “8”, “6” on the remote to navigate through the menu and the switch: ”5”
to enter and memorize a value or setting. In the picture below the navigation switches are highlighted with their function.
MENU DI SETUP
L’Enigma REV2.0 ha ulteriori funzioni molto utili che possono essere abilitate nel menu setup accessibile premendo il tasto “AMP
SETUP” sul telecomando. Si usano i tasti: “2”, “4”, “8”, “6” del telecomando per muoversi tra le varie voci mentre per convalidare un
valore di settaggio si usa il tasto “5”. Nell’ immagine seguente sono evidenziati i tasti per navigare nel menu e le relative funzioni.
2: UP 2: Su
8: DOWN 8: Giù
4: LEFT 4: Sinistra
6: RIGHT 6: Destra
5: OK: To enter a value 5: OK: per confermare un settaggio
AMP SETUP: to enter the set
up menu
AMP SETUP: per entrare nel menu
di setup
• You can scroll through the Setup menu options with the UP [2] and DOWN [8] buttons. In the picture below there is the
menu map:
o Le voci del menu di setup si possono scorrere con I tasti: UP [2] e DOWN [8]. Nella immagine sotto è riportata la mappa
del menu:
VOL.RECALL
OFF
BALANCE
<>
AUTO PLAY OFF
RESET OK?
EXIT
VOL.
MODE
B
SETUP
SLEEP OFF

19
• You can navigate inside a menu with the switches LEFT [4] e RIGHT [6] between all the various options.
o all’interno di una voce del menu setup ci si può muovere con SINISTRA [4] e DESTRA [6] per navigare attraverso le varie
opzioni.
• With the OK [5] switch you can save a set value, the memorization of which is confirmed by the “STORED” message on
the display.
o Premendo il tasto OK [5] viene memorizzato il settaggio selezionato, la memorizzazione è confermata con la
visualizzazione sul display della scritta “STORED”
• To exit the Setup Menu you can select the EXIT option in the menu or you can push the AMP SETUP switch on the remote
in any menu option position that you are in (remember, you have to use the [5]: OK switch to store a value or setting!)
o Per uscire dal menu di setup si seleziona la voce EXIT del menu, oppure si può uscire premendo AMP SETUP sul
telecomando in qualsiasi voce del menu ci si trovi (si ricorda che per salvare un valore o un settaggio si deve premere il
tasto [5]: OK!)
FUNCTIONS
FUNZIONI
• VOL.RECALL: if enabled the volume level present when the unit goes in STANDBY is memorized and when the unit is
turned on again, the volume level is automatically reset to the memorized level.
o VOL.RECALL: se abilitata memorizza il livello del volume presente quando l’apparecchio viene messo in STANDBY. Alla
successiva riaccensione, il livello del volume è impostato automaticamente al valore memorizzato.
Notes: The function is active until it is disabled in the setup menu. The volume level is automatically reset after the end of
the vacuum tube heating procedure.
Note: Questa modalità risulterà sempre attiva, finché non viene disattivata nel menu di setup. Il livello del volume è
impostato automaticamente dopo la procedura di riscaldamento della valvola.
• VOL.MODE: this function permits the selection of the best volume scale to match the sensibility of the loudspeakers used.
Four different volume scales are available including a 1dB step scale and a scale designed for high efficiency
loudspeakers. The scales are indicated as A, B, C, D. In the following pictures you can see how the volume scale steps
have been organized for the different types.
o VOL.MODE: questa funzione permette di scegliere la scala di volume che meglio si accorda con la sensibilità dei diffusori
connessi all’apparecchio. Sono disponibili quattro scale di volume tra le quali una scala con passi di 1dB e una scala
pensata per diffusori ad alta efficienza. Le scale sono indicate come A,B,C,D. nelle figure seguenti viene mostrata la
divisione dei passi per le varie scale.
Note: the selected volume scale will remain set until a different one is selected!
Nota: la selezione di una scala volume è mantenuta finché non viene modificata!
VOL.
MODE
A
VOL.
MODE
B
VOL.
MODE
C
VOL.
MODE
D
VOL.RECALL
OFF
VOL.RECALL
ON

20
VOL.
MODE
A
VOL.
MODE
B
VOL.
MODE
C
VOL.
MODE
D
This scale with its low
beginning steps is well
suited to high efficiency
loudspeakers.
Questa scala con bassi
passi iniziali si adatta motlo
bene ai diffusori ad alta
efficienza.
The scale is organized with
79 steps of 1dB each.
La scala è organizzata in 79
passi da 1dB ciascuno
0
10
20
30
40
50
60
70
80
90
100
1 6 11 16 21 26 31 36 41 46 51
Posizione Volume
Attenuazione (-dB)
0
10
20
30
40
50
60
70
80
90
100
1 6 11 16 21 26 31 36 41 46 51
Posizione Volume
Attenuazione (-dB)
0
10
20
30
40
50
60
70
80
90
100
1 6 11 16 21 26 31 36 41 46 51
Posizione Volume
Attenuazione (-dB)
0,00
10,00
20,00
30,00
40,00
50,00
60,00
70,00
80,00
90,00
100,00
1 6 11 16 21 26 31 36 41 46 51 56 61 66 71 76
Posizione Volume
Attenuazione (-dB)
This is the default scale
Questa è la scala di default
This scale has lower steps
in the normal listening
volume range.
Questa scala ha passi più
piccoli in corrispondenza
del normale volume di
ascolto.

21
BALANCE <>
BALANCE L
-
x
BALANCE R
-
x
: central position: central balance
: indica la posizione centrale (nessuno sbilanciamento)
: shows how many (x) dB the Left channel is
attenuated compared to the Right one
: indica di quanti (x) db è attenuato il canale Sinistro rispetto al Destro
:
shows how many (x) dB the Right channel is attenuated compared to the Left one
: indica di quanti (x) db è attenuato il canale Destro rispetto al Sinistro
AUTO PLAY OFF
AUTO PLAY ON
: normal use
: normale funzionamento
:
automatically plays the CD, if a disc is present, after it exits the standby
mode after the vacuum tube heating procedure.
: all’accensione, se è presente un disco all’interno del lettore, il lettore va
automaticamente in riproduzione fino alla fine del disco.
• BALANCE: this function permits the balancing of the channel with 1dB steps for a maximum of 10dB. Use the switch [4]:
LEFT to decrease the Right channel compared to the Left one and the switch [6]: RIGHT to decrease the Left channel
compared to the Right one.
o BALANCE: permette di regolare il bilanciamento fra i canali a passi di 1dB, con un massimo di 10dB. Si usa il tasto [4]:
LEFT per diminuire il livello del canale Right in confronto a quello del canale Left e il tasto [6]: RIGHT per diminuire il
canale LEFT in confronto al canale Right.
o
Note: the balance setting is kept until a new one is set.
Nota: la regolazione del balance verrà mantenuta sempre finché non verrà modificata.
• AUTO PLAY : if this function is enabled the unit will automatically play the CD after it exits the standby mode after the
vacuum tube heating procedure. This happens in the following circumstances:
- The unit was turned off with the Cd Player as the selected source and is then turned on again by pressing the
Standby switch on the front panel.
- The unit was turned off with the Cd Player as the selected source and is then turned on again by pressing the
StandbyCD button on the remote control.
o AUTO PLAY: questa funzione, se attivata, permette di mandare automaticamente in riproduzione il CD all’accensione
dopo la fase di riscaldamento della valvola. Ciò accade alle condizioni seguenti:
- se l’apparecchio era stato spento con il lettore CD selezionato come sorgente e poi viene riacceso dal tasto Standby
sul frontale.
- L’apparecchio viene spento con il lettore CD selezionato come sorgente e poi viene riacceso da telecomando con il
tasto STANDBY CD.
Note : the function will continue to remain active, until it is deactivated!
Nota: questa modalità risulterà sempre attiva, finché non viene disattivata!
IMPORTANT: if both AUTOPLAY and VOLUME RECALL are enabled and the correct Standby procedure is used to
activate the AUTOPLAY, after the vacuum tube heather procedure has finished, the unit will automatically play
the CD with the desired volume level.
IMPORTANTE: se sia AUTOPLAY che VOLUME RECALL sono abilitati e si esegue la corretta procedura per lo
STANDBY in modo da attivare l’AUTOPLAY, l’apparecchio dopo la fase di riscaldamento della valvola riprodurrà
automaticamente il CD al livello di volume desiderato.

22
SLEEP 60
SLEEP OFF
SLEEP 15
SLEEP
30
SLEEP 45
: The
SLEEP
function is
disabled
-
L
a modalità SLEEP è disabilitata
: The sleep function is enabled and the set waiting time is displayed
on
the right.
: La modalità SLEEP è attiva e l’intervallo temporale è indicato a
destra.
SLEEP
11
: shows the residual time (
indication in minutes)
: visualizzazione del tempo residuo (indicazione in minuti)
02
-
01:45
Ø
07
LINE IN1
Ø
07
87.50FM
Ø
07
LINE
IN2
Ø
07
: Indication on the display that the
SLEEP function is active.
: Visualizzazione dell’indicazione della modalità SLEEP durante il
normale funzionamento dell’apparecchio
• SLEEP: when enabled, this function permits you to turn off the unit automatically after a defined time which can be set as:
15, 30, 45, 60 minutes.
o SLEEP: questa funzione permette di spegnere automaticamente l’apparecchio allo scadere di un intervallo temporale
selezionato, gli intervalli sono: 15, 30, 45, 60 minuti.
Note: to remind you that the SLEEP function is active a watch icon will flash on the display.
Nota: per ricordare che la funzione SLEEP è attiva viene visualizzato sul display l’icona di un orologio che lampeggia.
Note: it is possible to visualize the remaining time of the SLEEP countdown by entering the setup menu and reading the
time at the SLEEP option.
Nota: E’ possibile inoltre visualizzare il tempo residuo all’auto-spegnimento entrando nel menù SETUP alla voce SLEEP.
Note: in SLEEP mode when the time is finished if the CD Tray is open it is automatically closed and then the unit is
turned off.
Nota: in modalità SLEEP attiva se il cassetto è aperto, quando la temporizzazione è esaurita, il cassetto viene chiuso in
automatico e l’apparecchio si spegne!
• RESET: if selected, this menu option permits you to restore all the default values which are listed below:
o RESET: questa voce del menu se selezionata permette di ripristinare tutti i settaggi di default ossia:
Note: The reset option doesn’t affect the tuner settings so the memorized radio stations are not deleted.
Nota: il settaggio del Tuner risulta trasparente a questa funzione, per cui non verranno cancellate le stazioni radio
memorizzate.
RESET OK?
DEFAULT SETTINGS
DEFAULT SETTINGS
- VOL.RECALL OFF
- VOL.MODE B
- BALANCE <>
- AUTO PLAY OFF
-
SLEEP
OFF

23
• EXIT: selecting this option (pushing the 5: OK button on the remote) exits you from the menu set up, the same result is
achieved pushing the AMP SETUP button on the remote when you are in any section of the menu.
o EXIT: selezionando questa voce del menu (premendo il tasto 5: OK del telecomando ) si esce dal menu setup, lo stesso
effetto si ha anche con la pressione del tasto AMP SETUP in qualunque schermata.
NOTES
NOTE
• All the settings, which are re-loaded every time the unit is turned on, are memorized in EEPROM so even if the power
supply is switched off the settings are not lost.
o tutti i settaggi vengono memorizzati in EEPROM così da poter essere ricaricati all’accensione, in modo che anche
togliendo l’alimentazione all’apparecchio, queste informazioni non vengano perse.
• Access to the Setup menu is not enabled in CD Mode with REPEAT TRACK and REPEATA>B.
o l’accesso al menu SETUP in modalità CD non è abilitato nelle modalità di riproduzione REPEAT TRACK e REPEAT A>B.
Technical Data
Power consumption: 300VA
125 x 210 x 400 mm
Dimensions (Nota 1)
4,9 x 8,3 x 15,7 "
9,3 kg
Weight
20,5 Lbs
Line Gain 12dB
Power Amp Gain 26dB
Line Input impedance 40KOhm
10W @ 0.010% THD + N
40W @ 0.016% THD + N
Power on 8Ohm load, Input Line2 (Note 6)
50W @ 0.017% THD + N
Frequency responce (Note 2) 110KHz
Vout: 50Vpp
Responce to a Square Signal (Note 4)
Rise time: 3.3uS
98 dB (A weighted)
Signal Noise Ratio (Note 3)
95dB (No filter)
Noise level (Nota 5) -100dB
DAC: Burr Brown Enh.Multi. Sigma Delta PCM1781
Receiver: Burr Brown DIR9001
DAC Section
Full Scale Output = 3.9Vpp
AM: Signal Noise ratio =49dB min.
FM: Signal Noise Ratio = 72dB min.
Electr.Tuning: SANYO LA1837
Tuner Section
AM/FM PLL Freq. Synth: SANYO LC7213
Dynamic Range (Nota 8) 97dB
ENOB (Note 7) 15.65Bit
Inputs 2 Line Unbalanced Input + 1 Front Line Input
Outputs 1 Stereo MonoOut + Front Headphone Out
Notes:
Nota 1 - Height x Width x Depth (H x W x D)
Nota 2 - Attenuation 0dB, -3dB Band
Nota 3 - Attenuation: 0dB A weighted referred to 8 Ohm load nominal power
Nota 4 - 1KHz input signal, two piloted channels
Nota 5 - Band limits 0Hz-40KHz
Nota 6 - Band limits 0Hz-22KHz
Note 7 - ENOB = Effective number of Bits
Nota 8 - Measurement conditions: Source Selected CD Player, Volume = 0dB attenuation, Signal = - 60dB, 1KHz pure sine wave
track; Dynamic Range = measured THD + N value with a 20Hz-22KHz filter (no other filter!) in the described conditions
+60dB.
EXIT

24
Specifiche Tecniche
Assorbimento: 300VA
125 x 210 x 400 mm
Dimensioni (Nota 1)
4,9 x 8,3 x 15,7 "
9,3 kg
Peso
20,5 Lbs
Guadagno di Linea 12dB
Guadagno Finali 26dB
Impedenza di Ingresso Linea 40KOhm
10W @ 0.010% THD + N
40W @ 0.016% THD + N
Potenza su 8Ohm, Ingresso Line2 (Note 6)
50W @ 0.017% THD + N
Risposta in Frequenza (Note 2) 110KHz
Vout: 50Vpp
Risposta alla Quadra (Note 4)
Rise time: 3.3uS
98 dB (A weighted)
Rapporto Segnale Rumore (Note 3)
95dB (No filter)
Livello di Rumore (Nota 5) -100dB
DAC: Burr Brown Enh.Multi. Sigma Delta PCM1781
Receiver: Burr Brown DIR9001
Sezione DAC
Full Scale Output = 3.9Vpp
AM: Signal Noise ratio =49dB min.
FM: Signal Noise Ratio = 72dB min.
Electr.Tuning: SANYO LA1837
Sezione Tuner
AM/FM PLL Freq. Synth: SANYO LC7213
Dynamic Range (Nota 7) 97dB
ENOB (Note 8) 15.65Bit
Ingressi 2 Ingressi Linea Sbilanciati + 1 Ingresso sul frontale
Uscite 1 Stereo MonoOut + Uscita Cuffie sul frontale
Notes:
Nota 1 - Altezza x Larghezza x Profondità (A x L x P)
Nota 2 - Attenuazione 0dB, Banda a -3dB
Nota 3 - Attenuazione: 0dB, Pesato A riferito ad un carico nominale da 8 Ohm
Nota 4 - Segnale di Ingresso da 1KHz, su 2 canali
Nota 5 - Limiti di Banda 0Hz-40KHz
Nota 6 - Limiti di Banda 0Hz-22KHz
Note 8 - ENOB = Numero Effettivo di Bits
Nota 7 - Condizioni di Misura: Sorgente selezionata = CD Player, Volume = Attenuazione 0dB, Segnale = Traccia Audio a -60dB
di un Onda Sinusoidale alla frequenza di 1KHz, Dynamic Range = Misurato il valore del THD + N filtrato tra 20Hz-22KHz
(nessun altro filtraggio!) + 60dB.

25
TROUBLESHOOTING
Symptom Cause Remedy
The unit is in STANDBY mode Press the STANDBY button on the front panel of the
unit or the STANDBY button on the remote controller
Incorrectly plugged in power cable Make sure the power cable is correctly plugged into the
unit inlet and into the wall outlet
Mains power switch set to “0” Position the switch to “1”
Display is off
No sound
No response from the unit
Burned-out fuse Contact your Audio Analogue retailer for fuse
check/substitution
Display is off
No response from the unit
Incorrectly connected internal boards Contact your Audio Analogue retailer for connection
check.
Selected source: Line
Faulty or incorrectly connected signal
cables between Enigma and the audio
source
Check cables status and their connection Display is on
No sound
Incorrectly selected source on Enigma Check that the audio source is correctly selected on
Enigma
Selected source: tuner
No sound Enigma is in “Storage” mode Complete storage procedure by pressing “Store” button
on the front panel of the unit or on the remote controller
It is impossible to tune in any
radio station
Faulty or incorrectly plugged antennas Check antenna connections and disposition (FM
antenna has to be completely unrolled). Try to
substitute both antennas.
No battery/ worn-out battery Place/replace battery (2 ‘AAA’ batteries) Remote controller doesn’t work
You’re standing too far or at an
exceeding angle from the front panel
Get closer to the unit or reduce angle
If the suggested remedies should not work or the problem is not shown in the list above, please contact your local Audio Analogue retailer.
RICERCA GUASTI
Sintomo Causa Rimedio
Togliere l’apparecchio dallo stato di standby premendo
il tasto STANDBY sul pannello frontale oppure
STANDBY sul telecomando
Cavo di alimentazione non
correttamente collegato
Controllare che la spina del cavo di rete sia ben inserita
nella presa di rete e che il cavo sia correttamente
inserito nella vaschetta di rete
Interruttore posteriore in posizione 0 Portare l’interruttore posteriore in posizione 1
Display spento
Nessun suono
Nessuna risposta ai comandi
Fusibile bruciato Sostituire il fusibile all’interno della vaschetta di rete
Display spento, nessuna
risposta ai comandi
Schede interne non collegate
correttamente
Contattare il vostro rivenditore Audio Analogue per una
verifica dei collegamenti .
Sorgente selezionata: Line
Cavi di segnale tra Enigma e la
sorgente esterna connessi non
correttamente oppure difettosi
Controllare lo stato dei cavi e/o la corretta connessione
Display acceso
Nessun suono
Sorgente non selezionata correttamente
su Enigma
Controllare che la sorgente esterna desiderata sia
selezionata correttamente su Enigma
Sorgente selezionata: tuner
non si sente nessun suono L’apparecchio è in modalità memorizza Concludere la procedura di memorizzazione premendo
il pulsante Store sul frontale o il tasto Store sul
telecomando.
Non è possibile sintonizzare
alcuna stazione
Antenne collegate in modo non corretto
o difettose.
Controllare il corretto collegamento delle antenne e la
loro disposizione (la antenna Fm deve essere il più
distesa possibile) . Eventualmente provare a sostituire
le antenne.
Batterie scariche o mancanti Inserire o sostituire le batterie (2 ministilo tipo ‘AAA’) Il telecomando non funziona
Eccessiva distanza dal pannello frontale
dell’apparecchio o angolo non corretto
Avvicinarsi di più all’apparecchio o cambiare angolo
Se i rimedi suggeriti non dovessero funzionare oppure il problema non è riportato nella lista, contattate il vostro rivenditore Audio Analogue

26
WARNING!
All of our CD players may not be able to read some specific CD’s manufactured with a unique protection system against
copying. If in doubt, please try to read the CD using a PC CD-ROM drive. When the CD-ROM drive is incapable of accessing
the tracks on the CD, please do not play the CD in question with our CD players. Although there is generally no problem
with hybrid SACD’s, please check for any copy protection system in the CD layer. Our CD players are able to reproduce
CD’s protected with the IFPI system, whose symbol is made of two circles containing two triangles.
ATTENZIONE!
I nostri lettori CD potrebbero non essere in grado di leggere alcuni CD prodotti con un particolare sistema di protezione
anti-copia. Se in dubbio, si consiglia di provare prima a far leggere il CD dal CD-ROM di un PC. Nel caso in cui il CD-ROM
non riuscisse ad accedere alle tracce del CD, evitare di riprodurlo con i nostri lettori. Non è invece stato riscontrato alcun
problema con i SACD ibridi, che vengono regolarmente letti. Verificare comunque che lo strato CD di un SACD ibrido non
sia stato a sua volta protetto contro la copia. I nostri lettori sono in grado di leggere i CD protetti col sistema IFPI,
rappresentato dal simbolo dei due cerchi contenenti due triangoli.

Attention: Your product is marked with this symbol. It
means that used electrical and electronic products
should not be mixed with general household waste.
There is a collection system for these products.
Attenzione: il dispositivo è contrassegnato da questo
simbolo, che segnala di non smaltire le
apparecchiature elettriche ed elettroniche insieme ai
normali rifiuti domestici. Per tali prodotti è previsto un
sistema di raccolta a parte.
A. INFORMATION ON DISPOSAL FOR USERS (PRIVATE HOUSEHOLDS)
1. In The European Union
Attention: If you want to dispose of this equipment, please do not use an ordinary dust bin.
Used electrical and electronic equipment must be treated separately and in accordance with legislation that requires
proper treatment, recovery and recycling of used electrical and electronic equipment.
Following the implementation by member states, private households within the EU states may return their used electrical
and electronic equipment to designated collection facilities free of charge*. In some countries* your local retailer may also
take back your old product free of charge if your purchase a similar new one.
*) Please contact your authority for further details.
If your used electrical or electronic equipment has batteries or an accumulator, please dispose of these separately before
and in accordance to local requirements.
By disposing of this product correctly you will help ensure that the waste undergoes the necessary treatment, recovery
and recycling and thus prevent potential negative effects on the environment and human health which could otherwise
arise due to inappropriate waste handling.
2. In other countries outside the EU
If you wish to discard this product, please contact your local authorities and ask for the correct method of disposal.
For Switzerland: Used electrical or electronic equipment can be returned free of charge to the dealer, even if you don’t
purchase a new product. Further collection facilities are listed on the home page of www.swisco.ch or www. Sens.ch
B. Information on Disposal for Business Users
1.In the European Union
If this product is used for business purposes and you want to discard it:
Please contact your Audio Analogue dealer who will inform you about returning and recycling the item. Small products
(and small amounts) might be taken back by your local collection facilities.
For Spain: Please contact the established collection system or your local authority take-back foer of your used products.
2.In other Countries outside the EU
If you wish to discard of this product, please contact your local authorities and ask for the current method of disposal.
A. INFORMAZIONI SULLO SMALTIMENTO PER GLI UTENTI (PRIVATI)
1. Nell’Unione europea
Attenzione: Per smaltire il presente dispositivo, non utilizzare il normale bidone della spazzatura!
Le apparecchiature elettriche ed elettroniche usate devono essere gestite a parte in conformità alla legislazione che
richiede il trattamento, il recupero e il riciclaggio adeguato dei suddetti prodotti.
In seguito alle disposizioni attuate dagli Stati membri, i privati residenti nella UE possono conferire gratuitamente le
apparecchiature elettriche ed elettroniche usate a centri di raccolta designati*.
In alcuni paesi*, anche il rivenditore locale può ritirare gratuitamente il vecchio prodotto se l’utente acquista un altro nuovo
di tipologia simile.
*) Per maggiori informazioni di prega di contattare l’autorità locale competente.
Se le apparecchiature elettriche o elettroniche usate hanno batterie o accumulatori, l’utente dovrà smaltirli a parte
preventivamente in conformità alle disposizioni locali.
Lo smaltimento corretto del presente prodotto contribuirà a garantire che i rifiuti siano sottoposti al trattamento, al
recupero e al riciclaggio necessari prevenendone il potenziale impatto negativo sull’ambiente e sulla salute umana, che
potrebbe derivare da un’inadeguata gestione dei rifiuti.
2. In paesi che non fanno parte dell’UE
Se si desidera eliminare il presente prodotto,contattare le autorità locali e informarsi sul metodo di smaltimento corretto.
Per la Svizzera: Le apparecchiature elettriche o elettroniche possono essere restituite gratuitamente al rivenditore, anche
se non si acquista un prodotto nuovo. Altri centri di raccolta sono elencati sulla homepage www.swiso.ch o di
www.sens.ch.
B. INFORMAZION SULLO SMALTIMENTO PER GLI UTENTI COMMERCIALI
1. Nell’Unione Europea
Se il prodotto è impiegato a scopi commerciali. Procedere come segue per eliminarlo.
Contattare il proprio rivenditore Audio Analogue che fornirà informazioni circa il ritiro del prodotto. Potrebbero essere
addebitate le spese di ritiro e riciclaggio. Prodotti piccoli e quantitativi ridotti potranno essere ritirati anche dai centri di
raccolta locali.
Per la Spagna: Contattare il sistema di raccolta ufficiale o l’ente locale preposto al ritiro dei prodotti usati
2. In paesi che non fanno parte dell’UE
Se si desidera eliminare il presente prodotto, contattare le autorità locali e informarsi sul metodo di smaltimento corretto.

28
Audio Analogue
Manufactured and Distributed by:
AUDIO FUTURA spa
Via Maestri Del Lavoro 583
51015 Monsummano Terme (PT) Italy
Tel. 0572 954513 fax 0572 958099
www.audioanalogue.com - info@audioanalogue.com
/