Page is loading ...

AUDIO ANALOGUE
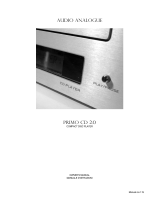
PRIMO
COMPACT DISC PLAYER
OWNER’S MANUAL
MANUALE D’ISTRUZIONI

5
INTRODUCTION
AUDIO ANALOGUE does not take any responsibilities in the following cases:
Whenever the operational procedures related to the use and the maintenance of the equipment as described in this manual are not
respected.
Whenever damages to the equipment occur because of fixing and modifications made form non-authorized staff or because of
normal deterioration of the system.
No part of this manual can be reproduced by any means, transmitted or copied for private or public use without private authorization
from AUDIO ANALOGUE.
The information contained in this manual is related to the data kept by AUDIO ANALOGUE at the moment of the issue o f this
publication; AUDIO ANALOGUE has the right to make changes to this document without prior notice.
The equipment has been projected and manufactured according to the Regulations of the Community 89/336/CEE and is marked CE.
This equipment can’t be used for different purposes other than those for which it has been manufactured.
AUDIO ANALOGUE does not take any responsibilities for accidents or damages due to improper use of the equipment.
WARNING
Please do respect the safety standards contained in this manual before starting to operate the equipment.
Do not open the equipment. No further interventions than those described in this manual should be made. For technical assistance,
please consult a qualified technician or an AUDIO ANALOGUE dealer.
Not respecting the instructions contained in this manual will invalidate the terms and conditions of the guarantee.
NECESSARY PRECAUTIONS FOR SAFETY AND MAINTENANCE
ATTENTION: before starting any operation, use or maintenance of the equipment it is strictly necessary to understand the following
manual.
To avoid any accidents or hazards it is necessary to follow the following regulations.
Activate the equipment only prior checking if the installation has been properly made, and if it is related to the instructions contained
in this manual.
Avoid installing the equipment in places subjected to extremely high temperatures or humidity.
Check that the labels containing information about safety are always visible and in good conditions.
Ensure to not obstruct ventilation, to avoid excessive overheating. The equipment should be kept to a minimal distance of 15 cm
from any object and not to place on carpet or other soft surfaces. Also the installation close to radiators or in close environments
without ventilation should be avoided.
Do not switch on the equipment until it has not been correctly and completely installed.
Only supply the equipment with the kind of the electric supply as stated on the appropriate label. If in doubts about the kind of supply
available, please consult an expert technician for technical assistance.
The equipment needs to be wired to an earth terminal. The external case is metal made; a defective connection with the earth may
be dangerous.
In case damages occurs to the supply cable, it should be immediately replaced with the same kind of cable. This operation should be
only made prior to disconnecting the main supply.
Do not place objects on the supply cable and check that this is not positioned in way through. The cable should not be knotted or
curly.
Replace the fuses always with other of the same kind.
Do not use the equipment close to the water or other liquids. If liquid entered the equipment, the plug should be disconnected from
the socket avoiding to touch the metal parts. Competent technical staff should be asked to check the equipment before operating it
again.
Do not place recipients containing liquids on the equipment. Even when it is switched off.
Keep the equipment far from sources of heat such as the solar light, kitchens, radiators etc…
Always unplug the supply cable during rainy weather.
Always Switch off and unplug the supply cable before cleaning the equipment externally
.: this operation should be made using a dry
and soft cloth. Never use alcohol based cleaning material.
If the amplifier was carried from an extremely cold environment to and extremely hot one, it could create internal condensation,
causing possible bad functioning.
If this occurs, please wait for at least an hour before using it again, to allow it to gradually reach room temperature.
When not used for long periods, please unplug the equipment.
INSTRUCTIONS TO PUT IT OUT OF SERVICE
Consult qualified staff
Follow the regulations of the current legislation regarding recycling and waste disposal.

7
15
2
34
Front panel
1) STANDBY, STOP/OPEN. Multi-functional button. By pressing this button, CD playback is interrupted if the CD player is in play
mode. When the CD player is in the stop mode, by pressing this button the CD tray is opened/closed. If pressed for a few
seconds, it activates the standby mode.
2) CD tray.
3) LCD display.
4) IR receiver.
5) PLAY/PAUSE. By pressing this button, CD playback is activated if the CD player is in stop mode. It pauses/resumes CD
playback when CD player is playing a CD.
Descrizione del pannello frontale
1) STANDBY, STOP/OPEN. Tasto multifuzionale. La pressione di questo tasto interrompe la lettura del disco se il lettore è in
modalità play, quando invece il lettore è un modalità stop, la pressione di questo tasto provoca l’apertura o la chiusura del
cassetto porta CD, oppure attiva lo stand-by se lo si tiene premuto per qualche secondo.
2) Cassetto porta CD.
3) Display LCD.
4) Ricevitore IR.
5) PLAY/PAUSE. La pressione di questo tasto attiva la riproduzione del disco se il lettore è in modalità stop, oppure ne attiva o
disattiva la pausa durante la lettura.

8
1
2
3
4
Back panel
1) S/PDIF DIGITAL OUT. Digital out connector.
2) RIGHT OUT. Right analog out connector.
3) LEFT OUT. Left analog out connector.
4) Power cord.
Descrizione del pannello posteriore
1) S/PDIF DIGITAL OUT. Connettore di uscita digitale.
2) LEFT OUT. Connettore di uscita analogica left.
3) RIGHT OUT. Connettore di uscita analogica right.
4) Cavo di alimentazione di rete.

9
Remote control – CD player section
• PLAY/PAUSE. By pushing this button, you start CD playback or interrupt/resume CD playback (pause).
• STP/OPEN. By pressing this button, you stop CD playback or open/close CD tray.
• PREV/REW. By pressing this button during playback, you move to the previous CD track or, holding it down for a few seconds,
activate fast rewind search. When playback is stopped, you may choose the CD track from which resuming playback or search
CD tracks backward.
• NEXT/FFW. By pressing this button during playback, you move to the next CD track or, holding it down for a few seconds,
activate fast forward search. When playback is stopped, you may choose the CD track from which resuming playback or search
CD tracks forward.
• 10+. When the CD player is on stop mode, you may press it together with PREV/NEXT button while looking for a specific track
to skip 10 tracks forward/backward. Just press the 10+ button again to deactivate this function.
• TIME. During CD playback the display shows the time elapse since the beginning of the running track (“TIME”). By pressing this
button it is possible to show also different time information about the CD playback: residual track time (“TLAP”) and residual CD
time (“TREM”).
• STDBY. By pressing this button, you activate/deactivate standby mode.
• REPEAT. This button has two different functions, according to the CD player status. When the CD player is on stop mode, you
may choose to repeat a single track or the whole disc by pressing this button one or more times. Select the track to be repeated
by pressing PREV/NEXT buttons. By pressing this button at two different times during CD playback, you mark the beginning (A)
and ending (B) point of a disk section to be repeated. When this function is selected, you may deselect it just pressing REPEAT
button again and the disc will play normally.

13
Specifications
Parameter Measurement conditions Value
Channels: - 2
Maximum output voltage: 0DBFS 2.5Vpp
Frequency response: +0/-3dB 20Hz-20kHz
Noise level: Band limits0Hz-20kHz
Signal/noise ratio: 20Hz-20kHz
Power requirements: - 230V 50-60Hz or 115V 50-60Hz
Power consumption: - 25VA
Specifiche Tecniche
Parametro Condizioni di misura Valore
Numero di canali: - 2
Tensione max di uscita 0DBFS 2.5Vpp
Risposta in frequenza +0/-3dB 20Hz-20kHz
Livello di rumore Limiti di banda 0Hz-20kHz -120dB
Rapporto segnale/rumore 20Hz-20kHz -94dB
Alimentazione: - 230V 50-60Hz oppure 115V 50-60Hz
Assorbimento: - 25VA

14
TROUBLESHOOTING
Symptom Cause Remedy
The unit is in standby mode Exit the standby mode by pressing the
“STANDBY” button on the front panel or
the “STBY” button on the remote controller
Power cord incorrectly plugged Make sure the power cord is correctly
plugged into the wall outlet
Display is off
No sound
No response to the commands
Burned-out fuses Contact your Audio Analogue retailer for
fuse check and substitution
Faulty or incorrectly plugged connectors
between Primo CD and the amplifier
Check cords and their connection
Display is on
No sound
Incorrectly selected source on the amplifier Check that Primo CD is correctly selected
through the amplifier ins
CD player works but the display is off
Faulty or incorrectly plugged front panel Contact your Audio Analogue retailer for
connections check and front panel
substitution
No battery/ worn-out battery Place/replace battery (2 ‘AAA’ batteries) Remote controller doesn’t work
You’re standing too far or on an exceeding
angle from the front panel
Get closer to the unit or reduce angle
If the suggested remedies should not work or the problem is not shown in the list above, please contact your local Audio
Analogue retailer.
RICERCA GUASTI
Sintomo Causa Rimedio
L’apparecchio è in stand by Togliere l’apparecchio dallo stato di stand
by premendo il tasto STANDBY sul
pannello frontale oppure STBY sul
telecomando
Cavo di alimentazione non correttamente
collegato
Controllare che la spina del cavo di rete
sia ben inserita nella presa di rete
Display spento
Nessun suono
Nessuna risposta ai comandi
Fusibile bruciato all’interno
dell’apparecchio
Contattare il vostro rivenditore Audio
Analogue per una verifica ed eventuale
sostituzione del fusibile
Cavi di segnale tra Primo CD e
amplificatore non connessi correttamente
oppure difettosi
Controllare lo stato dei cavi e/o la corretta
connessione
Display acceso
Nessun suono
Sorgente non selezionata correttamente
sull’amplificatore
Controllare che il Primo CD sia
selezionato correttamente con il selettore
degli ingressi dell’amplificatore
Il CD player funziona
ma il display è spento
Scheda frontale non collegata
correttamente oppure difettosa
Contattare il vostro rivenditore Audio
Analogue per una verifica dei collegamenti
ed eventuale sostituzione della scheda
Batterie scariche o mancanti Inserire o sostituire le batterie (2 ministilo
tipo ‘AAA’)
Il telecomando non funziona
Eccessiva distanza dal pannello frontale
dell’apparecchio o angolo non corretto
Avvicinarsi di più all’apparecchio o
cambiare angolo
Se i rimedi suggeriti non dovessero funzionare oppure il problema non è riportato nella lista, contattate il vostro rivenditore
Audio Analogue

16
Audio analogue
Head Office Ufficio commerciale:
Via C. Bottai, 88B - 51015 Monsummano Terme (PT) Italy tel. 0572 954513 fax 0572 954010
R&D Laboratory Laboratorio ricerca e sviluppo:
Via XX Settembre, 47 - 56017 San Giuliano Terme (PI) Italy
www.audioanalogue.com - [email protected]
/