Page is loading ...

9
11
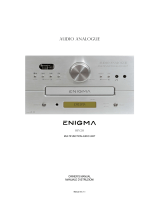
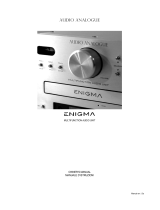
Radio remote control with 6 keys
This radio control is a transmitting radio device
which can directly drive radio actuators items
F470/1, F470/2, 3526, 3526/10 and 3526/16.
The radio control has six radio channels and
comes with six backlit keys which can be
customised. It has an audible selection tone
and can also be used as a torch.
It has an orange luminous indicator which
signals, when a key is pressed, that the radio
transmission is taking place. If this indicator
turns red it signals that the remote control
batteries are flat and should be replaced.
Inserting the batteries
2 AA 1.5V alkaline pen batteries.
10
Torch function
On pressing keys 5 and 6 simultaneously the
remote control acts as a torch.
Key 1
Key 2
Key 3
Key 4
Key 5
Key 6
Luminous
indicator
Do not use
rechargeable batteries.
Key 6
Key 5
The batteries will
not last as long.
1
2
3
4
Orange = radio transmission
Red = flat batteries
12
Technical data
Power supply: 2 non-rechargeable AA 1.5V alkaline pen batteries (supplied)
Minimum battery lifetime: 3 years (with the batteries supplied)
Radio frequency: 868 MHz
Range: 100 m in free space (metal and cement walls reduce the range)
Type of modulation:
FSK
GB

14
Configuration
The remote control has six keys which can be customised. They are backlit and have an audible selection tone.
When purchased the remote control has the following factory configuration: each key when pressed lights up, emits an audible
signal and cyclically switches the load state associated with it (as shown below).
Switch 1
Switch 1 = UP
Key lighting = ON
When pressed the remote control key lights up.
Switch 1 = DOWN
Key lighting = OFF
When pressed the remote control key does
not light up.
Switch 2
Switch 2 = UP
Audible signal = ON
When a key is pressed an audible signal sounds.
Switch 2 = DOWN
Audible signal = OFF
When a key is pressed no audible signal sounds.
Switch 3
Switch 3 = UP
Operation = CYCLICAL (
*
)
The keys are managed individually in cyclical
operation mode (ON/OFF).
Switch 3 = DOWN
Operation = SINGLE FUNCTION (
*
)
The keys are managed automatically in pairs
1-2, 3-4, 5-6 (e.g.: key 1 = ON, key 2 = OFF).
Switch 4
Switch 4 = UP
Programming mode
(
**
)
When the programming is finished return the switch
to the DOWN position (normal mode of operation).
Switch 4 = DOWN
Normal mode of operation
1
2 3 4
1
2 3 4
1
2
3 4
1
2
3 4
1 2
3
4
1 2
3
4
1 2 3
4
1 2 3
4
1 2 3 4
Customising the keys
The remote control keys can be customised using the labels
supplied.
1 - use a screwdriver to unhook the upper part of the remote
control
2 - remove the upper part of the remote control
3 - remove the 6 key covers
4 - position the labels supplied on the keys
5 - reposition the key covers
6 - close the remote control again
13
5
2
3
4
Anchoring
points
1
The factory configuration can be modified by changing the
position of the configuration switches as shown in the table
below.
To access the switches remove the upper part of the remote
control.
Load
state
Load
state
Load
state
Load
state
OFF
press
key
☛
ON
press
key
☛
OFF
press
key
☛
ON

(
**
) In programming mode one can:
Select the level of the audible signal from the two available
1 - Keep keys 1 and 3 pressed simultaneously. After 2 seconds keys 1 and 2 light up.
2 - Press one of the lit keys to hear the audible signal associated with it (key 1 louder level).
3 - Press the key associated with the level required for more than 2 seconds.
4 - The audible signal sounds and the key flashes, confirming that the level is saved.
Associate the commands associated with rolling shutter management with one or more pairs of keys
1 - Keep the keys of the pair involved (1-2, 3-4, 5-6) pressed simultaneously for more than 2 seconds.
2 - The associated keys flash to confirm that the programming has taken place.
Return a pair of keys associated with rolling shutter management to light mode
1 - Keep the keys of the pair associated with rolling shutter management pressed simultaneously until the keys flash.
2 - The associated keys flash to confirm that the programming has taken place.
Return all the keys to light mode
1 - Keep keys 1, 2, 5 and 6 pressed simultaneously for more than 2 seconds.
2 - All six keys flash to confirm the reset.
15
ON/OFF (load 1)
ON/OFF (load 2)
ON/OFF (load 3)
ON/OFF (load 4)
ON/OFF (load 5)
ON/OFF (load 6)
(
*
) The following figure shows the CYCLICAL and SINGLE FUNCTION operations,
which can be selected by means of switch 3.
ON (load 1)
OFF (load 1)
ON (load 2)
OFF (load 2)
ON (load 3)
OFF (load 3)
CYCLICAL OPERATION SINGLE-FUNCTION OPERATION
Each radio actuator must be programmed by all the remote control keys which drive it (e.g. if
the rolling shutter mode is associated to keys 1-2, i.e. UP to 1 and DOWN to 2, the programming
procedure must be performed on the actuator for both key 1 and key 2).

Calling the main remote control functions
A disabled person can also call the main radio control functions by means of the signal from an external sensor (control devices
which can make use of the residual motor ability of a disabled person).
KEY SCANNING - the first signal from the external sensor starts scanning the remote control keys; the key which the scanning
has reached can be recognised by the luminous and/or audible signal.
KEY SELECTION - the second signal from the sensor stops the scanning at the key selected.
COMMAND ACTUATION - the third signal from the sensor is the same as the standard pressing of the key selected. If the key is
pressed quickly, it is understood as pressed and released; if instead it is pressed for longer, the remote control waits for a fourth
signal from the sensor which will be interpreted as releasing the key. The time between the third and fourth signal is interpreted
as a long press. If the key selected is associated with a rolling shutter, the UP/DOWN command is directly associated with the
long press.
.
If the signal from the sensor is closed for longer than 5 seconds a signal is sent with a special code which is very different from
that sent with the conventional keys. In this way, if a radio actuator which activates a siren is associated with this signal, an alarm
signal can be generated..
Configurating the remote control
In programming mode the scanning time of each key can be modified.
When purchased the remote control is supplied with a scanning time of 1 second.
1 - Position switch 4 in programming mode (UP).
2 - Press keys 1 and 6 at the same time for more than 2 seconds; the first four keys light up.
3 - Press one of the lit keys for a test scan of the time associated with it.
The scanning times are the following:
Key 1 = 2 seconds
Key 2 = 1 second
Key 3 = 0.5 seconds
Key 4 = 0.3 seconds
4 - Keep the key corresponding to the scanning time required pressed for more than 2 seconds.
5 - The pressed key flashes to confirm that the programming has taken place.
6 - Position switch 4 in normal mode of operation (DOWN).
16
Further remote control functions (for use by the disabled)
The radio remote control is fitted with:
- standard 3.5 mm mono jack input for connection
to a sensor for disabled people;
- screw connection for fastening to a wheelchair
or to the edge of a bed.
Jack
input
Screw
connection
The external sensors used must represent,
from an electrical point of view, a closed contact.
If the command (third closing) is not activated within three times
the time selected for the scanning, the scanning itself starts again.
/