Page is loading ...

AUDIO ANALOGUE
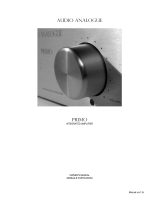
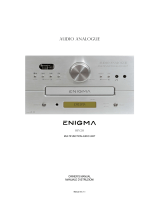
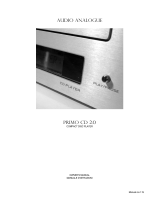
PRIMO
VT TUNER
AM/FM RDS VACUUM TUBE TUNER
OWNER’S MANUAL
MANUALE D’ISTRUZIONI
Manual rev1.3a

3
INTRODUCTION
AUDIO ANALOGUE does not take any responsibilities in the following cases:
Whenever the operational procedures related to the use and the maintenance of the equipment as described in this manual are not
respected.
Whenever damages to the equipment occur because of fixing and modifications made form non-authorized staff or because of
normal deterioration of the system.
No part of this manual can be reproduced by any means, transmitted or copied for private or public use without private authorization
from AUDIO ANALOGUE.
The information contained in this manual is related to the data kept by AUDIO ANALOGUE at the moment of the issue o f this
publication; AUDIO ANALOGUE has the right to make changes to this document without prior notice.
The equipment has been projected and manufactured according to the Regulations of the Community 89/336/CEE and is marked CE.
This equipment can’t be used for different purposes other than those for which it has been manufactured.
AUDIO ANALOGUE does not take any responsibilities for accidents or damages due to improper use of the equipment.
WARNING
Please do respect the safety standards contained in this manual before starting to operate the equipment.
Do not open the equipment. No further interventions than those described in this manual should be made. For technical assistance,
please consult a qualified technician or an AUDIO ANALOGUE dealer.
Not respecting the instructions contained in this manual will invalidate the terms and conditions of the guarantee.
NECESSARY PRECAUTIONS FOR SAFETY AND MAINTENANCE
ATTENTION: before starting any operation, use or maintenance of the equipment it is strictly necessary to understand the following
manual.
To avoid any accidents or hazards it is necessary to follow the following regulations.
Activate the equipment only prior checking if the installation has been properly made, and if it is related to the instructions contained
in this manual.
Avoid installing the equipment in places subjected to extremely high temperatures or humidity.
Check that the labels containing information about safety are always visible and in good conditions.
Ensure to not obstruct ventilation, to avoid excessive overheating. The equipment should be kept to a minimal distance of 15 cm
from any object and not to place on carpet or other soft surfaces. Also the installation close to radiators or in close environments
without ventilation should be avoided.
Do not switch on the equipment until it has not been correctly and completely installed.
Only supply the equipment with the kind of the electric supply as stated on the appropriate label. If in doubts about the kind of supply
available, please consult an expert technician for technical assistance.
The equipment needs to be wired to an earth terminal. The external case is metal made; a defective connection with the earth may
be dangerous.
In case damages occurs to the supply cable, it should be immediately replaced with the same kind of cable. This operation should be
only made prior to disconnecting the main supply.
Do not place objects on the supply cable and check that this is not positioned in way through. The cable should not be knotted or
curly.
Replace the fuses always with other of the same kind.
Do not use the equipment close to the water or other liquids. If liquid entered the equipment, the plug should be disconnected from
the socket avoiding to touch the metal parts. Competent technical staff should be asked to check the equipment before operating it
again.
Do not place recipients containing liquids on the equipment. Even when it is switched off.
Keep the equipment far from sources of heat such as the solar light, kitchens, radiators etc…
Always unplug the supply cable during rainy weather.
Always Switch off and unplug the supply cable before cleaning the equipment externally.: this operation should be made using a dry
and soft cloth. Never use alcohol based cleaning material.
If the amplifier was carried from an extremely cold environment to and extremely hot one, it could create internal condensation,
causing possible bad functioning.
If this occurs, please wait for at least an hour before using it again, to allow it to gradually reach room temperature.
When not used for long periods, please unplug the equipment.
INSTRUCTIONS TO PUT IT OUT OF SERVICE
Consult qualified staff
Follow the regulations of the current legislation regarding recycling and waste disposal.

7
Description of the remote controller
TUNER Functions
. STANDBY TUNER: switches-on and switches-off of the device
. SEARCH +: the tuning frequency is increased of one step
. SEARCH - : the tuning frequency is decreased of one step
. SCAN +: the tuning frequency is increased to reach the first radio station which has a higher frequency than the one it started from;
if this is not possible a complete scansion of the band is carried out and the present frequency is tuned again by just pressing the
button.
. SCAN -: the tuning frequency is decreased to reach the first radio station which is has a lower frequency than the one it started
from; if this is not possible a complete scansion of the band is carried out and the present frequency is tuned again by pressing the
button.
. AM/FM: it permits to commute from AM and FM.
. MEMORY+: for the description of this function refer to the front panel description.
. MEMORY-: for the description of this function refer to the front panel description.
. STORE: for the description of this function refer to the front panel description.

9
PLUGGING AND CONNECTING PRIMO VT TUNER
Before connecting Primo VT Tuner to other equipments, please be sure that they are all unplugged from wall outlets. First of all,
connect the antennas to their inputs. Unroll the FM antenna as much as possible. Connect Primo VT Tuner outs to an integrated
amplifier or to a preamplifier line inputs Plug Primo VT Tuner and all the other units to the main power. Turn the integrated amplifier
or the preamplifier on.
COLLEGAMENTO DEL PRIMO VT TUNER
Prima di collegare il Primo VT Tuner ad altri apparecchi, verificare che essi siano scollegati dalla rete elettrica. Collegare le antenne
ai relativi connettori. Disporre la antenna Fm in modo che risulti il più possibile distesa. Collegare le uscite del Primo VT Tuner ad un
ingresso linea dell’amplificatore integrato o del preamplificatore. Collegare tutti gli apparecchi, compreso il Primo VT Tuner alle
prese di rete. Accendere l’amplificatore integrato o il preamplificatore.
POWERING UP PRIMO VT TUNER
Turn Primo VT Tuner on by pressing the STANDBY button on the front panel of the unit or on the Tuner section of the remote
controller: the display turns on and a presentation message shows. After that, frequency is set and the unit is fully operative.
If the unit does not turn on, please refer to the troubleshooting section of the present manual.
ACCENSIONE DEL PRIMO VT TUNER
Accendere il Primo VT Tuner premendo il pulsante STANDBY sul frontale dell’apparecchio oppure premendo il tasto STANDBY
nella sezione Tuner del telecomando: il display si accende visualizzando un messaggio di presentazione. Subito dopo viene
sintonizzata la frequenza e l’apparecchio è pronto a rispondere ai comandi che riceve dal telecomando o dai tasti posizionati sul
frontale.
Qualora l’apparecchio non si dovesse accendere, consultare la sezione dedicata alla risoluzione dei problemi.
IMPORTANT: even when in STANDBY mode, the unit is plugged to the main power. We recommend to always put the unit
in STANDBY mode when it is not in use and, eventually, to unplug it when it is not used for a long period of time and
anytime the unit or the equipments the unit is connected to have to be connected/disconnected to other equipments. We
also recommend unplugging the unit from the main power during lightning and electric storms to avoid possible damages.
IMPORTANTE: anche quando è in standby, l’apparecchio è comunque sotto tensione. Si consiglia quindi di metterlo
sempre in STANDBY quando non viene utilizzato, ed eventualmente di scollegarlo dalla rete se non lo si utilizza per lunghi
periodi di tempo o quando si deve effettuare qualunque modifica delle connessioni al Primo VT Tuner o a qualunque altro
apparecchio dell’impianto a cui esso è collegato. Inoltre, in occasione di temporali e tempeste elettriche si consiglia
disconnettere l’apparecchio dalla rete per evitare danni dovuti a fulmini.
TUNED and STEREO leds
On the right side of the display there are two leds which are labelled TUNED and STEREO. TUNED led turns green when there is a
radio station on the selected frequency. STEREO led turns green or red depending on the selected listening mode. When in stereo
mode, it turns green when the incoming signal is stereophonic (otherwise it stays off). When in mono mode, it turns red to show that
the listening is forced to be monophonic.
LED TUNED E STEREO
Sul lato destro del display si trovano due LED denominati TUNED e STEREO. Il LED TUNED, di colore verde, si illumina quando
alla frequenza sintonizzata è presente una stazione radio. Il LED STEREO, bicolore verde/rosso, si illumina con colore differente a
seconda della modalità di riproduzione selezionata. In modalità stereofonica si illumina di colore verde quando il segnale ricevuto
risulta stereo e rimane spento altrimenti. In modalità monofonica si illumina di colore rosso per indicare che si sta forzando la
riproduzione del segnale in mono.
RADIO STATIONS TUNING
It is possible to tune in radio stations by two different functions: SEARCH (it is activated by pressing one of the SEARCH buttons on
the front panel of the unit or on the remote controller) and SCAN (it is activated by holding for one second one of the SEARCH
buttons on the front panel of the unit or one of the SCAN button on the remote controller). The SEARCH function allows modifying
the selected frequency by one step, while the SCAN function increase/decreases the frequency according to the button you pressed
until the unit finds a radio station (if this is not possible, the whole bandwidth is scanned to get back to the frequency level previous
to the pressure of the SCAN). The quickest way to tune in a radio station is to use the SCAN function first then the SEARCH function
for fine tuning.
SINTONIA DI UNA STAZIONE RADIO
La frequenza di sintonia può essere modificata secondo due diversa funzioni: SEARCH (attivabile premendo e rilasciando uno dei
due pulsanti SEARCH sul frontale oppure premendo uno dei tasti SEARCH sul telecomando) e SCAN (attivabile tenendo premuto
per circa un secondo e poi rilasciando uno dei due pulsanti SEARCH sul frontale oppure premendo uno dei tasti SCAN del
telecomando). La funzione SEARCH permette di modificare di uno step la frequenza selezionata, mentre la funzione SCAN
modifica la frequenza di sintonia nel verso indicato, aumentandola o diminuendola a seconda del comando impartito, fino a trovare
una frequenza per la quale viene rilevata una stazione radio (se ciò non è possibile viene effettuata una scansione completa della
banda, e quindi nuovamente selezionata la frequenza presente al momento dell’attivazione della funzione SCAN). Pertanto il metodo
più veloce per sintonizzare una stazione radio è quello di effettuare una ricerca SCAN e poi affinare la sintonia mediante la funzione
SEARCH.

10
RADIO STATION STORING
It is possible to store up to 18 AM and 18 FM radio stations following this procedure:
1. Tune in your desired radio station
2. Put the unit in “Storage” mode by pressing the STORE button on the front panel of the unit or on the remote controller. When
entering the “Storage” mode the “Mute” mode is also activated. The content of the first allocation is shown on the display. If no
station has been stored into this allocation, an EMPTY message is shown: otherwise, the frequency or the RDS message (if
available) of the radio station is shown.
3. Choose the memory allocation when the radio station has to be stored by pressing MEMORY+/ MEMORY- buttons on the front
panel of the unit or the MEM+/MEM- buttons on the remote controller. For each allocation, the display will show the progressive
number and an EMPTY message if no station has been stored in that allocation or the frequency/RDS message (if available) of
the radio station.
4. Press the STORE button on the front panel of the unit or one of the STORE buttons on the remote controller to store the
selected radio station. The unit will exit the “Storage” and the “Mute” mode and will be fully operative again.
MEMORIZZAZIONE DELLE STAZIONI RADIO
Si possono memorizzare fino a 18 stazioni radio FM e 18 per la AM. Per la memorizzazione seguire la seguente procedura:
1. Sintonizzare la stazione radio di interesse.
2. Entrare in modalità “memorizzazione” premendo e rilasciando il pulsante STORE sul frontale dell’apparecchio oppure
premendo il tasto STORE sul telecomando. In modalità “memorizzazione” l’apparecchio entra in mute. Sul display viene
visualizzato il contenuto della prima locazione. Se in tale locazione non è stata memorizzata alcuna stazione radio viene
visualizzata sul display la scritta “EMPTY”, altrimenti viene visualizzata la frequenza della stazione memorizzata o, se
disponibile, il relativo messaggio RDS.
3. Premendo e rilasciando i pulsanti MEMORY+ e MEMORY- presenti sul frontale dell’apparecchio o premendo i tasti MEM+ e
MEM- sul telecomando, scorrere le varie locazioni di memoria e fermarsi nella posizione dove si intende memorizzare la
stazione radio. Per ogni locazione il display indicherà, oltre al numero della locazione, l’indicazione EMPTY se nella locazione
non è stata memorizzata alcuna stazione o la frequenza o l’eventuale messaggio RDS (se disponibile) della stazione
memorizzata.
4. Premere e rilasciare il pulsante STORE presente sul frontale dell’apparecchio o premere il tasto STORE sul telecomando per
memorizzare la stazione nella locazione selezionata e uscire dalla modalità “memorizzazione”, l’apparecchio esce dal mute e
torna in modalità di funzionamento normale.
RADIO STATIONS SELECTION
It is possible to quickly jump from stored station to another by pressing MEMORY+/ MEMORY- buttons on the front panel of the unit
or the MEM+/MEM- buttons on the remote controller. When the unit is in AM mode it is possible to jump from on of the 18 AM stored
radio station to the other: the same thing is possible for FM radio station when the unit is in FM mode. When the unit is turned on or
the AM/FM button on the front panel of the unit or on the remote controller is pressed, the unit will be automatically tuned on the first
radio station of the selected mode. It is possible to select the memory allocations by pressing the MEMORY+/MEMORY- on the front
panel of the unit or the MEM+/MEM- buttons on the remote controller. If the memory allocation is empty, an EMPTY message is
shown on the display and the unit goes back to the previously selected frequency.
SINTONIA DELLE STAZIONI RADIO MEMORIZZATE
E’ possibile accedere velocemente alle stazioni radio memorizzate mediante l’uso dei pulsanti MEMORY+ e MEMORY- sul frontale
o premendo i tasti MEM+, MEM- sul telecomando. In modalità AM si possono sintonizzare le stazioni radio AM memorizzate nelle
18 locazioni di memoria riservate alla AM e analogamente per la modalità FM. Alla accensione o in seguito ad una pressione e
rilascio del pulsante AM/FM sul frontale o alla pressione del tasto AM/FM del telecomando, l’accesso alla memoria ripartirà dalla
prima locazione della banda selezionata. Mediante i pulsanti MEMORY+, MEMORY- sul frontale o i tasti MEM+, MEM- sul
telecomando sarà possibile selezionare le varie locazioni di memoria. Se la locazione di memoria selezionata risulta vuota, il display
mostrerà la scritta “EMPTY” e l’apparecchio sintonizzerà nuovamente la frequenza presente prima della selezione della locazione.

11
SPECIFICATIONS
Parameter Value
Channels: 2
Output level FM: 500-700mV; AM: 115-215mV
Image rejection FM: 70dB min; AM: >40dB min
Auto Stop Sens FM: 18-28dBu; AM: 45-65dBu
Usable sens FM: 12dBu max; AM: 60dBu max
Signal/noise ratio: FM: 60dB min; AM: 40dB min
FREQ. FM:87.5MHz-108MHz; AM:567kHz-1.6MHz
Power requirements: 115V-220V-230V-240V 50-60Hz
Power consumption: 19VA
SPECIFICHE TECNICHE
Parametro Valore
Numero di canali: 2
Output level FM: 500-700mV; AM: 115-215mV
Image rejection FM: 70dB min; AM: >40dB min
Auto Stop Sens FM: 18-28dBu; AM: 45-65dBu
Usable sens FM: 12dBu max; AM: 60dBu max
Rapporto segnale/rumore FM: 60dB min; AM: 40dB min
FREQ. FM:87.5MHz-108MHz; AM:567kHz-1.6MHz
Alimentazione: 115V-220V-230V-240V 50-60Hz
Assorbimento: 19VA

12
TROUBLESHOOTING
Symptom Cause Remedy
The unit is in STANDBY mode Press the STANDBY button on the front
panel of the unit or the STANDBY button
on the remote controller
Incorrectly plugged power cord Make sure the power cord is correctly
plugged into the wall outlet
Display is off
No sound
No response from the unit
Burned-out fuses Contact your Audio Analogue retailer for
fuse check/replacement
Faulty or incorrectly plugged connectors
between Primo VT Tuner and the amplifier
Check cables and their connection Display is on
No sound
Incorrectly selected source on the amplifier
Check that Primo VT Tuner is correctly
selected through the amplifier input
The unit is on but there is no sound
The unit is in “Storage” mode Complete storage procedure by pressing
the STORE button on the front panel or on
the remote controller
It is impossible to tune in a radio station Faulty or incorrectly plugged antennas. Check that the antennas are correctly
plugged and placed (FM antenna has to
be unrolled as much as possible). Try
replacing both the antennas.
Primo VT Tuner works but the display is
off
Faulty or incorrectly plugged front panel. Contact your Audio Analogue retailer for
connections check and front panel
replacement
No battery/ worn-out battery Place/replace battery (2 ‘AAA’ batteries) Remote controller doesn’t work
You’re standing too far or on an exceeding
angle from the front panel
Get closer to the unit or reduce angle
If the suggested remedies should not work or the problem is not shown in the list above, please contact your local Audio
Analogue retailer.

Attention: Your product is marked with this symbol. It
means that used electrical and electronic products
should not be mixed with general household waste.
There is a collection system for these products.
Attenzione: il dispositivo è contrassegnato da questo
simbolo, che segnala di non smaltire le
apparecchiature elettriche ed elettroniche insieme ai
normali rifiuti domestici. Per tali prodotti è previsto un
sistema di raccolta a parte.
A. INFORMATION ON DISPOSAL FOR USERS (PRIVATE HOUSEHOLDS)
1 In The European Union
Attention: If you want to dispose of this equipment, please do not use the ordinary dust bin.
Used electrical and electronic equipment must be treated separately and in accordance with legislation that requires
proper treatment, recovery and recycling of used electrical and electronic equipment.
Following the implementation by member states, private households within the EU states may return their used electrical
and electronic equipment to designated collection facilities free of charge*. In some countries* your local retailer may also
take back your old product free of charge if your purchase a similar new one.
*) Please contact your authority for further details.
If your used electrical or elctronic equipment has batteries or accumulator, please dispose of these separately before and
according to local requirements.
By disposing of this product correctly you will help ensure that the waste undergoes the necessary treatment, recovery
and recycling and thus prevent potential negative effects on the environment and human health which could otherwise
arise due to inappropriate waste handling.
2. In other countries outside the EU
If you wish to discard this product, please contact your local authorities and ask for the correct method of disposal.
For Switzerland: Used electrical or electronic equipment can be returned free of charge to the dealer, even if you don’t
purchase a new product. Further collection facilities are listed on the home page of www.swisco.ch or www. Sens.ch
B. Information on Disposal for Business Users
1. In the European Union
If this product is used for business purposes and you want to discard it:
Please contact your Audio Analogue dealer who will inform you about the take-back and recycling. Small products (and
small amounts) might be taken back by your local collection facilities.
For Spain: Please contact the established collection system or your local authority foer take-back of your used products.
2. In other Countries outside the EU
If you wish to discard of this product, please contact your local authorities and ask for the current method of disposal.
A. INFORMAZIONI SULLO SMALTIMENTO PER GLI UTENTI (PRIVATI)
1 Nell’Unione europea
Attenzione: Per smaltire il presente dispositivo, non utilizzare il normale bidone della spazzatura!
Le apparecchiature elettriche ed elettroniche usate devono essere gestite a parte in conformità alla legislazione che
richiede il trattamento, il recupero e il riciclaggio adeguato dei suddetti prodotti.
In seguito alle disposizioni attuate dagli Stati membri, i privati residenti nella UE possono conferire gratuitamente le
apparecchiature elettriche ed elettroniche usate a centri di raccolta designati*.
In alcuni paesi*, anche il rivenditore locale può ritirare gratuitamente il vecchio prodotto se l’utente acquista un altro nuovo
di tipologia simile.
*) Per maggiori informazioni di prega di contattare l’autorità locale competente.
Se le apparecchiature elettriche o elettroniche usate hanno batterie o accumulatori, l’utente dovrà smaltirli a parte
preventivamente in conformità alle disposizioni locali.
Lo smaltimento corretto del presente prodotto contribuirà a garantire che i rifiuti siano sottoposti al trattamento, al
recupero e al riciclaggio necessari prevenendone il potenziale impatto negativo sull’ambiente e sulla salute umana, che
potrebbe derivare da un’inadeguata gestione dei rifiuti.
2 In paesi che non fanno parte dell’UE
Se si desidera eliminare il presente prodotto,contattare le autorità locali e informarsi sul metodo di smaltimento corretto.
Per la Svizzera: Le apparecchiature elettriche o elettroniche possono essere restituite gratuitamente al rivenditore, anche
se non si acquista un prodotto nuovo. Altri centri di raccolta sono elencati sulla homepage www.swiso.ch o di
www.sens.ch.
B. INFORMAZION SULLO SMALTIMENTO PER GLI UTENTI COMMERCIALI
1. Nell’Unione Europea
Se il prodotto è impiegato a scopi commerciali. Procedere come segue per eliminarlo.
Contattare il proprio rivenditore Audio Analogue che fornirà informazioni circa il ritiro del prodotto. Potrebbero essere
addebitate le spese di ritiro e riciclaggio. Prodotti piccoli e quantitativi ridotti potranno essere ritirati anche dai centri di
raccolta locali.
Per la Spagna: Contattare il sistema di raccolta ufficiale o l’ente locale preposto al ritiro dei prodotti usati
2. In paesi che non fanno parte dell’UE
Se si desidera eliminare il presente prodotto, contattare le autorità locali e informarsi sul metodo di smaltimento corretto.

16
Audio Analogue
Manufactured and Distributed by:
AUDIO FUTURA spa
Via Maestri Del Lavoro 583
51015 Monsummano Terme (PT) Italy
Tel. 0572 954513 fax 0572 958099
www.audioanalogue.com - info@audioanalogue.com
/