Page is loading ...

FORM NO: 5908302 REV: A
11
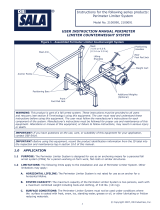
SAFETY INFORMATION
Please read, understand, and follow all safety information contained in these instructions prior to the use of this Technical Rescue
Device. FAILURE TO DO SO COULD RESULT IN SERIOUS INJURY OR DEATH.
These instructions must be provided to the user of this equipment. Retain these instructions for future reference.
Intended Use:
This Technical Rescue Device is intended for use as part of a complete personal fall protection or rescue system.
Use in any other application including, but not limited to, material handling, recreational or sports related activities, or other activities not described in
the User Instructions, is not approved by 3M and could result in serious injury or death.
This device is only to be used by trained users in workplace applications.
! WARNING
This Technical Rescue Device is intended for use as part of a complete personal fall protection or rescue system. It is expected that all users be fully
trained in the safe installation and operation of their Technical Rescue Device. Misuse of this device could result in serious injury or death. For
proper selection, operation, installation, maintenance, and service, refer to these User Instructions and all manufacturer recommendations, see your
supervisor, or contact 3M Technical Service.
• To reduce the risks associated with working with a Technical Rescue Device which, if not avoided, could result in serious injury or
death:
- Inspect the device before each use and at least annually. Inspect in accordance with the User Instructions.
- If inspection reveals an unsafe or defective condition in the device or a component of the device, remove the device from service and repair or
replace according to the User Instructions.
- Label the device ‘UNUSABLE’ and immediately remove the device from service if it has been subjected to fall arrest or impact force. Inspect
and handle the device according to the User Instructions.
- Do not use this device unless you have received appropriate technical rescue training.
- Always maintain control of the device and descend at a controlled rate.
- Ensure the device and lifeline are kept free from all hazards including, but not limited to, entanglement with other workers, yourself, and
surrounding objects.
- Ensure proper procedures are used when connecting or terminating a lifeline.
- When performing rescue operations, always utilize fall protection safety measures as determined by your workplace rescue plan.
- Do not touch parts of devices exposed to high friction during or after long descents, as these parts may get hot and cause burns.
- Ensure proper edge protection is used if the lifeline may contact sharp edges or corners.
- Ensure a clear descent path, and that the landing area is clear of any obstructions or hazards that you may contact.
- Ensure that devices/subsystems assembled from components made by different manufacturers are compatible and meet the requirements
of applicable standards, including the ANSI Z359 or other applicable fall protection codes, standards, or requirements. Always consult a
Competent or Qualied Person before using these devices.
- (ROPE LIFELINE DEVICES) Use only rope described and approved in the User Instructions.
• To reduce the risks associated with working at height which, if not avoided, could result in serious injury or death:
- Ensure your health and physical condition allow you to safely withstand all of the forces associated with working at height. Consult with your
doctor if you have any questions regarding your ability to use this equipment.
- Never exceed allowable capacity of your fall protection equipment.
- Never exceed maximum free fall distance of your fall protection equipment.
- Do not use any fall protection equipment that fails pre-use or other scheduled inspections, or if you have concerns about the use or suitability
of the equipment for your application. Contact 3M Technical Services with any questions.
- Some subsystems and component combinations may interfere with the operation of this equipment. Only use compatible connections. Consult
3M prior to using this equipment in combination with components or subsystems other than those described in the User Instructions.
- Use extra precautions when working around moving machinery (e.g. top drive of oil rigs) electrical hazards, extreme temperatures, chemical
hazards, explosive or toxic gases, sharp edges, or below overhead materials that could fall onto you or the fall protection equipment.
- Use Arc Flash or Hot Works devices when working in high heat environments.
- Avoid surfaces and objects that can damage the user or equipment.
- Ensure there is adequate fall clearance when working at height.
- Never modify or alter your fall protection equipment. Only 3M or parties authorized in writing by 3M may make repairs to the equipment.
- Prior to use of fall protection equipment, ensure a rescue plan is in place which allows for prompt rescue if a fall incident occurs.
- If a fall incident occurs, immediately seek medical attention for the fallen worker for the worker who has fallen.
- Do not use a body belt for fall arrest applications. Use only a Full Body Harness.
- Minimize swing falls by working as directly below the anchorage point as possible.
- If training with this device, a secondary fall protection device must be utilized in a manner that does not expose the trainee to an unintended
fall hazard.
- Always wear appropriate personal protective equipment when installing, using, or inspecting the device/system.
EN

13
;
Prior to installation and use of this equipment, record the product identication information from the ID label in the
Inspection and Maintenance Log (Table 2) at the back of this manual.
PRODUCT DESCRIPTION:
Figure 1 illustrates the 3M™ Self-Rescue™ Descent System.
Figure 2 identies key components of the Self-Rescue Descent System (Self-Rescue System). The Self-Rescue System is a
harness mounted Backpack (A) containing a spooled Lifeline (B) feeding through a sealed Descent Device (C). The Lifeline
is terminated with an Easy-Link™ D-Ring (D) coupled to the exit port on the Descent Device. In an emergency, the user can
release the Easy-Link™ D-ring and initiate descent by pulling a Release Cord (E) mounted on the harness shoulder strap. If the
user is incapacitated, a rescuer can pull the Assisted-Rescue Ring (F) on the side of the Backpack with the accessory Rescue Pole
Kit (G) to release the D-Ring and initiate descent. A Mounting Pin (H) on the Descent Device Housing and two adjustable Clip
Straps (I) on the bottom of Backpack secure the Self-Rescue System to the Full Body Harness. A D-Ring Cover (J) on the top of
the Backpack snaps over the Harness Dorsal D-Ring to eliminate inadvertent use of the D-Ring. A Front Flap (K) and Back Zipper
(L) on the Backpack facilitate inspection of the Product Labels and internal components. See Figure 1 for available Self-Rescue
models and accessories:
Table 1 – Specications
System Specications:
Capacity: 1 Person with a combined weight (clothing, tools, etc.) of no more than 310 lbs (141 kg)
1
.
Anchorage: Fall Arrest: The structure to which the Descent System is attached must sustain static loads applied
in the directions permitted by the Fall Arrest System of at least: 3,600 lbs (16 kN)with certication of a
Qualied Person
2
; or 5,000 lbs (22 kN) without certication. When more than one Personal Fall Arrest
System (PFAS) is attached to an anchorage, these static loads must be multiplied by the number of
PFAS attached to the anchorage.
;
OSHA 1926.500 and OSHA 1910.66: Anchorages used for attachment to a Personal Fall Arrest
System (PFAS) must be independent of any anchorage used to suspend or support platforms and
must support 5,000 lbs (22 kN) per user attached, or be designed, installed, and used as part of a
completer PFAS which maintains a Safety Factor of a least 2 and is supervised by a Qualied Person
2
.
Restraint: The structure to which the Descent System is attached must sustain static loads applied in
the directions permitted by the Restraint System of at least 3,000 lbs (13 kN). When more than one
Restraint System is attached to an anchorage, the static load must be multiplied by the number of
Restraint Systems attached to the anchorage.
Dimensions: See Figure 1 for the dimensions of each Self-Rescue System model.
Product Weight: See Figure 1 for the weight of each Self-Rescue System model.
Standards:
Meets the test requirements of ANSI/ASSE Z359.4, OSHA
Operating Temperature Maximum Number of Descents Approximate Descent Speed Maximum Number of Users User Weight Range
-40° F to 140° F
(-40° C to 60° C)
1
5 ft/s @ 310 lb
(0.9 m/s @ 141 kg)
1 Person
130 lb - 310 lb
(59 kg - 141 kg)
Component Specications:
Figure 2 Reference Component Materials Note:
A
Backpack
Ripstop Nylon Bag with Molded PVC Wear Pad, Nylon Mesh Inspection Panel, and Polyester Web Straps
B
Lifeline
5.5 mm Dia. Rope Minimum Breaking Strength: 6,500 lbs (28.9 kN)
C
Descent Device
Aluminum Alloy Housing with integrated Alloy Steel Harness Interface Pin and Alloy Steel Latch Arm
D
Easy-Link™ D-Ring
Alloy Steel
Minimum Breaking Strength: 5,000 lbs (22 kN)
Proof Load: 3,600 lbs (16 kN)
E
Release Cord
Stainless Steel Cable
F
Assisted-Rescue Ring
9 ft (2.7 m) Aluminum Telescoping Pole, 3/16 in. Dia. Polypropylene Rope, Aluminum Carabiner
G
Rescue Pole Kit
9 ft (2.7 m) Aluminum Telescoping Pole, 3/16 in. Dia. Polypropylene Rope, Aluminum Carabiner
H
Mounting Pin
I
Clip Straps
J
D-Ring Cover
K
Front Flap
L
Back Zipper
1 Capacity: 310 lbs (141 kg) is the capacity range required by ANSI.
2 Qualied Person: An individual with a recognized degree or professional certicate, and extensive experience in Fall Protection. This individual must be capable
of design, analysis, evaluation, and specication in Fall Protection.

14
1.0 APPLICATIONS
1.1 PURPOSE: DBI-SALA
®
Self-Rescue Systems are self-rescue devices that attach between the dorsal webbing on a
Full Body Harness and Fall Arrest Equipment such as a Lanyard or Self-Retracting Device. The Self-Rescue System
allows the user to descend from a suspended height in an emergency. Figure 1 denes available Self-Rescue
models and their capabilities.
1.2 STANDARDS: This Self-Rescue System conforms to the national or regional standard(s) identied on the front cover of
these instructions.
1.3 TRAINING: This equipment is intended to be used by persons trained in its correct application and use. It is the
responsibility of the user to assure they are familiar with these instructions and are trained in the correct care and use
of this equipment. Users must also be aware of the operating characteristics, application limits, and the consequences of
improper use. The Self-Rescue TRAINING System can be used to train personnel in the use of the Self-Rescue System
(see Appendix A)
1.4 LIMITATIONS: In addition to the limitations dened in the manufacturer instructions for the Full Body Harness and Fall
Arrest Equipment, always consider the following limitations when installing or using the Self-Rescue System:
! WARNING: Failure to observe the following restrictions may result in injury or death.
• Capacity: The Self-Rescue System has been compliance tested for use by one person with a combined weight
(clothing, tools, etc.) from 130 lbs (59 kg) to 310 lbs (141 kg). Make sure all of the components in the system are
rated to a capacity appropriate to the application.
• Anchorage Strength: Anchorages suspending the Self-Rescue System shall have a strength capable of
sustaining static loads applied in the directions permitted by the system of at least: 5,000 lbs. (22.2 kN) for non-
certified anchorages, or two times the maximum arresting force for certified anchorages.
• Maximum Number of Descents: The Self-Rescue 50 and Self-Rescue 100 Systems are single-descent devices.
After a descent, remove the Self-Rescue System from service and contact 3M regarding repair.
L IMPORTANT: Only 3M or parties authorized in writing may make repairs to this equipment.
L SELF-RESCUE TRAINING SYSTEM: The Self-Rescue TRAINING System can be used for up to 20
descents in a controlled training environment with secondary fall protection (see Appendix A).
• Maximum Descent Speed: Per ANSI Z359.4, Maximum Descent Speed of the Self-Rescue System shall not
exceed 6.6 ft/s (2 m/s). Descent Speed will vary with the weight of the user. See the Figure 1 performance
specications for the “Approximate Descent Speed”.
• Hazards: Use of this equipment in areas where surrounding hazards exist may require additional precautions to
reduce the possibility of injury to the user or damage to the equipment. Hazards may include, but are not limited
to: high heat, caustic chemicals, corrosive environments, high voltage power lines, explosive or toxic gases, moving
machinery, or overhead materials that may fall and contact the user or fall arrest system. Avoid working where
Self-Rescue Lifeline may cross or tangle with that of another worker. Avoid working where an object may fall and
strike the Lifeline, resulting in loss of balance or damage to the Lifeline. Do not allow the Lifeline to pass under arms
or between legs.
• Sharp Edges: Avoid working where the Self-Rescue Lifeline will be in contact with or abrade against unprotected
sharp edges.
Where contact with a sharp edge is unavoidable, cover the edge with abrasion resistant material.
2.0 USE
2.1 FALL PROTECTION AND RESCUE PLAN: The employer must have a Fall Protection and Rescue Plan in place that
meets ANSI Z359.2 Minimum Requirements for a Comprehensive Managed Fall Protection Program. The plan
should provide guidelines and requirements for an employer’s managed fall protection program, including policies,
duties and training; fall protection procedures; eliminating and controlling fall hazards; rescue procedures;
incident investigations; and evaluating program effectiveness.
2.2 INSPECTION FREQUENCY:
The Self-Rescue 50 and Self-Rescue 100 Systems must be inspected by an Authorized
Person
1
or Rescuer
2
before each use. Additionally, annual inspections must be conducted by a Competent Person
3
other than the user. Extreme working conditions may necessitate more frequent Competent Person inspections.
The Self-Rescue TRAINING System shall be inspected by a Competent Person before each use. The Competent
Person shall use the Inspection Schedule (Table 1) to determine appropriate inspection intervals.
Inspection
procedures are described in the “Inspection Checklist” (Table 2). Results of the Competent Person inspection should
be recorded in the “Inspection and Maintenance Log” on the back pages of these instructions or recorded with the
i-Safe™ system (see Section 5).
1 Authorized Person: A person assigned by the employer to perform duties at a location where the person will be exposed to a fall hazard.
2 Rescuer: Person or persons other than the rescue subject acting to perform an assisted rescue by operation of a rescue system.
3 Competent Person: An individual designated by the employer to be responsible for the immediate supervision, implementation, and monitoring of the employer’s
managed fall protection program who, through training and knowledge, is capable of identifying, evaluating, and addressing existing and potential fall hazards, and
who has the employer’s authority to take prompt corrective action with regard to such hazards.

15
Table 2 – Competent Person Inspection Schedule
Type of Use Application Examples Conditions of Use
Competent Person
Inspection Frequency
Infrequent to Light Rescue and Conned Space, Factory Maintenance Good Storage Conditions, Indoor or Infrequent Outdoor
Use, Room Temperature, Clean Environments
Annually
Moderate to Heavy Transportation, Residential Construction, Utilities,
Warehouse
Fair Storage Conditions, Indoor and Extended Outdoor
Use, All Temperatures, Clean or Dusty Environments
Semi-Annually to Annually
Severe to Continuous Commercial Construction, Oil and Gas, Mining Harsh Storage Conditions, Prolonged or Continuous
Outdoor Use, All Temperatures, Dirty Environment
Quarterly to Semi-Annually
Multiple Descents Training with the Self-Rescue TRAINING System only Up to 20 descents in a controlled training environment Before each Descent
2.3 BODY SUPPORT: A Full Body Harness must be used with the Self-Rescue System. The EZ-Link™ D-Ring on the
Self-Rescue System must be above the user’s center of gravity. A body belt is not authorized for use with the
Self-Rescue System. If a fall occurs when using a body belt it may cause unintentional release or physical trauma
from improper body support.
2.4 COMPATIBILITY OF COMPONENTS: Unless otherwise noted, 3M equipment is designed for use with 3M
approved components and subsystems only. Substitutions or replacements made with non approved components
or subsystems may jeopardize compatibility of equipment and may affect safety and reliability of the complete
system.
L IMPORTANT: Follow manufacturer instructions for all components and subsystems in the personal fall
arrest system.
2.5 COMPATIBILITY OF CONNECTORS: Connectors are considered to be compatible with connecting elements
when they have been designed to work together in such a way that their sizes and shapes do not cause their gate
mechanisms to inadvertently open regardless of how they become oriented. Connectors (hooks, carabiners, and
D-rings) must be capable of supporting at least 5,000 lbs. (22.2 kN). Connectors must be compatible with the
anchorage or other system components. Do not use equipment that is not compatible. Non-compatible connectors may
unintentionally disengage (see Figure 3). Connectors must be compatible in size, shape, and strength. Self-locking snap
hooks and carabiners are required.
2.6 MAKING CONNECTIONS: Snap hooks and carabiners used with this equipment must be self-locking. Ensure all
connections are compatible in size, shape and strength. Do not use equipment that is not compatible. Ensure all
connectors are fully closed and locked. 3M connectors (snap hooks and carabiners) are designed to be used only as
specied in each product’s user instructions. See Figure 4 for examples of inappropriate connections. Do not connect
snap hooks and carabiners:
A. To a D-ring to which another connector is attached.
B. In a manner that would result in a load on the gate.
L NOTE: Large throat snap hooks should not be connected to standard size D-rings or similar objects
which will result in a load on the gate if the hook or D-ring twists or rotates, unless the snap hook
is equipped with a 3,600 lb (16 kN) gate. Check the marking on the snap hook to verify that it is
appropriate for the application.
C. Where the size or shape of the mating connectors are not compatible and, without visual conrmation of proper
connection, may create the false impression of being properly connected.
D. To each other.
E. Directly to webbing or rope lanyard or tie-back (unless the manufacturer’s instructions for both the lanyard and
connector specically allows such a connection).
F. To any object which is shaped or dimensioned such that the snap hook or carabiner will not close and lock, or that
roll-out could occur.
G. In a manner that does not allow the connector to align properly while under load.

16
3.0 INSTALLATION
;
Installation of the Self-Rescue Self-Rescue System must be supervised by a Qualied Person
1
. The installation must
be certied by a Competent Person
2
as meeting the criteria for a Certied Anchorage, or that it is capable of supporting
the potential forces that could be encountered during a fall.
3.1 PLANNING: Plan your fall protection system prior to installation of the Self-Rescue System. Account for all factors that
may affect your safety before, during and after a fall. Consider all requirements, limitations and specications dened in
Section 2 and Table 1.
3.2 HARNESS MOUNTING - STANDARD D-RING: On 3M or other manufacturers’ Full Body Harnesses, the Self-Rescue
Descent System attaches to harness webbing directly below the Dorsal D-Ring (see Figure 8). To mount the
Self-Rescue System on the Harness:
1. Loosen the Harness Webbing: Pull out the Harness Straps (A) where they pass through the bottom of the Dorsal
D-Ring (B) until there is sufcient space to slide the Mounting Pin between the Harness Straps and Back Pad.
2. Open the Mounting Pin: Push in the Locking Buttons (A) simultaneously and slide the Locking Pin (B) out.
3. Cover the Harness Dorsal D-Ring: Unsnap the D-Ring Cover (A). Slide the D-Ring Cover over the Dorsal D-Ring
(B) of the Harness to prevent accidental connection to the wrong D-Ring when the Self-Rescue System is in use.
Snap the D-Ring Cover shut.
;
Covering the Harness Dorsal D-Ring is optional, but leaving the D-Ring uncovered allows accidental connection to the
wrong D-Ring; in which case, the Self-Rescue System is unusable in the event rescue descent is necessary.
4. Pin the Mounting Pin around the Harness Straps: Position the Mounting Pin (A) around the Web Straps (B). Push
the Locking Pin (C) in under the Web Straps until the Locking Buttons engage (pop out) and the Red Warning Ring
(D) is no longer visible. Pull the Harness Straps tight.
5. Attach and adjust the Clip Straps: Attach the Locking Clips (A) on each Clip Strap (B) to the Back Straps or Waist
Belt on the Harness. The webbing should pass through both slots on the Locking Clip so the Locking Clip does not
slide freely on the webbing. Adjust the Clip Straps so the Self-Rescue Backpack is centered on the users back and the
bottom of the Backpack can not ip up during use.
6. Secure the Release Cord to the Harness Shoulder Strap: Drape the Release Cord Shoulder Strap (A) over the
right Shoulder Strap (B) on the Harness. Fasten the Hook and Loop Strip (C) around the Shoulder Strap webbing.
3.3 HARNESS MOUNTING - EASY-LINK™ D-RING: On 3M Full Body Harnesses equipped with an Easy-Link™ Dorsal
D-Ring, the Self-Rescue Descent System attaches to the upper device adapter on the Easy-Link D-Ring (see Figure 9). To
mount the Self-Rescue System on the Harness:
1. Open the Mounting Pin: Push in the Locking Buttons (A) simultaneously and slide the Locking Pin (B) out.
2. Cover the Harness Dorsal D-Ring: Unsnap the D-Ring Cover (A). Slide the D-Ring Cover over the Dorsal D-Ring
(B) on the Harness to prevent accidental connection to the wrong D-Ring when the Self-Rescue System is in use.
Snap the D-Ring Cover shut.
;
Covering the Harness Dorsal D-Ring is optional, but leaving the D-Ring uncovered allows accidental connection to the
wrong D-Ring; in which case, the Self-Rescue System is unusable in the event rescue descent is necessary.
3. Pin the Mounting Pin to the Easy-Link D-Ring: Align the gate on the Mounting Pin (A) with the upper Easy-Link
Connection (B). Push the Locking Pin (C) through the Easy-Link Connection until the Locking Buttons engage (pop out)
and the Red Warning Ring (D) is no longer visible.
4. Attach and adjust the Clip Straps: Attach the Locking Clips (A) on each Clip Strap (B) to the Back Straps or Waist
Belt on the Harness. The webbing should pass through both slots on the Locking Clip so the Locking Clip does not
slide freely on the webbing. Adjust the Clip Straps so the Self-Rescue Backpack is centered on the users back and the
bottom of the Backpack can not ip up during use.
5. Secure the Release Cord to the Harness Shoulder Strap: Drape the Release Cord Shoulder Strap (A) over the Right
Shoulder Strap (B) on the Harness. Fasten the Hook and Loop Strip (C) around the Shoulder Strap webbing.
3.4 FALL PROTECTION EQUIPMENT ATTACHMENTS: The Self-Rescue Descent System is equipped with an Easy-Link™
D-Ring with attachment elements for Harness-Mounted Self-Retracting Devices (SRDs). Energy Absorbing Lanyards and
Overhead Anchorage SRDs attach to the D-Ring (see Figure 7). Harness Mounted SRDs are secured through the Easy-Link
Connection below the D-Ring with their designated Interface Connector (see Figure 10). See the instructions included with
the SRD for details regarding the Interface Connector and installation.
FIGURE 10: (A) DBI-SALA Nano-Lok™ Edge SRDs (B) DBI-SALA Nano-Lok SRDs (Twin) (C) DBI-SALA Nano-Lok SRDs
(Single) (D) Protecta Rebel™ SRDs (Twin) (E) DBI-TALON SRD (Twin)
;
Contact 3M with any questions or concerns regarding compatibility of your SRD with the Easy-Link System.
;
When connecting a DBI-SALA Nano-Lok™ Edge SRD, DO NOT ATTACH the velcro shock pack straps to the HARNESS
or SELF-RESCUE DEVICE.

17
4.0 USE
4.1 BEFORE EACH USE: Verify that your work area and Personal Fall Arrest System (PFAS) meet all criteria dened in
Section 2 and a formal Rescue Plan is in place. Inspect the Self-Rescue System per the ‘User’ inspection points dened
on the “Inspection and Maintenance Log” (Table 2). If inspection reveals an unsafe or defective condition, do not use the
system. Remove the system from service and destroy, or contact 3M regarding replacement or repair.
;
Check to make sure the Red Assisted Rescue Ring is located on the side of the bag and is accessible for assisted rescue
operation.
4.2 FALL ARREST CONNECTIONS: The Self-Rescue System is used with a Full Body Harness and Energy Absorbing Lanyard
or Self-Retracting Device (SRD). Figure 7 illustrates connection of the Lanyard (A) or SRD (B) between the Harness and
Self-Rescue System. Connect the Lanyard or SRD between the D-Ring on the Self-Rescue System and the back Dorsal
D-Ring on the Harness as instructed in the instructions included with the Lanyard or SRD.
;
Horizontal Lifeline Connections: See the product instruction for your Horizontal Lifeline (HLL) for proper
connection of the Lanyard or SRD to the HLL.
4.3 SELF-RESCUE OPERATION: The Self-Rescue System is equipped with a Release Cord to initiate descent (see Figure 11).
To release the Easy-Link D-Ring™ from the Descent Device and begin descending to safety:
;
Before descending with the Self-Rescue System always check the descent path and landing zone below for sharp
edges that can cut the lifeline and other potential hazards that may injure the worker. Make sure the landing area is
clear of any obstructions that you might strike.
;
When descent is activated, harness mounted SRDs or Lanyards and the attached Easy-Link D-Ring will completely
decouple from the Self-Rescue Descent Device. On Twin Leg SRDs or Twin Leg Lanyards, make sure the unanchored
leg of the SRD or Lanyard is not connected to the Harness or anywhere else on the user’s person where it will interrupt
descent.
1. Pull up on the Red Tab on the Release Cord Shoulder Strap to expose the Red Pull Handle.
2. Grasp the Red Pull Handle and pull the Release Cord rmly to release the Easy-Link D-Ring and begin descending.
3. Bend your knees and brace for the landing.
4.4 ASSISTED RESCUE OPERATION: In the event the wearer is incapacitated, the Red Assisted Rescue Ring can be
accessed with the accessory DBI-SALA Rescue Pole or similar equipment to initiate descent (see Figure 12). To perform an
assisted rescue with the DBI-SALA Rescue Pole:
;
Before descending with the Self-Rescue System always check the descent path and landing zone below for sharp
edges that can cut the lifeline and other hazards that may injure the worker. Make sure the landing area is clear of
any objects that the incapacitated user might strike. Wherevever possible station personnel at critical areas along the
descent path to guide the incapacitated user safely to the landing area.
;
When descent is activated, harness mounted SRDs and the attached Easy-Link D-Ring will completely decouple
from the Self-Rescue System. On Twin Leg SRDs, make sure the unanchored leg of the SRD is not connected to the
Harness or anywhere else on the user’s person where it will interrupt descent.
1. Rotate each section of the Rescue Pole counterclockwise and pull to extend the pole. Turn each section clockwise to
lock in place.
2. Open the Spring Latch on the Rescue Pole Head.
3. Position the Tagline Carabiner in the crook of the Rescue Pole Head. Secure the Carabiner in the Rescue Pole Head
with the Spring Latch so the Carabiner Gate is open.
4. Grasp the Rescue Pole and tail end of the Tagline. Reach with the Rescue Pole and position the open Carabiner around
the Red Assisted Rescue Ring. Pull back on the Rescue Pole to release the Spring Latch and close the Carabiner Gate.
5. Pull the Tagline to release the Easy-Link D-Ring and initiate descent.
;
The Red Assisted Rescue Ring is designed to detach from the Self-Rescue System when pulled. If the Tagline is
pulled from below, the Rescue Ring and attached Tagline may fall to the surface below. Make sure the rescuer is not
standing where they might be hit by the falling Tagline or Carabiner.
4.5 AFTER A DESCENT: The Self-Rescue 50 and Self-Rescue 100 Systems are single-descent devices. After a descent,
remove the Self-Rescue System from service and contact 3M regarding repair.
;
Only 3M or parties authorized in writing may make repairs to this equipment.
;
Internal components of the Self-Rescue System will heat up during a long descent. Do not open the backpack or
remove it from the harness until it has sufcient time to cool.

18
5.0 INSPECTION
5.1 INSPECTION FREQUENCY: The Self-Rescue System must be inspected at the intervals dened in Section 1. Inspection
procedures are described in the “Inspection and Maintenance Log” (Table 2). Inspect all other components of the Fall
Protection System per the frequencies and procedures dened in the manufacturer’s instructions.
;
Self-Rescue Systems are equipped with a Radio Frequency Identication (RFID) Tag (Figure 13). The RFID Tag can
be used in conjunction with a Handheld Reading Device to simplify inspection and inventory control and provide records
for your fall protection equipment.
5.2 DEFECTS: If inspection reveals an unsafe or defective condition, remove the Self-Rescue System from service
immediately and contact 3M regarding replacement or repair. Do not attempt to repair the Fall Arrest System.
;
Authorized Repairs Only: Only 3M or parties authorized in writing my make repairs to this equipment.
5.3 PRODUCT LIFE: The functional life of the Fall Arrest System is determined by work conditions and maintenance. As long
as the product passes inspection criteria, it may remain in service.
6.0 MAINTENANCE, SERVICING, STORAGE
6.1 CLEANING: Periodically clean the Self-Rescue System’s metal components with a soft brush, warm water, and a mild
soap solution. Ensure parts are thoroughly rinsed with clean water.
6.2 SERVICE: Only 3M or parties authorized in writing by 3M may make repairs to this equipment. If the Self-Rescue System
has been subject to fall force or inspection reveals an unsafe or defective conditions, remove the system from service and
contact 3M regarding replacement or repair.
6.3 STORAGE AND TRANSPORT: When not in use, store and transport the Self-Rescue System and associated fall protection
equipment in a cool, dry, clean environment out of direct sunlight. Avoid areas where chemical vapors may exist.
Thoroughly inspect components after extended storage.
7.0 LABELS
Figure 16 illustrates labels on the Self-Rescue System. Labels must be replaced if they are not fully legible.

Table 3 – Inspection and Maintenance Log
Inspection Date: Inspected By:
Components: Inspection: (See Section 1 for Inspection Frequency) User
Competent
Person
1
Self-Rescue System
Figure 15
Inspect the Harness Interface. Ensure the Locking Pin (A) is fully seated (Red Warning Ring is
not visible) and both Locking Buttons (B) are engaged.
Inspect the Easy-Link D-Ring (C) for damage, corrosion, and proper working condition.
Inspect inside the Easy-Link D-Ring opening (D) to ensure the lifeline termination is in good
condition and the Latch Fuse (E) has not been broken from previous deployment.
Inspect the Descent Device Housing (F) through the Front Flap (G) for distortion, cracks, or
other damage. Verify that the Red Rope Exit Seal (H) is in place.
Open the Back Zipper (I) far enough to validate the Lifeline (J) is dry, undamaged, and properly
spooled.
;
On the Self-Rescue TRAINING System, some discoloration and fraying of the
lifeline rope is expected after multiple descents (Figure 14). As long as strands of
the rope are not completely severed, the TRAINING System can remain in use for
up to 20 descents (see Appendix A).
Open the Hook and Loop Flap (L) on the side of the Backpack and verify that the Assisted
Rescue Cable (M) is properly seated in the in the slot on the Connector Side Housing Clip (N).
Inspect the Assisted Rescue Handle (O) to ensure that it is correctly positioned with the handle
protruding out the side of the Backpack.
All labels must be present and fully legible (see “Labels”).
Full Body Harness
Inspect the Full Body Harness per the manufacturer’s instructions.
Lanyards and
Self-Retracting
Devices
Inspect Lanyards and Self-Retracting Devices per the manufacturer’s instructions.
Serial Number(s): Date Purchased:
Model Number: Date of First Use:
Corrective Action/Maintenance: Approved By:
Date:
Corrective Action/Maintenance: Approved By:
Date:
Corrective Action/Maintenance: Approved By:
Date:
Corrective Action/Maintenance: Approved By:
Date:
Corrective Action/Maintenance: Approved By:
Date:
Corrective Action/Maintenance: Approved By:
Date:
Corrective Action/Maintenance: Approved By:
Date:
Corrective Action/Maintenance: Approved By:
Date:

20
APPENDIX A - SElf-REScuE TRAINING SYSTEM
L IMPORTANT: The Self-Rescue 50 System and Self-Rescue 100 System are single-descent systems. Once
used in a descent, they must be removed from service. Do not use the Self-Rescue 50 System or Self-Rescue
100 System for multiple descents as described in this Appendix. Only the Self-Rescue TRAINING System can be
used for multiple descents (for training only).
A.1 DESCRIPTION: The model 3320037 Self-Rescue TRAINING System is a multi-descent Self-Rescue Trainer
specically for training personnel in a controlled training environment. It must be used with backup fall
protection (SRL with Descent, Belay Line, etc.). Up to 20 descents of 30 ft. (9 m) or less can be performed
with each Self-Rescue Trainer.
A.2 BEFORE EACH DESCENT: Review the Training Descent Log (Table 3) to conrm the Self-Rescue Trainer
has not reached its 20 descent limit. If the Self-Rescue Trainer has been used in 20 descents it should be
removed from service, marked as “UNUSABLE”, and replaced. Contact 3M for replacement.
A.3 SETUP: Prior to each additional descent, the Self-Rescue Trainer must be recongured by a Competent
Person
1
per the following steps (shown in Figure A1):
1. Detach the Self-Rescue Backpack from the Harness and open the Back Flap:
A. Push in the Locking Buttons on the Mounting Pin and pull out the Locking Pin.
B. Flip the Backpack over to access the Back Flap.
C. Unzip and open the Back Flap.
2. Unsnap and remove the Rope Spool from the Spool Cover. Pull excess Lifeline played out in the previous
descent back through the Descent Device. Pull on the rope rather than the Rope Spool to prevent the
rope from pinching and binding in the spool or damaging the spool anges.
3. Attach the Easy-Link D-Ring to the Latch Assembly on the Descent Device:
A. Slide the Latch Coupling on the Easy Link D-Ring over the Latch Arm.
B. Push down on the Latch Arm until the Plunger Pin clicks into place.
C. Route the Lifeline around the hinged end of the Latch Arm. Remove any slack in the loop terminating
the Lifeline to the Easy-Link D-Ring by pulling excess rope back through the Descender.
4. Rewind the excess Lifeline onto the Rope Spool and then snap the Rope Spool back into the Spool Cover.
5. If the Red Assisted Rescue Ring was used in the previous descent, reconnect the Assisted Rescue Cable
to the Release Cable. Make sure the cable and cable stop on the Release Cable are fully seated in the
slot in the Assisted Rescue Cable Clip.
6. Reposition the Release Cable under the Hook and Loop Flap on the Shoulder Strap and then close the
ap. Any excess cable should be loosely looped and tucked under the Hook and Loop Flap.
7. Loosely loop any excess cable from the Assisted Rescue Handle and tuck it inside the Hook and Loop
Flap along the inside wall of the Backpack. Reposition the Assisted Rescue Handle with the anges of the
handle sandwiched between the two layers of the Backpack and the Red Assisted Rescue Ring protruding
out the side of the Backpack. Close the Hook and Loop Flap.
8. Pull up on the Easy-Link D-Ring to conrm the Latch Arm is fully latched.
A.4 INSPECTION: After setup and prior to each descent, the Self-Rescue Trainer must be inspected by a
Competent User per the procedures in the Inspection Checklist (Table 2).
A.5 AFTER EACH DESCENT: Record the descent in the Training Descent Log (Table 3).

22
Table 3 – Training Descent Log
Descents Serial Number Descent Date Inspector Trainer
1
2
3
4
5
6
7
8
9
10
11
12
13
14
15
16
17
18
19
20

USA
3833 SALA Way
Red Wing, MN 55066-5005
Toll Free: 800.328.6146
Phone: 651.388.8282
Fax: 651.388.5065
Brazil
Rua Anne Frank, 2621
Boqueirão Curitiba PR
81650-020
Brazil
Phone: 0800-942-2300
Mexico
Calle Norte 35, 895-E
Col. Industrial Vallejo
C.P. 02300 Azcapotzalco
Mexico D.F.
Phone: (55) 57194820
Colombia
Compañía Latinoamericana de Seguridad S.A.S.
Carrera 106 #15-25 Interior 105 Manzana 15
Zona Franca - Bogotá, Colombia
Phone: 57 1 6014777
Canada
260 Export Boulevard
Mississauga, ON L5S 1Y9
Phone: 905.795.9333
Toll-Free: 800.387.7484
Fax: 888.387.7484
EMEA (Europe, Middle East, Africa)
EMEA Headquarters:
Le Broc Center
Z.I. 1re Avenue - BP15
06511 Carros Le Broc Cedex
France
Phone: + 33 04 97 10 00 10
Fax: + 33 04 93 08 79 70
Australia & New Zealand
137 McCredie Road
Guildford
Sydney NSW 2161
Australia
Phone: +(61) 2 8753 7600
Toll-Free : 1800 245 002 (AUS)
Toll-Free : 0800 212 505 (NZ)
Fax: +(61) 2 8753 7603
Asia
Singapore:
1 Yishun Avenue 7
Singapore 768923
Phone: +65-6450 8888
Fax: +65-6552 2113
China:
38/F, Maxdo Center, 8 Xing Yi Rd
Shanghai 200336, P R China
Phone: +86 21 62753535
Fax: +86 21 52906521
Korea:
3M Koread Ltd
20F, 82, Uisadang-daero,
Yeongdeungpo-gu, Seoul
Phone: +82-80-033-4114
Fax: +82-2-3771-4271
Japan:
3M Japan Ltd
6-7-29, Kitashinagawa, Shinagawa-ku, Tokyo
Phone: +81-570-011-321
Fax: +81-3-6409-5818
WEBSITE:
3M.com/FallProtection
ISO
9001
FM534873
EU DECLARATION OF CONFORMITY:
3M.com/FallProtection/DOC
U.S. PRODUCT WARRANTY, LIMITED REMEDY
AND LIMITATION OF LIABILITY
WARRANTY: THE FOLLOWING IS MADE IN LIEU OF ALL WARRANTIES OR CONDITIONS, EXPRESS
OR IMPLIED, INCLUDING THE IMPLIED WARRANTIES OR CONDITIONS OF MERCHANTABILITY OR
FITNESS FOR A PARTICULAR PURPOSE.
Unless otherwise provided by applicable law, 3M fall protection products are warranted against factory
defects in workmanship and materials for a period of one year from the date of installation or fi rst use
by the original owner.
LIMITED REMEDY: Upon written notice to 3M, 3M will repair or replace any product determined by
3M to have a factory defect in workmanship or materials. 3M reserves the right to require product be
returned to its facility for evaluation of warranty claims. This warranty does not cover product damage
due to wear, abuse, misuse, damage in transit, failure to maintain the product or other damage beyond
3M’s control. 3M will be the sole judge of product condition and warranty options.
This warranty applies only to the original purchaser and is the only warranty applicable to 3M’s fall
protection products. Please contact 3M’s customer service department at 800-328-6146 or via email at
[email protected] for assistance.
LIMITATION OF LIABILITY: TO THE EXTENT PERMITTED BY APPLICABLE LAW, 3M IS NOT
LIABLE FOR ANY INDIRECT, INCIDENTAL, SPECIAL OR CONSEQUENTIAL DAMAGES INCLUDING,
BUT NOT LIMITED TO LOSS OF PROFITS, IN ANY WAY RELATED TO THE PRODUCTS REGARDLESS
OF THE LEGAL THEORY ASSERTED.
GARANTÍA GLOBAL DEL PRODUCTO, REPARACIONES LIMITADAS
Y LIMITACIÓN DE RESPONSABILIDAD
GARANTÍA: EL SIGUIENTE TEXTO SIRVE A MODO DE GARANTÍA O CONDICIÓN, EXPLÍCITA O IMPLÍCITA,
E INCLUYE LAS GARANTÍAS O CONDICIONES IMPLÍCITAS DE COMERCIABILIDAD O APTITUD PARA UN
PROPÓSITO ESPECÍFICO.
A menos que las leyes locales indiquen lo contrario, los productos de protección contra caídas 3M tienen
garantía por defectos de fábrica en la mano de obra y en los materiales durante un período de un año desde
la fecha de instalación o desde el primer uso del propietario original.
REPARACIONES LIMITADAS: 3M reparará o reemplazará un producto si determina que tiene un defecto
de fábrica en la mano de obra o en los materiales y tras haber recibido una notifi cación por escrito sobre
el presunto defecto. 3M se reserva el derecho de exigir la devolución del producto a sus instalaciones
para evaluar los reclamos sobre la calidad. Esta garantía no cubre los daños ocasionados por el desgaste,
el abuso, el mal mantenimiento, o como consecuencia del traslado del producto, u otros daños ajenos al
control de 3M. 3M será el único capaz de determinar la condición del producto y las opciones de la garantía.
Esta garantía solo se aplica al comprador original y es la única garantía válida para los productos de
protección contra caídas 3M. Comuníquese con el departamento de servicio al cliente de 3M de su región
para obtener ayuda.
LIMITACIÓN DE RESPONSABILIDAD: EN LA MEDIDA PERMITIDA POR LAS LEYES LOCALES, 3M NO
SERÁ RESPONSABLE DE LOS DAÑOS INDIRECTOS, IMPREVISTOS, ESPECIALES O CONSECUENTES; ENTRE
ELLOS, LA PÉRDIDA DE INGRESOS RELACIONADOS DE CUALQUIER MANERA CON LOS PRODUCTOS,
INDEPENDIENTEMENTE DE LA TEORÍA JURÍDICA QUE SE PUDIERA INVOCAR.
/