Page is loading ...

FB47163
Jeep® TJ or XJ
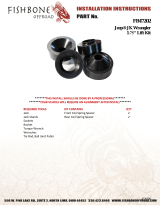
1.75” Front (TJ and XJ) or Rear (TJ Only) Coil Spacer
4716300
*******THIS INSTALL SHOULD BE DONE BY A PROFESSIONAL*******
*******YOUR VEHICLE WILL REQUIRE AN ALIGNMENT AFTER INSTALL*******
REQUIRED TOOLS
Jack
Jack Stands
Sockets
Rachet
Torque Wrench
Wrenches
Locking Pliers
C-Clamp
Tie Rod, Ball Joint Puller
KIT CONTAINS
Coil Spring Spacer
QTY
2

FB47163
Jeep® TJ or XJ
1.75” Front (TJ and XJ) or Rear (TJ Only) Coil Spacer
1 4716300
BEFORE INSTALLATION:
Check all part and hardware to make sure you have
a complete kit.
Inspect all steering and suspension parts before
installing your kit. Worn or damaged parts could fail
after install of your kit. Replace or repair any worn
or damaged parts.
INSTALLATION:
1) On a smooth, flat, and hard surface. Block
your tires and set the emergency brake.
2) Jack your vehicle up and set on jack stands.
3) Remove your front or rear tires and wheels.
Depending on where you are installing the
spacers.
4) Using a jack support the axle on the side of
the Jeep you are working on.
5) Remove the shock, unbolt the sway bar end
link from both sides of the vehicle, remove
the tie rod end nut and remove the tie rod
end from the knuckle. Remove coil spring
retaining clips.
6) Slowly release the jack until the axle drops
enough to remove the coil spring. (You
might need to unbolt the track bar from the
axle to get enough drop).
7) Remove the bump stop and bump stop
bracket.
8) Remove the factory spring isolator to do a
1” lift. Leave the factory spring isolator in if
you are doing a 1.75” lift and install the
Fishbone spring spacer.
9) Reinstall bump stop bracket and bump stop.
10) With the coil spring installed in the spring
pocket slowly raise the axle with your jack.
11) Once the axle is raised enough reattach the
tie rod end, reinstall front shock, and spring
retaining clip. (Reinstall track bar into the
axle mount if previously removed).
12) Repeat on the opposite side.
13) Reinstall the sway bar end links once both
sides are complete.
14) Install tires and wheels.
15) Set vehicle back on the ground.
16) Make sure to tighten all bolts to factory
torque specifications. Re-torque all bolts
after 500 miles.
WARNING!!!
This vehicle now has modified suspension. The
steering, braking and handling will be different than
an unmodified vehicle. Avoid driving conditions that
could cause loss of control. You must drive your
vehicle carefully! If larger tires are installed your
speedometer will read lower than the vehicles
actual speed.
ENJOY YOUR FISHBONE OFFROAD COIL SPRING
SPACERS!!!
/
