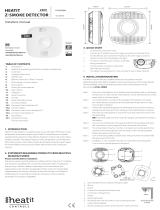
HEATIT 4512688 User manual
- Category
- Smoke detectors
- Type
- User manual
This manual is also suitable for

1
H
He
ea
at
ti
it
t
Z
Z-
-S
Sm
mo
ok
ke
e
B
Ba
at
tt
te
er
ry
y
Heatit Z-Smoke Battery is a mini-sized wireless smoke detector with built-in PIR motion sensor, temperature sensor and emergency light
(optional). Designed to protect your family against potential fire hazards, the Smoke detector is also capable of detecting movements and
reporting temperature to users. The Z-Wave Smoke Detector allows access to the “S2 Unauthenticated” class.
Heatit Z-Smoke Battery is a wirelessly operated photo-electronic Smoke Detector designed to operate with any Z-Wave enabled controller
devices; it also features smoke detecting, temperature sensing and IR detection. The Smoke Detector’s alarm situations, battery condition,
operating conditions, supervisory data and general fault information are sent to the Z-Wave Gateway/Control Panel wirelessly. The device is
also serially connected with other sensors in the Z-Wave gateway to serve as an extra siren.
The Smoke Detector is a Z-Wave enabled device and is fully compatible with any Z-Wave enabled network. Z-Wave is a wireless
communication protocol that uses a low-power RF radio. By taking advantage of the Z-Wave mesh network, commands can be transmitted to
their destination via intermediary “listening” Z-Wave products.
The Smoke Detector calibrates for the air contents after warming up to determine a standard condition for the environment. It can also be
manually instructed to calibrate for air content. It is also pre-programmed to automatically calibrate once a month.
P
Pa
ar
rt
ts
s
I
Id
de
en
nt
ti
if
fi
ic
ca
at
ti
io
on
n
1. LED Indicator /Function Button / Emergency Light
Red LED
Turns ON briefly: Transmitting signal.
Quick flash: Alarming.
Flashes every 1 second: Smoke Detector under Sleep Mode
Flashes every 2 seconds: Smoke Detector under warmup and calibration process.
Flashes every 4 seconds: battery exhausted.
Orange LED
Flash every second: Device power on/Calibration failed.
Flashes every 5 seconds: Detecting smoke failed or device malfunctioning.
Flashes every 4 seconds: battery exhausted.
Flashes every 45 seconds: Low battery condition
Function Button
Press the button once to send test signal.
Press the button once during alarm to silence the alarm.
Press the button twice to discharge before inserting new batteries.
Press the button 3 times within 1.5 seconds to send a learn code.
Press and hold the button for 10 seconds to enter calibration process.
Press and hold the button for 20 seconds to perform factory reset.
White LED (Emergency Light)
The emergency light will begin to flash slowly to alert uses that the system is alarming.
2. IR Lens
3. Buzzer
4. Battery Compartment Fixing Screw
5. Battery compartment
6. Hooks
7. Mounting Bracket
8. Mounting Holes (for Hooks)
The Hooks of the Mounting Bracket can hook into this Mounting Hole.
9. Mounting Sheet

2
F
Fe
ea
at
tu
ur
re
es
s
B
Ba
at
tt
te
er
ry
y
Three 3V CR123 Lithium batteries are used to supply power to the Smoke Detector.
The Smoke Detector will report its battery percentage to the Control Panel respectively at 100%, 75%, 50%, and 25%. If the battery
voltage is low (25%), a Low Battery signal will be sent to the Control Panel to notify the user.
When the Smoke Detector is low on battery, a low battery signal will be transmitted along with regular signal transmissions. The
Orange LED will flash with accompanying low-volume beep once every 45 seconds.
The Red and Orange LED will flash once every 4 seconds when the batteries are exhausted.
<
<N
NO
OT
TE
E>
>
When changing batteries, after removing the old batteries, press the Function button twice to fully discharge before inserting new
batteries.
T
Te
es
st
ti
in
ng
g
t
th
he
e
S
Sm
mo
ok
ke
e
D
De
et
te
ec
ct
to
or
r
By pressing the Function button on the Smoke Detector, you can test if the Smoke Detector is functioning normally.
If the Smoke Detector functions normally, the Red LED will be on for 2 seconds followed by a 2-tone beep.
If the buzzer sounds 2-tone beeps 3 times, the “Optical Chamber” on the Smoke Detector is either dirty or out-of-order.
T
Te
em
mp
pe
er
ra
at
tu
ur
re
e
&
&
S
Sm
mo
ok
ke
e
D
De
et
te
ec
ct
ti
io
on
n
Temperature detection:
Once the temperature rises by 8.25 °C per minute (rise rate) or exceeds the threshold temperature of 57.25 °C, the Smoke
Detector lights up its LED to indicate it is sending an alarm report. The Smoke Detector then activates its buzzer with LED
flashing rapidly for 10 seconds for local warning.
After this 10-second local warning period, the Smoke Detector performs a follow-up temperature check. If the temperature is
found to be alarming still, the Smoke Detector will repeat another 10 seconds of local warning with buzzer and rapid flashing
LED.
The Smoke Detector will repeatedly perform follow-up checks until the temperature is lower than the set value of 49°C. The
alarm will stop automatically if the temperature drops below 49°C. The alarm can also be stopped manually by using the “Alarm
Silence” function.
The Smoke Detector can also report temperature signal to the Control Panel in every 30 to 33 minutes with Smoke Detector
normal operating or when temperature changes by +/- 2°C.
Smoke Detection:
Once the concentration of the smoke exceeds the set threshold value, the Smoke Detector lights up its Red LED to indicate it is
sending the Smoke Alarm signal to the Z-Wave Gateway/Control Panel. After the transmission is completed, the Smoke Detector
then activates its buzzer with the Red LED flashing rapidly for 10 seconds for local warning.
After this 10-second local warning period, the Smoke Detector proceeds to perform a follow-up smoke check. If the smoke
concentration is found to be alarming still, the Smoke Detector will repeat another 10 seconds of local warning with buzzer and
rapid flashing Red LED.
The Smoke Detector will repeatedly perform follow-up checks until the smoke concentration is lower than the set value, then the
alarm will be stopped automatically or the alarm can be stopped manually by using the “Alarm Silence” function.
Once a Smoke Alarm Signal has been transmitted, the Smoke Detector will continue to send alarm signals every 2 minutes
when the smoke concentration continues to be higher than allowed. This 2-minute cycle will be repeated until the smoke
concentration is lower than the set value, then the alarm will be stopped automatically or the alarm can be stopped manually by
using the “Alarm Silence” function.
IR Detection:
The Smoke Detector will transmit signal to the Control Panel if any movement is picked up within the IR detection coverage. The
buzzer will not sound and the LED will not flash. Please refer to your Control Panel for details.
E
Em
me
er
rg
ge
en
nc
cy
y
L
Li
ig
gh
ht
t
The Smoke Detector has a built-in emergency light that can provide visual alerts in case of emergency. When the Smoke
Detector is activated, the emergency light will begin to flash slowly to indicate the system is alarming.
A
Al
la
ar
rm
m
S
Si
il
le
en
nc
ce
e
When the Smoke Detector is alarming, pressing the Function Button will put the Smoke Detector into Alarm Silence mode to
silence the alarm for 9 minutes. The buzzer will only stop sounding after the alarm has been activated for at least 1-minute. If the
button is pressed before alarm time reaches 1 minute, the Smoke Detector will wait until alarm time has reach 1 minute before
silencing the alarm.
During the 9-minute Alarm Silence period, the Red LED will flash once per second. The Smoke Detector will continue to monitor
smoke concentration during the alarm silence period:
After the 9-minute Alarm Silence period has expired, if the smoke concentration has dropped below alarm threshold, the Smoke
Detector will emit a 2-tone beep and return to normal operation without sounding alarm.
If smoke concentration still exceeds alarm threshold, the Smoke Detector will start alarming again.
If smoke concentration continues to rise during Alarm Silence period and exceeds a second alarm threshold, the Smoke
Detector will start alarming again. An alarm activated by exceeding the second alarm threshold could not be silenced by pressing
the Function Button.
R
Re
ec
ca
al
li
ib
br
ra
at
ti
io
on
n
As the operation condition of the Smoke Detector may vary after being installed for some time, you may wish to recalibrate the Smoke
Detector to take a new smoke detection threshold value and ensure optimal performance of the Smoke Detector. To do this:
Press 10 seconds on the Function button and hold until the Red LED starts to flash. The Smoke Detector will sound 2 short
beeps then follow the calibration process described in step 4 of Installation Procedure to take the new reference value.

3
Every time the battery is removed and reinserted, the Smoke Detector will also take the new threshold value following the
warming and calibration process.
A
Au
ut
to
o-
-C
Ca
al
li
ib
br
ra
at
ti
io
on
n
After first installation, Smoke Detector will perform auto-calibration after 4 hours. Afterwards it will perform auto-calibration once
every month. During the auto-calibration process, Smoke Detector will not emit any sound.
If auto calibration fails, the Orange LED will start to flash every second and the Smoke Detector will send calibration failure code
to the Z-Wave Gateway/control panel. The Orange LED flashing can be cancelled by removing and reloading the battery, or by
manually starting the calibration process.
If the manual calibration fails again, Smoke Detector will emit continuous beeps and the Red LED will also flash continuously. In
this case you need to remove the batteries, wait for 30 seconds then reload the batteries to restart Smoke Detector.
<
<N
NO
OT
TE
E>
>
When Smoke Detector auto calibration fails, the smoke alarm function will still work normally using the threshold value taken
from last successful calibration
A
Ad
dd
d
D
De
ev
vi
ic
ce
e
(
(I
In
nc
cl
lu
us
si
io
on
n)
)
The Smoke Detector can be included and operated in any Z-Wave network with other Z-Wave certified devices from other manufactures
and/or other applications. All non-battery operated nodes within the network will act as repeaters regardless of vendor to increase
reliability of the network.
Insert three 3V CR123 Lithium batteries into the battery compartment. Orient the battery according to the battery compartment
polarity indication before insertion.
<
<N
NO
OT
TE
E>
>
The Smoke Detector has a foolproof mechanism which prohibits cover closure without first installing battery. Press down on the
tab and insert three new batteries into the compartment.
After batteries are inserted, the Smoke Detector will sound 2 short beeps, the Red LED will start to flash and initiates a 1-minute
warm-up period.
During the 1-minute warming period, you can learn (include) the Smoke Detector into the Panel, refer to Add Device (Inclusion)
for details.
Put the Z-Wave gateway or control panel into Inclusion or Learning mode (please refer to the Z-Wave gateway or control panel
manual).
Within 1.5 seconds, press the Function button 3 times. The Smoke Detector will emit a 2-tone beep and the LED will turn on for
~2 seconds. Refer to the operation manual of the Z-Wave gateway or control panel to complete the learn-in process.
When the 1-minute warming period is over, one short beep will sound to indicate that the Smoke Detector is starting calibration
process. Learning/Inclusion is prohibited during calibration. If the Smoke Detector has not been included in the panel yet, wait for
calibration to complete before including the Smoke Detector. The completion of calibration process will be notified by a 2-tone
beep and the Red LED will turn off. If the Smoke Detector gives out continuous beeps instead, it indicates that the Smoke
Detector has failed the calibration. Remove the battery and restart from step 1 after a pause of at least 30 seconds.
After the warming-up and calibration process, if the Smoke Detector is not learned (included) into the Z-Wave gateway/Control
Panel, complete the learning/inclusion process then refer to Installation section below to mount the Smoke Detector.
If the sensor has already been included (learnt) into another Z-Wave Gateway/Control Panel, or if the sensor is unable to be
learnt into the current Z-Wave Gateway/Control Panel, please exclude it first (see Exclusion) before attempting to include it into
the current Z-Wave Gateway/Control Panel.
R
Re
em
mo
ov
vi
in
ng
g
D
De
ev
vi
ic
ce
e
(
(E
Ex
xc
cl
lu
us
si
io
on
n)
)
The Smoke Detector must be removed from existing Z-Wave network before being included into another. There are two methods
available to exclude a device.
Exclusion Mode
Put the Z-Wave gateway or control panel into Exclusion mode (please refer to the Z-Wave gateway or control panel manual).
Within 1.5 seconds, press the Function button 3 times and the Smoke Detector will be removed from the Z-Wave network.
Factory Reset
(Only use factory reset when network Control Panel/Gateway is missing or inoperable).
Press and hold the button of the smoke detector for 20 seconds. Release the button when you hear 3 beeps to perform factory
reset.
<
<N
NO
OT
TE
E>
>
Before you remove or factory reset the Smoke Detector, please ensure that the device DSK information has been removed or
does not exist in the gateway. If you remove or factory reset the device, but its DSK still exists in the gateway, the gateway will
automatically include the device again.
Factory resetting the Smoke Detector will restore it to factory default settings (excluded from the Z-Wave network). The Z-Wave
gateway or control panel will still keep its Z-Wave settings. Please refer to the gateway or control panel manual on how to
remove the Smoke Detector’s Z-Wave settings.
R
Ra
an
ng
ge
e
T
Te
es
st
t
To test whether the device is able to communicate with the Z-Wave gateway or control panel:
Put the gateway / panel into range test mode (Walk Test).
Press the Function button on the device.
The gateway / panel should display if the device is within the operation range (please refer to the operation manual of the
gateway / panel).
Z
Z-
-W
Wa
av
ve
e
S
Sl
le
ee
ep
p
M
Mo
od
de
e
The Smoke Detector will enter Z-Wave Sleep mode (to conserve power) after waking up for a short period of time (~10 seconds).
While in Z-Wave sleep mode, Z-Wave gateways or control panels are unable to send commands to the Smoke Detector.
To program the Smoke Detector, please send command(s) to the Smoke Detector within the wake-up period.

4
Installation
I
In
ns
st
ta
al
ll
la
at
ti
io
on
n
G
Gu
ui
id
de
el
li
in
ne
e
It is recommended that the installation site be in the center area of the ceiling.
Do not locate the detector in the following locations:
The Kitchen – Smoke from cooking might cause an unwanted alarm.
Near a ventilating fan, florescent lamp or air-conditioning equipment – air drafts from them may affect the
sensitivity of the detector.
Near ceiling beams or over a cabinet – stagnant air in these areas may affect the sensitivity of the
detector.
In the peak of an “A” frame type of ceiling.
I
In
ns
st
ta
al
ll
la
at
ti
io
on
n
R
Re
ec
co
om
mm
me
en
nd
da
at
ti
io
on
n
It is recommended to install the Smoke Detector in the following locations.
In a ceiling area with full view of its detection coverage unobstructed by appliances and furniture.
Near the entrance of a room or house to monitor entry activity.
Limitations
Do not install the Smoke Detector exposed to direct sunlight.
Avoid installing the Smoke Detector in areas where devices may cause rapid change of temperature in the detection area, i.e.
air conditioner, heaters, etc.
Avoid large obstacles in the detection area.
Do not pointing directly at sources of heat e.g. Fires or boilers, and not above radiators.
Avoid moving objects in the detection area i.e. curtain, wall hanging etc.
Press the Function Button to enter Test Mode. Walk around the protected area noting when the LED lights up and check that the
detection coverage is adequate.
When detection coverage is found to be satisfying, installation is now completed.
M
Mo
ou
un
nt
ti
in
ng
g
t
th
he
e
S
Sm
mo
ok
ke
e
D
De
et
te
ec
ct
to
or
r
Step 1. Place the Smoke Detector at desired mounting location and use the Range Test function to make sure the Smoke Detector
can be received by the Control Panel at mounting location.
Step 2. Take out the mounting sheet included in the package. The picture’s size equals the Smoke Detector’s actual size and the
perforated design allows for easy tear-off after installation.
Step 3. Position the sheet tight against the ceiling and use the four holes as template to drill holes and insert wall plugs if required.
Step 4. Place the mounting bracket on top of the mounting sheet and screw it onto the wall.
Step 5. The Smoke Detector has three notches on its back cover for easy identification.
Step 6. Hold the Smoke Detector with extra care and align the three notches with the hooks on the mounting bracket.
Step 7. Rotate clockwise to lock the hook.
Step 8. Installation is now complete. You can now tear off the mounting sheet.
The Smoke Detector is designed to be mounted on the ceiling. The ideal mounting height for the Smoke Detector is 2.7 meters to
3 meters. Mounting above 3 meters can affect detection performace.
The Smoke Detector can support detection coverage within a radius of 4 meters. Please refer to below figures for the installation
details.
When mounted on the ceiling, the PIR has better detection performance against horizontal movement.

5
Z
Z-
-W
Wa
av
ve
e
I
In
nf
fo
or
rm
ma
at
ti
io
on
n
Device Type: Sensor – Notification Smoke Alarm
Role Type: Listening Sleeping Slave (LSS)
Max Association Group: 2
Command Class Support/Control
Mandatory CC Support:
Z-Wave Plus Info CC
Association CC, (S2)
Multi Channel Association, (S2)
Association Group Information CC, (S2)
Transport Service CC
Version CC, (S2)
Manufacturer Specific CC, (S2)
Device Reset Locally CC, (S2)
Power Level CC, (S2)
Battery CC, (S2)
Security 2
Notification CC, (S2)
Sensor Multilevel CC, (S2)
Supervision CC, (S2)
Wake UP CC
Firmware Update Md CC, (S2)
Z
Z-
-W
Wa
av
ve
e’
’s
s
G
Gr
ro
ou
up
ps
s
(
(A
As
ss
so
oc
ci
ia
at
ti
io
on
n
C
Co
om
mm
ma
an
nd
d
C
Cl
la
as
ss
s
V
Ve
er
rs
si
io
on
n
2
2)
)
The Smoke Detector can be set to send reports to associated Z-Wave devices. It supports 2 association groups.
Group 1 for “LifeLine”: (maximum node: one)
Battery CC (COMMAND_CLASS_BATTERY)
Notification CC,V4 (COMMAND_CLASS_NOTIFICATION)
SensorMutilevel CC, V4 (COMMAND_CLASS_SENSOR_MULTILEVEL)
Device Reset Locally CC (COMMAND_CLASS_DEVICE_RESET_LOCALLY)
Group 2 for “Smoke Basic set”: (maximum node: one)
Basic CC (COMMAND_CLASS_BASIC)
When the Smoke Detector is active, it will send Basic Set (0xFF) in Group 2.
When the Smoke Detector is restored, it will send Basic Set (0x00) in Group 2.
C
Co
om
mm
ma
an
nd
d
C
Cl
la
as
ss
s
D
Da
at
ta
a
F
Fo
or
rm
ma
at
t
Battery: [COMMAND_CLASS_BATTERY] [BATTERY_REPORT]
0x64 --- 100% Battery Full
0x4B --- 75% Battery
0x32 --- 50% Battery
0x19 --- 25% Battery
0xFF --- Battery Dead (Cut Off)
Smoke Detection Triggered/Smoke Detection Restored: [COMMAND_CLASS_NOTIFICATION] [NOTIFICATION_REPORT]
Smoke Alarm Triggered: 00 00 00 FF 01 02 00
Smoke Alarm Restored: 00 00 00 FF 01 00 01 02
Smoke Alarm Silenced: 00 00 00 FF 01 06 00
Heat Detection Triggered/Heat Detection Restored: [COMMAND_CLASS_NOTIFICATION] [NOTIFICATION_REPORT]
Heat Alarm Triggered: 00 00 00 FF 04 02 00
Heat Alarm Restored: 00 00 00 FF 04 00 01 02
Heat Alarm Silenced: 00 00 00 FF 04 09 00
Movement Detection Triggered/Movement Detection Restored: [COMMAND_CLASS_NOTIFICATION]
[NOTIFICATION_REPORT]
Movement Detection Triggered: 00 00 00 FF 07 08 00
Movement Detection Restored: 00 00 00 FF 07 00 01 08
Tamper Open/Close report [COMMAND_CLASS_NOTIFICATION] [NOTIFICATION_REPORT]
The smoke detector is protected by a tamper switch which is compressed when the smoke detector is hooked onto the
mounting bracket. When the smoke detector is removed from the mounting bracket, the tamper switch will be activated and
the smoke detector will send a tamper open signal to the system control panel to remind the user of this condition.
Tamper Open : 00 00 00 07 03 00 00

6
Tamper Close: 00 00 00 07 00 01 03
Temperature Report: [COMMAND_CLASS_SENSOR_MULTILEVEL] [SENSOR_MULTILEVEL_REPORT]
The Smoke Detector can report temperature signal to the Control Panel every 30 to 33 minutes with Smoke Detector normal
operating or when temperature changes by +/- 2°C.
Temperature: 01 22 00 FA
Sensor Type : 0x01
Size : 2
Scale : 0
Precision : 1
If temperature signal 01 22 00 FA is transmitted, 00 FA can be viewed as 0x00FA in Hexadecimal number. You can convert
hexadecimal to decimal and divide by 10 to check the temperature data (in Celsius).
0x00FA=250=25.0℃.
-
 1
1
-
 2
2
-
 3
3
-
 4
4
-
 5
5
-
 6
6
HEATIT 4512688 User manual
- Category
- Smoke detectors
- Type
- User manual
- This manual is also suitable for
Ask a question and I''ll find the answer in the document
Finding information in a document is now easier with AI
Related papers
-
 HEATIT Z-Wave Z-Smoke Smoke and Multisensor 230V Black User manual
-
 HEATIT Z-Smoke Detector Owner's manual
-
HEATIT 4512688 Installation guide
-
 HEATIT VANNLEKKASJESENSOR, HVIT Quick start guide
-
HEATIT Thermofloor User manual
-
HEATIT Z-TEMP2 User manual
-
HEATIT Z-WATER User manual
-
HEATIT 4512673 Operating instructions
-
 HEATIT 5430131 User guide
-
HEATIT 1444430 User guide
Other documents
-
Climax Technology SD-32 Smoke Detector User manual
-
Climax SD-29-SC-AC Series Wireless Smoke Detector User manual
-
Popp POPE701486 User manual
-
Climax Technology WLS-23 Water Leak Sensor User guide
-
Climax DC-23ZW User manual
-
Yale KML22079 User guide
-
EVERSPRING HSP02 User manual
-
AJAX FireProtect 2 Jeweller Wireless Fire Detector User manual
-
 BRK Brands ZCOMBO User manual
-
Risco Agility 3 Installer Manual


