Infinity APIINFIMS User manual

Category
Musical Equipment
Type
User manual

This manual is also suitable for

IMS
Input Management System
kappa series
instructions
R
Vol
+
-
Select
2
INTRODUCTION
THANK YOU
for purchasing the Infinity
®
IMS Input Management System. So that we may
better serve you should your new product require service, please retain your original
purchase receipt and read the enclosed warranty registration card.
BOX CONTENTS
Your IMS box should contain all the items shown in Figure 1:
WARNING!
Playing loud music in an automobile can hinder your ability to hear traffic and
permanently damage your hearing. We recommend listening at low or moderate
levels while driving your car. Infinity accepts no responsibility for hearing loss, bodily injury
or property damage resulting from the use or misuse of this product.
INSTALLATION
IMPORTANT
To get the most out of your IMS’ features, we strongly recommend that installation be
entrusted to a qualified professional. Although these instructions explain how to install,
connect and set-up the IMS, they cannot show all of the different possible systems that can
be assembled using the IMS. Please ask your authorized Infinity car audio dealer about
professional installation.
INSTALLATION WARNINGS AND TIPS
Always use protective eyewear when using tools
Turn OFF the vehicle’s audio system and other electrical devices before beginning installa-
tion. disconnect the (–) negative lead from the vehicle’s battery.
• Check clearances on both sides of any planned mounting surface before drilling any holes
or installing any screws. Remember that the screws can extend behind the mounting
surface.
At the installation locations, locate and make a note of all fuel lines, hydraulic brake lines,
vacuum lines and electrical wiring. Use extreme caution when cutting or drilling in and
around these areas.
Before drilling or cutting holes, use a utility knife to remove unwanted fabric or vinyl to keep
material from snagging in the drill bit.
To minimize noise, when routing cables, keep input-signal cables away from power cables
and speaker wires.
When making connections, make certain they are secure and properly insulated.
• If the IMS’ fuse must be replaced, use only the same type and rating as the original. Do not
substitute another kind.
INSTALLING THE CONTROL HEAD
We recommend finding a location for the Control Head first, and then finding a
location for the Junction Box that is within the length of the Control Head’s integral 4m cable.
IMPORTANT INSTALLATION WARNINGS:
Do not install the Control Head where it may obstruct your view through the
windshield, or of your vehicle’s indicator displays.
Do not install the Control Head where it may hinder the function of safety
devices such as an airbag. Doing so may prevent the airbag from
functioning properly in the event of an accident.
• Mount the Control Head in a location that is easily accessible.
i
n
s
t
r
u
c
t
i
o
n
s
IMS
Input Management System
reference series
R
Vol
+
-
Select
Junction Box
Hands-Free
Microphone
Flush-Mount
Ring
Wiring
Harness
Adhesive
Strip
Bag with
Installation Screws*
*Contents
4 x #8 x 1” Screws for Junction Box
2 x #6 Screws for Control Head
2 x 3mm Machine Screws for U-Bracket
Instruction Manual, Quick-Start Guide
and Warranty Card
Velcro
®
Strip
U-Bracket
Hands-Free
Microphone
Surface-Mount
Holder
Control Head
F IGURE 1: BOX C ONTENTS
3
kappa series
The Control Head can be surface-mounted using the included U-Bracket, Velcro
®
strip, or
adhesive strip or it can be flush-mounted using the included Flush-Mount Ring.
UUssiinngg tthhee UU--BBrraacckkeett
1. Determine the location for the Control Head. Be sure to leave room to route the integral cable.
2. Attach the U-Bracket to the mounting location using fasteners that are appropriate for
the mounting surface, as shown in Figure 2.
3. Attach the Control Head to the U-Bracket as shown in Figure 2.
UUssiinngg tthhee VVeellccrr oo SSttrriipp
1. Determine the location for the Control Head. Be sure to leave room to route the integral cable.
2. Clean the mounting location with an alcohol swab or similar.
3. Remove the protective strip from the hook side of the Velcro strip and adhere the strip
to the mounting location.
4. Remove the protective strip from the loop side of the Velcro strip and adhere the strip
to the back of the Control Head.
UUssiinngg tthhee AAddhheessiivvee SSttrriipp
1. Determine the location for the Control Head. Be sure to leave room to route the integral cable.
IMPORTANT: Select the mounting location carefully — once the adhesive strip
has been adhered to the surface it is not possible to remove it and re-adhere it
elsewhere.
2. Clean the mounting location with an alcohol swab or similar.
3. Remove the protective strip from one side of the adhesive strip and adhere it to the
back of the Control Head.
4. Remove the remaining protective strip from the adhesive strip and adhere the Control
Head to the mounting surface.
INSTALLING THE JUNCTION BOX
The Junction Box should be installed in an out-of-the-way location where you can route the
input/output connections from all of the audio system’s components.
IMPORTANT: The Junction Box must be mounted within 4m of the Control Head
Use the 4 supplied #6 screws to secure the Junction Box to the mounting surface.
INSTALLING THE HANDS-FREE MICROPHONE
IMPORTANT INSTALLATION WARNINGS:
Do not install the microphone where it may obstruct your view through the
windshield, or of your vehicle’s indicator displays.
Do not install the microphone where it may hinder the function of safety devices
such as an airbag. Doing so may prevent the airbag from functioning properly in
the event of an accident.
The hands-free microphone’s design allows it to work properly from a wide variety of
installation locations. Experiment with different locations before permanently attaching the
microphone or routing its cable. The microphone has a ‘butterfly’ clip that lets you attach it
to a sun visor or similar location. A surface-mount mic holder is also included (see
Figure 3). The holder has an adhesive pad on the bottom and is made of a flexible material
so you can attach it to a curved surface. To attach the mic holder:
1. Clean the mounting surface with an alcohol swab or similar.
2. Remove the protective cover from the adhesive pad and adhere the mic holder to the
mounting surface.
3. Run the mic cable through the slot in the holder and tuck the microphone under the
holders ‘hood’, as shown in Figure 3.
4. Route the cable to the Junction Box and plug it into the Input 2 jack (see Figure 4, on page 4).
3mm
Machine Screws
(included)
Fasteners appropriate
for mounting surface
AB C
F IGURE 2: ATTACHING THE U-BRACKET
F
IGURE 3: INSERTING THE H ANDS-FREE M ICROPHONE IN THE H OLDER
4
L
R
SUB
REAR
FRONT
MIC INPUT
IMS
INPUT MANAGEMENT SYSTEM
WARRANTY VOID
POWER
IMS OUTPUT
USB
CHARGING
PORT
AUDIO OUT
1
3
4
DISPLAY
INPUT
POWER IN
HIGH
LOW
INPUT 5
FL
FR
INPUT
INPUT 6
High R-Purple/Blk
High R+Purple
Middle R-Gray/Blk
Middle R+Gray
Woofer R-Green/Blk
Woofer R+Green
High L-Brown/Blk
High L+Brown
Middle L-White/Blk
Middle L+White
Woofer L-Orange/Blk
Woofer L+Orange
ACC Red
OUT Blue
BAT+Yellow
BAT-Blk
LOWREAR/MIDFRONT/HIGH
R
Vol
+
-
Select
Junction Box
Front
Hands-Free
Microphone
(included)
Navigation Unit
Game Console
OEM RadioMusic Player
TO
MIC
INPUT
(
INPUT
2
)
TO
INPUT
1
TO
INPUT
5
TO
INPUT
6
TO
INPUT
7
POWER
/
GND
(
SEE
FIGURE
5
)
FROM
SPEAKER
OUTPUTS
TO
INPUT
3
OR
INPUT
4
TO
DISPLAY
INPUT
Control Head
Aftermarket CD Head Unit
Junction Box
Rear
Wiring Harness (included)
F IGURE 4: INPUT C ONNECTIONS
kappa series
5
CONNECTIONS
POWER CONNECTIONS
The included wiring harness contains the IMS power connections, as well as the Input 6
OEM radio speaker input connections. See Input 6, below for Input 6 connections.)
Wiring harness power connections (see Figure 5):
Yellow = +12V In
Red = Accessory
Black = Ground
Blue = +12V Out (for amp turn-on)
AUDIO INPUTS
(see Figure 4, on page 4)
INPUT 1:
3.5mm stereo jack. This input has priority over all other inputs, and is intended
for the audio (voice command) output of a navigation system. When an audio signal is
present at Input 1 the IMS will automatically switch to Input 1, and will return to the
previous input when the Input 1 audio signal ceases.
INPUT 2:
Bluetooth wireless and 2.5mm stereo jack. This input has priority over all other
inputs except Input 1, and is intended for use with a Bluetooth-enabled phone. The included
microphone plugs-into the Input 2 connector and enables hands-free performance, as well
as voice dialing when used with a VD-capable phone. Input 2 is actually two separate inputs,
since it also supports A2DP streaming from a music-enabled Bluetooth-capable phone, or
from a portable music player via available dongles.
INPUT 3:
3.5mm stereo jack. For audio devices like portable music players, CD players, etc.
INPUT 4:
3.5mm stereo jack. For audio devices like portable music players, CD players, etc.
INPUT 5:
Stereo RCA jack. Intended for use with an aftermarket CD head unit. Input 5 has
selectable input sensitivity via a 2-position switch located next to the input connection:
High is high-sensitivity, for use with low-output head units.
Lo is low sensitivity, for use with high-output head units.
INPUT 6:
6-Pair bare wires on included wiring harness. Input 6 is intended for the speaker
outputs of the vehicle’s OEM radio. Input 6 has left and right Front (High), Rear (Middle) and
Woofer connections.
The Input 6 wiring harness color-coding is:
Front Left: Brown (+) Brown/Black (—)
Front Right: Purple (+) Purple/Black (—)
Rear Left: White (+) White/Black (—)
Rear Right: Gray (+) Gray/Black (—)
Woofer Left: Orange (+) Orange/Black (—)
Woofer Right: Green (+) Green/Black (—)
If the OEM radio’s speaker outputs are bandwidth-limited (high/midrange/low), connect
them as follows:
Radio high to IMS Front Left & Right
Radio middle to IMS Rear Left & Right
Radio low to IMS Woofer Left & Right
The Front/High, Rear/Middle and
Woofer/Low input signals are blend-
ed to stereo by the IMS. After con-
necting the OEM radio to Input 6,
you must balance these three inputs:
1. Turn the OEM radio ON and tune
to a strong radio station.
2. Turn the Front/High blend control
clockwise until the Blend LED just
barely lights (see Figure 5). Then
repeat with the Rear/Mid blend
control and again with the Low
blend control.
INPUT 7:
3.5mm stereo jack. Located on the front of the Control Head, this jack is ideal for
temporary connections (game consoles, portable DVD players, etc).
DISPLAY
INPUT
FL
FR
High R
High R
Middle
Middle
Woofer
Woofer
High L-
High L
Middle
LOWREAR/MIDFRONT/HIGH
Blend Controls Blend LED
F IGURE 5: ADJUSTING THE I NPUT 6
B LEND C ONTROLS
1
3
4
DISPLAY
INPUT
POWER IN
HIGH
LOW
INPUT 5
FL
FR
INPUT
INPUT 6
High R-Purple/Blk
High R+Purple
Middle R-Gray/Blk
Middle R+Gray
Woofer R-Green/Blk
Woofer R+Green
High L-Brown/Blk
High L+Brown
Middle L-White/Blk
Middle L+White
Woofer L-Orange/Blk
Woofer L+Orange
ACC Red
OUT Blue
BAT+Yellow
BAT-Blk
LOWREAR/MIDFRONT/HIGH
TO INPUT 6/POWER IN
BLACK: TO GROUND
RED: TO ACCESSORY
YELLOW: TO +12V
BLUE: +12V OUT
(FOR AMP TURN-ON)
TO OEM RADIO
SPEAKER OUTPUTS
(SEE FIGURE 4)
Junction Box
Wiring
Harness
(included)
F IGURE 5: POWER C ONNECTIONS
6
AUDIO OUTPUTS
The IMS has stereo Front and Rear RCA-type output connectors, and a mono Sub RCA-type
output connector. All stereo sources appear at both the Front and Rear outputs, which are
controlled by the IMS’ Balance and Fader controls (see Audio Adj, on page 8).
The Sub output connector is a pass-through for the Input 6 Woofer/Low input signal and
does not function for any other IMS input. The level of the Sub output is controlled by the
IMS’ Volume Knob, and is balanced with the Front and Rear outputs by the Sub Level
control (see Sub Level, on page 8).
Connect the IMS’ Front and Rear outputs to the system’s front and rear amplifier inputs;
connect the IMS’ Sub output to the system’s subwoofer amplifier input. See Figure 6.
IMS OUTPUT
This RJ45 connector duplicates the signal found at the Audio Out connections (see above),
and can be used in place of the Audio Out RCA jacks when connecting the IMS to compati-
ble Infinity Reference Series amplifiers. Connection is made via standard CAT-5 cable with
RJ45 plugs. (See Figure 6.)
NOTE: WHEN USING THE IMS OUTPUT JACK IT IS NOT NECESSARY TO CONNECT
THE
+12V OUT WIRING HARNESS WIRE (
SEE
FIGURE 5, ON PAGE 5), SINCE THE IMS
O
UTPUT CONNECTION INCLUDES AN AMPLIFIER TURN-ON FUNCTION.
USB CHARGING PORT
A standard USB connector that supplies charging voltage to compatible music players and
other components. See Figure 7. Use the USB charging cable included with the component.
NOTE: THE USB CHARGING PORT ONLY SUPPLIES A CHARGING VOLTAGE IT DOES NOT
ENABLE ANY AUDIO OR CONTROL FUNCTIONS
.
L
R
SUB
REAR
FRONT
MIC INPUT
IMS
INPUT MANAGEMENT SYSTEM
WARRANTY VOID
POWER
IMS OUTPUT
USB
CHARGING
PORT
AUDIO OUT
Junction Box
Front
TO
FRONT
OUTPUTS
TO
REAR
OUTPUTS
TO
SUB
OUTPUT
TO
IMS
CONNECTION
TO
IMS
CONNECTION
TO
IMS
CONNECTION
TO
IMS
OUTPUT
(
IN
PLACE
OF
AUDIO
OUT
CONNECTIONS
)
Front
Speakers
4-Channel
Amp
Subwoofer
Amp
Rear
Speakers
Subwoofer
F IGURE 6: OUTPUT C ONNECTIONS
L
R
SUB
REAR
FRONT
MIC INPUT
IMS
INPUT MANAGEMENT SYSTEM
WARRANTY VOID
POWER
IMS OUTPUT
USB
CHARGING
PORT
AUDIO OUT
USB Charging Port
F IGURE 7: USB CHARGING P ORT
7
kappa series
OPERATION
FRONT-PANEL CONTROLS
(see Figure 7)
VOLUME KNOB:
Turn to raise and lower the IMS volume, and to highlight and adjust items
in menu screens.
NOTE: EACH TIME YOU SELECT A DIFFERENT INPUT THE VOLUME WILL CHANGE TO THE
LEVEL SETTING FROM THE PREVIOUS TIME THAT INPUT WAS ACTIVE
.
SELECT BUTTON:
During normal operation, press to enter the menu system. When menu
screens are active, press to select items.
LIGHT SENSOR:
The Light Sensor detects the amount of ambient light and automatically
sets the LCD Display for day or night viewing. See Figure 8.
INPUT 7 JACK:
3.5mm stereo jack that is is ideal for temporary input connections such as
game consoles and portable DVD players. See Figure 4, on page 4.
VOICE DIAL BUTTON:
Activates voice-dialing when used with a VD-capable Bluetooth
cell phone. See Using the IMS with a Cellular Phone, on page 9.
HANG-UP/SKIP AHEAD BUTTON:
When making a telephone call on a Bluetooth cell
phone paired through Input 2 (see Using With A Cellular Phone, on page 9), pressing the
Hang-Up/Skip Ahead button disconnects the phone call.
When using the IMS to control a paired Bluetooth music player or cell phone’s music play
functions, pressing the Hang-Up/Skip Ahead button skips ahead to the next music track.
PLAY/PAUSE BUTTON:
When using the IMS to control a Bluetooth music player or cell
phone’s music play functions through Input 2, pressing the Play/Pause button pauses the
currently-playing track. Pressing the Play/Pause button again resumes play.
ANSWER C
ALL/SKIP BACK BUTTON:
When using a Bluetooth cell phone paired
through Input 2 (see Using With A Cellular Phone, on page 9), pressing the Answer Call/Skip
Back Button will answer an incoming phone call.
When using the IMS to control a paired Bluetooth music player or cell phone’s music play
functions, pressing the Hang-Up/Skip Ahead button skips back to the beginning of the
current music track. Pressing the button multiple times skips to previous music tracks.
POWER BUTTON:
Turns the IMS ON and OFF.
LCD DISPLAY:
Provides information about the IMS’ operating status, and displays adjust-
ment menus. During normal operation, the LCD display will look as shown in Figure 9:
R
Vol
+
-
Select
Volume Knob
Select Button
Light Sensor
Input 7 Jack
Voice Dial
Button
Hang-Up/
Skip Ahead
Button
Answer Call/
Skip Back
Button
Play/Pause
Button
Power
Button
LCD
Display
F IGURE 7: FRONT-PANEL C ONTROLS AND C ONNECTIONS
MP3 Player
In 3
Input
Name
Volume
Indicator
Active Input
Connector
Paired Bluetooth
Phone Icon
Bluetooth
Operation Icon
Paired Bluetooth
Music Player Icon
F IGURE 9: NORMAL O PERATION D ISPLAY S CREEN
Day Night
F IGURE 8: LCD DISPLAY D AY AND N IGHT V IEWING M ODES
8
MENUS
During normal operation, pressing the Select button activates the main menu screen (see
Figure 10). Rotate the Volume Knob to highlight one of the five items and press the Select
button to select it.
NOTE: THE IMS WILL RETURN TO THE NORMAL OPERATION SCREEN IF YOU DONT MAKE
A MENU SELECTION WITHIN
3 SECONDS.
INPUT SELECT:
Turn the Volume Knob to scroll-through the available inputs. As you
scroll, the display will show each input’s name and its connection number will flash
(see Figure 11, left). When the desired input is shown, press the Select button and the
IMS will change to that input.
NOTE: EACH INPUT RETAINS THE VOLUME SETTING FROM THE PREVIOUS TIME IT WAS THE
ACTIVE INPUT
.
IMPORTANT: When an audio signal or phone call is received at Input 1 or Input 2
the IMS will automatically switch to that input for as long as the audio signal or
phone call lasts, then will switch back to the previously-active input. If Input 2 is
the active input when audio is received at Input 1 the IMS will mix the audio from
both Input 1 and Input 2 so you can continue with a cellphone call when a
navigation prompt occurs.
SUB LEVEL:
Lets you balance the subwoofer volume with the rest of the sound (see Figure 11,
right). The Sub Level control only functions with an OEM radio woofer output that is connect-
ed to Input 6. For all other inputs the Sub Level control does not function.
AUDIO ADJ:
Lets you adjust the following audio parameters: bass, treble, balance, and
fader (see Figure 12). Press the Select button to cycle-through the items and turn the Volume
Knob to make adjustments.
BT PAIRING:
Enables pairing for operation with a Bluetooth-capable cellphone through
Input 2. For details see Bluetooth Pairing, on page 9.
INPUT LABEL:
Lets you assign a name to each input connection (see Figure 13). The
following input names are available: Radio, Navigation, DVD, Game, MP3 Player, Phone/BT
Audio, XM Radio, Sirius, iPod, Radar, Input 1, Input 2, Input 3, Input 4, Input 5, Input 6, Input 7,
Hide. You can assign the same name to as many inputs as you wish.
1. INPUT SELECT
2. SUB LEVEL
3. AUDIO ADJ
4. BT PAIRING
2. SUB LEVEL
3. AUDIO ADJ
4. BT PAIRING
5. INPUT LABEL
F IGURE
10: MAIN M ENU SCREEN
Navigation
Input 1
F IGURE 11: INPUT S ELECT S CREEN ( I NPUT 1 SHOWN, LEFT);
S
UBWOOFER L EVEL S CREEN ( RIGHT)
Bass
Treble
Balance
LR
Fader
RF
F IGURE 12: AUDIO A DJUSTMENT M ENU I TEMS
Select Input
Game
Input 3
MP3 Player
Input 3
Select Name
etc.
F IGURE 13: LABELING I NPUTS
9
kappa series
HIDE: Naming an input Hide removes it from the Input Select rotation (so you don’t have to
cycle-through unused inputs). To return the input to the rotation use the Input Label
function to assign a different name to it.
RADIO: Whenever the IMS is turned OFF via the Accessory power wire (such as when the
vehicle’s ignition is switched off while the IMS is ON), when the IMS is turned back ON it will
automatically default to whichever input is labeled Radio.
USING THE IMS WITH A CELLULAR PHONE
Since different Bluetooth-enabled cellphones operate differently, please read your cell-
phone’s instructions manual before using your cellphone with the IMS.
BBlluueettooootthh PPaaiirriinngg
The exact connection procedure may vary somewhat among different Bluetooth-enabled
phones. When attempting to pair the IMS to a cellphone for the first time, be sure to follow
any screen prompts on Bluetooth-enabled phone.
1. Put the cellphone in pairing mode. Note: The Bluetooth pairing code for the IMS is 0–0–0–0.
2. Press the Select button on the IMS. The main menu will appear. (See Figure 10, on page 8.)
3. Use the Volume Knob to highlight BT Pairing and press the Select button. The IMS will
enter the pairing mode. The display will read IMS Pairing, and the word Pairing will flash.
see Figure 14.
4. Once pairing has been completed the screen will change to Pairing Complete
(see Figure 14). The Bluetooth Operation and Paired Bluetooth Phone icons will appear on
the normal operation screen (see Figure 9, on page 7).
PPllaacciinngg VVooiiccee--DDiiaalleedd CCaallllss
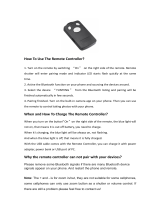
1. Press the Press-To-Talk button (see Figure 7, on page 7).
2. The IMS will automatically switch to Input 2 and you will hear your phones voice-dial
prompts through the audio system.
3. Follow the prompts to complete dialing the call.
4. You will hear the other party’s voice through the audio system’s speakers and the IMS’
Hands-Free Microphone will pick-up your voice.
5. When the call is completed, press the Hang-Up/Skip Ahead button (see Figure 7, on page 7).
PPllaacciinngg NNuummeerriiccaallllyy--DDiiaalleedd CCaallllss
1. Switch the IMS to Input 2.
2. Dial the call directly through your cellphone.
3. You will hear the other party’s voice through the audio system’s speakers and the IMS’
Hands-Free Microphone will pick-up your voice.
4. When the call is completed, press the Hang-Up/Skip Ahead button (see Figure 7, on page 7).
AAnnsswweerriinngg IInnccoommiinngg CCaallllss
1. When you receive a call the IMS will automatically switch to Input 2 and play a ring tone
through the audio system’s speakers.
2. Press the Answer Call/Skip Back button (see Figure 7, on page 7).
3. You will hear the other party’s voice through the audio system’s speakers and the IMS’
Hands-Free Microphone will pick-up your voice.
4. When the call is completed, press the Hang-Up/Skip Ahead button (see Figure 7, on page 7).
CCoonnttrroolllliinngg CCeellllpphhoonnee MMuussiicc PPllaayy FFuunnccttiioonnss
Since different cellphones operate differently, please read your cellphone’s instruction
manual before using your cellphone’s music play features with the IMS.
1. Place your cellphone in its music play mode.
2. Press the IMS’ Play/Pause button to play and pause the currently-playing song. An icon
will appear on the LCD display (see Figure 15).
3. Press the IMS’ Skip Ahead button to skip to the next song in the queue. An icon will appear
on the LCD display (see Figure 15).
4. Press the IMS’ Skip Back button once to skip to the beginning of the currently-playing
song. Press the Skip Back button multiple times to skip to previous songs in the queue. An
icon will appear on the LCD display (see Figure 15).
BT
Pairing
Pairing
Complete
F IGURE 14: BLUETOOTH PAIRING S CREENS
F IGURE 15: CELLPHONE M USIC P LAY C ONTROLS
Vol
-
Select
Skip Ahead
Button
Skip Ahead
Icon
Skip Back
Button
Skip Back
Icon
Play/Pause
Button
Play/Pause
Icon
<< >>
PLAY
10
NNootteess AAbboouutt UUssiinngg aa CCeellllpphhoonnee wwiitthh tthhee IIMMSS
If you turn the IMS OFF during a phone call the call’s audio will mute for 3 or 4 seconds
before resuming through the phone. The call remains connected during this time.
If you break pairing while the IMS remains ON (such as walking away while talking on the
phone), after the phone is back within pairing range the IMS may take up to 1 minute to
re-pair with it. During this time the IMS will automatically switch to Input 2, but you can
manually change to a different input.
Depending on your particular cellphone, if you’re listening to the cellphone’s music mode
through Input 2 when an incoming call is received, the music will mute, but the phone call
ringtone may not sound through the audio system’s speakers.
When operating a music player through Input 2 using an A2DP dongle the Play/Pause icon
on the IMS display may get out of sync if you press the music players Play/Pause button.
Input 2 will only work with one music player at a time. If you have a paired phone with
music play capability and a music player with an A2DP dongle, the phone will take
priority over the music player with the dongle.
If you want to change from a phone that is currently paired with the IMS to another phone
that was previously paired with the IMS:
a) Turn the currently-paired phone’s Bluetooth pairing OFF.
b) Turn the IMS OFF.
c) Put the previously-paired phone into its Bluetooth pairing mode.
d) Turn the IMS back ON.
TROUBLESHOOTING
11
kappa series
SPECIFICATIONS
Inputs
#1
Navigation
#2
Bluetooth
#3 #4 #7
Input Impedance 20k Balanced N/A 20k Balanced 20k Balanced 20k Balanced
Gain Trim N/A N/A N/A N/A Var A Var B Var C N/A
Peak Indicator (red LED) N/A N/A N/A N/A N/A
Specs apply to both RCA and RJ45 output
Maximum Input Signal
V/C at Max Output
<1%THD+N
1Volts N/A 1 Volts 1 Volts 2 Volts 4 Volts 13 Volts 13 Volts 13 Volts 1 Volts
Signal to Noise
Adjust V/C for 100mV output
70 ? 70 70 ? ? ? ? ? 70
Cross Talk
Adjust V/C for 100mV output
70 ? 70 70 70 70 70 70 70 70
Navigation #1 Spec
Effect
N/A
Blend
Mute Mute Mute Mute Mute Mute
Attack Voltage
100mV
Attack Time
1uSec
Release Time
1 Second
Phone #2 Spec
Incoming Call
Blend
(w/ Ring Tone)
Mute BT Music
(Ring Tone)
Mute
(Ring Tone)
Mute
(Ring Tone)
Mute
(Ring Tone)
Mute
(Ring Tone)
Mute
(Ring Tone)
Mute
(Ring Tone)
Out Going Call
Blend
Mute BT Music
Mute Mute Mute Mute Mute Mute
Power
Off
Standby
(ACC high IMS off)
On
(ACC high IMS on)
Operating
Voltages
Battery (yellow)
<100uA <100uA <100uA 10 to 16
Accessory (red)
0 <110mA <1A 11 to 16
Remote Output (blue)
0 0 0.3 A 12 to 14
Output #1 Connector
Impedance Max Output
Front
RCA
(1) stereo pair
560 ohm
single ended
8 Volts
Rear
RCA
(1) stereo pair
561 ohm
single ended
8 Volts
Sub
RCA
(1) Single
562 ohm
single ended
8 Volts
Output #2
IMS (RJ45)
Pin Function Output
Pin 1 Audio Ground Secondary Ground
Pin 2 Protect input
Ground
to display "Protect"
Pin 3 Remote output 0.3 A
Pin 4 Sub Output 8 Volts
Pin 5 Lt Rear Output 8 Volts
Pin 6 Rt Rear Output 8 Volts
Pin 7 Lt Front Output 8 Volts
Pin 8 Rt Front Output 8 Volts
2 Volts
#5
#6
20k Balanced
20k Balanced
High / Low Swt
Mute
Mute
(Ring Tone)
Mute
N/A
Declaration of Conformity
We, Harman Consumer Group, Inc.
2, route de Tours
72500 Château du Loir
France
declare in own responsibility that the products described in this owner’s manual
are in compliance with technical standards:
EN 61000-6-3:2001
EN 61000-6-1:2001
Klaus Lebherz
Harman Consumer Group, Inc.
Château du Loir, France 3/08
Technology • Performance • Design
A valid serial number is required for warranty coverage.
Features, specifications and appearance are subject to change without notice.
This product is designed for mobile applications and is not intended for connection to the mains.
Harman Consumer Group, Inc. • 2 route de Tours, 72500 Chateau du Loir, France • www.infinitysystems.com
©2008 Harman International Industries, Incorporated. All rights reserved. Part No. XXXX
Infinity and Kappa are tr
ademarks of Harman International Industries, Incorporated,
registered in the United States and/or other countries
  • Page 1 1
  • Page 2 2
  • Page 3 3
  • Page 4 4
  • Page 5 5
  • Page 6 6
  • Page 7 7
  • Page 8 8
  • Page 9 9
  • Page 10 10
  • Page 11 11
  • Page 12 12

Infinity APIINFIMS User manual

Category
Musical Equipment
Type
User manual
This manual is also suitable for

Ask a question and I''ll find the answer in the document

Finding information in a document is now easier with AI