Page is loading ...

Doc No:1385 Issue 1.06
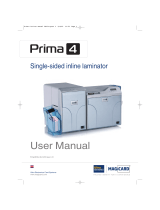
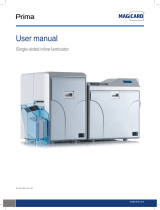
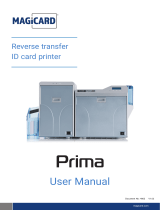
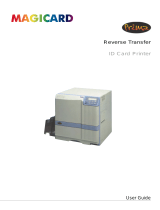
User manual
Double-sided inline laminator
magicard.com

2
Before Use
Characteristics of this Unit
This laminator attaches a protective layer to one or both
sides of the card printed by the card printer.
A hologram that helps to enhance the security level of the
card can be formed on the protective layer.
This laminator can be made to operate in conjunction with
the card printer unit through infrared communication.
It is built in with a function for adjusting the lengthwise
position of the laminate film, which enables easy
adjustment of the patch in the front-back direction.
In case of disposal
In case of disposal this unit, take care for compliance
with the local law and regulations in your country.
Contents
Before Use
Characteristics of this Unit ................................................2
Contents ............................................................................2
Safety Precautions ............................................................4
About this Manual .............................................................6
Precautions During Use ....................................................6
Capability of this Unit ........................................................7
Name and Functions of Parts ............................................7
Internal Mechanism Diagram ............................................9
Specifications ..................................................................10
Accessories/Products Sold Separately ...........................10
Setup
Installation and Connection .............................................11
Setting Laminate Film .....................................................12
Operating the Laminator
Operation Panel ..............................................................14
Initializing ........................................................................17
Turning On the Power ......................................................18
Turning Off the Power ......................................................18
Firmware Update.............................................................19
Settings
Status Monitor Settings ...................................................20
Printer Driver Settings .....................................................22
Replacement
Laminate Film ..................................................................23
Maintenance
Card Feed Roller/Heating Roller .....................................25
Fan Filter .........................................................................28
Film Cassette ..................................................................28
Interior of Laminator ........................................................30
Troubleshooting
Card Jam .........................................................................32
Film is Entangled .............................................................34
Misaligned Patch Position ...............................................35
Card Warpage .................................................................36
List of Error Codes ..........................................................38

3
Read through the following carefully before operating to ensure proper use of this laminator.
After reading, store this manual at a place that can be easily retrieved when necessary.
Caution: Changes or modifications not approved by party responsible for compliance could void user's authority
to operate the equipment.
Information for USA
For a Class A digital device or peripheral, the instructions furnished the user shall include the following or similar
statement, placed in a prominent location in the text of the manual:
Note: This equipment has been tested and found to comply with the limits for a Class A digital device, pursuant to
part 15 of the FCC Rules. These limits are designed to provide reasonable protection against harmful
interference when the equipment is operated in a commercial environment. This equipment generates, uses, and
can radiate radio frequency energy and, if not installed and used in accordance with the instruction manual, may
cause harmful interference to radio communications. Operation of this equipment in a residential area is likely to
cause harmful interference in which case the user will be required to correct the interference at his own expense.
Information for Canada
Operation is subject to the following two conditions:
(1) this device may not cause interference, and (2) this device must accept any interference, including
interference that may cause undesired operation of the device.
Information for Canada
This Class A digital apparatus complies with Canadian ICES-003.
Cet appareil numérique de la classe A est conforme à la norme NMB-003
du Canada.
Information for EU
Machine noise
Sound power level: less than 70dB(A) according to DIN45635 part 19 (EN27779).
The measurements are to be made according to DIN45635 part 2019 or EN27779, respectively.

Before Use
4
Safety Precautions

5

Before Use
6
About this Manual
Symbols Used in this Manual
Cautions : States precautions to be taken during operation.
Memo : States restrictions on the functions or use of this
equipment. for reference purposes.
A
: Indicates the page numbers or items to refer to.
Contents of this Manual
The copyright of this manual belongs to our company.
Reprint and duplicate of this manual in part or full without
the prior consent of our company is strictly prohibited.
Designs, specifications, or other details described in this
manual may be modified for improvement without prior
notice.
Precautions During Use
Please read through all the following items before
using the laminator.
Laminator Installation
When you are not printing cards, it is recommended
that you turn off the power, and use a cover that is large
enough to cover up the card printer and laminator units.
Avoid installing at the following locations as doing so may
have adverse effects on this unit.
Carpeted room.
Places with a busy flow of people.
Places where paper (corrugated boards, etc.) is handled or
stored.
Places near photocopiers.
Places exposed to direct sunlight or near a heating equipment
(such as a stove).
Inclined or unstable surfaces.
Places exposed directly to cold air, such as near an air-
conditioner outlet, or places subject to high temperatures.
During installation, make sure that there is sufficient space
around the laminator. (Allow a clearance of at least 20
cm between the sides of the laminator and the wall. Allow
a clearance of at least 10 cm between the rear of the
laminator and the wall.)
Observe the following when installing or moving the
laminator.
Make sure to turn off the power before moving the laminator.
Carry the laminator at the bottom of the two sides (handle) to
prevent your hands or fingers from being caught under the unit.
The filter cover is detachable for replacing the fan filter. When
you are moving the laminator, do not hold it at the filter cover.
Films
Handling procedures
Pay attention to the following points when handling films.
Do not touch the film surface with your hand. Doing so
may result in poor adhesion.
Foreign objects attached to the surface of the film
may result in poor adhesion. Load the film in a clean
environment.
If the film is left unattended for a prolonged period of time
with the laminator in the [Ready] state, the heat from the
heater may cause the film to change color. When this unit
is not in use, turn off the power, or switch it to the card
printer’s “Power-saving mode”.
When replacing films with one that has been stored
under a low temperature, store it at the operating ambient
temperature of the laminator for at least one hour before
using. Otherwise, condensation may occur, causing poor
adhesion or malfunction.
Storage environment
Temperature: 5 °C to 25 °C
Relative humidity: 50 % and below
Storage location
Do not store in the following locations.
Places exposed to direct sunlight.
Places with a high temperature and humidity.
Places near organic solvents or diazo copiers.
Storage period
Use it as soon as possible after opening.
Cards
Compliant cards
Compliant with ISO 7810 ID-1
For details on the handling and storage procedures of cards,
refer to the manual of the card printer.
Cautions:
Reimbursement will not be done for poor adhesion or card
warpage. For more information about the card, please
consult our authorized dealers and evaluate the settings.

7
Capability of this Unit
This laminator selects the side of the card to be laminated
by the presence of the film cassette. Refer to the following
table and load the film cassette to the side of the card to
be laminated.
Side to Be Laminated
Film Cassette Status
Top side
film cassette
Bottom side
film cassette
Double-sided lamination Load Load
Top side lamination Load Remove
Bottom side lamination Remove Load
Cautions:
An error will occur if a film cassette that is not loaded
with laminate film is attached to the side that is not to be
laminated. Remove the film cassette from the side that is
not to be laminated.
For double-sided lamination, ensure that both the top side
and bottom side film cassettes are attached. The absence
of film cassette on either side will result in single-sided
lamination.
For double-sided lamination, use the same type of laminate
film for the top side and bottom side. Using different types
of laminate film may result in card jam or error.
Please store the removed film cassette properly.
Name and Functions of
Parts
Front
B
C
D
E
F
A
LED display (red)
Blinks or lights up in red, and combines with the
B
LED
display (blue) to indicate the status of the laminator.
(
A
page 15 “Laminator Status, LED Display and Card
Printer’s Operation Panel Display”)
A
LED display (blue)
Blinks or lights up in blue, and combines with the
A
LED
display (red) to indicate the status of the laminator.
(
A
page 15 “Laminator Status, LED Display and Card
Printer’s Operation Panel Display”)
Operation button
Pressing this button when the laminate film is loaded will
reset the laminator settings.
When no film cassette is loaded, pressing the button for two
seconds or longer starts the cleaning operation. (The cleaning
operation does not start if the heating roller is still hot.)
Sliding knob
Opens/closes the laminator door.
Laminator door
Closing the door when the laminate film is loaded will
reset the laminator settings.
This door can be locked by operating in conjunction with
the card printer unit through the security lock function.
Power switch
Turns the power on/off.
Rear
OPTION
INLET
B
C
D
A
Exhaust fan
Discharges heat accumulated inside the laminator unit.
Air suction fan opening
Air inlet of the internal cooling fan.
Security slot
An anti-theft device that supports Kensington locks can be
attached.
AC inlet
For connecting the power cord.
B
C
D
E
F
A
B
C
D

Before Use
8
Right
A
B
C
D
Card feed port
Feeds the printed card from the card printer that is
connected to the laminator.
Infrared window
Sends or receives data via infrared communication by
connecting with the card printer.
Filter cover
Remove when you want to exchange the filter.
When moving the laminator, do not carry it at the filter
cover.
D
Handle
Hold this area when moving the laminator.
Left
A
C
B
D
Card outlet
Discharges the cards.
Card stacker attachment slot
For attaching the card stacker supplied with the card printer.
Filter cover
Remove when you want to exchange the filter.
When moving the laminator, do not carry it at the filter
cover.
D
Handle
Hold this area when moving the laminator.
A
B
C
A
B
C
When Laminator Door is Open
B
E
D
C
A
Cassette buttons
Press the buttons to remove the film cassette.
Top side film cassette (orange)
For attaching the laminate film.
Jog dial attachment slot
For discharging the card during a card jam by attaching
the jog dial supplied with the card printer to the card feed
roller and turning it.
Bottom side film cassette (yellowish-green)
For attaching the laminate film.
Jog dial attachment slot
Enables attachment of a supplied jog dial to the card
printer.
Film Cassette
BA
A
BA
A
CDDC
Top Side Film Cassette Bottom Side Film Cassette
Guide shaft
Provides guide to the position for attaching the film cassette
.
Film Guides
When attaching the laminate film, unwind it along the shafts
.
Bobbin holder
For securing the take-up side of the laminate film.
Bobbin holder (patch position adjustment
mechanism attached)
For securing the supply side of the laminate film.
It can also be used to adjust the patch position in the front
back direction.
A
B
C
D
E
A
B
C
D

9
Internal Mechanism
Diagram
O N
M
A CB D
U
T
S
R
Q
P
E
F
G
H
I
J
K
L
Top take-up side laminate film
Top side laminate pressure motor
Top side laminate heater pressure mechanism
Top supply side laminate film
Top side laminate film supply motor
Top side laminate film position sensor
Card lamination position sensor
Inlet sensor
Card feeder unit
Card feed motor
Bottom side laminate film position sensor
A
B
C
D
E
F
G
H
I
J
K
Bottom side laminate film supply motor
Bottom supply side laminate film
Bottom side laminate heater pressure mechanism
Bottom side laminate pressure motor
Interlock switch
Bottom take-up side laminate film
Bottom side laminate film take-up motor
Card discharge sensor
Security lock solenoid
Top side laminate film take-up motor
L
M
N
O
P
Q
R
S
T
U

Before Use
10
Specifications
Main Specifications
Item Description
Recording system DC heat roller system
Transfer time
Approx. 22 sec. to 38 sec. (Time varies according to the
setting.)
Operating
environment
conditions
Temperature: 15 °C to 28 °C
Humidity: 35 % to 60 % (no condensation)
Storage
environment
conditions
<Laminator unit>
Temperature: -15 °C to 55 °C
Humidity: 20 % to 80 %
<Laminate film>
Temperature: 5 °C to 25 °C
Humidity 50 % and below
Power supply
AC 100 V - 120 V, 50 Hz/60 Hz
AC 220 V - 240 V, 50 Hz/60 Hz
Current
consumption
3.5 A (100 V system)
1.6 A (200 V system)
Mass Approx. 9.5 k
g
Dimensions
210 mm × 360 mm × 333 mm (W x H x D)
Outline Dimensional Drawing
Front View
210
360
Side View
316
333
Accessories/Products Sold
Separately
Accessories
Please check to ensure that the laminator accessories are in
place when unpacking the product package.
Power Cord (2 m) x 2
For AC 100 V - 120 V Type
(North America)
For AC 220 V - 240 V Type
(Europe)
Instruction Manual x 1
Unit Connection Adapter x 1
Cleaning Card x 1
Bobbin x 2
Products Sold Separately
To purchase these items, please consult our authorized
dealers.
0.6 mil patch film
1 mil patch film
Overlay film
Cleaning Kit, Model: CX210-CKIT1
Magnetic Head Cleaning Card (5 Pcs),
Cotton Swab (5 Large and 5 Small), Cleaning Wipes (1 Box)
Cleaning Card, Model: CX210-CC1
10 Pcs/Set
* The specifications and appearance of this product may
be modified for improvement without prior notice.

11
Installation and Connection
Installation Location
Ventilation holes for the cooling fan are located at the rear
of the laminator as well as the side and rear of the card
printer.
Allow a clearance of at least 20 cm between the sides of
the laminator and the wall.
Allow a clearance of at least 10 cm between the rear of
the laminator and the wall.
Do not place any object on the laminator.
Card Printer Connection
1
Fit the card printer to the supplied unit connection
adapter
2
Fit the laminator to the supplied unit connection
adapter
Card Printer
Connection
Cautions:
Do not hold the rear filter cover when installing or moving
the laminator. The filter cover may be damaged or
detached from the laminator, causing the laminator to fall
off and resulting in injuries.
Make sure that you connect the units on a flat and firm
surface.
Insert the unit connection adapter firmly into the card
printer connection. Cards cannot be fed if there is a
difference in level.
After installation, if you need to remove the laminator from
the card printer, turn off the power of the card printer.
Setup

Setup
12
Card Stacker
1
Hook the tab of the card stacker that is supplied
with the card printer to the card stacker attachment
slot
A
B
D
C
Card outlet
Card stacker attachment slot
Tab
Card stacker
Power Cord Connection
1
Insert the power cord (supplied) to the AC inlet at
the rear of the laminator
2
Plug the power cord (supplied) into an outlet
IN
L
E
T
IN
L
E
T
O
P
T
I
O
N
Cautions:
Make sure that the power outlet is grounded and used as
a dedicated power source for the laminator. Make sure
that the power cord is inserted directly into the outlet, and
do not share with other devices.
Memo:
Make use of an AVR (automatic voltage regulator)
to prevent any fluctuation in voltage. Alternatively, an
uninterruptible power supply is recommended in case
momentary power outage occurs.
A
B
C
D
Setting Laminate Film
Attach a patch film or overlay film on the film cassette.
The film type is set to patch film by default. When using
overlay film for the first time after purchasing the laminator,
turn on the laminator and the card printer and change [Film
Type] of the laminator to [Overlay] on the status monitor
before removing the cassette to load the film.
This laminator selects the side of the card to be laminated
by the presence of the film cassette. Load the film cassette
to the side of the card to be laminated.
Cautions:
If the security lock of the card printer is on, deactivate it.
After work is complete, activate the security lock again.
For details on locking/unlocking the security lock, refer to
the manual of the card printer.
Stand the film cassette on a flat surface. Avoid doing so
on a floor as dust attached to the film may cause poor
adhesion or malfunction.
A film cassette that has laminate film attached on it is
heavy. Hold the film cassette with both hands to avoid
dropping when working with it.
If the laminate film is attached in the wrong direction, film
detection error or lamination defects may occur. Attach the
laminate film in the right direction.
Match the loaded laminate film with the [Film Type] setting.
If the laminate film and the setting do not coincide, film
detection error occurs after the laminate film has been
forwarded for a certain length.
In the case of single-sided lamination, an error will occur
if a film cassette that is not loaded with laminate film is
attached to the side that is not to be laminated. Remove
the film cassette from the side that is not to be laminated.
For double-sided lamination, ensure that both the top side
and bottom side film cassettes are attached. The absence
of film cassette on either side will result in single-sided
lamination.
For double-sided lamination, use the same type of
laminate film for the top side and bottom side. Using
different types of laminate film may result in card jam or
error.
1
Open the laminator door

13
2
Press and hold down the cassette button, and pull
out the film cassette
3
Attach the tip of the new laminate film to the bobbin
Place the new laminate film and the take-up bobbin side
by side on a clean and flat platform.
Attach the tip of the new laminate film to the take-up bob-
bin using the fixing tape.
Use the fixing tape after peeling off
the adhesive label of the laminate
film.
Cautions:
Attach the laminate film to the take-up bobbin such that
they are parallel to each other.
Otherwise, it may result in poor adhesion or cause film
detection errors.
4
Install the new laminate film on the film cassette
Install while referring to the indication on the label of
the cassette.
Top Side Film Cassette Bottom Side Film Cassette
Insert the supply side of the film into the bobbin holders
(patch position adjustment mechanism attached).
Unwind the laminate film along the film guides, and insert
the take-up side into the bobbin holders.
A
B
A
B
Top Side Film Cassette Bottom Side Film Cassette
C
Wind the film twice around the take-up side.
Top Side Film Cassette Bottom Side Film Cassette
5
Remove any slack in the laminate film
6
Insert the film cassette all the way in along the
guide rail until a “click” sound is heard, and close
the laminator door
Cautions:
Make sure to insert the film cassette all the way in until
a “click” sound is heard. Failure to do so may result in
defective patch or card jam.
If the film cassette is inserted upside down, it cannot
be inserted all the way in and the cassette button does
not lock in place. Also, you will not be able to close the
laminator door.
Orange
Yellowish-
green

Operating the Laminator
14
Operation Panel
The status display of the laminator is displayed on the operation panel of the card printer as well as the status monitor of the
computer that is connected to the card printer.
The status is indicated on the laminator unit using a combination of solid and blinking LED displays in red and blue colors.
Card printer operation panel
R e a d y
R e a d y
Reset Menu
A
B
D
C
Printer status display
Displays the status of the card printer.
Laminator status display
Displays the status of the laminator when the display
mode of the card printer is set to [Laminator State].
(
A
page 15 “Setting Procedures for Laminator Status
Display”)
Status icon display
A laminator icon is displayed once the card printer
recognizes the laminator.
Operation button
For selecting a button function displayed on the operation
panel.
A
B
C
D
Laminator operation panel
A CB
LED display (red)
Indicates an error when only the red light is lit or blinking.
LED display (blue)
Indicates that the laminator is functioning normally when
only the blue light is lit or blinking.
Operation button
Pressing this button when the film is loaded will reset the
laminator settings.
When no film cassette is loaded on the top and bottom
sides, pressing the button for two seconds or longer starts
the cleaning operation. (The cleaning operation does not
start if the heating roller is still hot.)
(
A
page 25 “Card Feed Roller/Heating Roller”)
A
B
C
Operating the Laminator

15
Laminator Status, LED Display and Card Printer’s Operation Panel Display
Laminator Status
LED display
(red)
LED display
(blue)
Card Printer
Operation Panel
Display
Description
Initializing
Off
Blinking
(Slow)
Initializing..
Initializing in progress
Preheating Preheating..
Adjusts the heating roller to the preset temperature
Low temperature standby mode Standby
In HR Control mode
Power-saving mode Sleeping..
Low power consumption standby mode. Operates in
conjunction with the card printer settings.
Ready Off On Ready
Ready for laminating operations.
Laminating Off Blinking (Fast) Laminating..
Laminating in progress
Error mode
Blinking
(Slow)
Off Error message
Errors that does not require reboot of the power, such
as insufficient film, film error, cassette not loaded, and
card jams.
(
A
page 38 “List of Error Codes”)
Blinking (Fast) Off Error message
Errors that require reboot of the power
(
A
page 38 “List of Error Codes”)
Roller cleaning in progress
Blinking
(Slow)
Blinking
(Slow)
Cleaning..
Awaiting insertion of the cleaning card, or cleaning is
in progress. Returns to the original state if a cleaning
card is not inserted after a specific time interval.
Download mode On On Download
Awaiting download data, or process has ended
Downloading Blinking (Fast) Blinking (Fast) Downloading..
Downloading data.
Memo: The blinking speed is faster than that when
laminating is in progress.
Setting Procedures for Laminator Status Display
You can display the laminator status on the operation panel of the card printer.
1
Press
I
Enter the setting mode.
R e a d y
To t a l
Res e t Men u
* * *
2
Press
J
to set to [Setting]
Pressing it each time displays the next setting item.
Exi t NextEnt e r
>
C l e a n i n g
>
3
Press
G
A [Display] message appears.
>
S e t t i n g
>
Exi t NextEnt e r
4
Press
G
A [Mode] message appears.
>>
D i s p l a y
>
Exi t NextEnt e r
5
Press
F
Enter the settings change mode.
>>>
M o d e
C o u n t e r
Exi t Next
Change
6
Press
A
and select [Laminator State]
>>>
M o d e
C o u n t e r
Exi t
7
Press
B
to confirm the setting
Pressing
B
confirms the setting and returns you
to the previous screen.
>>>
M o d e
L a m i n a t o r S t a t e
Exi t
8
Press
H
to exit the setting mode
Pressing it each time displays the setting item of the
next higher level.
>>>
M o d e
L a m i n a t o r S t a t e
Exi t
Next
Change

Operating the Laminator
16
Checking the Laminator Settings
Settings can be viewed on the card printer’s operation
panel.
Settings can be changed on the status monitor of the
computer that is connected to the card printer.
(
A
Page 20 “
Status Monitor Settings
”)
1
Press
I
Enter the setting mode.
R e a d y
R e a d y
Re set Me n u
2
Press
J
to set to [Laminator]
Pressing it each time displays the next setting item.
Ex it Nex tEn ter
>
C l e a n i n g
>
3
Press
G
A [Mode] message appears.
Pressing
J
each time displays the next setting
item and its current setting.
>
L a m i n a t o r
>
Ex it Nex tEn ter
4
After checking is complete press
H
to exit
the setting mode
Pressing it each time displays the setting item of the
next higher level.
Settings
Laminator
Mode: Laminate, Pass
Set to [Laminate] to perform laminating.
Set to [Pass] if you do not want to laminate.
Cassette: None, Top, Bottom, Both
The load status for the film cassette appears.
Film-T: Patch, Overlay
For selecting the film to be used for the top side.
Film-B: Patch, Overlay
For selecting the film to be used for the bottom side.
Film-T Pos:
-7, -6, -5, -4, -3, -2, -1, 0, 1, 2, 3, 4, 5, 6, 7
For setting the patch position for the moving direction
of the top side.
Film-B Pos:
-7, -6, -5, -4, -3, -2, -1, 0, 1, 2, 3, 4, 5, 6, 7
For setting the patch position for the moving direction
of the bottom side.
HR-T Temp:
90 degC to 180 degC (in increments of 5 degC)
For setting the top side heating roller temperature.
(The temperature may be 185 degC or higher
depending on the firmware version of the card printer.
However, in this case, the temperature for the heating
roller remains at 180 degC. )
HR-B Temp:
90 degC to 180 degC (in increments of 5 degC)
For setting the bottom side heating roller temperature.
(The temperature may be 185 degC or higher
depending on the firmware version of the card printer.
However, in this case, the temperature for the heating
roller remains at 180 degC.)
Speed: 3.0 mm/s to 12.0 mm/s
(in increments of 0.5 mm/s)
For setting the card feed speed during lamination.
Cooling Time: 0sec, 5sec, 7sec, 10sec, 15sec, 20sec,
30sec
For setting the standby time for cooling down the card
immediately before lamination starts.
HR Control: Off, On
For setting the low temperature standby mode. This
setting works simultaneously with the card printer
setting. For setting whether to standby the laminator by
lowering the heating roller temperature if cards are not
printed for 30 minutes or longer.
This is always set to [On] automatically when overlay
film is selected.
(Regardless of the setting, turn off the heating roller
and standby the laminator if you will not be performing
card printing for a long time.)
Count
Displays the number of laminations performed after the
last roller cleaning. This number is reset to 0 each time
roller cleaning is performed.

17
Factory Settings
Item Factory Settings
Mode Laminate
Film-T Patch
Film-B Patch
Film-T Pos 0
Film-B Pos 0
HR-T Temp 140 degC
HR-B Temp 140 degC
Speed 7.0 mm/s
Cooling Time 0sec
Count
0
Initializing
Performing the operations below will reset the laminator
settings. Thereafter, when the heating roller is adjusted
to the preset temperature, a [Ready] message will be
displayed and laminating can be performed.
Turning On the Power
Turning on the power when the laminate film is loaded will
reset the laminator settings.
Closing the Laminator Door
Closing the laminator door when the laminate film is
loaded will reset the laminator settings.
Loading a patch film will forward the laminate film by one
image and reset the laminator settings.
Cautions:
If the loading statuses of the top side and bottom side film
cassettes change when opening and closing the laminator
door, initialization may not be performed when the
laminator door is closed. In this case, press the operation
button to initialize.
Pressing the Operation Button
Pressing the operation button when the laminate film is
loaded will reset the laminator settings.
Loading a patch film will forward the laminate film by one
image and reset the laminator settings.

Operating the Laminator
18
Turning On the Power
1
Check to ensure that the card printer and laminator
are properly connected
2
Turn on the power of the laminator
3
Turn on the power of the card printer
Cautions:
Turn on the power for the laminator first. If the power for
the card printer is turned on first, the card printer may not
recognize the laminator.
Do not interrupt the laminator when laminating is in
progress. Doing so may cause cards to adhere to the
interior of the laminator, thus causing it to malfunction.
Make sure to observe the following.
Do not open the laminator door
Do not turn off the power
Do not unplug the power cord
Check the laminator settings before printing.
Turning Off the Power
1
Turn off the power of the card printer
2
Turn off the power of the laminator
Turn on the power again only after both LED displays of
the laminator have been turned off.

19
Firmware Update
Setting the laminator and card printer to download mode
enables you to update the firmware for the laminator by
using a PC through card printer connection.
1
Press and hold down the operation button, and turn
on the power at the same time
Both the LED displays are lit.
2
Turn on the power of the card printer
3
Press
I
Enter the setting mode.
R e a d y
D o w n l o a d
Re set Me n u
4
Press
J
to set to [Download]
Pressing the [Next] button each time displays the next
screen.
Ex it Nex tEn ter
>
C l e a n i n g
>
5
Press
G
A [Download Ready] message appears, indicating that
the card printer is ready to download data from the
computer.
Ex it Nex tEn ter
>
D o w n l o a d
>
Ex it
>
D o w n l o a d
R e a d y
6
Data download from the computer starts
A [Downloading..] message appears.
D o w n l o a d i n g . .
K e e p Po w e r O n
Cautions:
It takes time to download the data.
Do not turn off the power during data download from the
computer. Doing so may damage the laminator firmware
and cause malfunction.
A [Download Ready] message appears when data
download from the computer is complete.
Ex it
>
D o w n l o a d
R e a d y
7
Press
H
when [Download Ready] is displayed
8
Turn off the power for the card printer when [Please
Power Off] is displayed
9
Turn off the power of the laminator
The firmware is updated after the power is turned on
again.
When download fails and the laminator
cannot start up
Update the firmware again.

Settings
20
Status Monitor Settings
What is status monitor?
Status Monitor is a software that displays the status for the card printer and laminator, and enables you to adjust the settings
for the card printer and laminator.
Start the status monitor by using a computer that is connected to the card printer. For details on starting the status monitor,
refer to the manual of the card printer.
[Printer Status] Tab Sheet
Displays the status of the laminator.
Printer
Status
Laminator
Status
Laminator Status
Ready mode. The laminator is ready to start printing.
The laminator is busy.
Failure has occurred. The error code and description of
the failure are displayed. In the example below, “05000059”
is the error code. For more details, refer to “List of Error
Codes”.
List of Status Display Messages
Status Display
Message
Description
Laminator is not
found.
The power of the laminator is not
turned on, or the laminator is not
properly connected to the card
printer.
Ready The laminator is in the ready mode.
Initializing Laminator initializing in progress.
Cleaning Roller cleaning of the laminator is in
progress.
Preheating Preheating of the laminator’s heating
roller is in progress. The laminator
switches to Ready mode upon
reaching the preset temperature.
Laminating Card laminating of the laminator
is in progress. After laminating is
complete, the laminator returns to
the Ready mode.
Power Saving The laminator is in the Power
Saving mode, which helps to reduce
power consumption. To exit the
Power Saving mode, reset using the
operation panel of the card printer.
Download Mode The laminator is in the download
mode.
Low Power Mode Standby state with the heater
temperature lowered when cards
are not printed for a specific time
interval.
Settings
/