Page is loading ...

General Required Tools
* Pencil or water soluble felt pen
* Hacksaw with 24 tooth blade
* Metal file (smooth sharp edges)
* Tape measure
* Drill, electric or battery
* #2 Phillips Screw driver
* 3/16” Carbide drill bit for tile
* 1/8" Drill bit for metal
* Caulking gun
* Clear 100% Silicone (recommended)
* 4 ft. Level
* Rubber mallet
* Razor knife
* Blue painters tape
* Booklet: MM.5037
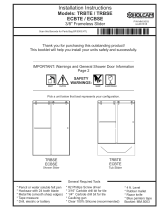
SSE
DSE
Shower Slider
STE
DTE
Tub Slider
Pick a unit below that best represents your configuration.
IMPORTANT: Warnings and General Shower Door Information
Page 2
Thank you for purchasing this outstanding product!
This booklet will help you install your units safely and successfully.
SAFETY
WARNINGS:
GLASS FRAGILESHARPCAUTIONHEAVY
This installation sheet is a required component in Parts Bag BP.3541
Installation Instructions
Models: STE / SSE
DTE / DSE
1/4" Frameless Slider
- These instructions must be followed carefully to reduce the risk of serious injury. Any deviation from these
instructions can create a serious safety hazard.
- Glass panels are tempered to conform with general building and safety codes. Be very careful handling tempered
glass. Especially protect all edges of the glass from contact with hard surfaces.
- All exposed aluminum edges should be deburred to avoid serious injury.
Special Note: Drilling holes and anchoring horizontal sills and curbs into thresholds and tub decks is discouraged
because it can cause leaking and water damage below the unit. Use masking tape or double-sided tape to hold
components down during installation and then apply silicone for structural support and water protection. Exceptions
to this policy are necessary when components are structurally required to be anchored.
P/N MM.5037
rev061818

Installation Instructions
1/4" Frameless Slider
Models: STE / SSE or DTE / DSE
Parts List
Extra screws may be provided for your convenience
10
11
5
5
3
12
7
8
1
12
3
7
8
10
11
7
4
2
12
6
7
10
11
Item
1
2
3
4
5
6
7
8
9
10
11
12
Description
Tub Header
Stay Clean Sill
Tub Jamb
TF-2B T-Fin
Sliding Glass Panel
AVG-3 Center Guide
Bumper Guides
Hanger Bracket Assy
#8 x 1-1/2 FHPHSMS
Wall Anchor
#6 x 3/8 PHPHSMS
QTY
1
1
2
1
2
1
4
4
6
6
3
Part #
1049
1062
1051
4032
7102
2206
2209
2256
2101
2217
2102
Item
Description
QTY
Part #
13
Towel Bar/Screw Kit
1
BP.27XX
Item
Description
QTY
Part #
13
STEP 1 - CENTERLINE:
Ÿ Locate the centerline of the shower or tub rim and mark it with a water soluble marker. See illustration #3 (page 3)
Ÿ The Stay Clean Sill (Item #2) is installed directly over and parallel to the centerline
Ÿ Measure the wall to wall distance, 1/2” above the threshold to allow for any radius or obstructions in the corners
Ÿ Deduct 7/16” f cut the Stay Clean Sill (2) to lengthrom this measurement and
Installation
CENTER GUIDE (6)
#6X3/8” PHPHSMS (12)
STAY CLEAN SILL (2)
T-FIN (4)
STEP 2 - STAY CLEAN SILL:
ILLUSTRATION #2
Ÿ Mark the center of the Stay Clean Sill for the Center Guide
Ÿ Use the Center Guide’s hole for a template and mark the
location onto the sill.
Ÿ Drill hole with a 1/8” drill bit.
Ÿ Do not attach the Center Guide at this time.
Ÿ Install the T-Fin into the Stay Clean Sill with the fin pointing
down. Flush cut at the ends.
Ÿ Set the Sill in place over the centerline and hold in place with
Painters tape.
(2) (6).
(6)
See illustration #2.
(6)
(2)
(2)
Page 2
ILLUSTRATION #1
14 BP.3000 Anti jump Bag 1
Showerhead
Wall
ACTUAL SIZE
12

Page 3
STEP 3 - TUB JAMBS:
Ÿ The Tub Jamb (3) opposite the shower head wall is installed first
Ÿ Set Tub Jamb in gap between the Stay Clean Sill (2) and wall
Ÿ Plumb the jamb
Ÿ Mark only the bottom Tub Jamb hole using the factory hole as a
template
Ÿ Drill the hole with a 3/16” drill bit (carbide bit for masonry)
Ÿ Insert one Wall Anchors
Ÿ Insert a 1 - #8x1-1/2” FHPHSMS (10) into
bottom hole
Ÿ
Ÿ
Ÿ
(11) into the tile. See Illustration #1
Bumper Guide (7) and
Orient Bumper Guide with panel crevice to outside. Illustration #4
Tighten screw until snug.
Secure top of jamb to wall on both sides with painter’s tape
--------
Ÿ Position and plumb the second Tub Jamb onto the opposite wall,
Ÿ Plumb with a level and mark all three holes.
Ÿ Drill the holes with a 3/16” drill bit. Insert three Wall Anchor (11)
and secure Tub Jamb with three #8 X 1-1/2” FHPHSMS (10) and
2 - Bumper Guides (7). Panel crevice of these bumper guides
should be oriented inside of unit. Illustration #4.
.
STEP 4 - TUB HEADER:
Ÿ Measure wall to wall at the top of the Tub Jambs
Ÿ Deduct 1/16” and cut Tub Header (1) to length
Ÿ Drill a 1/8" hole at each end on the inside. Screw size is a
#6x3/8” PHPHSMS (12), see illustration #5.
-----
Ÿ Make sure that the Tub Jamb opposite the showerhead (only one screw) is
snug, and secured with painters tape
Ÿ Place inside panel (Knob Panel) inside the shower or tub stall. Lean against
the back wall. Use pad to protect the glass/tile from damage. See Illustration #3
Ÿ Hang outside panel (Towel Bar Panel) in place in the and slide to
showerhead wall (fully secured Tub Jamb)
Ÿ Install the inside panel and slide to wall opposite shower head
Ÿ Ensure rollers on both panels are fully seated into the header tracks
Ÿ Install the Center Guide (11) and securing it with one #6x3//8” MS (12).
STEP 5- PANEL INSTALLATION:
STEP 6 - PANEL ALIGNMENT and FINAL PANEL INSTALLATION:
Ÿ Standing outside the shower, slowly move the sliding panels one at a time into the
proper Bumper Guides (7) and Tub Jambs (3)
Ÿ Adjust the header side to side (you will have to remove and reapply painter’s tape)
until both panels pocket perfectly into both Tub Jambs
Ÿ When the panels pocket perfectly, mark the remaining two holes of the Tub Jamb
onto the wall opposite the showerhead
Ÿ Slide both panels back to the showerhead Tub Jamb
Ÿ Remove the Center Guide
Ÿ Remove both sliding panels and set them in a safe place on a padded surface.
Ÿ Move the Tub Jamb out of the way just far enough to reveal the marked holes and
drill the holes with a 3/16” drill bit
Ÿ Insert two Wall Anchors (11)
Ÿ Realign the Tub Jamb and secure with two #8 X 1-1/2” FHPHSMS (10). Ensure
you install the top Bumper Guide (7) when you install the top screw
Ÿ Reinstall both of the sliding glass panels as you did earlier in the last step, then
reinstall the Center Guide
Installation Instructions
1/4" Frameless Slider
Models: STE / SSE or DTE / DSE
ILLUSTRATION #6
Anti Jump Runner
w/ Red Tape
1/8”
ILLUSTRATION #5
Step #1
Mark Centerline
up walls and
along threshold
Install this side
Tub Jamb first
Showerhead
Wall
set inside
panel
Inside
shower
Ÿ Find Parts Bag BP.3000.NTL - Anti-Jump Runners (14) and follow installation
instructions (see Illustration #6). NOTE: Use of runners is encouraged, but
optional and must be ordered separately on some units
-----
Ÿ Set header in place over the Tub Jambs but do not secure at this time.
ILLUSTRATION #3
ILLUSTRATION #4
1/8”
3
1
Bumper Guide orientation for
showerhead right
Reverse above orientation for
showerhead left

Page 4
SAFETY
WARNING:
STEP 7 - TOWEL BARS AND KNOBS:
Ÿ Refer to Illustration #7 for typical Euro Towel Bar
installation for an showerhead right enclosure
Ÿ Refer to the instruction sheet that came with your door
for more detailed instructions
STEP 8 - PANEL ADJUSTMENT:
Ÿ To adjust the sliding panels for out-of-square wall
conditions or to level them, etc., locate the hex nuts in
the Hanger Brackets (8) and the Adjustment Wrench
provided in the parts kit. See Illustration #8
-----
NOTE: The panels can be adjusted while still hanging
in the header.
----
Ÿ Loosen the hex nut with the special wrench until roller
can slide along the angled slot on the Hanger Bracket (8)
Ÿ Raise or lower each side of the panel by sliding the
roller along the angled slot until desired adjustment is
achieved
Ÿ Be sure to re-tighten the screws.
STEP 9 - HEADER ATTACHMENTS:
Ÿ Secure the Header to the Tub Jambs by drilling
through the holes in the header, from the inside of the
shower, into the Tub Jambs with a 1/8” drill bit.
Ÿ Secure with two #6 X 3/8” PHPHSMS (Item #12) as
shown in illustration #8.
STEP 10 - SEALANT:
Ÿ Apply a bead of sealant along the entire outside of the
enclosure where it meets the wall and base.
Ÿ Pay special attention at the bottom corners where the
Tub Jambs meet the Stay Clean Sill. These joints must
be totally sealed for a leak proof installation.
Top view shows towel bar and knob locations for a shower head on right wall.
If the shower head is on the left the panels would be reversed.
ILLUSTRATION #7
Improper screw placement
during STEP 9 could cause
damage to the glass.
Installation Instructions
1/4" Frameless Slider
Models: STE / SSE or DTE / DSE
7
2
5
5
3
3
7
Cushioned
Knob
Cushioned
Knob
Cushioned
Knob
Blind
Fastener
Towel
Bar
ILLUSTRATION #8
HANGER
BRACKET (8)
TUB
HEADER(1)
TUB
JAMB(3)
GLASS
PANELS (5)
INSIDE
OUTSIDE
(Towel Bar
not shown)
#6 X 3/8”
PHPHSMS (12)
CENTER
GUIDE (6)
TF-2B
T-FIN (4)
STAY
CLEAN
SILL (2)
#6 X 3/8”
PHPHSMS (12)
Outside Shower
Inside Shower
HANGER
BRACKET
HEX NUTS
/


