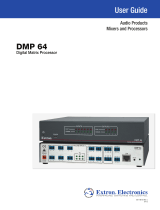
Extron AXP 64 C AT User manual

Category
Musical Equipment
Type
User manual
User Guide
AXP 64 C AT
Audio Products
Mixers and Processors
Audio Expansion Processor
68-2721-01 Rev. C
01 19
Safety Instructions
Safety Instructions • English
WARNING: This symbol, ,when used on the product, is
intended to alert the user of the presence of uninsulated dangerous
voltage within the product’s enclosure that may present a risk of electric
shock.
ATTENTION: This symbol, , when used on the product, is intended
to alert the user of important operating and maintenance (servicing)
instructions in the literature provided with the equipment.
For information on safety guidelines, regulatory compliances, EMI/EMF
compatibility, accessibility, and related topics, see the Extron Safety and
Regulatory Compliance Guide, part number 68-290-01, on the Extron
website, www.extron.com.
Sicherheitsanweisungen • Deutsch
WARNUNG: Dieses Symbol auf dem Produkt soll den Benutzer
darauf aufmerksam machen, dass im Inneren des Gehäuses dieses
Produktes gefährliche Spannungen herrschen, die nicht isoliert sind und
die einen elektrischen Schlag verursachen können.
VORSICHT: Dieses Symbol auf dem Produkt soll dem Benutzer in
der im Lieferumfang enthaltenen Dokumentation besonders wichtige
Hinweise zur Bedienung und Wartung (Instandhaltung) geben.
Weitere Informationen über die Sicherheitsrichtlinien, Produkthandhabung,
EMI/EMF-Kompatibilität, Zugänglichkeit und verwandte Themen finden Sie in
den Extron-Richtlinien für Sicherheit und Handhabung (Artikelnummer
68-290-01) auf der Extron-Website, www.extron.com.
Instrucciones de seguridad • Español
ADVERTENCIA: Este símbolo, , cuando se utiliza en el producto,
avisa al usuario de la presencia de voltaje peligroso sin aislar dentro del
producto, lo que puede representar un riesgo de descarga eléctrica.
ATENCIÓN: Este símbolo, , cuando se utiliza en el producto, avisa
al usuario de la presencia de importantes instrucciones de uso y
mantenimiento recogidas en la documentación proporcionada con el
equipo.
Para obtener información sobre directrices de seguridad, cumplimiento
de normativas, compatibilidad electromagnética, accesibilidad y temas
relacionados, consulte la Guía de cumplimiento de normativas y seguridad
de Extron, referencia 68-290-01, en el sitio Web de Extron, www.extron.com.
Instructions de sécurité • Français
AVERTISSEMENT : Ce pictogramme, , lorsqu’il est utilisé sur le
produit, signale à l’utilisateur la présence à l’intérieur du boîtier du
produit d’une tension électrique dangereuse susceptible de provoquer
un choc électrique.
ATTENTION : Ce pictogramme, , lorsqu’il est utilisé sur le produit,
signale à l’utilisateur des instructions d’utilisation ou de maintenance
importantes qui se trouvent dans la documentation fournie avec le
matériel.
Pour en savoir plus sur les règles de sécurité, la conformité à la
réglementation, la compatibilité EMI/EMF, l’accessibilité, et autres sujets
connexes, lisez les informations de sécurité et de conformité Extron, réf.
68-290-01, sur le site Extron, www.extron.com.
Istruzioni di sicurezza • Italiano
AVVERTENZA: Il simbolo, , se usato sul prodotto, serve ad
avvertire l’utente della presenza di tensione non isolata pericolosa
all’interno del contenitore del prodotto che può costituire un rischio di
scosse elettriche.
ATTENTZIONE: Il simbolo, , se usato sul prodotto, serve ad
avvertire l’utente della presenza di importanti istruzioni di funzionamento
e manutenzione nella documentazione fornita con l’apparecchio.
Per informazioni su parametri di sicurezza, conformità alle normative,
compatibilità EMI/EMF, accessibilità e argomenti simili, fare riferimento
alla Guida alla conformità normativa e di sicurezza di Extron, cod. articolo
68-290-01, sul sito web di Extron, www.extron.com.
Instrukcje bezpieczeństwa • Polska
OSTRZEŻENIE: Ten symbol, , gdy używany na produkt, ma na celu
poinformować użytkownika o obecności izolowanego i niebezpiecznego
napięcia wewnątrz obudowy produktu, który może stanowić zagrożenie
porażenia prądem elektrycznym.
UWAGI: Ten symbol, , gdy używany na produkt, jest przeznaczony do
ostrzegania użytkownika ważne operacyjne oraz instrukcje konserwacji
(obsługi) w literaturze, wyposażone w sprzęt.
Informacji na temat wytycznych w sprawie bezpieczeństwa, regulacji
wzajemnej zgodności, zgodność EMI/EMF, dostępności i Tematy pokrewne,
zobacz Extron bezpieczeństwa i regulacyjnego zgodności przewodnik, część
numer 68-290-01, na stronie internetowej Extron, www.extron.com.
Инструкция по технике безопасности Русский
ПРЕДУПРЕЖДЕНИЕ: Данный символ, , если указан
на продукте, предупреждает пользователя о наличии
неизолированного опасного напряжения внутри корпуса
продукта, которое может привести к поражению электрическим
током.
ВНИМАНИЕ: Данный символ, , если указан на продукте,
предупреждает пользователя о наличии важных инструкций
по эксплуатации и обслуживанию в руководстве,
прилагаемом к данному оборудованию.
Для получения информации о правилах техники безопасности,
соблюдении нормативных требований, электромагнитной
совместимости (ЭМП/ЭДС), возможности доступа и других
вопросах см. руководство по безопасности и соблюдению
нормативных требований Extron на сайте Extron: ,
www.extron.com, номер по каталогу - 68-290-01.
安全说明 简体中文
警告 产品上的这个标志意在警用户该产品机壳内有暴露的危险 电压,
险。
注意 产品上的这个标志意在提示用户设备随附的用户手册中有
重要的操作和维护(维修说明
关于我们产品的安全指南、遵循的规范、EMI/EMF 的兼容性、无障碍
使用的特性等相关内容,敬请访问 Extron 网站 , www.extron.com,参见
Extron 安全规范指南,产品编号 68-290-01
안전 지침 • 한국어
경고: 이 기호 가 제품에 사용될 경우, 제품의 인클로저 내에 있는
접지되지 않은 위험한 전류로 인해 사용자가 감전될 위험이 있음을
경고합니다.
주의: 이 기호 가 제품에 사용될 경우, 장비와 함께 제공된 책자에 나와
있는 주요 운영 및 유지보수(정비) 지침을 경고합니다.
안전 가이드라인, 규제 준수, EMI/EMF 호환성, 접근성, 그리고 관련 항목에
대한 자세한 내용은 Extron 웹 사이트(www.extron.com)의 Extron 안전 및
규제 준수 안내서, 68-290-01 조항을 참조하십시오.
安全記事 • 繁體中文
警告: 若產品上使用此符是為了提醒使用者產品機殼內存
可能會導致觸電之風險的未絕緣危險電壓。
注意 產品使用此符號提醒使用備隨附戶手冊中有
重要的操作和維(維修説明
有關安全性指導方針法規遵EMI/EMF 相容存取範圍和相關主題的詳細
訊,瀏覽 Extron 網站www.extron.com然後《Extron 安全性與法規
守手冊準則編號 68-290-01
安全上の注意 日本語
警告: この 製品上に表示されている場合は筐体内に絶縁され
いない高電圧が流れ、感電の危険があるこています
意:この が製品上に表されている場合はの取明書
されている重作と保()の示についてユーザーの
を喚起するものです
安全上の注意、法規厳守、EMI/EMF適合性、その他の関連項目
スト イト www.extron.com よ り Extron Safety
and Regulatory Compliance Guide』 ( P/N 68-290-01) をださい。
Copyright
© 2013-2019 Extron Electronics. All rights reserved. www.extron.com
Trademarks
All trademarks mentioned in this guide are the properties of their respective owners.
The following registered trademarks (
®
), registered service marks (
SM
), and trademarks (
TM
) are the property of RGBSystems, Inc. or
ExtronElectronics (see the current list of trademarks on the Terms of Use page at www.extron.com):
Registered Trademarks
(
®
)
Extron, Cable Cubby, ControlScript, CrossPoint, DTP, eBUS, EDID Manager, EDID Minder, Flat Field, FlexOS, Glitch Free. Global
Configurator, GlobalScripter, GlobalViewer, Hideaway, HyperLane, IPIntercom, IPLink, KeyMinder, LinkLicense, LockIt, MediaLink,
MediaPort, NetPA, PlenumVault, PoleVault, PowerCage, PURE3, Quantum, Show Me, SoundField, SpeedMount, SpeedSwitch,
StudioStation, SystemINTEGRATOR, TeamWork, TouchLink, V-Lock, VideoLounge, VN-Matrix, VoiceLift, WallVault, WindoWall, XTP,
XTPSystems, and ZipClip
Registered Service Mark
(SM)
: S3 Service Support Solutions
Trademarks
(
)
AAP, AFL (Accu-RateFrameLock), ADSP(Advanced Digital Sync Processing), Auto-Image, CableCover, CDRS(ClassD Ripple
Suppression), Codec Connect, DDSP(Digital Display Sync Processing), DMI (DynamicMotionInterpolation), DriverConfigurator,
DSPConfigurator, DSVP(Digital Sync Validation Processing), eLink, EQIP, Everlast, FastBite, FOX, FOXBOX,
IP Intercom HelpDesk, MAAP, MicroDigital, Opti-Torque, PendantConnect, ProDSP, QS-FPC(QuickSwitch Front Panel Controller),
RoomAgent, Scope-Trigger, ShareLink, SIS, SimpleInstructionSet, Skew-Free, SpeedNav, Triple-Action Switching, True4K, Vector™ 4K ,
WebShare, XTRA, and ZipCaddy
FCC Class A Notice
This equipment has been tested and found to comply with the limits for a Class A digital
device, pursuant to part15 of the FCC rules. The ClassA limits provide reasonable
protection against harmful interference when the equipment is operated in a commercial
environment. This equipment generates, uses, and can radiate radio frequency energy and,
if not installed and used in accordance with the instruction manual, may cause harmful
interference to radio communications. Operation of this equipment in a residential area is
likely to cause interference. This interference must be corrected at the expense of the user.
NOTE: For more information on safety guidelines, regulatory compliances, EMI/EMF
compatibility, accessibility, and related topics, see the Extron Safety and Regulatory
Compliance Guide on the Extron website.
vAXP64CAT • Table of Contents
Contents
Introduction............................................................ 1
About this Guide ................................................. 1
About the AXP64CAT ...................................... 1
Features ............................................................. 1
AXP64CAT Application Diagrams..................... 4
Installation .............................................................. 6
System Configuration ......................................... 6
Rear Panel Features and Cabling ........................ 7
Front Panel Indicators ....................................... 10
Connecting the AXP 64 C AT to a Network ....... 11
Creating a Physical Dante Network ................... 11
Star Network Configuration ........................... 12
Daisy Chain Configuration ............................. 12
Software Installation.......................................... 13
AXP64CAT Software Programs .................. 13
Software Installation Overview ...................... 13
Downloading and Installing Dante
Controller for Windows ................................ 14
Downloading and Installing DSP
Configurator ................................................ 19
Updating Firmware ........................................... 21
Resetting .......................................................... 22
DSP Configurator Configuration and
Operation .............................................................. 23
AXP64CAT Operation .................................... 23
Starting the DSP Configurator .......................... 24
The AXP 64 C AT Main Screen ......................... 25
Menus .......................................................... 27
Navigating the Main Screen .......................... 33
Connecting to and Disconnecting from a
Device on the Network .................................... 34
Connecting to an AXP 64 ............................. 34
Disconnecting from an AXP 64 ..................... 35
Live and Emulate Modes .............................. 36
Naming a Digital Input or an Analog Output
using DSP Configurator ................................... 36
DSP Processing and Signal Flow ...................... 37
Copying, Cutting, and Pasting Blocks ........... 38
Managing Filter and Processor Blocks .......... 40
Changing Block Parameters ......................... 40
Input Channels ................................................. 41
Switching an Input between Analog and
Digital .......................................................... 42
Input Gain ..................................................... 42
Filter Blocks — Input .................................... 43
Acoustic Echo Cancellation (AEC) ................ 49
Dynamics Processor Blocks ......................... 52
Output Channels .............................................. 58
AT Output Gain (GAIN) ................................. 59
Analog Output Blocks ................................... 59
Digital I/O ......................................................... 63
Configuring the Digital I/O Ports .................... 63
Digital I/O Example ....................................... 65
Signal Path Building Blocks .............................. 66
Selecting a Microphone Configuration........... 66
Creating a Building Block .............................. 66
Organizing Building Blocks ........................... 68
Dante Controller Configuration and
Operation ............................................................. 71
AXP64AT Bus ................................................. 71
Managing Network Traffic ................................. 71
Starting Dante Controller .................................. 72
Device Name ................................................ 73
Dante Controller Naming Conventions .......... 73
Renaming an Input or Output........................ 73
Selecting Inputs and Outputs for Dante ............ 77
AXP64CAT Inputs and Outputs on
Dante Controller .......................................... 77
Routing Signals using Dante ......................... 78
Dante Troubleshooting ...................................... 79
AXP64CAT • Table of Contents vi
SIS Configuration and Control ........................ 82
Establishing a Network Connection .................. 82
Using SIS Commands ...................................... 83
AXP64CAT-initiated Messages ................... 83
SIS Command Sets ...................................... 84
Using the Command and Response
Tables .......................................................... 84
Error Responses ........................................... 84
Basic SIS Commands....................................... 85
Symbol Definitions ........................................ 85
Special Characters ....................................... 85
Command and Response Table for Basic
SIS Commands ........................................... 85
DSP SIS Commands ........................................ 86
Command Structure ..................................... 86
Processors Configurable by SIS
Commands ................................................. 86
Symbol Definitions ........................................ 87
Special Characters ....................................... 88
Command and Response Table for DSP
SIS Commands ........................................... 89
Digital I/O SIS Commands ................................ 90
Symbol Definitions ........................................ 90
Command and Response Table for
Digital I/O SIS Commands ........................... 90
Mounting the AXP 64 C AT ............................... 91
AXP64CAT • Introduction 1
Introduction
This section provides an overview of this guide and the features of the Extron AXP 64CAT
Audio Expansion Processor. Topics include:
About this Guide
About the AXP 64 C AT
Features
AXP 64 C AT Application Diagrams
About this Guide
This guide contains installation, configuration, and operation information for the Extron
Electronics AXP64CAT Audio Expansion Processor. In this guide, the terms “AXP,”
“AXP64,” “AXP 64 C AT,” and “processor” are used interchangeably to refer to the
AXP64CAT.
About the AXP64CAT
The Extron AXP 64 C AT is an audio expansion processor with six mic/line inputs and
four line outputs for remote connectivity to a Dante™-enabled DMP 128 audio system.
It is used to place six mic/line sources onto a Dante audio network, and route any four
Dante channels from the network to analog output for connection to an amplifier or other
destination. The AXP 64 C AT features Extron ProDSP with gain, filtering, and dynamics
processing for all inputs and outputs. Four of the inputs also include Acoustic Echo
Cancellation (AEC), 48 volt phantom power for each, and dedicated control ports for mic
control.
In addition, inputs 1 through 4 are FlexInput capable, allowing you to route a Dante channel
in place of a local mic/line input. A single Ethernet cable to a central equipment rack can
link multiple AXP 64 C AT units, avoiding the need to pull one cable for each mic/line input.
The DSP Configurator Software, downloadable free of charge from www.extron.com,
enables setup of DSP parameters and AEC.
The compact 1U high, half rack wide, 9.5-inch (24.1cm) deep enclosure can be placed on
furniture near table microphones and line level sources. It can also be mounted to a rack or
under furniture. For information on mounting options and UL rack mounting guidelines see
Mounting the AXP 64 C ATMounting the
AXP 64 C AT on page9191.
Features
Inputs — Six balanced or unbalanced mic/line level processed inputs, four with AEC,
are provided on 3.5 mm, 3-pole captive screw connectors.
Phantom power — 48-volt phantom power is provided on the first four inputs.
AXP64CAT • Introduction 2
Independent AEC — Four independent channels of high performance AEC, as well as
selectable noise cancellation, are provided on the first four inputs. Extron AEC features
advanced algorithms that deliver fast echo canceler convergence for optimal intelligibility
in situations that challenge AEC performance, including double-talk and the use of
wireless microphones at the near end.
FlexInput Channels — The first four inputs provide FlexInput capability to route a
Dante channel in place of a local mic/line input. The flexible input selection enables the
AXP 64 C AT to process audio from remote wireless microphones, wallplates, and other
sources from anywhere on the Dante network.
Flexible pre-processed and post-processed input signal routing — The internal
DSP architecture sends both pre-processed and post-processed input feeds from the
first four inputs onto the Dante network. The last two inputs provide post-processing
feeds to the Dante network. This provides the flexibility to limit the signal processing on
mic input signals for recording, assistive listening, or voice reinforcement feeds, while
applying full processing and AEC to a conferencing application.
Outputs — Four balanced or unbalanced line level outputs are provided on a 3.5 mm,
6-pole captive screw connector.
AT Expansion outputs — Ten DSP AT expansion outputs are placed directly onto a
Dante audio network.
Dante-to-line level outputs — Four Dante-to-line level outputs convert Dante audio
network signals to line level output signals with filtering and dynamic processing tailored
for the local environment.
Digital I/O — One digital input, ground, and dual digital outputs at each mic/line input
allow for external triggering, such as mic activation and muting and illuminating status
LEDs.
Expansion through Dante audio networking — The Dante equipped AXP64CAT,
in conjunction with the DMP128, provides scalability for creating large audio matrixes
over a local area network using standard Internet protocols. Dante technology
distributes up to 512x512 audio channels at 24-bit/48kHz over a single Gigabit
Ethernet link. A built-in four-port Gigabit switch also provides direct interconnection of
multiple AXP64CAT units to create large, cost-effective audio matrixes. Both Dante
and the four-port switch are AVB-ready.
Four-port Gigabit switch — The built-in, four-port Gigabit switch provides network
pass-through to additional AXP64CAT units and direct interconnection with
DMP 128AT units.
ProDSP 32/64-bit floating point signal processing — The AXP64CAT features
32/64-bit floating point audio DSP processing, which maintains very wide dynamic
range and audio signal transparency, to simplify management of gain staging while
reducing the possibility of DSP signal clipping.
Studio grade 24-bit/48 kHz analog-to-digital converters — Professional
converters fully preserve the integrity of the original audio signal.
Low latency DSP processing — The AXP64CAT features very low, deterministic
latency from input to output, regardless of the number of active channels or processes.
While latency increases in channels with AEC enabled, overall latency remains low,
keeping audio in sync with video.
DSP Configurator Software — A powerful yet user-friendly PC-based software tool
can be used for managing all audio operations of the AXP64CAT. It enables complete
setup and configuration of digital audio processing tools on the ProDSP platform.
AXP64CAT • Introduction 3
Intuitive Graphical User Environment — The DSP Configurator Software features
a Graphical User Environment that offers a clear view of all inputs, outputs, and audio
processing blocks in a single window. This allows a designer or installer to quickly view
an audio configuration without having to access multiple windows or menus.
Device Manager configuration software — Device Manager in the DSP Configurator
Software enables configuration of multiple Extron DSP products, including networked
AXP64CAT by toggling between Graphical User Environments for each unit.
Processors can be grouped into folders for organizing as separate rooms or buildings.
Settings for multiple Extron DSP products in Device Manager can be saved to a single
file.
Control options — The AXP64CAT can be controlled using the DSP Configurator
Software and a PC connection to the Ethernet port. It can also be controlled through a
computer or control system with Extron Simple Instruction Set (SIS) commands.
Copy and paste for processing blocks — For efficient audio system design and
setup, parameter settings can be quickly copied between individual processing blocks
or identical groups of blocks within the Graphical User Environment using conventional
cut-and-paste commands.
Building Blocks processor settings — Flexible Building Blocks are a set of
pre-designed processor settings optimized for a specific type of input device (such
as microphones) with preset levels, filters, dynamics, and more. Building Blocks are
available on each input strip and allow system designers to fully customize and save
their own Building Blocks for efficient system design and integration.
Live and Emulate operation modes with configuration file saving — Live mode
allows integrators to connect to the AXP64CAT and make live parameter adjustments
while hearing or metering them in real-time. This avoids the need to compile and upload
a configuration file to the DSP.
Emulate mode allows settings to be configured offline, then uploaded to the
AXP64CAT. Additionally, current settings on an AXP64CAT can be backed up to a
configuration file for archiving.
SpeedNav keyboard navigation – SpeedNav enables user-friendly, keyboard-based
navigation of the DSP Configurator Software without the need for a mouse or touchpad.
Using keyboard navigation keys and shortcuts, you can access any input and all audio
DSP tools. Using only the keyboard for software access can help expedite audio system
setup and optimization while on-site using laptop PCs.
Front panel input signal presence and clipping LEDs — The AXP64CAT front
panel contains LEDs for each input, enabling real-time monitoring of signal presence. A
separate LED illuminates as a warning whenever analog signal clipping is detected.
Ethernet monitoring and control — Ethernet control enables you to proactively
monitor and manage the AXP64CAT over a LAN, WAN, or the Internet, using standard
TCP/IP protocols.
AXP64CAT • Introduction 4
AXP64CAT Application Diagrams
100-240V 1.5A, 50-60 Hz
12
80 Hz
OFF
LIMITER/
PROTECT
SIGNAL
GREEN - ACTIVE
AMBER - STANDBY
CLASS 2 WIRING
XPA 4002 -70V
1
2
0
2
4
6
8
10
14
18
26
12
0
2
4
6
8
10
14
18
26
12
STANDBY
G
REMOTE
INPUTS HPF 70 V OUTPUTS
ATTENUATION
1 2121 2
100-240V ~ --A MAX
50/60 Hz
LAN
EXP
RS-232
Tx Rx G
RESET
MIC +48V
5678
1234
8
4 1
12345G 6
1234
78910 G
11 12 13 14 15 G1617181920G
234
56 78
910
11 127
3
6
2
5
1
MIC/LINE INPUTS
OUTPUTS
DIGITAL I/O
REMOTE AT
DMP 128 C AT
POWER
12V
0.7A MAX
LR
L
8Ω / 4Ω
CLASS 2
WIRING
R
10V
VCG
50mA
L
MPA 152 Plus
R
INPUTS
OUTPUTS
REMOTE
POWER
12V
0.7A MAX
LR
L
8Ω / 4Ω
CLASS 2
WIRING
R
10V
VCG
50mA
L
MPA 152 Plus
R
INPUTS
OUTPUTS
REMOTE
POWER
12V
0.7A MAX
LR
L
8Ω / 4Ω
CLASS 2
WIRING
R
10V
VCG
50mA
L
MPA 152 Plus
R
INPUTS
OUTPUTS
REMOTE
POWER
12V
0.7A MAX
LR
L
8Ω / 4Ω
CLASS 2
WIRING
R
10V
VCG
50mA
L
MPA 152 Plus
R
INPUTS
OUTPUTS
REMOTE
AXP 64 C AT
RESET
1
1
1
IN G
POWER
12V
X.XA MAX
01 02
234
I/OINPUTS
OUTPUTS
AT
2
IN G0102
3
IN G0102
4
IN G0102
2 3 4 5 6 1 2 3 4
AXP 64 C AT
RESET
1
1
1
IN G
POWER
12V
X.XA MAX
01 02
234
I/OINPUTS
OUTPUTS
AT
2
IN G0102
3
IN G0102
4
IN G0102
2 3 4 5 6 1 2 3 4
AXP 64 C AT
RESET
1
1
1
IN G
POWER
12V
X.XA MAX
01 02
234
I/OINPUTS
OUTPUTS
AT
2
IN G0102
3
IN G0102
4
IN G0102
2 3 4 5 6 1 2 3 4
Gooseneck
Microphones
4 Channel
Recorder
CM#1
CM#2
CM#3
CM#4
CM#5
CM#6
CM#
7
Clerk
Speakers
Lectern
Extron
SI 26CT
Two-Way Ceiling Speakers
Extron
XPA 4002-70V
Power Amplier
Extron
DMP 128 C AT
Digital Matrix
Processor
Wireless Microphone
Receivers
Codec
Wireless Microphone Transmitters
Equipment Rack
Assistive Listening
System Transmitter
Assistive Listening
System Emitters
Extron
AXP 64 C AT
Expansion
Processor
Extron
AXP 64 C AT
Expansion
Processor
Extron
AXP 64 C AT
Expansion
Processor
Extron
MPA 152 Plus
Power
Amplier
Extron
MPA 152 Plus
Power
Amplier
Network
Figure 1. Typical AXP 64 C AT System
AXP64CAT • Introduction 5
XPA 4002
LIMITER / PROTECT
SIGNAL
1
OVER
TEMP
2
GREEN - ACTIVE
AMBER - STANDBY
DMP 128
DIGITAL MATRIX PROCESSOR
CONFIG
1
CLIP
SIGNAL
INPUTS OUTPUTS
1
CLIP
SIGNAL
2 3 4 5 6 7 8 9 10 11 12 2 3 4 5 6 7 8
EXPLAN
ACTIVITY
AXP 64 C AT
INPUTS OUTPUTS
1
CLIP
SIGNAL
AUDIO EXPANSION PROCESSOR
Extron
2 3 4 1 2 3 45 6
CLIP
SIGNAL
AXP 64 C AT
INPUTS OUTPUTS
1
CLIP
SIGNAL
AUDIO EXPANSION PROCESSOR
Extron
2 3 4 1 2 3 45 6
CLIP
SIGNAL
AXP 64 C AT
INPUTS OUTPUTS
1
CLIP
SIGNAL
AUDIO EXPANSION PROCESSOR
Extron
2 3 4 1 2 3 45 6
CLIP
SIGNAL
Wireless Microphone Transmitters
Extron
SI 26CT
Speakers
Assistive Listening
System Emitters
Speakers
Network
Microphones
CM#4
Lectern
Clerk
CM#1
CM#2
CM#3
CM#5
CM#6
CM#7
In Rack
Equipment:
IR Transmitter
Codec
(2) Wireless
Recievers
DMP 128 AT
XPA 4002-70V
4 Channel
Recorder
Extron
AXP 64 C AT
Expansion
Processor (3)
Extron
MPA 152 Plus
Amplifer (4)
BASSLEVELTREBLE
MINI POWER AMPLIFIER
MPA 152 Plus
STEREO
DUAL
MONO
BASSLEVELTREBLE
MINI POWER AMPLIFIER
MPA 152 Plus
STEREO
DUAL
MONO
BASSLEVELTREBLE
MINI POWER AMPLIFIER
MPA 152 Plus
STEREO
DUAL
MONO
BASSLEVELTREBLE
MINI POWER AMPLIFIER
MPA 152 Plus
STEREO
DUAL
MONO
Figure 2. AXP 64 C AT Auditorium Application
AXP64CAT • Installation 6
Installation
This section describes the front and rear panel features and the rear panel connections. It
also provides procedures for installing the Dante Controller and DSP Configurator software.
The following topics are discussed:
System Configuration
Rear Panel Features and Cabling
Front Panel Indicators
Connecting the AXP 64 C AT to a Network
Creating a Physical Dante Network
Software Installation
Updating Firmware
Resetting
System Configuration
The AXP64CAT does not have physical controls for configuration or operation. These are
accomplished using a computer running Windows
®
7
®
or later and the DSPConfigurator
software (available at www.extron.com), or by SIS commands using Extron DataViewer
(also available from the Extron Website).
Dante Controller for Windows from Audinate is required to select and route Dante transmit
and receive channels to all connected Dante-compatible devices (see Downloading and
Installing Dante Controller for Windows on page 14). The AXP64CAT has front and
rear panel operational indicators and a rear panel reset button for hardware resets (see
Resetting on page22).
You can fully configure the AXP64CAT using the DSP Configurator software. When first
launched, the DSP Configurator opens a blank configuration with no processing defined. All
gain stages are muted and set to Unity (0 dB) gain.
The AXP64CAT provides a comprehensive set of DSP processing tools. Use the filter tools
to shape the tonal quality of your microphones or EQ the room to compensate for acoustic
gain. Use the dynamics processors for level control or system protection. Input and output
gain stages provide metering in decibels relative to full scale (dBFS) to assist in configuration
of the device for optimal operation. Optimal operating levels are close to 0 dBFS (0 dB “full
scale” on the input or output meters) without exceeding that level. Levels above 0dBFS
cause clipping, which is always audible on a digital device.
AXP64CAT • Installation 7
Rear Panel Features and Cabling
AA
B
B
D
D
E
E
AXP 64 C AT
RESET
1
1
1
IN G
POWER
12V
1.0A MAX
01 02
234
I/OINPUTS
OUTPUTS
AT
2
IN G0102
3
IN G0102
4
IN G0102
2 3 4 5 6
1 2 3 4
CC
FF
A
Power connector
D
Analog output connectors
B
Digital I/O connectors
E
AT port connectors
C
Mic/line input connectors
F
Reset button
Figure 3. AXP64CAT Rear Panel
A
Power input connector — Connect the provided 12VDC power supply to this captive
screw connector and plug the power cord into an AC power source. Verify that the front
panel power LED lights (see figure 8,
A
, on page 10).
ATTENTION:
Do not connect any external power supplies until you have read the Attention
notifications on the next page.
Ne branchez pas de sources d’alimentation externes avant d’avoir lu les mises
en garde de la page suivante.
Rear Panel
Power Receptacle
DC Power Cord
Captive Screw
Connector
Ground
all devices.
External
Power Supply
12 VDC, 1.5 A max.
– Return
+12 VDC input
Ridged
Smooth
1A MAX
100-240V 50-60Hz
Figure 4. Connecting the External Power Supply
Power cycle — The mixing and audio processor settings (the current state) of the AXP
are saved in nonvolatile memory. When the unit is powered off, all settings are retained.
When the unit is powered back on, it recalls settings from the nonvolatile memory and
reapplies them. If a configuration is in process but has not been saved when power is
removed, the previously saved audio level and audio DSP processor settings become
active.
After the AXP is powered on, the front panel power LED (see figure 8,
A
) lights
steadily when the unit is available for operation or configuration.
AXP64CAT • Installation 8
ATTENTION:
Always use a power supply provided by or specified by Extron. Use of an
unauthorized power supply voids all regulatory compliance certification and
may cause damage to the supply and the end product.
Utilisez toujours une source d’alimentation fournie par Extron. L’utilisation
d’une source d’alimentation non autorisée annule toute conformité
réglementaire et peut endommager la source d’alimentation ainsi que l’unité.
Unless otherwise stated, the AC/DC adapters are not suitable for use in air
handling spaces or in wall cavities. The power supply is to be located within
the same vicinity as the Extron AV processing equipment in an ordinary
location, Pollution Degree2, secured to the equipment rack within the
dedicated closet, podium, or desk.
Sauf mention contraire, les adaptateurs AC/DC ne sont pas appropriés pour
une utilisation dans les espaces d’aération ou dans les cavités murales.
La source d’alimentation doit être située à proximité de l’équipement de
traitement audiovisuel dans un endroit ordinaire, avec un degré2 de pollution,
fixé à un équipement de rack à l’intérieur d’un placard, d’une estrade, ou d’un
bureau.
The installation must always be in accordance with the applicable provisions
of National Electrical Code ANSI/NFPA 70, article 725 and the Canadian
Electrical Code part 1, section 16. The power supply shall not be permanently
fixed to building structure or similar structure.
Cette installation doit toujours être en accord avec les mesures qui s’applique
au National Electrical Code ANSI/NFPA70, article725, et au Canadian
Electrical Code, partie1, section16. La source d’alimentation ne devra pas
être fixée de façon permanente à une structure de bâtiment ou à une structure
similaire.
B
Digital I/O connectors — Four 4-pole, 3.5 mm captive
screw connectors associated with the mic/line inputs provide
digital input and output ports to connect microphones with
logic circuits (see figure 3 on the previous page). Each has an
input (IN), a ground (G), and two output (O1 and O2) ports.
The input port can enable mic mute from a remote source.
The two output ports can provide tally back to the mic LEDs
to indicate mic status. To wire these connectors, see the
illustration at right.
NOTE: To configure these ports, use DSP Configurator (see Digital I/O on
page 63).
C
Mic/Line input connectors 1-6 — Connect up to six balanced or unbalanced
microphone or mono line level devices to these 3-pole, 3.5mm captive screw
connectors for analog mic or line audio input (see figure 3). Inputs 1 through 4 provide
48 volts phantom power.
Wire the connectors as shown in figure 5.
Balanced Input
Tip
Sleeve
Ring
Tip
Sleeve
Unbalanced Input
Figure 5. Balanced or Unbalanced Mic and Line Input Wiring
Do not tin the wires!
(5 mm) MAX.
3 "
16
IN
G
O1
O2
Digital I/O Wiring
AXP64CAT • Installation 9
Phantom power — Power through the signal lines of the first four mic/line inputs is
selectable via the DSP software.
ATTENTION:
Condenser microphones require phantom power. Dynamic microphones do
not require power.
Les microphones électrostatiques nécessitent une alimentation fantôme. Les
microphones dynamiques n’ont pas besoin d’alimentation.
Never set an unbalanced dynamic microphone to +48 V. Doing so may
damage the microphone.
Ne réglez jamais un microphone dynamique asymétrique à +48V. Cela pourrait
endommager le micro.
For condenser microphones, verify it safely operates at +48 VDC.
Pour les microphones électrostatiques, vérifiez qu’ils fonctionnent bien à
+48Vcc.
When a line level source is connected, be certain the +48 V phantom power is
off (cleared).
Lorsqu’une source de niveau ligne est connectée, soyez certain que
l’alimentation fantôme +48V est débranchée (enlevée).
D
Analog output connectors — Audio outputs 1 through 4 are on two 3.5 mm, 6-pole
captive screw connectors (see figure 3 on page 7). Connect up to four balanced or
unbalanced mono line level or two stereo outputs to these two 6-pole 3.5 mm captive
screw connectors. Wire as shown in figure 6.
Do not tin the wires!
(5 mm) MAX.
3 "
16
Balanced Output
Unbalanced Output
+
+
Tip
Ring
Tip
Ring
Sle
eves
Tip
No Ground Here
No Ground Here
Tip
Sleeves
Sle
eves
Sleeves
+
+
Figure 6. Wiring for Analog Output
Alternatively, 3-pole or 5-pole connectors can be used. See figure 7 on the next page
for an example.
ATTENTION:
For unbalanced audio outputs, connect the sleeves to the ground contact. DO
NOT connect the sleeves to the negative (-) contacts.
Pour l’audio asymétrique, connectez les manchons au contact au sol. Ne PAS
connecter les manchons aux contacts négatifs (–).
AXP64CAT • Installation 10
DO NOT
Connect Here
AXP 64 C AT
RESET
1
1
1
IN G
POWER
12V
X.XA MAX
01 02
2 3 4
I/OINPUTS
OUTPUTS
AT
2
IN G 01 02
3
IN G 01 02
4
IN G 01 02
2
3
4
5
6
1
2
3
4
5-pole CSR
Figure 7. Connecting a 5-pole Audio Connector
E
AT port connectors — This four-port Gigabit switch with four RJ-45 Ethernet
connectors supports digital audio transport (AT) and communications (see figure 3 on
page 7). Connect one or more AXP64CATs to a device such as the DMP 128 AT to
form a larger matrix system (see Creating a Physical Dante Network on the next
page). Up to 56 channels can be connected.
NOTE: The digital and analog input channel is shared for each input. An input is
either analog or digital (Dante).
Any of these AT connectors can also be connected to an Ethernet LAN or WAN.
Communication between the AXP and a controlling device or computer is via a TCP
socket using port 4333 (see Connecting the AXP 64 to a Network on the next page).
This connection also enables control of the AXP via SIS commands issued from a
computer connected to the same LAN or WAN (see SIS Configuration and Control
beginning on page 82).
E
Reset button — This recessed button returns the AXP64CAT to its factory default
state (see figure 3 on page 7 (see Resetting on page22).
Front Panel Indicators
CC
B
B
AXP 64 C AT
INPUTS OUTPUTS
1
CLIP
SIGNAL
AUDIO EXPANSION PROCESSOR
Extron
2 3 4 1 2 3 45 6
CLIP
SIGNAL
AA
A
Power LED
B
Input LEDs
C
Output LEDs
Figure 8. AXP 64 C AT Front Panel
AXP64CAT • Installation 11
A
Power LED — This green LED blinks during boot-up. It lights steadily when the
AXP64CAT is powered on and ready to operate (see figure 8 on the previous page).
B
Input LEDs — One pair for each of the six inputs (see figure 8):
Clip indicators: These red LEDs light when the corresponding input signal
exceeds -3 dBFS. The clip indicator remains on for 200ms after the input signal
drops below that level.
Signal indicators: These green LEDs light when there is an active source on the
corresponding input.
C
Output LEDs — One pair for each of the four analog outputs (see figure 8):
Clip indicators: These red LEDs light when the corresponding output signal
exceeds -3 dBFS. The clip indicator remains on for 200ms after the output signal
drops below that level.
Signal indicators: These green LEDs light when a signal is detected on the
corresponding analog output.
Connecting the AXP 64 C AT to a Network
The AXP 64 supports 100 and 1000 Mbps halfduplex and full duplex connections. You can
use either a standard, straight-through Ethernet cable or a crossover cable to connect the
AXP to a network via one of the four AT ports (see figure 3,
E
, on page 7). The control
device must be connected to the same network. Any one of the four AT ports can be
dedicated as a control connection.
If you do not know the IP address of the control device, use Dante Controller to obtain it
(see Establishing a Network Connection on page 82).
When all connections are made and power is applied, the green (activity) LED of the
connected AT port blinks to indicate data activity on the connection.
Creating a Physical Dante Network
A physical network is required to share Dante audio channels between an AXP64CAT and
DMP128AT devices. Each AXP64CAT contains a 4-port Gigabit switch with four RJ-45
connectors located on the back panel that accept standard network cables. The 4-port
switch can operate as a standard switch described in this section.
NOTE: The Dante Controller network configuration defaults to switched mode (basic)
making star and daisy-chain configurations possible.
An AXP64CAT-based Dante network can be configured in a daisy-chain or star network
topology using the 4-port switch and the Dante Controller in Switched mode.
AXP64CAT • Installation 12
Star Network Configuration
Star network topology has one DMP128CAT as the central unit, which is then directly
connected to up to three AXP64CATs. Alternatively, a larger network switch can be used
in place of the central DMP128CAT, allowing more than three AXP64CATs connected in
the star configuration (see figure 9).
100-240V ~ --A MAX
50/60 Hz
LAN
EXP
RS-232
Tx Rx G
RESET
MIC +48V
5678
1234
8
4 1
1 2345G6
1234
78910 G
11 12 13 14 15 G1617181920G
234
56 78
910
11 127
3
6
2
5
1
MIC/LINE INPUTS
OUTPUTS
DIGITAL I/O
REMOTE AT
DMP 128 C AT
AXP 64 C AT
AXP 64 C AT
RESET
1
1
1
IN G
POWER
12V
X.XA MAX
01 02
234
I/OINPUTS
OUTPUTS
AT
2
IN G0102
3
IN G0102
4
IN G0102
2 3 4 5 6 1 2 3 4
AXP 64 C AT
AXP 64 C AT
RESET
1
1
1
IN G
POWER
12V
X.XA MAX
01 02
234
I/OINPUTS
OUTPUTS
AT
2
IN G0102
3
IN G0102
4
IN G0102
2 3 4 5 6 1 2 3 4
DMP 128 C AT
AXP 64 C AT
AXP 64 C AT
RESET
1
1
1
IN G
POWER
12V
X.XA MAX
01 02
234
I/OINPUTS
OUTPUTS
AT
2
IN G0102
3
IN G0102
4
IN G0102
2 3 4 5 6 1 2 3 4
Figure 9. Star Network Topology
Daisy Chain Configuration
A daisy chain configuration can also be used. Each unit is connected to both the previous
unit and the next unit in the chain (see figure 10).
DMP 128 AT
100-240V ~ --A MAX
50/60 Hz
LAN
EXP
RS-232
Tx Rx G
RESET
MIC +48V
5678
1234
8
4 1
1 2345G6
1234
78910G
11 12 13 14 15 G1617181920G
234
56 78
910
11 127
3
6
2
5
1
MIC/LINE INPUTS
OUTPUTS
DIGITAL I/O
REMOTE AT
DMP 128 C AT
AXP 64 C AT #1
AXP 64 C AT #2
AXP 64 C AT #3
AXP 64 C AT
RESET
1
1
1
IN G
POWER
12V
X.XA MAX
01 02
234
I/OINPUTS
OUTPUTS
AT
2
IN G0102
3
IN G0102
4
IN G0102
2 3 4 5 6 1 2 3 4
AXP 64 C AT
RESET
1
1
1
IN G
POWER
12V
X.XA MAX
01 02
234
I/OINPUTS
OUTPUTS
AT
2
IN G0102
3
IN G0102
4
IN G0102
2 3 4 5 6 1 2 3 4
AXP 64 C AT
RESET
1
1
1
IN G
POWER
12V
X.XA MAX
01 02
234
I/OINPUTS
OUTPUTS
AT
2
IN G0102
3
IN G0102
4
IN G0102
2 3 4 5 6 1 2 3 4
Figure 10. Daisy Chain Topology
Hybrid versions combining the star and daisy chain topologies can also be built, but a ring
topology, or any topology that creates a duplicate connection, causes a connection failure in
the Dante Controller software.
NOTE: Connections between AXP64CAT ports in either a star or daisy chain
network do not need to be sequential (port 1 to port 2, port 2 to port 3, port 3 to
port 4, and so on), nor do they need to be made between the same port numbers
(port 1 to port 1, port 2 to port 2, port 3 to port 3, and so on).
AXP64CAT • Installation 13
Software Installation
AXP64CAT Software Programs
The AXP64CAT has no front panel hardware controls. To configure and operate the AXP,
use a PC running Microsoft Windows 7 or newer and the following software programs:
Dante Controller for Windows from Audinate is required to select and route
AXP64CAT digital inputs and outputs to and from all connected Dante-compatible
devices on the same network and to rename connected devices.
DSPConfigurator is used to customize signal processing for the input channels of the
AXP64CAT.
To assist identification of multiple connected AXP64CATs on the network, rename each
device using Dante Controller (see Renaming connected AXP 64 C AT devices on
page 17). After the AXPis renamed, you can connect DSP Configurator to configure it (see
Downloading and Installing DSP Configurator on page 19).
Both DSPConfigurator and Dante Controller are available from the AXP64CAT product
page on the Extron Website. Digital signal routing can be done only using Dante Controller
from Audinate.
See Rear Panel Features and Cabling Rear Panel Features and Cabling on
page7, and Connecting the AXP 64 to a Network on page11 for additional details
to connect via the LAN ports.
Software Installation Overview
Both DSPConfigurator and Dante Controller must be installed to configure the AXP64CAT
and route transmit and receive channels. Download and install both software programs in
the order they are listed below:
1. Download Dante Controller for Windows from the Extron Website (see
Downloading and Installing Dante Controller for Windows on page 14).
2. Install Dante Controller.
3. Rename each AXPCAT as it is placed on the network (when there are multiple
AXP64CATs on the network) (see Renaming connected AXP 64 C AT devices on
(see Renaming connected AXP64CAT devices on page17).
NOTES:
To avoid confusion, rename each device with a unique identifier.
To simplify renaming, connect only one device to the network at a time. As
each device is renamed, it can remain on the network.
4. Download DSP Configurator (see Downloading and Installing DSP Configurator
(see Downloading and Installing DSPConfigurator on page19).
5. Install DSP Configurator.
AXP64CAT • Installation 14
Downloading and Installing Dante Controller for Windows
1. On the Extron web page, click the Download tab (see figure 11,
1
).
2. On the Download screen, click the Dante Controller link (
2
) on the left sidebar.
Figure 11. Dante Controller Link on the Download Page
3. On the Dante Controller web page, click the Download Now button (see figure 12,
1
).
Figure 12. Download Button on Dante Controller Web Page
  • Page 1 1
  • Page 2 2
  • Page 3 3
  • Page 4 4
  • Page 5 5
  • Page 6 6
  • Page 7 7
  • Page 8 8
  • Page 9 9
  • Page 10 10
  • Page 11 11
  • Page 12 12
  • Page 13 13
  • Page 14 14
  • Page 15 15
  • Page 16 16
  • Page 17 17
  • Page 18 18
  • Page 19 19
  • Page 20 20
  • Page 21 21
  • Page 22 22
  • Page 23 23
  • Page 24 24
  • Page 25 25
  • Page 26 26
  • Page 27 27
  • Page 28 28
  • Page 29 29
  • Page 30 30
  • Page 31 31
  • Page 32 32
  • Page 33 33
  • Page 34 34
  • Page 35 35
  • Page 36 36
  • Page 37 37
  • Page 38 38
  • Page 39 39
  • Page 40 40
  • Page 41 41
  • Page 42 42
  • Page 43 43
  • Page 44 44
  • Page 45 45
  • Page 46 46
  • Page 47 47
  • Page 48 48
  • Page 49 49
  • Page 50 50
  • Page 51 51
  • Page 52 52
  • Page 53 53
  • Page 54 54
  • Page 55 55
  • Page 56 56
  • Page 57 57
  • Page 58 58
  • Page 59 59
  • Page 60 60
  • Page 61 61
  • Page 62 62
  • Page 63 63
  • Page 64 64
  • Page 65 65
  • Page 66 66
  • Page 67 67
  • Page 68 68
  • Page 69 69
  • Page 70 70
  • Page 71 71
  • Page 72 72
  • Page 73 73
  • Page 74 74
  • Page 75 75
  • Page 76 76
  • Page 77 77
  • Page 78 78
  • Page 79 79
  • Page 80 80
  • Page 81 81
  • Page 82 82
  • Page 83 83
  • Page 84 84
  • Page 85 85
  • Page 86 86
  • Page 87 87
  • Page 88 88
  • Page 89 89
  • Page 90 90
  • Page 91 91
  • Page 92 92
  • Page 93 93
  • Page 94 94
  • Page 95 95
  • Page 96 96
  • Page 97 97
  • Page 98 98

Extron AXP 64 C AT User manual

Category
Musical Equipment
Type
User manual

Ask a question and I''ll find the answer in the document

Finding information in a document is now easier with AI