Page is loading ...

2020-Current Jeep Gladiator JT ADD-Lander™
Overland Rack Installation Instructions
Addictive Desert Designs® | Page 1
ADDICTIVE DESERT DESIGNSADDICTIVE DESERT DESIGNS®®
®
Preparation:
• Disconnect the negative battery terminal. Park the vehicle on level ground and set the emergency brake.
• We recommend reading through the installation instructions in whole before performing the work.
• When button head bolts are being used, install the supplied washer on the nut side. en, hold the bolt station-
ary and only turn the nut to tighten. Do not turn the bolt to tighten hardware assembly, unless otherwise noted.
• Estimated Installation Time: 2 Hours for Assembly/Installation
**This installation requires 2 people for best results**
**Labor Rates are based on a vehicle with no pre-existing damage. Wiring labor is based on a standard wiring procedure
with light switches installed in an easily accessible location. Custom light triggering or switch mounting location will
result in a greater labor charge.**
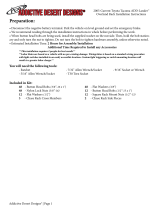
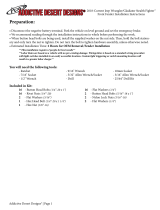
You will need the following tools:
- Ratchet - 9/16" Wrench - 7/32" Allen Wrench/Socket
- 5/16" Allen Wrench/Socket
Included in Kit:
12 - Button Head Bolts
(1/2"-13 x 1")
13 - Flat Washers
(1/2”)
12 - Square Rack Nuts
(1/2”-13)
48 - Button Head Bolts
(3/8"-16 x 1")
48 - Flat Washers
(3/8")
48 - Nylon Lock Nuts
(3/8"-16)
1 - Button Head Bolts
(1/2"-13 x 1 1/2")
2 - Chase Rack Side Piece
2 - Chase Rack Cross Member 1 - Chase Rack Cross Member
(No Front Lip)

2020-Current Jeep Gladiator JT ADD-Lander™
Overland Rack Installation Instructions
Addictive Desert Designs® | Page 2
ADDICTIVE DESERT DESIGNSADDICTIVE DESERT DESIGNS®®
®
Assembly:
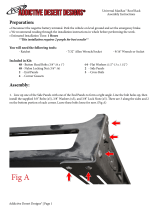
1. Find the two chase rack side pieces. en, set them upright and install the rst cross member. Install the
cross member with the missing lip in the front spot, where the missing lip will face the rear glass of the
truck. Install the supplied 3/8" Bolts (x16), 3/8" Washers (x16), and 3/8" Lock Nuts (x16). Leave these bolts
loose for now. (Fig A)
Fig AFig A
2. Repeat Step 1 with the middle and rear cross members. (Fig B)
Fig BFig B

2020-Current Jeep Gladiator JT ADD-Lander™
Overland Rack Installation Instructions
Addictive Desert Designs® | Page 3
ADDICTIVE DESERT DESIGNSADDICTIVE DESERT DESIGNS®®
®
Installation:
3. Slide the supplied Square Nuts (6 per side) into the rail system in the bed of the Jeep. Make sure to line them
up about where the mounting holes of the chase rack are going to land. (Fig C)
Fig CFig C
4. Install the supplied 1/2" x 1" Bolts (6 per side) and 1/2" Washers (6 per side) into the side rail. If the 1" long
bolts don't reach, you will have to use the start 1 1/2" long bolt into one of the holes to bring the chase rack rail
closer to the truck bed rail. Once the chase rack is close enough to the bed rail, start the 1" bolt in the hole right
next to the one you've started the 1 1/2" long bolt in. en, remove the 1 1/2" long bolt and reinstall the 1" long
bolt. Do not tighten the 1 1/2" long bolt all the way (it will hit the back of the bed rail), only use it to bring
the chase rack closer to the bed rail. Leave these bolts loose for now. (Fig D)
Fig DFig D

2020-Current Jeep Gladiator JT ADD-Lander™
Overland Rack Installation Instructions
Addictive Desert Designs® | Page 4
ADDICTIVE DESERT DESIGNSADDICTIVE DESERT DESIGNS®®
®
5. Tighten the front facing bolts on the front cross member to 30 foot pounds. You may to move the chase rack
as far back as you can to access the front of the bolt heads. (Fig E) Leave the rest of the cross member bolts
loose for now.
Tighten these two bolts before Tighten these two bolts before
tightening the 1/2" mounting bolts, tightening the 1/2" mounting bolts,
but do not tighten any other cross but do not tighten any other cross
member bolts. member bolts.
Fig EFig E
6. Tighten the 1/2" Mounting Bolts to 57 foot pounds.
7. Tighten the remaining 3/8" Mounting Bolts to 30 foot pounds.
8. Stand back and enjoy your new ADD-Lander™ Overland Chase Rack.
9. Check and re-tighten, if needed, all mounting bolts aer 100 miles and periodically thereaer.

2020-Current Jeep Gladiator JT ADD-Lander™
Overland Rack Installation Instructions
Addictive Desert Designs® | Page 5
ADDICTIVE DESERT DESIGNSADDICTIVE DESERT DESIGNS®®
®
For Additional Support or Technical Questions,
Please Call 480-671-0820 or
Email Info@AddictiveDesertDesigns.com
is product is protected by one or more U.S. patents
www.addictivedesertdesigns.com/patents
/
