The Brighter Choice
UTILITY SHOP LIGHT
Install Guide and Manual
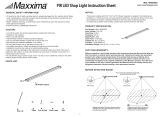
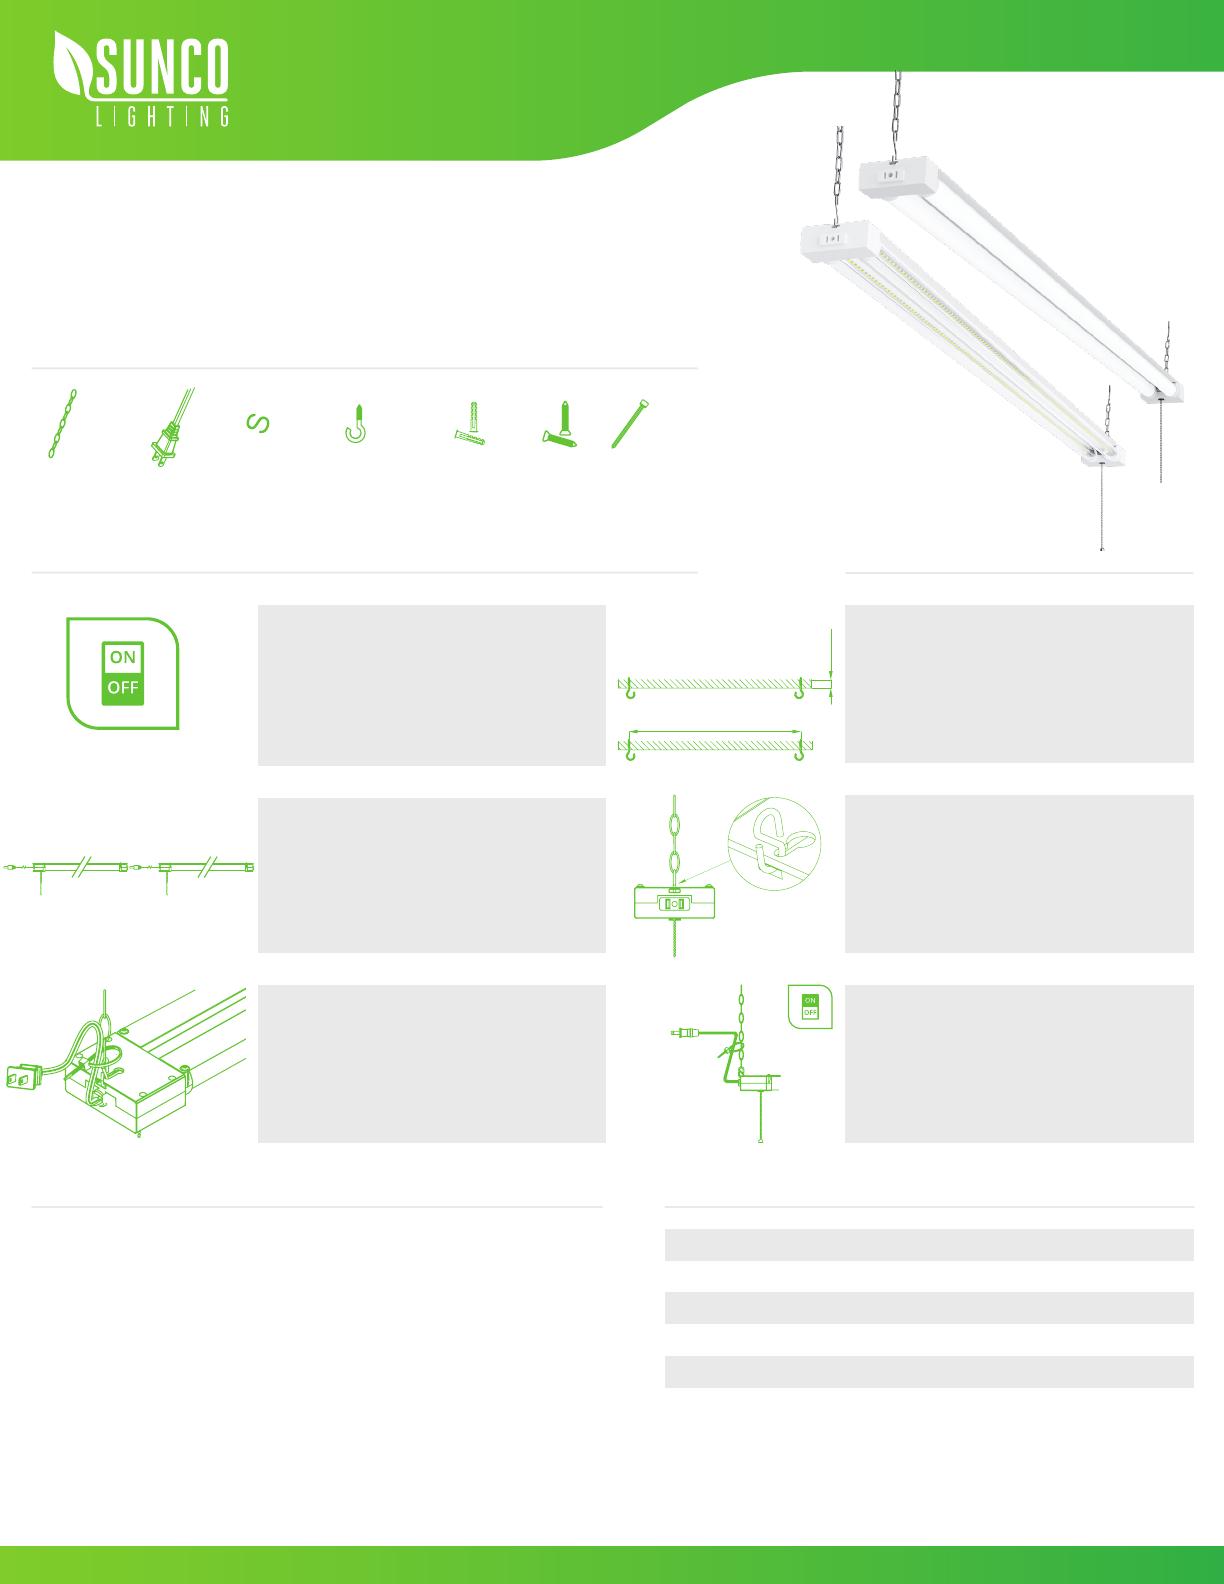
COMPONENTS
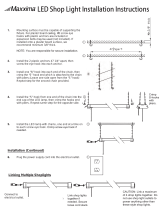
EASY INSTALLATION
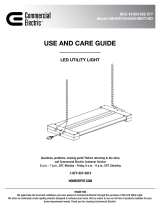
WARNING SPECIFICATIONS
1.
2.
5.
8.
3.
4.
6.
7.
9.
11.
10.
Voltage
Wattage
Damp
Aluminum + PC
1.47lbs
7 years
120V
40W
Housing
Weight
Warranty
Suitable for Locations Ingress
To reduce the risk of fire, electric shock or injury to people:
• This product should be installed in accordance with the applicable installation code
by a person familiar with the construction and operation of the product and the hazards involved.
•Do not alter, relocate or remove wiring (plug) during installation.
•Proper grounding is required to ensure safety. Do not install directly over a heat source.
•Check for damage during shipping prior to install. If the product is damaged, do not use it.
•This fixture complies Part 15 of the FCC rules. Operation is subject to the following
two conditions: (1) this device may not cause harmful interference, and (2) this device must
accept any interference received, including interference that may cause undesired operation.
•Not to use with dimmers.
•Do not use the plug on the side of the LED Shop Light as an outlet for appliances, vacuums,
power tools, extension cables, etc. This was designed for daisy chain only.
Using it for other purposes will void your warranty.
•Turn off the switch and circuit breaker before installing this LED light fixture. When using the
wall switch, make sure the pull chain is on.
•Use safety precautions. Safety eyeglasses and gloves are recommended.
•Please review instructions carefully before proceeding.
Turn off circuit breaker that provides power to the
light switch for the LED Shop Light.
Mounting surface must be able to support the
weight of the fixture.
• Plasterboard - #8 eye hook screw with plastic anchors, or
expansion bolts (not included);
• Plaster board thickness should be 3/8 inch.
• Open frame wood joists. -#8 eye hooks only, no anchors
required.
Space the anchors to suit your lighting plan and
power cord length.
• Link up to 4
Loop the supplied cable tie through one chain link
and around the power cord to secure it to the chain.
This is necessary prior to hanging.
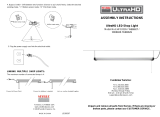
Drill pilot holes. Spacing between hooks should
be 46.83 inches apart.
• Dry Wall = 7/32” drill bit
• Wall Stud = 9/64” drill bit
Insert x2 wall anchors, then screw in the screw
eye hooks into the anchors.
Install one S hook into each end of the chain.
• Repeat with second chain.
• Crimp to secure to chain. Leave other side open
Loop S hook into the fixture’s end keyhole slot.
• Repeat with second chain.
• Crimp end to secure.
Hang the lose end of the S hook chain on
screw eye hook in ceiling.
• Repeat with second chain.
Plug in power cord to electrical outlet.
Turn on circuit breaker and test light.
Turn Power OFF
Suspension Install
Required Tools: Drill, Ladder,
Hammer, Pliers, Tape Measure, Pencil.
46.83” apart
Min. 3/8” thick
Link up
4 shop lights
together
Connect to
additional
shop light
Connect to
Power Outlet
Turn Power
ON
X2
Chain Link
60”
Flat Power Cord
X2
Screw Eye Hook
X1
Zip Tie
X4
Plastic Anchor
X2
Screw
X2
“S” Hook