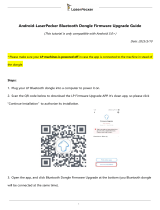
Page is loading ...

Novitool® Aero® Splice Press
Dashboard & Mobile App Manual
www.flexco.com
IMPROPER OR UNSAFE use of this tool can result in serious bodily injury! is manual contains important information
about product function and safety. Please read and understand this manual BEFORE operating the tool. Please keep this
manual available for other users and owners before they use the tool. is manual should be stored in a safe place.
WARNING
Patent number: US 9,090,022 B1 and other Patents Pending

www.flexco.com
—2—
Connectivity Specifications .................................3
Description ...............................................4
Novitool® Aero® Splice Press Initialization .....................5
Adding Your Registered Novitool® Aero®
Splice Press to Dashboard ................................6
Novitool® Aero® Splice Press Mobile App ......................8
Connecting Mobile App to Press
Update Firmware
Sync Data to Dashboard
Offline Data Sync Upload to Dashboard
Adjusting Connectivity Settings
Additional Features of the Novitool® Aero®
Splice Press Dashboard .................................14
Managing & Adding Users
Managing Presses on Dashboard
Managing Companies on Dashboard
Aero® Dashboard Troubleshooting Guide ....................19
Aero® Mobile App Troubleshooting Guide ....................20
Table of Contents
Initializing Press
Prior to first time operation, you must register your press in order to unlock it for use.
This will also allow Flexco to communicate critical firmware updates.
a. Screen will show press is locked and requires access code.
Go to www.flexco.com/code to enter your serial number and to obtain
your access code.
b. Use the selector knob and scroll to “Enter Access Code.” Depress knob.
c. Scroll down, enter access code, and select “Confirm.”
Contact Flexco Customer Service if you have difficulties entering the code.

—3—
Connectivity Specifications
Web browsers recommended:
• Google Chrome
• Firefox
• Edge
• Safari
Smart device specifications:
• iOS – version 9.0 or newer
• Android – version 5.0 or newer
Bluetooth® specifications:
• Bluetooth® Dongle: Flexco Item Code 09574.
Order this dongle to ensure good performance;
otherwise, connectivity results may vary.
• 50 feet / 15 meters Bluetooth® range

www.flexco.com
—4—
Novitool® Aero® Splice Press
Description
Aero® Connectivity
Ability to upload new versions of firmware soware to the Aero® press from the Novitool® Aero® Splice Press
Dashboard to a smart device via a Wi-Fi or cellular connection and from the smart device with the Aero®
Mobile App to the Aero® press via Bluetooth®.
• Firmware updates include press operation improvements to enhance the productivity of your press and
splice reliability.
Ability to upload splice cycle data from the Aero® press to the smart device with a mobile app via Bluetooth®
and sync from the mobile app to the dashboard via a Wi-Fi or cellular connection.
• Data assists with advanced splicing support, troubleshooting, and collection overtime to assist with product
reliability.
Aero® Dashboard
Purpose of the dashboard is to manage:
• Aero® Presses
• Users
• Companies
During the press registration process, company and personal data are collected to register you for the
Novitool® Aero® Splice Press Dashboard. Immediately following the registration process, you will receive an
email to create a password for access to the dashboard.
Aero® Mobile App
Purpose of mobile app is to connect:
• To upload new firmware versions
• To upload splice cycle logs and to sync splice cycle data to dashboard
Go to the appropriate app store (either iOS or Android) to find and download Novitool® Aero®
Splice Press app.

—5—
Dashboard & Mobile App Manual
Prior to first time use of the Aero press, operator must initialize the press by registration. e information
provided will allow Flexco to communicate critical press firmware updates and provide the operator
permission to utilize the Novitool® Aero® Splice Press Dashboard and Aero® Mobile App.
Novitool® Aero® Splice Press Initialization
& Dashboard Registration

www.flexco.com
—6—
Novitool® Aero® Splice Press
New Customer
1. On a smart device or computer go to www.flexco.com/code to obtain the Activation Code to initialize your
new Novitool® Aero® Splice Press.
2. If you are not registered in the Novitool® Aero® Splice Press Dashboard, under New Customer, enter the
Aero® press serial number exactly as it appears on serial number plates including dashes.
Serial numbers can be found at the rear of press or on the transport case.
3. Fill out information in the fields. When complete select the SUBMIT button.
Note: If you try to register under New Customer and your email exists in the dashboard, a warning will
appear that advises to select Go to Dashboard button to register the press.
4. e nine-digit activation code will display and is ready to enter on new press.
Note: A confirmation email will be sent listing the Serial # and Activation Code.
5. At the press, using the selector knob, scroll to “Enter Access Code” and depress knob.
6. Enter nine-digit access code provided from Activation Code page.
7. Aer entering the Activation Code, select Confirm.
Novitool® Aero® Splice Press Initialization
& Dashboard Registration

—7—
Dashboard & Mobile App Manual
Existing Customer
1. If you are already registered in the Novitool® Aero® Splice Press Dashboard, under Existing Customer
select the Go to Dashboard button.
2. Sign into your account with your Email and Password and select the SUBMIT button.
3. Upon login the Create Press page appears.
4. Select the Company Name from the dropdown.
5. Enter the Aero® press serial number exactly as it appears on serial number plates including dashes. Serial
numbers can be found at the rear of press or on the transport case.
6. Create a press nickname if desired. If a nickname is not created, then the press serial number is displayed.
7. Click the SAVE button.
8. e nine-digit activation code will display and is ready to enter on new press.
Note: A confirmation email will be sent listing the Serial # and Activation Code.
9. At the press, using the selector knob, scroll to “Enter Access Code” and depress knob.
10. Enter nine-digit access code provided from Activation Code page.
11. Aer entering the Activation Code, select Confirm.
Contact Flexco Customer Service if technical assistance is needed: www.flexco.com
Novitool® Aero® Splice Press Initialization
& Dashboard Registration

www.flexco.com
—8—
Novitool® Aero® Splice Press
Immediately following the online registration of your Novitool® Aero® Splice Press, you will receive an email
invitation from Flexco to access the Novitool® Aero® Splice Press Dashboard.
Click link provided in email. Note: A Wi-Fi or cellular connection is required to login to dashboard.
• e link will direct user to a reset password page in order to set up a password for the dashboard and mobile
app. Password must be a minimum of 8 characters and must contain at least one of each of the following:
one upper case letter, one lower case letter, and one number. Enter password twice and click Submit.
• Dashboard URL: https://Novitool.flexco.cloud
• Cellular or Wi-Fi connection is needed in order to login and/or connect to the dashboard.
• Login to the Novitool® Aero® Splice Press Dashboard by entering your email address and password. Click the
Submit button.
e first screen is the main dashboard screen. is view shows the number of Aero® presses that have been
registered to your company account, the number of users that have been registered to your company account,
and the Firmware Update History.
Note: First-time user will automatically be set up as a Company Admin user.
Company Admin users are able to add presses and users. Operator users are able to view only.
Accessing the Novitool® Aero®
Splice Press to Dashboard

—9—
Dashboard & Mobile App Manual
• To add/manage Aero® presses, select Manage Aero® Presses in side menu.
• Select Create Press button to add a new, registered press.
• Adding a new press:
1. Select your company.
2. Add the Aero press serial number exactly as it appears on the serial number plate on rear end plate
of press.
3. Create a Press Nickname. Character length is 16 characters. If a nickname is not created, then the press
serial number is displayed.
4. Choose Save to complete process.
NOTE: If the press serial number has 6 middle digits rather than 9, add
3 zeros in front of the 6 digits. Ex. E3-000xxxxxx-06A.

www.flexco.com
—10—
Novitool® Aero® Splice Press
Connecting Mobile App to Press
Plug in and power on Aero® Press per Novitool® Aero® Splice Press Safety and Operation Manual.
e Aero® Mobile App functions include:
1. Wireless transmission of new firmware updates to press(es)
2. Sync and upload splice cycle data to dashboard
• On your smart device, select Aero® Mobile App icon to load the mobile app. Use "Novitool® Aero®
Splice Press" to search your store.
Note: User must be already registered on dashboard with a User Name and Password in order to use the
Novitool® Aero® Splice Press Mobile App. A Wi-Fi or cellular connection is required to download mobile app.
• Once the Aero® Mobile App has been downloaded to your Smart Device, open the mobile app.
• At Login, enter User Name and Password (same as established on dashboard) and select Get Started button.
• Home screen displays all registered Aero® Splice Presses. Presses that are powered on and within range of
Bluetooth® dongle located in USB port located in air inlet of top press beam closest to the controller will
show a white background and are selectable. NOTE: If AEROPRESS-E3-xxxxxxxxx-xxA is in upper case,
the press is within Bluetooth® range, but is not accessible, it needs to be added to the dashboard.
• Bluetooth® range is approximately 50 feet (15 meters).
• Bluetooth® dongle with Flexco Item Code 09574 is strongly suggested to ensure good performance;
otherwise, connectivity results may vary.
• Select desired Aero® Press (white background) to initiate connection. e mobile app may be connected
to only one Aero® press at a time.
Troubleshooting Tip:
Presses that are powered on and within range of
Bluetooth® dongle located in air inlet of top press beam
will show a white background and are selectable.
If no presses are highlighted in white:
• confirm press is powered on
• ensure Bluetooth® is enabled on smart device
• refer to Troubleshooting Guides on page 19-20
• contact Flexco Customer Service
for more assistance
Novitool® Aero® Splice Press Mobile App
Smart device specifications:
• iOS – version 9.0 or newer
• Android – version 5.0 or newer

—11—
Dashboard & Mobile App Manual
• Select the Connect button to connect with selected press. When the Aero® press is connected to the mobile
app, the app sounds an audible tone and the LED light on the green start button of the press illuminates blue.
• Once connected to press, there are two processes available:
1. Update Firmware –> “Red” banner indicates new Update Firmware available for upload.
–> “Green” banner indicates Firmware Up-To-Date.
2. Sync Data –> “Red” banner indicates Sync Data. New splice cycle logs are available for upload.
–> “Green” banner indicates Data Sync Complete. No additional splice cycle logs to upload.
–> “Yellow” banner indicates an upload is necessary. Go To Offline Sync Logs to
Complete Sync (on page 12).
Update Firmware
• Select on the “red” Update Firmware banner to initiate the updating process.
Note: Must be connected to Wi-Fi or cellular to upload firmware. If Wi-Fi and cellular signals are strong
and smart device is in close proximity to the press, updates take less than 3 minutes.
• Once Firmware is finished updating, press will restart and mobile app will disconnect from press.
• Select OK button.

www.flexco.com
—12—
Novitool® Aero® Splice Press
Sync Data to Dashboard
• Select the Connect button to reconnect to the press.
(A “green” banner confirms that press Firmware Up-to-Date.)
• Select “red” banner on Sync Data, to initiate data sync. In order to complete the Data Sync to the dashboard,
you must have Wi-Fi or Cellular connectivity. e function of Sync Data is to upload all the splice cycle data
logs since the last time it was uploaded. e upload time depends on the number of splice cycles and the
connectivity.
• At completion a pop up indicates all log files uploaded successfully. Select OK.
• A “green” banner indicates Data Sync Complete. Select the Connected button to disconnect from the press.
• Select Aero® Splice Press Detail to go back to Aero press list.

—13—
Dashboard & Mobile App Manual
Additional Features
• Select collapsed menu icon to access:
1. Dashboard
2. Offline Sync Logs
3. Settings
4. Log Out
• Select Dashboard to display “All Aero Splice Presses” registered with Flexco under your company.

www.flexco.com
—14—
Novitool® Aero® Splice Press
Offline Data Sync Upload to Dashboard
If Wi-Fi or cellular are not available during the Data Sync, splice cycle logs will need to be synced to smart
device via Bluetooth®. Go To Offline Sync Logs to Complete Sync is indicated by a “yellow” banner. Once
Wi-Fi or cellular connection is available, the user can perform data sync to push cycle logs from smart device
to the dashboard.
• Under menu icon, select Offline Sync Logs.
• Select press(es) and click on rotating arrows in upper right corner

—15—
Dashboard & Mobile App Manual
Adjusting Connectivity Settings
• Under the menu icon, select Settings to adjust sync settings and language preference. e mobile app
defaults to Sync using Wi-Fi and Cellular.
Note: If Sync Using Wi-Fi and Cellular is selected, operator will receive a pop-up advising, “Potential
delays or extra data usage may occur during Sync using cellular data”.
Logging Out of the Mobile App
• Under menu icon, select Log Out to log off of the mobile app
Contact Flexco’s Customer Service if technical assistance is needed: www.flexco.com

www.flexco.com
—16—
Novitool® Aero® Splice Press
Additional Features of the
Novitool® Aero® Splice Press Dashboard
e first screen of the dashboard (URL: https://novitool.flexco.cloud) shows the number of Aero® presses that
have been registered to your company account, shows the number of users that have been registered to your
company account, and the Firmware Update History.
Managing & Adding Users
• Click on Manage Users in the le-side menu
• ere are two types of users in dashboard:
1. Company Admin: role is responsible for managing presses and users by adding, updating, or deleting.
2. Operator: role is read-only access. is role is not permitted to add, update or delete presses
or users. May view users, presses, firmware update history, data cycle logs and data cycle log
graphing capabilities.

—17—
Dashboard & Mobile App Manual
• A Company Admin may create a new user. Click Create User.
• Fill in detail in provided blanks and choose Save to complete addition of user.
Note: When adding a new user, the new user will receive an email invitation to join the dashboard
and mobile app.

www.flexco.com
—18—
Novitool® Aero® Splice Press
Managing Presses on Dashboard
• To learn more about a specific press click on a press serial number.
• Select Firmware Update tab to view firmware version. e version that is currently on the press is listed
first along with a short description of the firmware update, who installed the latest firmware, and the
date installed. Firmware updates occur due to continuous improvement of the press operation based on
information gathered from customers, repairs, etc.
Note: Always keep your Firmware Update to the current version. Use the mobile app to connect to presses that
need Firmware Updates.

—19—
Dashboard & Mobile App Manual
• Select the Event Log tab to view splice cycle data. is view lists all splice cycle data that have been loaded
from the press via the mobile app (see instructions how to upload from press starting on page 10). Splice
cycle data includes the cycle, date, parameters entered for the splice recipe and actual splice cycle data
including power, temperature, pressure, and times. Review of this data can assist with ease of splicing
support and troubleshooting potential issues with the splice or press.
• Splice cycles may be viewed in a graph format. Select one or multiple cycles by selecting the check box next
to the cycle number that are to be viewed.
Note: Up to 25 splice cycles may be selected for graphing.
• e graph shows pressure and top and bottom temperature of the selected cycles. By hovering cursor on the
graph line, X/Y coordinates can be viewed for that cycle.

www.flexco.com
—20—
Novitool® Aero® Splice Press
Managing Companies on Dashboard
• Select Manage Companies from side menu to edit company information.
Contact Flexco’s Customer Service if technical assistance is needed: www.flexco.com
/