Page is loading ...

Important
• Consult your local building code official and check all code requirements. Purchaser has the
sole responsibility to determine whether the aluminum railing and aluminum post products
comply with applicable codes and are appropriate for the intended use. The purchaser and
installer should review the intended use of the products with a licensed professional
engineer to determine code compliance.
• Obtain all required building permits.
• Read all instrucons thoroughly prior to assembly to assure correct installaon.
Manufacturer will not be held responsible for unsafe or incorrect installaon.
• Instrucons are guides and do not cover every installaon scenario.
• Always use fasteners provided in the railing kit.
• Railing has been tested by PEI and meets 2016 IRC Construcon Code Standards.
• Applying paint, other than manufacturer’s touch up paint, will void warranty.
• Always wear proper safety equipment while assembling and installing.
Installaon - Stair Railing
Note: Ensure that posts are installed with the 1-piece post skirt in place. Skirt cannot be installed
aer railing installaon (see Post Instrucons). Rails must be posioned in the correct direcon
prior to cung. If rails are not in the correct posion, they may be cut incorrectly and pickets
will not line up.
1. Lay boom rail beside the post assemblies with approximately 1” clearance (use 1“ spacer)
between the boom rail and the nose of the steps (Image 1).
2. Insert a picket into the last hole on each end of the boom rail. Place the top rail on these spindles.
Posion the rail assembly against the posts and even the spacing on each end with the pickets
parallel to the post assemblies. Clamp the rail assembly to the posts (Image 2).
3. Using the post, mark the top and boom rails for cung. Cut the rails 1/16” shorter than the marks on each end. This is needed to prevent the
rails from scratching the posts during installaon. Note: Cut the top and boom rails exactly the same (Image 3). Important: If your post spacing
is acceptable for the standard length rails provided, you will not need to cut them down as described in Steps 1 and 2.
4. Slide the boom rail brackets onto the bom rail. Place a 1“ spacer between the boom rail and the nose of the steps. Move the boom rail into
posion and fasten the self-centering boom rail brackets to the posts using the #10 screws provided. Aer installing the brackets, secure them
to the boom rail using the same #10 screws.
5. Insert pickets into each hole in the boom rail.
6. Slide the top rail brackets onto the top rail. Hold the top rail at an angle above pickets. Starng at one end, feed each picket into the corresponding
hole on the top rail (Image 4). When all pickets are in the holes, lightly tap the top of the top rail with a rubber mallet to ensure they are fully
seated. Measure to ensure the final top rail height is achieved. Note: Due to variances, you may need to move the top rail up 1/16” to 1/8” to
achieve the proper height.
7. Fasten the self-centering top rail brackets to the posts using the #10 screws provided. Secure the top rail brackets to the top rail with the same
#10 screws.
Recommended Tools
Safety Glasses, Tape Measure, Pencil, Saw w/ Fine Tooth Metal Blade, Rubber Mallet, Level,
Power Drill, Philips Drive Bit, T25 Torx Drive Bit.
Image 1
Image 2 Image 3 Image 4
STAIR RAILING ASSEMBLY INSTRUCTIONS
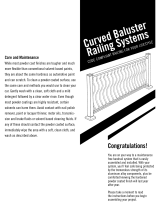
Included Components
(Post Assembly sold seperately)
Boom Rail
Bracket
Top Rail
Brackets
#10 Bracket
Screw
Boom
Rail
Top
Rail
Spindle
1/16”
1” Spacer
/