Page is loading ...

Installation Guide
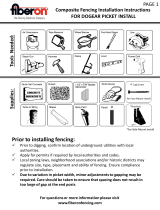
Tools & materials required for each application
• Mitre saw with a non-ferrous
metal cutting blade
• Drill
• Phillips #2 & #3 bits
• Phillips #2 screwdriver
• Slot-head screwdriver
• Level
• Socket or wrench set
• Measuring tape
• Pencil
Concrete anchor
Concrete screw
Hard Surfaces
Soft Surfaces
• Post hole digger
• Shovel
• Concrete mixing
equipment
• Concrete trowel
• Dry premixed concrete (per post):
Fasteners included with each fence component
LED Application
• Drill bits for metal:
1/4", 1/2", 5/8“
• Hole saw for metal: 1"
• Small round metal file
• Scissors
All Applications
Rail & Picket Kit Rail Kit for Glass Panel
Hard Surface Post Yard Gate
Climate with frost heave - 200 lb.*
Climate without frost heave - 100 lb.*
*Quantities are estimated. Always check your
local codes for post hole size and depth.
• Hammer drill
• Masonry bits:
7/32", 5/16"
• Hammer
5/8" Self-drilling screw 5/8" Self-drilling screw
Connector bolt
1" Self-drilling screw
Hinge bolt
Pool Gate
1" Self-drilling screw
5/8" Self-tapping screw
U.S. VersionU.S. Version

No representation or warranty is given that your particular application of
these products complies with relevant building codes or that the fasteners provided or
used are appropriate for your application. Consult with professionals and local building
officials before beginning work: (i) to ensure compliance with relevant building codes
for your application and for your proposed use of fasteners; (ii) to ensure the integrity of
the structural components in connection with which these products are to be used; (iii)
to identify appropriate safety gear that is to be used during installation; (iv) to ensure
that the work area is free from utilities, services and hazards; and (v) to clarify any
instructions or warnings that may not be clear. Work in a safe manner wearing
protective gear such as gloves, eyewear, headwear, footwear and clothing. When using
tools comply with operation manuals and instructions. Installation materials may have
sharp edges and could fragment or splinter during or as a result of handling or cutting.
Do not use these products in connection with any substance that is or may be harmful or
corrosive to the products. Inspect and maintain these products and the structural
components that they are used in connection with on a regular basis, using professionals
when appropriate.
No member of The Peak Group of Companies (as defined at www.peakproducts.com)
shall be liable for any loss or damage resulting from the improper installation or use of
this product. In the unlikely event that any member of The Peak Group of Companies
becomes liable for any loss or damage, the aggregate liability shall be limited to the
retail purchase price of the product.
Peak products and associated materials are protected by patents, designs, copyrights
and/or trademarks used under license from Peak Innovations Inc.
Important Information
• Maximum post spacing:
6' 2
5
/
8
" on center for a picket fence system
3’ 11
5
/
8
" on center for a glass panel fence system
• Pool fence compliant*
*Meets 2015 International Swimming Pool and Spa Code. Conditions apply (for details visit
www.peakproducts.com/compliance). Complete Aquatine™PLUS system required including
Pool Gate (do not use Yard Gate). Building Codes may vary. Always understand and comply
with your local building codes.
• For pool fences:
The opening between pickets, or a picket and a post must not exceed 4".
The opening between a glass panel and a post must not exceed 1¾".
Follow local codes for minimum fence height and other specified requirements.
• Always understand and comply with your local building codes.
WARNING
Angle Bracket Kit
(for Picket Panels)
The Angle Bracket Kit (for Picket Panels) makes
it easy to connect picket panels at an angle.
Angle brackets install the same way as
standard brackets.
The opening between pickets, or a picket and
post must not exceed 4". Always understand
and comply with your local building codes.
Angle Bracket Kit
(for Glass Panels)
The Angle Bracket Kit (for Glass Panels) makes
it easy to connect glass panels at an angle.
Angle brackets install the same way as
standard brackets.
The opening between a glass panel and a
post must not exceed 1¾". Always understand
and comply with your local building codes.
Follow the LED Installation section of this
guide to attach the Peak™ LED Lighting
system to Peak™ Aquatine™PLUS, then
download the free Peak™ Lighting app.
For more information visit:
www.led.peakproducts.com
!
!
Dear Customer,
We’d like to take a moment to say “thank you and congratulations” for choosing
our products. At Peak® your satisfaction is very important to us. That is why we
work very hard to provide you with products of exceptional quality, value, and
beauty. And that is also why we want to hear from you.
Please contact us with your comments or suggestions at:
quality@peakproducts.com
Or if you prefer, write to us at:
“Customer Care”
The Peak Group of Companies
P.O. Box 96060
Richmond, B.C. Canada V7A 5J4
Finally, we’d like to remind you to always work safely. Then, take pride, relax with
your family and experience years of enjoyment with Peak® products.
The Peak Group of Companies
Smart lighting for your outdoors
™

PICKET FENCE INSTALLATION (soft surface)
1
Fence
System
4' height
5' height
4
Remove post caps and slide the bottom
brackets into the slots on the first and
second posts but do not fasten them yet.
3
Always check your local codes for post hole
size and depth.
!
Measure and mark the position of all posts and
ensure they are aligned. Dig the post holes.
Second post
Position the first post in the post hole and brace
plumb. Mix and pour concrete into the first post
hole. Position and brace the second post in the
post hole, but do not pour the concrete yet.
Recommended
Post Depth
21"
27"
Maximum
post spacing
6' 2
5
/
8
" on center
See LED Installation, Steps 1 and 2A
See LED Installation, Steps 3A and 3B
See LED Installation, Steps 4 - 6
First post
2
Insert all the pickets into the rails,
ensuring that the picket slots engage
with the ridge on each rail.
To lock the pickets into the rails,
snap the side caps onto both the
top rail and bottom rail.
If the side caps do not snap
in place, check that each
picket is correctly seated.
!
This symbol indicates important information
6
Install a top bracket on each
end of the top rail and fasten
in place with 5/8" self-drilling
screws (provided).
9
10
Fasten the top brackets to both posts
with the 5/8" self-drilling screws
(provided), then replace post caps.
7
Install the assembled fence panel into the posts by
sliding the top brackets into the slot on each post.
8
Insert bottom rail into bottom brackets and fasten
together, then fasten the bottom brackets to the posts.
Use 5/8" self-drilling screws (provided) for this step.
Level and brace the second
post. Mix and pour the
concrete into the second hole.
Repeat these steps for remaining sections.
For pool fences, the opening between a picket and a post
must not exceed 4". Always follow your local building codes.
!
For pool fences, the opening between the
bottom rail and the ground must not exceed 2".
Follow local codes for minimum fence height.
!
5
If required, cut the rails to
fit between the brackets.
If you plan to cut the rails
before assembling the
fence panel, ensure the
rails are correctly oriented
before cutting.
!
rail length
rail length
Top Rail
Bottom Rail

PICKET FENCE INSTALLATION (hard surface)
Put the second post in position but do not
fasten it yet. Remove post caps and slide the
bottom brackets into the slots on the first
and second posts but do not fasten them yet.
4
1
Measure and mark the position of all posts and ensure
they are aligned. Put the first post in position.
A: Use a hammer drill with a 5/16" masonry bit to drill
four holes 3" deep through each corner of the post
base. Clean the holes.
B: Use a hammer to insert assembled concrete anchors
until washer is touching post base. Use a 7/16" wrench
to tighten the nuts. Ensure post is plumb.
2
This symbol indicates important information
!
10
A: Install a top bracket on each end of the top rail and
fasten in place with 5/8" self-drilling screws (provided).
B: Slide the bottom rail support into the bottom
rail and move it to the center (do not fasten yet).
6
A
7
8
9
See LED Installation, Steps 1 and 2B
Use 5/8" self-drilling screws (provided) for this step.
Insert bottom rail into bottom brackets and fasten
together, then fasten the bottom brackets to the posts.
See LED Installation, Steps 3A and 3B
Install the assembled fence panel into the posts by
sliding the top brackets into the slot on each post.
For pool fences, the opening between a picket and a post
must not exceed 4". Always follow your local building codes.
!
For pool fences, the opening between the
bottom rail and the ground must not exceed 2".
Follow local codes for minimum fence height.
!
B
A B
Fasten the top brackets to both posts
with the 5/8" self-drilling screws
(provided), then replace post caps.
Insert all the pickets into the rails,
ensuring that the picket slots engage
with the ridge on each rail.
5
If required, cut the rails to
fit between the brackets.
If you plan to cut the rails
before assembling the
fence panel, ensure the rails
are correctly oriented
before cutting.
!
rail length
rail length
Maximum post spacing: 6' 2
5
/
8
" on center.
!
3
To lock the pickets into the rails,
snap the side caps onto both the
top rail and bottom rail.
If the side caps do not snap
in place, check that each
picket is correctly seated.
!
Top Rail
Bottom Rail
A
B
C
Fasten the second post to the concrete surface (see Step 1).
Install bottom rail support:
A: Slide the bottom rail support to the center and mark
the hole for the concrete screw (provided).
B: Use a hammer drill with a 7/32" masonry bit to drill a 2"
deep hole in the concrete surface.
C: Use a 5/16" wrench to install the concrete screw.
See LED Installation, Steps 4 - 6
Repeat these steps for remaining sections.

GLASS FENCE INSTALLATION (hard surface only)
A: Slide the bottom rail support into the bottom
rail and move it to the center (do not fasten yet).
B: Insert bottom rail into bottom brackets and
fasten together using the 5/8" self-drilling screws
(provided). Fasten the second post to the concrete
surface (see Step 1).
C: Level the bottom rail and then fasten the
bottom brackets to the posts using 5/8"
self-drilling screws (provided).
Slide the mid brackets into the slots on
both posts but do not secure them yet.
5
3
4
Put the second post in position but do not
fasten it yet. Remove post caps and slide the
bottom brackets into the slots on the first
and second posts but do not fasten them yet.
2
1
A: Center the bottom rail support and mark the
hole for the concrete screw (provided). Use a
hammer drill with a 7/32" masonry bit to drill a 2"
deep hole in the concrete surface.
B: Use a 5/16" wrench to install the concrete screw.
!
Install the glass panel into the bottom rail glass gasket.
Install the top rail into the top brackets, ensuring
the glass panel is fully engaged in the glass gasket.
Once the top rail is installed, wash away excess
soap with clean water.
Ensure that the glass gasket and bottom edges of the
glass panel are well lubricated with liquid soap before
installing the glass panel.
!
Ensure that the glass gasket and top edges of the
glass panel are well lubricated with liquid soap
before installing the top rail.
A: Fasten both top brackets to the top rail
using the 5/8" self drilling screws (provided).
B: Secure the mid bracket plate using the
connector bolts (provided).
6
7
A: Measure and mark the position for the
top brackets on both posts.
B: Slide the top brackets into the slot on each
post and fasten with the 5/8" self-drilling
screws (provided), then replace the post caps.
On both posts, slide the mid bracket to the
center and fasten brackets into place with
the 5/8" self-drilling screws (provided).
8
9
10
Fence System
4' height
5' height
Distance ‘x’
43½"
55½"
Measure and mark the position of all posts and ensure
they are aligned. Put the first post in position.
A: Use a hammer drill with a 5/16" masonry bit to drill
four holes 3" deep through each corner of the post
base. Clean the holes.
B: Use a hammer to insert assembled concrete anchors
(provided) until washer is touching post base. Use a
7/16" wrench to tighten the nuts. Ensure post is plumb.
See LED Installation, Steps 1 and 2B
A B
Do not overtighten screws.
!
A B
A B
A
B
A
See LED Installation, Steps 3A and 3B
See LED Installation, Steps 4-6
For pool fences, the opening between a glass
panel and a post must not exceed 1¾".
x
Repeat these steps for remaining sections.
For pool fences, the opening between the bottom
rail and the ground must not exceed 2". Always
follow your local building codes.
!
Follow local codes for minimum fence height.
!
B
Always use two people to handle glass panels. Always lift a glass panel by its sides.
Tempered glass is extremely fragile – do not bump the edges. Always use protective gear
including eyewear and gloves when handling glass panels.
WARNING
C
This symbol indicates important information
Maximum post spacing: 3’ 11
5
/
8
" on center
!
Second post
First post

LED INSTALLATION
2A
2B
For a soft surface post:
Determine which post(s) you would
like to pass the lighting cable(s) through.
A: Measure and mark the position of the
hole for the lighting cable. Drill a 1/4"
pilot hole through the side of the post
B: Finish by drilling a 5/8" hole for an
extension cable, or a 1" hole for a
splitter cable.
C: Use a small round metal file to remove
burrs from the inside of the hole.
D: For single LED strip applications, feed
the extension cable through the hole
and out the top of the post. For dual LED
strip applications, feed the dual end of
the splitter cable through the hole and
out the top of the post.
E: Connect the extension or splitter cable
to the wifi controller and purchase
extension cables (sold separately) if you
need additional length. Determine the
best way to secure and conceal the cable
for your application.
For a hard surface post:
Determine which post(s) you would like to pass the
lighting cable(s) through.
A: For single LED strip applications, feed the extension
cable through the hole in the bottom of the post and out of
the top of the post. For dual LED strip applications, feed the
dual end of the splitter cable through the hole in the
bottom of the post and out of the top of the post.
B: Connect the extension or splitter cable to the wifi
controller and purchase extension cables (sold separately)
if you need additional length. Determine the best way to
secure and conceal the cable for your application.
3A
3B
For a standard top bracket:
A: Once the location of each top bracket has
been determined, mark the position of the
holes for the LED strip to pass through the post.
B: Remove the assembled fence panel (for
picket installation) or top bracket (for glass
panel installation) and drill a 1/4" pilot hole
into the post.
C: Finish by drilling a 1/2" hole.
D: Use a small round metal file to remove burrs
from the inside and outside of each hole, then
reinstall the assembled fence panel or top
bracket. Repeat steps for each post.
Ensure you drill the hole on the
desired side of the post.
1
Strip
Cover
A: Feed the connector end of the LED strip
through the drilled hole in the side of the
post and out through the top. Connect the
cables together. For dual strip applications,
connect both connector ends of the LED
strips to each end of the splitter cable.
B: Feed the connection(s) and remaining
cable inside the post.
A: Before feeding the LED strip through the
posts, ensure the LED strip is not twisted and
that the lights are facing downward. Using two
hands, gently feed the LED strip through the
posts (DO NOT PULL, you will damage the strip).
B: For angle top brackets only: use a pair of
pliers to break off tabs on the cylinder, allowing
the LED strip to pass through the desired side of
the bracket and through the post.
To avoid damage to the strip, keep the LED
strip away from sharp edges on drilled holes.
Starting with the first section, insert the LED strip into the LED
channel in the top rail, then snap the cover in place. During
this process, feed the excess LED strip into the next section.
Repeat this step until the LED strip is installed in all sections.
Feed any excess LED strip into the last post.
To prevent damage, do not cut the LED strip.
5
4
6
READ AND FOLLOW ALL WARNINGS AND SAFETY INSTRUCTIONS INCLUDED INSIDE THE LED
STARTER KIT CARTON. RISK OF INJURY, ELECTRICAL SHOCK AND FIRE. CONSULT A QUALIFIED
ELECTRICIAN FOR CORRECT WIRING AND SUPPLY OF ELECTRICITY.
WARNING
Mount the power supply and the wifi controller in a
clean, dry, sheltered location near an electrical outlet
with GFCI protection. The maximum recommended
distance between the post at the start of the LED strip
and the wifi controller is 15'.
BE SURE TO DISCONNECT THE POWER SUPPLY
FROM THE POWER SOURCE BEFORE THIS STEP.
Connecting three or more 20' extension cables before
any LED strip may change the lighting intensity.
WARNING
For an angle top bracket:
Once the location of each angle top bracket has
been determined, mark the position of the holes for
the LED strip to pass through the post. Repeat steps
B, C & D in 3A to drill the holes and remove burrs.
Connect
A
C
D
A
B
B
C
D
A
AA
B
C
D
A
A B
BB
This symbol indicates important information
Cylinder
Connect
Connect
BB
A
E
E

37 ¼" - 38 ¼"
The opening between the fence
posts must be 37¼" - 38¼".
POOL GATE INSTALLATION
1
2
3
4
5
Fasten the hinges to the gate with
1" self-drilling screws (provided).
A: Align the bottom of the gate with the bottom of the fence, ensuring
there is a gap of 11/16" - 13/16" between the gate and the fence post.
Then fasten the gate to the fence post with 1" self-drilling screws (provided).
B: Snap the covers onto both hinges.
IMPORTANT: Always understand and comply with your local building codes for
access gate requirements:
• Height, clearances, and openings
• Distance between the tops of horizontal members
• Location of the self-latching device above grade
• Swing direction from the pool or spa
• Self-closing
• Other specified requirements
Space hinges at least 35½" apart
!
Follow local codes for swing direction.
!
!
35 ½"
min.
B
A
C
A: Position the latch at the
required height on the fence
post and then mark the location
of both latch brackets (maximize
distance between brackets).
B: Remove the latch, and fasten
both latch brackets with 1"
self-drilling screws (provided).
C: Slide the latch down onto
the tracks of the latch brackets.
A: Position the striker with the bottom of the latch and mark the location
of the mounting holes on the gate.
B: Fasten the striker to the gate with 1" self-drilling screws (provided).
C: Snap the cover onto the front of the striker.
Follow local codes for location
of the self-latching device
above grade.
!
A
A
B
6
7
A: Adjust the vertical position of
the latch until the marks line up
on the latch and striker.
B: Use a Phillips #2 screwdriver to
install the self-tapping screw
(provided) through the notch in
the latch most closely centered
over a hole in the bracket.
C: Adjust the horizontal position
of the striker by using a
screwdriver to turn the #2
Phillips screw until the marks line
up on the striker and latch.
With the gate closed, adjust each hinge to the required closing
tension. Use a slot-head screwdriver to depress the top adjuster
on the hinge, then turn and release. Turn counter-clockwise to
increase tension and clockwise to decrease tension.
B
A
C
11/16" - 13/16"
C
The gate must be self-closing from any position.
Both hinges must have equal tension.
Adjust tension on each hinge from the top adjuster only.
B

YARD GATE INSTALLATION
1
2
3A
3B
4
The opening between the
fence posts must be 42".
42"
Install each hinge and U-bracket assembly on the gate
and secure with bolt, bushings and nut (provided).
For wooden posts only: Do not use the U-bracket.
For Aquatine™ PLUS fence posts:
Use 1" self-drilling screws (provided) for these steps:
A: Align the bottom of the gate with the bottom of the
fence, then fasten each U-bracket to the fence post.
B: Install the top screw on each hinge
C: Install the bottom screw on each hinge by releasing
the bolt (do not completely remove)
For wooden posts:
Secure each hinge to the fence post (fasteners not provided).
A
C
B
D
Do not use for pool or spa applications.
WARNING
Unassembled
U-bracket
Assembled
A B
C
Use 1" self-drilling screws (provided) for these steps:
A: Secure the retainer to the gate at the marked position.
B: Insert the latch through the retainer.
C: Secure the latch to the gate at the marked position.
D: Check and mark the position for the latch plate on the fence post.
Secure the latch plate to the fence post.
/