LEVOLOR Light Filtering Roman Shades Installation guide

Type
Installation guide

LEVOLOR Light Filtering Roman Shades combine beauty and functionality to enhance your home's ambiance and provide precise light control. With motorized control, you can effortlessly adjust the shade's position using the included remote control, offering convenience and ease of use.

LEVOLOR Light Filtering Roman Shades combine beauty and functionality to enhance your home's ambiance and provide precise light control. With motorized control, you can effortlessly adjust the shade's position using the included remote control, offering convenience and ease of use.

Motorized Control Lift
Elevación con control motorizado
Roman Shades
Persianas romanas
INSTALLATION • OPERATION • CARE
INSTALACIÓN • FUNCIONAMIENTO • CUIDADO
Getting Started
Window and Shade Terminology ................................................................... 3
Product View ....................................................................................................4
Components Included ....................................................................................5
Tools and Fasteners You May Need ................................................................ 6
Installation
Installation Overview ....................................................................................... 7
Inside Mount (IM) ..................................................................................... 7–10
Outside Mount (OM) ................................................................................11–14
Valance Installation ....................................................................................... 15
Operation
Remote Operation ......................................................................................... 16
Battery Charging ........................................................................................... 16
Removing the Shade ..................................................................................... 16
Additional Information and Support
Troubleshooting ..............................................................................................17
Cleaning Procedures ..................................................................................... 18
Warranty ........................................................................................................ 19
Customer Service Support ........................................................................... 19
WARNING: Keep all small parts, components and packaging away
from children as they pose a potential choking hazard which may
result in serious injury or death. Please reference all warning tags
and labels in the instructions and on the shade.
!
CONTENTS
2© 2022 LEVOLOR®
Roman Shades Motorized Control Lift
Molding
Head Jamb
Sill
Jamb Jamb
Outside Mount
Inside Mount
Molding
Head Jamb
Sill
Jamb Jamb
Outside Mount
Inside Mount
Molding
Head Jamb
Sill
Jamb Jamb
Thank you for purchasing LEVOLOR® Roman Shades. With proper installation, operation,
and care, your new roman shade will provide years of beauty and performance. Please
thoroughly review this instruction booklet before beginning installation.
MOUNTING TYPES AND WINDOW TERMINOLOGY
Inside Mount
Shade fits within window opening.
Great for windows with beautiful trim.
Window Components
Terminology
Collectively, the sill and jambs
are called the “window
casement” or “frame”.
Outside Mount
Shade mounts outside window opening.
Increased light control and privacy.
Minimum Depth Requirements for Proper Shade Installation (inches)
Operating System Minimum
Mounting Depth
Minimum Depth for
Fully Recessed / Flush
Mount Headrail
Motorized 1¼" 2¼"
WINDOW AND SHADE TERMINOLOGY
3Roman Shades Motorized Control Lift
PRODUCT VIEW
Power AdapterMicro-USB
Charging Cable
Hub
(optional)
Remote Control Kit
(optional)
AAA Battery
(2-Pack)
Standard
Remote Control Remote Control
Holder
Magnetic
Charging Adapter
Standard
Bottom-Up
Shade
Installation
Brackets
Bottom Rail
Headrail Micro-USB
Charging
Port
Programming
Button
GETTING STARTED
4Roman Shades Motorized Control Lift
Hub
(optional)
Remote Control Kit
(optional)
AAA Battery
(2-Pack)
Standard
Remote Control
Remote Control
Holder
Shade
Mounting Brackets
Installation Hardware
Remote Control Kit
Other accessories (optional)
Optional items will be included,
if selected at time of shade order.
COMPONENTS INCLUDED
Hex Head Screws
(2 per bracket)
#6 Flat Head Screw for
Use with End Mounts
(provided)
Speed Nut and Screw
(two provided with each
extension bracket)
Extension / Side Mount Brackets
(optional)
Spacer Block
(optional)
Hold-Down Bracket
(optional)
Roman Shade
GETTING STARTED
5Roman Shades Motorized Control Lift
TOOLS AND FASTENERS YOU MAY NEED (not included)
The tools you will need for installing your shade will vary, depending on the
installation surface, and mounting bracket type.
Tools typically used for installation include:
Metal Tape Measure
Safety Glasses
Drill with Bits
3
32" drill bit &
1
4" hex driver
Ladder
Screwdrivers
(both flat and Phillips head)
Drywall Anchors
Level
14" Nutdriver
Pencil
Note: Longer screws may be needed with extension brackets and spacers, not shown.
CAUTION: Use drywall anchors (not provided) when mounting into
drywall. Failure to properly anchor shade could cause shade
to fall, possibly resulting in injury.
!
GETTING STARTED
6Roman Shades Motorized Control Lift
PAIR SHADE BEFORE INSTALLING
REMOTE CONTROL
Use the and + buttons to select the channel
to pair to.
Press and hold the programming button on the
window covering for about 2 seconds until the
shade jogs once.
In the next 10 seconds, press and hold the on
the remote until the shade jogs twice.
USING THE INMOTION APP
If you purchased a hub, download the LEVOLOR
InMotion app to get started.
Shade can be directly paired to app, but it is
recommended to pair to remote first.
INSIDE MOUNT (IM)BEFORE YOU BEGIN
Micro-USB
Charging Port
Indicator
Light
Programming
Button
INSTALLATION OVERVIEW
IMPORTANT: If bound, do not remove
binding until the shade is installed in
the window.
Your order will include the correct number
of installation brackets for your shade
width, as shown in the table.
Shade
Width Brackets
Required
Up to 38" 2
38" – 68" 3
68" – 82" 4
82" – 106" 5
106" – 130" 6
> 130" 7
End Mount BracketsBracket
INSTALLATION
7Roman Shades Motorized Control Lift
Bracket
For shallow mount, insert
screw in the upper rear
corner of the bracket
Bracket
STEP 1: MARKING THE BRACKET LOCATIONS
Mark 2" in from each jamb for bracket location. Mount into wood whenever possible.
If more than two installation brackets came with your order, space additional
bracket(s) evenly between the two end brackets.
Center the brackets on your marks, then mark each of the screw holes.
The minimum depth for installation brackets is 1¼".
The minimum depth for a fully recessed mount is 2¼".
Use the center screw hole when depth permits.
For shallow mounting depths, use the hole located in the upper
rear corner of the bracket.
INSIDE MOUNT (IM)
2" Space Evenly
Jamb Jamb
Space Evenly
Room Side
2"
Minimum of 15" for Battery Wand
Window Side
INSTALLATION
8Roman Shades Motorized Control Lift
Screw
Bracket
Bracket
Screw
STEP 2: INSTALLING THE BRACKETS
Drill the screw holes using a 3
32" drill bit (use drywall anchors to mount
into drywall).
Attach the installation brackets using the screws provided, 1 screw
per bracket.
Ensure all brackets are square with each other.
INSIDE MOUNT (IM)
INSTALLATION
9Roman Shades Motorized Control Lift
INSIDE MOUNT (IM)
Snap in
Place
Headrail
Bracket
Bad
The front of the bracket
fits under the groove.
STEP 3: INSTALLING THE SHADEMOUNTING THE HEADRAIL
Fit the front channel on top of the headrail onto the front
lip of installation brackets.
Push the headrail up and back until it snaps into place.
Check to ensure the headrail is securely in the brackets.
Check that the bottom of the headrail is snapped into
the base of each bracket.
Check that the front lip of each bracket is in the front
channel of the headrail.
If any brackets are not installed correctly,
release the shade and reinstall.
See “Removing the Shade (If Necessary)”
on page 16.
Good
Front Lip
Spring Tab
Headrail
10
INSTALLATION
Roman Shades Motorized Control Lift
PAIR SHADE BEFORE INSTALLING
REMOTE CONTROL
Use the and + buttons to select the channel
to pair to.
Press and hold the programming button on the
window covering for about 2 seconds until the
shade jogs once.
In the next 10 seconds, press and hold the on
the remote until the shade jogs twice.
USING THE INMOTION APP
If you purchased a hub, download the LEVOLOR
InMotion app to get started.
Shade can be directly paired to app, but it is
recommended to pair to remote first.
OUTSIDE MOUNT (OM)BEFORE YOU BEGIN
Micro-USB
Charging Port
Indicator
Light
Programming
Button
Bracket
Bracket
OUTSIDE MOUNT (OM)
STEP 1: MARKING THE BRACKET LOCATIONS
NOTE: The rear of the brackets must be flush against a flat mounting surface.
Do NOT mount brackets on curved molding.
Center the headrail over the window opening at the desired height.
11
INSTALLATION
Roman Shades Motorized Control Lift
Minimum of 15" for Battery Wand
Headrail End Marks
Window Opening
2" Space Evenly Space Evenly
Motor
Side
2"
Center the brackets on your marks, then mark each of the
screwholes.
A minimum of 1 14" flat vertical surface is required to mount
the brackets.
The top of the installation brackets or extension brackets
should be at the desired shade height. The brackets
should be level and aligned.
When using extension brackets, mark two screw holes
per bracket.
CAUTION: The rear of the brackets must be flush against a flat mounting
surface. Do not mount brackets on curved molding.
!
OUTSIDE MOUNT (OM)
STEP 1: MARKING THE BRACKET LOCATIONS, CONT.
Use a pencil to lightly mark each end of the headrail.
Alternatively, measure the width of the headrail and use that width to mark
the headrail end points over the window opening.
Mark approximately 1 2" in from each end of headrail for the installation
bracket locations.
Allow a minimum of 14 in. between the bottom of the installation bracket and the
top of the window molding.
With a pencil, mark the installation brackets or extension bracket screw locations
through the larger, oblong rear holes of the bracket, 1 screw per bracket.
Use a level to ensure all brackets are aligned.
If more than two installation brackets come with your order, space additional bracket(s)
evenly between the two end brackets, no more than 30" apart, mark drill hole locations.
INSTALLATION
12 Roman Shades Motorized Control Lift
OUTSIDE MOUNT (OM)
STEP 2: INSTALLING THE BRACKETS
NOTE: Use drywall anchors when mounting into drywall.
Drill the screw holes using a 332" drill bit.
Attach the installation or extension brackets using the
screws provided.
IMPORTANT: The front edges of the installation brackets
must be level and aligned to each other.
If using spacer blocks for added clearance, the spacer blocks
and shims may be stacked.
A maximum of 1 1
2" of added clearance using spacer
blocks and shims is recommended.
Attach the spacer blocks and installation brackets to a flat
vertical mounting surface with #6 mounting screws long
enough for asecure installation.
The top of the spacer blocks should be at the desired
shade height.
If using extension brackets, attach an installation
bracket to the underside of each extension bracket
using theprovided screws and speed nuts.
Screw
Bracket
Drywall
Anchor
Maximum
1½"
Longer Screw
(Not Provided)
INSTALLATION
13Roman Shades Motorized Control Lift
STEP 3: INSTALLING THE SHADE–MOUNTING THE HEADRAIL
Fit the front channel on top of the headrail onto the front
lip of installation brackets.
Push the headrail up and back until it snaps into place.
Check to ensure the headrail is securely in the brackets.
Check that the bottom of the headrail is snapped into
the base of each bracket.
Check that the front lip of each bracket is in the front
channel of the headrail.
If any brackets are not installed correctly,
release the shade and reinstall. See
“Removing the Shade (If Necessary)”
on page 16.
Snap in
Place
Headrail
Bracket
The front of the bracket
fits under the groove.
OUTSIDE MOUNT (OM)
BadGood
Spring Tab
Front Lip
Headrail
INSTALLATION
14 Roman Shades Motorized Control Lift
INSTALL VALANCE
IMPORTANT: Pair remote prior to installing the valance.
Hook the top of the valance over the top lip of the headrail.
Carefully press the valance down and back against the headrail until the valance
clips into place.
ATTACH VALANCE RETURNS
(Outside mount only)
Fold the valance returns around the end of the headrail and firmly press into place
so that the hook-and-loop strips engage.
Valance
Valance
Return
Valance
Valance
Return
INSTALLING ADDITIONAL COMPONENTS
15Roman Shades Motorized Control Lift
Remove
Bracket
Back of
Shade
Headrail
Bottom
Tab
REMOVING THE SHADE (IF NECESSARY)
Lower the shade approximately 4".
While holding the headrail, push
back on the bottom tab of the
installation bracket to release
the bottom edge of the headrail.
After releasing the bottom edge,
roll the back of the headrail
down and out from the bracket.
REMOTE OPERATION
Scan for remote guide.
BATTERY CHARGING
Rechargeable battery is integrated into
shade headrail.
For standard charging, remove the
magnetic charging insert from the headrail.
Use the micro-USB charging cable and
power adapter to charge shade.
For easier access to the charging port, a
removable magnetic charging adapter has
been installed during production. Attach the
magnetic charging adapter to the micro-
USB charging cable and power adapter
before connecting to headrail to charge.
Indicator light battery status:
– Low (red flash)
– Charging (green flash)
– Charged (green solid)
It is recommended to fully charge shade
prior to first use.
Micro-USB
Charging Port
Indicator
Light
Programming
Button
Magnetic
Charging
Insert
OPERATION
16 Roman Shades Motorized Control Lift
Problem The shade will not fit into the installation brackets.
Solution
Check that the installation brackets are level and aligned. Adjust and/
or shim to level, if necessary.
Be sure the heads of the mounting screws are flush against the
installation bracket.
Make sure that the shade fabric is not caught between the installation
bracket and the headrail.
Check that the headrail is completely inserted into the installation
brackets.
Problem The shade raises or lowers unevenly or the bottom rail is uneven
when fully raised.
Solution
Lower the shade completely to allow it to “self-correct” skewing.
Check that the headrail and installation brackets are level and aligned.
Shim the installation brackets to level the headrail, if necessary.
Adjust roman bar clips. Lower the shade completely and locate the
cord route in the top of the headrail behind the shade. On the back of
the shade, adjust any roman bar clips by hand that are out of vertical
alignment with the cord location in the headrail.
TROUBLESHOOTING
If your shade is not operating correctly:
First review the guide that came with your control device.
Refer to the following troubleshooting procedures for specific solutions for your shade.
If questions remain, please contact LEVOLOR Customer Service at 1-800-LEVOLOR or
1-800-538-6567.
17
ADDITIONAL INFORMATION AND SUPPORT
Roman Shades Motorized Control Lift
ADDITIONAL INFORMATION AND SUPPORT
Additional Notes
Once mounted, leave the shade in the lowered position for 48 hours to
release any wrinkles in the fabric.
Shades made from patterned fabrics may differ slightly in the location of
of the pattern from shade to shade. This is due to normal variation in the roll
from which the fabric is cut for the shade.
With time, soft folds may settle or flatten. Shades that are raised regularly
will be less subject to settling and will maintain a more relaxed appearance.
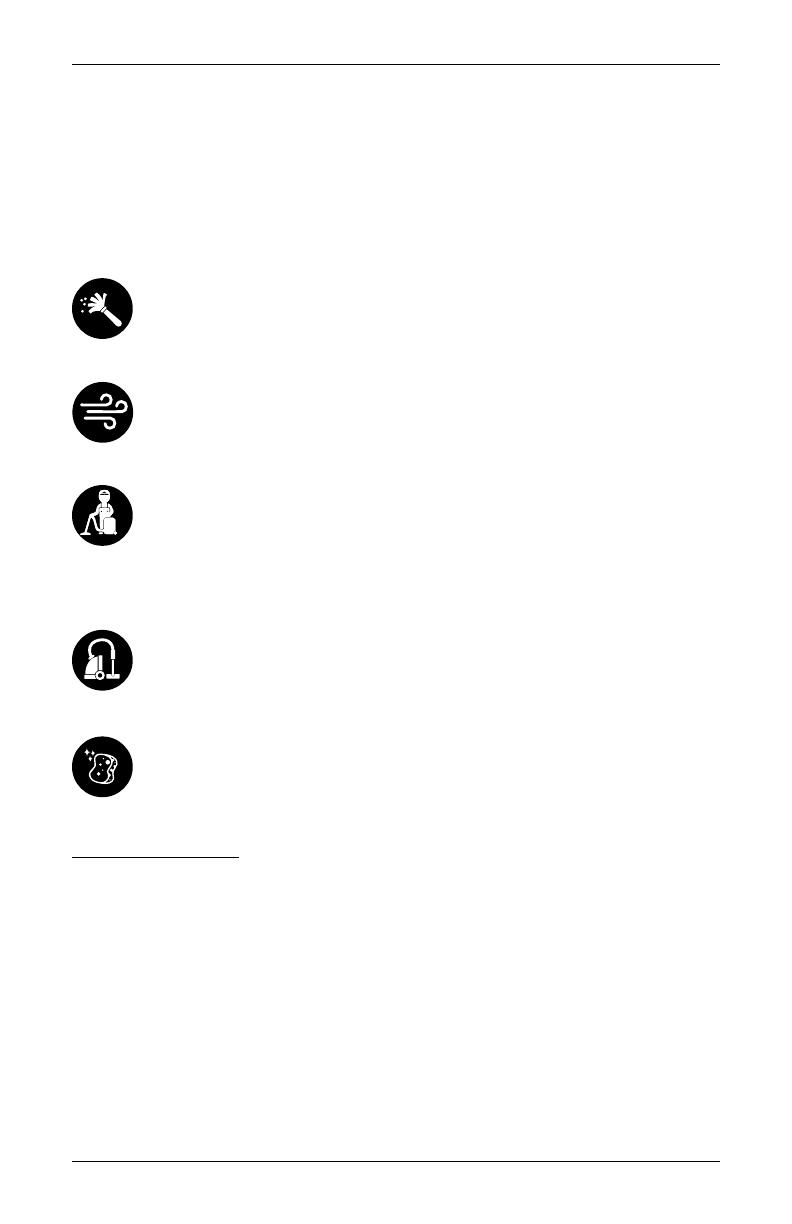
DUSTING
Use a feather duster for regular cleaning.
FORCED AIR
Blow away dirt and debris using clean compressed air.
PROFESSIONAL INJECTION/EXTRACTION CLEANING
Call local on-site blind/shade cleaner that injects a cleaning solution
into the fabric and extracts the dirty solution at the same time. The
service is typically performed at home so you do not need to remove
your window treatments.
VACUUMING
Use a low suction vacuum with a brush-type cleaner attachment;
stroke lightly over the shade to clean.
SPOT-CLEANING/STAIN REMOVAL AT HOME
Use warm water and a mild soap, like Woolite® or Scotchgard®,
if needed. Do not immerse shade in water.
CLEANING PROCEDURES
A brush-type vacuum attachment or feather duster should be used for cleaning.
If your shade should become stained, you may clean it by dabbing the spot with
a sponge dampened with lukewarm water. Do not immerse shade in water. Avoid
contact with window cleaning products as these may discolor your shade. Ultrasonic
cleaning is not recommended or covered by our warranty. Improper cleaning may
damage the shade and void warranty.
ADDITIONAL INFORMATION AND SUPPORT
18 Roman Shades Motorized Control Lift
WARRANTY
For complete warranty information visit LEVOLOR.com or call Customer Service
at 1-800-LEVOLOR or 1-800-538-6567.
CONTACTING US
To contact LEVOLOR Customer Service regarding any questions or concerns
you may have about your new shades, you may reach us at 1-800-LEVOLOR
(9:00 am – 6:00 pm EST)
www.LEVOLOR.com
ADDITIONAL PARTS AND SERVICES
Additional or replacement parts can be ordered, or shades can be repaired or
restrung through our repair center. Please contact LEVOLOR customer service
through www.LEVOLOR.com for a return authorization number.
19Roman Shades Motorized Control Lift
ADDITIONAL INFORMATION AND SUPPORT
  • Page 1 1
  • Page 2 2
  • Page 3 3
  • Page 4 4
  • Page 5 5
  • Page 6 6
  • Page 7 7
  • Page 8 8
  • Page 9 9
  • Page 10 10
  • Page 11 11
  • Page 12 12
  • Page 13 13
  • Page 14 14
  • Page 15 15
  • Page 16 16
  • Page 17 17
  • Page 18 18
  • Page 19 19
  • Page 20 20
  • Page 21 21
  • Page 22 22
  • Page 23 23
  • Page 24 24
  • Page 25 25
  • Page 26 26
  • Page 27 27
  • Page 28 28
  • Page 29 29
  • Page 30 30
  • Page 31 31
  • Page 32 32
  • Page 33 33
  • Page 34 34
  • Page 35 35
  • Page 36 36
  • Page 37 37
  • Page 38 38
  • Page 39 39
  • Page 40 40

LEVOLOR Light Filtering Roman Shades Installation guide

Type
Installation guide

LEVOLOR Light Filtering Roman Shades combine beauty and functionality to enhance your home's ambiance and provide precise light control. With motorized control, you can effortlessly adjust the shade's position using the included remote control, offering convenience and ease of use.

Ask a question and I''ll find the answer in the document

Finding information in a document is now easier with AI