Page is loading ...

IS-16226-US
We’re here to help 866-558-5706
Hrs: M-F 9am to 5pm EST
CAUTION
WHEN INSTALLING KICHLER® LANDSCAPE LIGHTING (LINE VOLTAGE OR LOW VOLTAGE), CARE SHOULD
BE TAKEN TO KEEP CLEAR OF POTENTIALLY COMBUSTIBLE MATERIALS.
TO ALLOW FOR PROPER OPERATION AND MAXIMUM LIGHT OUTPUT, BE SURE TO
REMOVE LEAVES, PINE NEEDLES, GRASS CLIPPINGS, MULCH, OR ANY DEBRIS THAT HAS ACCUMULATED
ON THE LIGHT BULB, LENS, OR BODY OF THE FIXTURE.
IMPORTANT SAFETY INSTRUCTIONS – READ ALL INSTRUCTIONS – SAVE THESE INSTRUCTIONS
For use with Kichler LED in-ground xtures 16226, 16227, 16228, 16229, 16230 and 16258
INSTALLATION:
• Excavation for conduit and conduit runs should be completed before proceeding.
• Installation must be done by a qualied electrician in accordance with local, state and national electric codes.
Installation:
1) Turn o power.
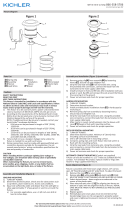
2) Remove decorative trim ring (A) by
removing four trim ring screws (B) using
2.5mm Allen hex wrench provided.
3) Remove xture assembly (C) from
plastic well assembly (D) by removing
two screws (E) using the 2.5mm hex
wrench provided. NOTE: It is not
necessary to open sealed xture
assembly for any part of the installation.
There are no adjustments or user
serviceable parts inside the unit.
4) Remove any packing material from well
housing or xture assembly.
5) NOTE: Well housing assembly must be
oriented correctly to ensure adjustable
beam tilt feature operates in the desired
directions.(See Figure 2 and 3.) At
desired location, dig hole approximately
3” larger in diameter and depth than the
housing. Top edge of housing should be
at or slightly above nish grade or to top
of concrete grade. Adjust by adding or
removing pea gravel or equivalent
drainage material.
6) Route conduit or supply through slots in
bottom of well housing.
7) Back-ll area between housing and hole
with pea gravel or equivalent drainage
material.
a. If installing in concrete, plastic
well housing should be secured
with reinforcing bars (rebar) (not
provided). Pour concrete to top
edge of well housing (D).
B – Trim Ring Screws
A – Trim Ring
E – Assembly Screws
F – Beam Tilt Adjustment Screw
C – Fixture Assembly
D – Well assembly
Figure 1

IS-16226-US
We’re here to help 866-558-5706
Hrs: M-F 9am to 5pm EST
Connect Black
Supply Wire to:
Connect White
Supply Wire to:
Connect Green
Ground Wire to:
Black White Ground
Insulated wire with
copper conductor
Insulated wire with
silver conductor
Insulated wire with
copper conductor
Figure 2
Figure 3
Beam Tilt
F – Beam Tilt
Adjustment Screw
E – Assembly Screws
Direction of Beam Tilt
Oval Aperture
F – Beam Tilt Adjustment Screw
Electrical connection:
8) Connect supply wires to xture (connectors
not provided). Reference chart for correct
connections and wire accordingly. NOTE:
Connections must be water-tight sealed in
accordance with local and national code(s).
Recommended: Wire gland seal for
3X#18 AWG SJOW xture wire (.32” [8mm] dia.)
and direct burial rated junction (not provided).
NOTE: Allow a minimum of 6” [15cm] clearance
from top edge of well housing for xture to seat
properly.
9) Replace xture assembly (C) into well housing
and reinstall screws (E) removed in step #3.
10) If desired, beam tilt angle may be adjusted up to
15° by rotating adjustment screw (F) at top of
xture assembly using the 3mm Allen hex
wrench provided. (See Figure 2 and 3.)
11) Reinstall decorative trim ring (A) and four trim
ring screws (B) using 2.5mm Allen hex wrench
provided.
Figure 4
IMPORTANT!!
ALLOW MINIMUM
6” [15cm] FIXTURE
CLEARANCE FROM
TOP EDGE OF WELL
PEA GRAVEL,
DRAINAGE
MATERIAL OR
CONCRETE
IMPORTANT!!
USE LISTED
WATERTIGHT
JUNCTION (NOT
PROVIDED)
PEA GRAVEL
OR OTHER
DRAINAGE
MATERIAL
FIXTURE ASSEMBLY
WELL ASSEMBLY
CONDUIT
(BY OTHERS)
15°
15°

IS-16226-US
Estamos aquí para ayudarle 866-558-5706
Horario: Lunes-Viernes 9am a 5pm EST (hora ocial del este)
PRECAUCIÓN
AL INSTALAR ILUMINACIÓN DE ALUMBRADO ORNAMENTAL DE KICHLER® (TENSIÓN DE LÍNEA O BAJA
TENSIÓN), ES IMPORTANTE MANTENERSE ALEJADO DE MATERIALES POTENCIALMENTE INFLAMABLES.
PARA GARANTIZAR UN FUNCIONAMIENTO ADECUADO Y UNA MÁXIMA SALIDA DE LUZ, ASEGÚRESE DE
RETIRAR LAS HOJAS, AGUJAS DE PINO, RECORTES DE CÉSPED, EL ABONO O CUALQUIER OTRO RESTO
QUE SE HAYA ACUMULADO SOBRE EL FOCO DE LUZ, LA LENTE O EL CUERPO DEL ARTEFACTO.
INSTRUCCIONES IMPORTANTES DE SEGURIDAD – LEA TODAS LAS INSTRUCCIONES
GUARDE ESTAS INSTRUCCIONES
Para uso con artefactos de iluminación LED embutidos en la tierra 16226, 16227, 16228, 16229, 16230 y 16258 de Kichler
INSTALACIÓN:
• La excavación para el conducto y los tramos del conducto deben haberse terminado antes de continuar.
• La instalación debe ser realizada por un electricista con licencia profesional conforme a los establecido por los
códigos de electricidad nacionales, estatales y locales.
Instalación:
1) Desconecte el suministro de energía eléctrica.
2) Retire el anillo de la guarnición decorativa (A)
quitando los cuatro tornillos del anillo de la
guarnición (B) con la llave Allen hexagonal de
2,5 mm incluida.
3) Retire el ensamblaje del artefacto (C) del
ensamblaje plástico del pozo (D) quitando los
dos tornillos (E) con la llave Allen hexagonal
de 2,5 mm incluida. NOTA: No es necesario
abrir el ensamblaje del artefacto sellado en
ningún momento de la instalación. No hay
ajustes ni piezas que requieran el
mantenimiento por parte del usuario dentro de
la unidad.
4) Retire todo el material de embalaje del
ensamblaje del artefacto o la cubierta del
pozo.
5) NOTA: El ensamblaje de la cubierta del pozo
debe estar correctamente orientado para
garantizar que la característica de inclinación
del haz ajustable opere en los sentidos
deseados. (Ver las Figura 2 y 3.) Cave un
hoyo de aproximadamente 3” más de
diámetro y profundidad que la cubierta en el
lugar deseado. El borde superior de la
cubierta debe estar al ras del acabado o
levemente por encima o hacia la parte
superior del nivel de concreto. Ajuste
agregando o quitando gravilla o algún material
de drenaje equivalente.
6) Enrute el conducto o páselo a través de las
ranuras en la parte inferior de la cubierta del
pozo.
7) Rellene el área entre la cubierta y el hoyo con
gravilla o algún material de drenaje
equivalente.
a. Si la instalación se realiza en concreto,
la cubierta plástica del pozo debe
asegurarse con barras de refuerzo (no
incluidas). Vierta el concreto hasta el
borde superior de la cubierta del pozo (D).
B – Tornillos del Anillo de la Guarnición
A – Anillo de la Guarnición
E – Tornillos de Ensamblaje
F – Tornillo de Ajuste de Inclinación del Haz
C – Ensamblaje del Artefacto
D – Ensamblaje del Pozo
Figura 1

IS-16226-US
Estamos aquí para ayudarle 866-558-5706
Horario: Lunes-Viernes 9am a 5pm EST (hora ocial del este)
Conecte el Cable
de Alimentación
Negro al:
Conecte el Cable
de Alimentación
Blanco al:
Conecte el Cable
de Tierra Verde a:
Cable Negro Cable Blanco Tierra
Cable con
aislamiento y
conductor de cobre
Cable con
aislamiento y
conductor de plata
Cable con
aislamiento y
conductor de cobre
Figura 2
Figura 3
Inclinación del Haz
F – Tornillo de Ajuste de
Inclinación del Haz
E – Tornillos de Ensamblaje
Sentido de Inclinación del Haz
Abertura Ovalada
F – Tornillo de Ajuste de Inclinación del Haz
Conexión Eléctrica:
8) Conecte los cables de alimentación al artefacto (no
se incluyen los conectores). Consulte la tabla que se
incluye a continuación para realizar las conexiones
eléctricas y el cableado de manera adecuada.
NOTA: Las conexiones deben presentar un
aislamiento resistente al agua conforme a los
establecido por el/los código(s) nacionales y locales.
Se recomienda: Sello para casquillo prensacable
para cable de artefacto 3X#18 AWG SJOW (0,32”
[8 mm] diámetro) y empalme para instalación
subterránea directa (no incluida).
NOTA: Deje un espacio mínimo de 6” [15 cm] desde
el borde superior de la cubierta del pozo para que el
artefacto se asiente de manera adecuada.
9) Vuelva a colocar el ensamblaje del artefacto (C) en la
cubierta del pozo y reinstale los tornillos (E) retirados
en el paso #3.
10) Si se desea, el ángulo de inclinación del haz puede
ajustarse hasta 15° haciendo girar el tornillo de ajuste
(F) en la parte superior del ensamblaje del artefacto
con la llave Allen hexagonal de 3 mm incluida. (Ver
Figuras 2 y 3.)
11) Vuelva a instalar el anillo de la guarnición decorativa
(A) y los cuatro tornillos del anillo de la guarnición (B)
con la llave Allen hexagonal de 2,5 mm incluida.
Figura 4
¡IMPORTANTE!
DEJE UN ESPACIO
MÍNIMO DE 6” [15 cm]
DESDE EL BORDE
SUPERIOR DEL POZO
GRAVILLA,
MATERIAL DE
DRENAJE O
CONCRETO
¡IMPORTANTE!
UTILICE EL EMPALME
RESISTENTE AL AGUA
ENUMERADO EN LA
LISTA
(NO INCLUIDA)
GRAVILLA O
ALGÚN OTRO
MATERIAL DE
DRENAJE
ENSAMBLAJE DEL ARTEFACTO
ENSAMBLAJE DEL POZO
CONDUCTO
(POR OTROS)
15°
15°
/


