Page is loading ...

FW004004
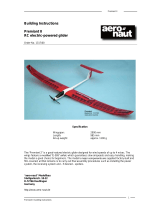
ZLIN 50 LX
Red Bull
1600mm
ARF
Building and
Operating Instructions

2
Contents Page
Contents 2
Safety Notes 3, 4
Important notes 5
Set contents / Specification / Essential and recommended accessories 6
Installing the aileron / Installing the aileron servo 7
Wing joiner / Installing the tailplane 8
Installing the tailwheel, rudder and elevators 9
Installing the tailplane struts 9
Installing the elevator linkage 10
Installing the rudder linkage 10
Installing the servos / Installing the undercarriage 11
Installing the motor / Installing the wing 12
Cowl and canopy / Centre of Gravity, control surface travels 13
Test-flying, flying notes 14
Replacement parts list 15
Dear fellow-modeller,
Congratulations on purchasing the robbe Flite-
work ZLIN 50LX Red Bull 1600 mm; this ver-
sion is produced by one of the world's finest
model manufacturers. We also wish to thank
you for the trust you have shown in us by bu-
ying the model. We hope you have many en-
joyable hours flying the robbe Flitework ZLIN
50LX Red Bull 1600 mm.
CAUTION!
Radio-controlled model aircraft are not toys! A
high level of technical expertise and modelling
experience are required to complete, fly and
maintain this model aeroplane. Assembling and
handling the model and its technical equipment
carelessly and inaccurately can result in serious
personal injury and property damage.
Building and Operating Instructions - ZLIN 50LX Red Bull 1600mm ARF No. FW004004

3
Be sure to read these Safety Notes before
you assemble your model. Always keep to
the procedures and settings recommended
in the instructions.
If you are operating a radio-controlled model
aircraft, helicopter, car or boat for the first
time, we recommend that you enlist an expe-
rienced modeller to help you.
Safety Notes
Radio-controlled models are not toys in the usual
sense of the term. Young persons under four-
teen years should only be allowed to operate
them under the supervision of an adult.
Building and operating these models requires
technical expertise, manual skills, a careful atti-
tude and safety-conscious behaviour.
Errors, negligence and omissions in building or
flying these models can result in serious perso-
nal injury and damage to property.
Since the manufacturer and vendor are not in a
position to check that your models are built and
operated correctly, all we can do is bring these
hazards expressly to your attention. We deny all
further liability.
Aircraft propellers, and all moving
parts generally, constitute a constant
injury hazard.
It is essential to avoid touching such
parts.
Please bear in mind that motors and
speed controllers may become hot
when operating.
It is essential to avoid touching such
parts.
Do not stand close to the hazard area
around rotating parts when an electric
motor is connected to the flight battery.
You must also take care to keep all other
objects away from moving or rotating
parts.
Observe the instructions provided by
the battery manufacturer.
Overcharged or incorrectly charged
batteries may explode. Take care to
maintain correct polarity.
Ensure that the equipment is protected from
dust, dirt and moisture. Do not subject the sys-
tem to excessive heat, cold or vibration.
Use the recommended charger only, and charge
the batteries only for the prescribed period.
Check your equipment for damage at regular in-
tervals, and replace defective components with
genuine spare parts.
Do not re-use any devices which have been da-
maged in a crash or by water, even when they
have dried out again.
Either send the equipment to the robbe Service
Department for checking, or replace the parts in
question.
Crash or water damage can result in concealed
defects which may lead to failure in subsequent
use.
Use only those components and accessories
which we specifically recommend.
Do not carry out modifications to the radio con-
trol system components apart from those descri-
bed in the instructions.
Building and Operating Instructions - ZLIN 50LX Red Bull 1600mm ARF No. FW004004

4
Operating the model
•Neveryoverortowardsspectatorsorother
pilots, and maintain a safe distance from them
at all times.
•Neverendangerpeopleoranimals.
•Never y close to high-tension overheadca-
bles or residential areas.
•Do not operate your model in the vicinity of
canal locks or open waterways.
•Donotoperateyourmodelfrompublicroads,
motorways, paths and squares etc. Fly from
authorised sites only.
•Never operate your equipment in stormy
weather.
Never “point” the transmitter aerial straight at the
model when operating it. The transmitter signal
is at its weakest in this direction. It is always best
to stand with the long side of the aerial angled
towards the model.
Insurance
Ground-based models are usually covered by
standard personal third-party insurance policies.
In order to fly model aircraft you will need to ex-
tend the cover of your existing policy, or take out
specific insurance.
Check your insurance policy and take out
new cover where necessary.
Liability Exclusion
robbe Modellsport is unable to ensure that you
observe the assembly and operating instruc-
tions, or the conditions and methods used for
installing, operating and maintaining the model
components.
For this reason we accept no liability for loss, da-
mage or costs which are due to the erroneous
use and operation of our products, or are con-
nected with such operation in any way.
Regardless of the legal argument employed, our
obligation to pay compensation is limited to the
invoice value of those robbe products directly
involved in the event in which the damage oc-
curred, unless otherwise prescribed by law. This
does not apply if the company is deemed to have
unlimited liability according to statutory regulati-
on due to deliberate or gross negligence.
Building and Operating Instructions - ZLIN 50LX Red Bull 1600mm ARF No. FW004004

5
Please check that your kit is complete before starting on assembly.
Models already part-assembled cannot be exchanged under gua-
rantee.
We are constantly striving to improve our models, with the aim of
offering our customers the best possible product. For this reason we
are obliged to reserve the right to introduce technical modifications
at any time.
These instructions are intended to aid and guide you when com-
pleting the model. The illustrations and notes do not represent
legal obligations. We will not countenance legal actions derived
from them.
Essential tools and adhesives:
Cross-point screwdriver
Twist drills: 1.5 mm, 2 mm and 4 mm ∅
Adhesive tape
Ropoxi 5-minute epoxy
Low-viscosity cyano-acrylate (thin cyano)
Various spanners
Building and Operating Instructions - ZLIN 50LX Red Bull 1600mm ARF No. FW004004

RC functions:
Elevator, rudder, aileron, throttle
Essential accessories:
T14SG-R7008SB 2.4 GHz
FASSTest
®
1 x F8075
ROXXY
®
POWER ZY
6S 4000 mAh 30C 1 x 6943
BLS 452 MG brushless servo
for elevator and rudder 2 x F1612
S9071SB S-BUS servo 2 x F1626
Servo extension lead, 0.3 sq mm 400 gold
2 x 4645
GO4 plugs + sockets,
pack of 2 + 2 1 x 4042
FW5055 motor set 1 x FW0085055
Battery tape, 30 cm,
pack of 5 1 x FW008502
Recommended accessories:
POWER PEAK
®
C8 EQ-BID
12 V / 230 V 180 W 1 x 8124
CT4 gold charge lead, 4 mm 1 x 4059
Specification:
Wingspan: approx. 1612 mm
Length: approx. 1403 mm
Scale: 1:5.5
Total surface: approx. 46.6 dm
2
Wing loading: approx. 65 g/dm
2
All-up weight: approx. 3050 g
6
Set contents
• Fuselage, wings, tail panels and control
surfaces factory-assembled from laser-cut
wooden components, covered in printed, high-
gloss film
• Ready-madeGRPcowl,painted
• Aluminiumundercarriageandwheels
• Controlsurfacelinkageset
• RCinstallationhardwarepack
• Comprehensiveillustratedbuildinginstructions
Building and Operating Instructions - ZLIN 50LX Red Bull 1600mm ARF No. FW004004

7
1. Installing the aileron
Use a sharp balsa knife to remove the film cove-
ring over the servo recess.
Glue the hinges in the wing and aileron using
cyano. Allow the glue to set hard, then check that
the control surface deflects freely up and down.
Make any adjustments required.
Repeat the procedure with the second wing pa-
nel.
2. Installing the aileron servos
Glue the horn in the aileron permanently using
cyano. Thread a servo extension lead (No. 4645)
through the opening in the top of the wing, and
connect it to the aileron servo. Wrap adhesive tape
round the connectors to prevent them working loose.
Prepare the aileron servo output arm as shown, and
install the servo as shown in the illustration. Now set
the servo to centre (neutral) from the transmitter,
and connect the pushrod to the servo. Connect the
other end to the aileron horn. Adjust the linkage so
that the aileron is not deflected up or down at the
neutral point. Repeat the procedure with the second
wing panel.
1
2
Building and Operating Instructions - ZLIN 50LX Red Bull 1600mm ARF No. FW004004
Pushrod, 2 ∅ x 65 mm
Control
surface horn
Pushrod
M3x5 mm
M2 mm
Washer
2 x 6 mm
PM 2 x 10 mm
Ball-link
PWA 2.3 x 8 mm
Hardwood block
20 x 15 x 8 mm
Servo pushrod
Glue the hardwood servo moun-
ting blocks in place permanently
using Ropoxi 5-minute epoxy.
Drill 1.5 mm ∅ pilot-holes for the
servo retaining screws.

8
3. Wing joiner
Use Ropoxi 5-minute epoxy to glue the plywood
joiner in one wing panel. Allow the glue to set
hard, then glue the two wing panels together,
again using Ropoxi 5-minute epoxy. Check that
the wing roots line up exactly.
Allow the glued joints to cure completely.
4. Installing the tailplane
Use a sharp balsa knife to cut away the covering
film over the tailplane slot in the fin. Remove the
film over the joint area of the tailplane. The tail-
plane can now be glued in the fin using Ropoxi
5-minute epoxy. Glue the elevator hinges in the
tailplane using cyano.
Take care to set the tailplane exactly at right-
angles to the fuselage centreline.
3
4
Plywood wing joiner, 375 x 33 x 6 mm
Building and Operating Instructions - ZLIN 50LX Red Bull 1600mm ARF No. FW004004

9
5. Installing the tailwheel, rudder and eleva-
tor
Glue the wire tailwheel unit (attached to the tail-
wheel bracket) to the rudder using Ropoxi 5-mi-
nute epoxy (see illustration).
Slip the elevator joiner through the opening in the
fin. Glue the hinges in the elevators using cyano,
and fix the elevator joiner in place using Ropoxi
5-minute epoxy.
Now insert the rudder hinges and glue them in
place with cyano. Install the rudder as shown.
When the glue has set hard, check that the rud-
der deflects freely to both sides, and carry out
any adjustments required.
6. Installing the tailplane struts
The tailplane struts are attached using 1.5 mm
aluminium brackets, which are screwed to the
struts, the fuselage and the tailplane.
5
6
Building and Operating Instructions - ZLIN 50LX Red Bull 1600mm ARF No. FW004004
Control surface joiner
2.5 ∅ x 20 x 100 mm
Collet, 2.1 mm ∅
Wheel, 30 mm
Rudder
Tailwheel bracket
Elevator
Ensure correct
orientation!
PA 2.3x10 mm
Elevator
PWA 2.3 x 10 mm
PWA 3 x 10 mm
Strut
Bracket
1.5 mm

10
7. Installing the elevator linkage
Glue the horn in the elevator permanently using
Ropoxi 5-minute epoxy.
Slip the elevator pushrod through the opening in
the fuselage, and install it as shown.
Prepare the elevator servo as shown in the il-
lustration, and set it to centre (neutral) from the
transmitter.
8. Installing the rudder linkage
Thread the braided cable through the opening
in the fuselage, as shown in the illustration. Slip
a brass crimp-sleeve onto the end of the cable,
followed by the ring-screw. Now form a loop in
the cable, and thread it through the brass slee-
ve a second time. Firmly crimp (squeeze) the
sleeve to secure the cable, using crimp pliers
or an electrical connector crimping tool. Screw
the ball-link onto the ring-screw. Glue the rudder
horn in place using Ropoxi 5-minute epoxy. Con-
nect the prepared cable to the horn as shown.
Repeat this procedure with the second cable on
the other side of the rudder.
7
8
Pm 2 x 10 mm
Building and Operating Instructions - ZLIN 50LX Red Bull 1600mm ARF No. FW004004
Control
surface horn
M2 mm
Washer
2 I.D. x 6 mm I.D.
Ball-link
Pushrod, 2 x 770 mm
PM 2 x 10 mm
Brass sleeve
Ring-screw M 2.2 mm
Braided cable, 840 mm
Ball-link
M2 mm
Washer
2 I.D. x 6 mm I.D.
Control surface
horn

11
9. Installing the servos
Install the two F1612 servos in the mounting
plate as shown in the illustration. Set the servos
to centre (neutral) from the transmitter. Connect
each of the rudder cables using a ring-screw, as
described in Point 8. Now slip the elevator push-
rod and the rudder cables through the barrel
connectors mounted on the servo output arms.
Check that the rudder and elevator are exactly
at centre before tightening the clamping screws.
10. Installing the undercarriage
The undercarriage is installed as shown in the
drawing.
Screw the undercarriage unit to the mounting
plate in the fuselage using the three M4 x 16 mm
screws supplied. Take care not to over-tighten
the screws!
Now install the wheels as shown in the illustra-
tion.
9
10
Building and Operating Instructions - ZLIN 50LX Red Bull 1600mm ARF No. FW004004
Elevator pushrod
2 ∅ x 770 mm
Rudder
servo
Elevator
servo
M3 x 5 mm
4 I.D.x10 mm O.D.
M4 x 16 mm
4 I.D. x 10 mm O.D.
Axle
Wheel, 65 mm ∅
M3 nut
3 x 4 mm
Collet, 4.1 mm ∅
Rudder cables
Ring-screw
Linkage cable
M4 self-locking nut

12
11. Installing the motor
Screw the motor mount to the fuselage, then fix the
motor assembly to the motor bulkhead as shown.
If you are using the FW5055 motor set, please note
that the 4 mm thick spacer washers included in the
set must be positioned between the motor mount
and the motor flange.
12. Installing the wing
Locate the retaining lug in the centre of the wing,
and insert it in the corresponding slot in the un-
dercarriage former.
Fix the wing to the fuselage using the two M4 x
30 screws, 4 I.D. x 12 mm O.D. washers and the
plywood reinforcement (see illustration).
11
12
4 I.D. x 10 mm O.D.
M4 x 30 mm
4 I.D. x 12 mm O.D.
Building and Operating Instructions - ZLIN 50LX Red Bull 1600mm ARF No. FW004004
2 mm plywood reinforcement
M4 x 25 mm

13
13. Cowl and canopy
Slide the canopy locating lugs into the corre-
sponding slot in the motor bulkhead. The canopy
is locked in place using the canopy latch instal-
led in the fuselage turtle deck.
Check that the cowl is a snug fit on the fuse-
lage; it should not be distorted or under strain.
Temporarily tape the cowl in place in the correct
position. Drill 1.5 mm ∅ holes through cowl and
fuselage for the four retaining screws, then fix
the cowl in place using the four PWA 2.3 x 8 mm
screws supplied. Take care not to over-tighten
the screws!
14. Centre of Gravity
The ideal Centre of Gravity is located 118 mm
aft of the wing leading edge, measured at the
fuselage. It is essential to check the C.G. before
flying the model for the first time; it can be cor-
rected by re-positioning the flight battery.
15. Control surface travels
If you need to adjust the control surface tra-
vels, re-connect the pushrod further in or out
in the servo output arm. You can also use your
transmitter's servo travel adjustment facility.
13
14 15
PWA 2.3 x 8 mm
Rudder
Elevator
Aileron
C.G. 118 mm
35 mm
35 mm
85 mm
85 mm
55 mm
55 mm
Building and Operating Instructions - ZLIN 50LX Red Bull 1600mm ARF No. FW004004
C.G. 118 mm

14
Test-flying, flying notes
- Check that there are no loose objects, such as rags, tools or similar, in front of model, as they could be sucked into the propeller.
Caution: Whenever you are working on the power system (for installation, set-up or maintenance), keep well clear of the
rotational plane of the propeller - injury hazard.
- For your first few flights it is best to wait for a day with no more than a gentle breeze.
- A good flying site consists of a field with a tarmac runway, or a large, flat, closely-mown grass field, devoid of trees, fences, high-tension
overhead cables etc.
- Repeat the check of all the working systems.
- The model must always be launched directly into any wind.
- Carry out a series of taxi tests to become accustomed to the model's ground handling and response to the control surfaces.
- With the nose pointing straight into wind, apply full-throttle and allow the aeroplane to pick up speed. When flying speed is reached, lift
off with a brief application of up-elevator.
- Keep the model flying straight and level at first; don’t initiate a turn while it is still close to the ground.
- Adjust the control surface trims if necessary, so that the model flies straight with a reasonable rate of climb “hands off”.
- Check the model's response to control commands . You may need to increase or reduce the control surface travels after the first landing.
- The stated control travels are just a guide for the first few flights. The exact settings should be selected to suit the individual pilot's flying style.
- Check the model's stalling speed at a safe height. Keep the airspeed well above this level for the landing.
- If you needed to adjust the trims during the test-flight, correct the length of the appropriate pushrod once the model is back on the ground,
then return the transmitter trims to centre so that full trim travel is available to both sides of neutral for subsequent flights.
Caution: stopping (obstructing) the motor when it is turning can cause serious damage to the mechanical system, and may even
result in a fire. Immediately move the throttle stick to Idle if this should happen.
Note regarding the flight battery: as soon as you notice a reduction in motor power, land immediately and disconnect the battery.
Never continue flying until the battery is flat, as this causes a deep-discharge condition which results in permanent damage. Allow
the battery to cool down before recharging it.
Replacing the propeller: a damaged propeller must be replaced immediately.
Building and Operating Instructions - ZLIN 50LX Red Bull 1600mm ARF No. FW004004

15
Replacement Parts List -
ZLIN 50 Red Bull 1600mm ARF
No. Article description
FW0040041 Cockpit
FW004014 Cowl
FW004024 Canopy
FW004034 Undercarriage, complete
FW004044 Wing set
FW004054 Fuselage set
FW004064 Elevators
FW004074 Rudder
FW004084 Linkage set
FW004094 Spinner
Building and Operating Instructions - ZLIN 50LX Red Bull 1600mm ARF No. FW004004

robbe Modellsport GmbH & Co.KG
Metzloserstraße 38 · D-36355 Grebenhain
Technical hotline: +49 (0)66 44 / 87-777 · hotline@robbe.com
Commercial register: Gießen Regional Court HRA 2722
Partner with personal liability:
robbe Modellsport Beteiligungs GmbH Gießen / HRB 5793 · Managing Director: E. Dörr
Errors and technical modifications reserved. - Copyright robbe-Modellsport 2013
Duplication and copying of the text, in whole or in part, is only permitted with the prior written approval of robbe-Modellsport GmbH & Co. KG
16
Building and Operating Instructions - ZLIN 50LX Red Bull 1600mm ARF No. FW004004
/