Page is loading ...

ELITE OPERATING INSTRUCTIONS
4211-1460 08/21/19 4211-1460 Page 1 of 10
Amerec’s Elite control for the AX steamer is a touch screen control intended
to be mounted on a wall, generally in or near the steam bath and mounted directly on the
wall surface.
Using the Elite, you set or adjust the steam bath time and temperature, control options
such as lights and fragrance pumps, and use Warm Start (if installed) to keep the
steamer’s water hot between baths so it produces steam more quickly when the bath is
started. Delayed start and calendar start settings allow you to have a steam bath ready
to use in a few hours or on a regular schedule. Favorites save your preferred settings for
later use. WiFi apps give you wireless control from your Android phone and iPhone or
while using a PC. You can even prevent the steam room from being used during certain
time periods.
Intelligent steam control learns how long it should take your room to reach a comfortable steam bath temperature
then adds this time to your delayed starts so you set when you want to start your steam bath and the bath will be
up to temperature and ready when you are.
You may use 1 to 3 controls with an AX steamer, such as 1 or 2 Elite controls + a Pure 2.0.
To reduce the risk of damage to the steamer or controls and to ensure the controls connect properly with the
steamer, always turn power off to the steamer before connecting or disconnecting a control. Most control settings
changed on one control will also be set the same for any other controls connected. Some settings, such as PIN,
Temperature (°F or °C), Time and Date formats, and Language used, will affect only the control they used to set
them.
Note: The Elite control comes with “haptic feedback” which causes the control to vibrate and buzz when you touch
the screen. You can turn this on or off using the Tools menu.
Index
Section
Page
Navigation
2
Turning Things On and Off
2
Start Up
3
Initial Set Up – Tools Menus
4
General
4
Limits
5
Additional Settings
5
System
5
Options
6
Favorites
7
WiFi
8
Apps
8
Available Languages in the Elite
9
Warm Start: Is It Installed?
9
Mounting the Control
10
Note: These instructions will mostly use light colored display for clarity. The Elite’s displays are black with grey
markings (except the on/off pads on the Home screen).

ELITE OPERATING INSTRUCTIONS
4211-1460 08/21/19 4211-1460 Page 2 of 10
Navigating the Elite
Some indicators are used while navigating and setting the control. These are light grey when their screen or
menus are in view, dark gray when they are not in use.
The Home button: touch this to return to the main screen. Here you will see the current temperature in
the steam room, the bath temperature setting, the remaining bath time (if any) and the time of day.
Touch the screen to show the bath and Warm Start on/off buttons, too.
The Settings button: touch this to display the Settings screen. Here you can adjust the temperature
and duration for the current bath. You can also manually turn on the installed options when the bath is
on (and turn on some options, such as Lights, when the bath is off). You can also save your settings as
a favorite so you can always have them available for your steam bath without having to change settings after
someone else has a steam bath.
The Favorites button: Here you can select a bath with your favorite settings, once you’ve saved it.
The Calendar button: Here you schedule a steam bath to start and run at a later time. You can select
by the day of the week or using a calendar month and select for one time bath or recurring.
The Tool button: here you make the many selections for what functions and options are available to be
used, set a PIN to limit who can change settings, and much more.
The Change Menu arrows are used to move between related menu screens. Press to return to the previous
screen or to continue to the next one.
Turning Things On and Off
The Bath On/Off indicator bar shows at the top of the home screen. Note: if it isn’t visible, simply touch the screen
to see it again. Touch the right side to turn the bath on, the center to start Warm Start (if installed) and the left to
turn the bath or Warm Start off.
Bath Off Bath On
Bath and Warm Start Off Bath On
Bath Off, Warm Start ON
The slider switches are moved to turn something on or off.
OFF ON
The Cancel and Accept buttons are used after making some changes. Press to accept your changes, press
to cancel any changes.

ELITE OPERATING INSTRUCTIONS
4211-1460 08/21/19 4211-1460 Page 3 of 10
Start Up
The first time your Elite is turned on, it will need some information loaded and some settings changed.
When the power is first turned on, the steamer will take about 30 seconds to start operating before the Elite is
turned on. The Elite screen will then light and display the amerec logo, then change to a lit screen with spinning
circle showing while it loads its own software. This will take 1-1/2 minutes with one steamer and one Elite. Multiple
steamers or multiple controls can make everything take a little longer while all the software loads.
With a new control or after a factory reset, the first thing you will see is the Welcome screen. Now press the
Change Menu button to move to the Language selection menu and select your language, then to the Region
menu and select North America, then to the Date Format menu, and then set the current date. Next set the Time
format, then the current time.Now change menus again and you will see the Home screen. (Note: page 9 for a list
of all available languages.)
Note: at this point, the room temperature may not be accurate yet. As the Elite measures the actual temperature,
the display will increase until the correct temperature is reached. After this the temperature display will change
quickly, as expected. This may take a few minutes the first time the control’s power is turned on.
Press the > to set the time.
When the time is set,
press > again
to finish the set-up and
go to the home screen.

ELITE OPERATING INSTRUCTIONS
4211-1460 08/21/19 4211-1460 Page 4 of 10
Initial Set-up
Once you are ready to use your Elite, there are a few things you need to set up. You’ll want to set the normal bath
time, the bath temperature, set the temperature readings for °C or °F, turn a few options on or off, and maybe set
an access code. Some functions may have already been set up by the installer, but we will assume only the initial
start-up has been done.
First, go to the Tools menu by pressing its button. You will start in the General menus section.
You should have already language, region, set time and date so next choose the
temperature Units setting by touching its
Touch to select Celsius (°C) or Fahrenheit (°F) to be
used for your temperature displays then press the
button to return to the Tools menu.
Next set the Display time out delay. This setting determines
how long the control’s display is lit before blacking out. The
Display time is set to minutes by default.
Select the time you want the use to return to the Tools
menu.
Do you want to use a PIN code to prevent others from
changing (or seeing) some of the control’s functions? If not,
skip to the next setting.
If you prefer to prevent some users from using some or all of the functions on a control,
create a PIN code to lock the operation. To create a PIN number, select PIN. Touch the Activate slider to turn the
PIN on then choose which functions you would like to have available to anyone without using the PIN code. In the
settings below, anyone can start or stop the bath and adjust the room temperature but they cannot control the
room light or make any other changes.
You may have other options available
on the PIN screen depending on how
your system is set up and which options
are installed.
Now select Change PIN to go to the
PIN screen (at right). Enter the current
code (0000 by default). Then select
to accept the entry.
Next, you’ll enter the new code, select
, then reenter the new code and
press again and you will see a note
that the new code is accepted before
you return to the previous screen
If you change your mind or want to cancel the new PIN code before accepting it, press
Next we’ll set some system limits.
Use to return to the Tool menu screen, then slide your finger down the screen to scroll further down to the Limits
section.

ELITE OPERATING INSTRUCTIONS
4211-1460 08/21/19 4211-1460 Page 5 of 10
Warm Start On
Limits menus
To set the maximum allowed bath temperature, select Bath temperature. This lets you
limit the temperature anyone can set the bath to (no more than 125°F by default). For
instance, if you have someone in the family who is sensitive to heat, you may set the
limit to 115°F so they cannot accidentally set the bath too hot. They can still adjust the
bath temperature, just with a lower maximum setting.
If you want to prevent the steam bath from being used during certain hours, say during
the day while you’re not at home or from 10:00 pm to 7:00 am for a hotel’s quiet time,
use the Not allowed start setting to set the time period.
If you have water problems which might prevent you from having water available for the
steamer, set the Max water fill time to a reasonable time limit. If water pressure is too
low, you may need a longer time. If your water supply is normally good, you may be
able to set it to 2 or 3 minutes. Default is 6 minutes.
If it takes longer than the fill time setting to reach normal operating levels in the steam, the system will
show you an error and shut down to prevent damage to the steamer. And remember, you must have at
least 20 psi (138 kPa) water pressure for proper operation.
Additional settings menus
Warm Start is an option which keeps the water in the steam tank warm so the steamer
produces steam more quickly after the bath is turned on. If you do not have Warm Start
installed, select warm start and move the slider to disable it.
If Warm Start is installed, you may adjust the temperature up from the 176°F default to
speed up steam production even more. If you do turn up the Warm Start temperature,
watch for steam from the steam outlet while the bath is off. If you see steam while only
Warm Start is running, turn down the temperature a few degrees and repeat until the
steaming stops.
If you have a vent fan connected to the steamer’s FAN option terminal block, select Fan
to set up how it will operate. Turn on Automatic to have the fan run after the bath. The
fan will run 20 minutes by default but may be set from 1 minute to 3 hours by changing
the Running Time setting. The fan may also be turned on or off manually while in this
menu.
Next scroll down further for the System menu section.
System menus
Options and WiFi will be covered in their own sections.
Use the Cleanup note settings to turn on/off a reminder which tells you when it is time
to clean the tanks, such as for decalcification when you have hard water. You can also
set the number of operating hours before the reminder appears.
In this menu, you also can choose to see reminders that the tank should be emptied
after a bath. If you do not have an automatic electronic drain valve, you should drain
the tank periodically to keep it clean. How often depends on you water quality. If you
cannot get to your steamer’s manual drain valve easily, we recommended turning off
the Tank Empty Notes so you don’t see the reminders.
The rest of this menu is for service use and should be left as is.
Warm Start Off

ELITE OPERATING INSTRUCTIONS
4211-1460 08/21/19 4211-1460 Page 6 of 10
Options
Go to Options to set up various options available for use with you steamer.
Your AX steamer comes with two options automatically
loaded: a room light which always light during the steam
bath and remains on for 10 minutes after the bath stops (or
can be manually turned on and off) and a dedicated fan
control (set-up previously in the Systems menus).
You also have connections for three additional options of
your choice, AUX 0, AUX 1 and AUX 2. These options use
a relay in the steamer as a switch connected to the Options
terminal block in the steamer.
To add an option, select Options then select one of the Aux
items. Below, we’ll set Aux 0 for controlling Chromatherapy
lights.
In Aux 0’s menu, select the blank white block so you can name your option and the
keyboard will appear. Enter the name for your option then press the to accept the
name. The name can have up to 15 characters maximum (longer names may not
display properly).
Now select On/Off for the operation
needed then return to the options
menu.
A Fragrance option may be connect-
ed to inject aromatic oils into the
steam bath. If you wish to connect a
Fragrance system, set an AUX to
Fragrance and name the option.
If you need to set the pump timing for more or less fragrance,
use the fragrance menu to select how long the Pump injects the
aroma oil and how long the pump Stops between injections. Start
with the default settings and adjust for more or less fragrance as you get use to the effects. You do not want too
much fragrance, so start with a little and work your way up as needed
Now go to the Settings screen and you’ll see the
options added to the screen. When you start a bath,
Lighting will automatically turn on but the options
will remain off until you turn them on manually.
When the bath turns off, the options will be turned off automatically, too.

ELITE OPERATING INSTRUCTIONS
4211-1460 08/21/19 4211-1460 Page 7 of 10
Favorites
When you finish your steam bath, the bath settings will be saved for the next bath automatically. If the next user
makes changes, the following bath will use the new settings.
You can save your bath settings as a favorite so you can always have the settings you
want. This will save the bath temperature and time and the options you want turned on
for you bath. The Elite will let you save a total of eight favorites
When you have your bath set up the way you like it, go to the Settings screen
then select Save as favorite.
Now you will go to the Keyboard where you can type in the name of your favorite set
up. The name can have up to 15 characters maximum (longer names may not display
properly).Select when done and you will be returned to the Settings screen.
To use your saved favorite, go to the Favorites screen.
You will see list of all the saved favorites settings. Select
your favorite and the Settings screen will appear with all
your favorite’s settings in place. Make any changes you
may want, then select Start to begin your bath.
If you decide to delete a favorite, go to the Favorites
screen and select that entry. When it returns you to the
Settings screen, there will be a small trashcan in the upper
right corner.
Select the trash can to delete that favorite.
You will be asked to accept deleting that
favorite, then you will be returned to
the Favorites screen.

ELITE OPERATING INSTRUCTIONS
4211-1460 08/21/19 4211-1460 Page 8 of 10
WiFi
If you plan on using an app with your steam system, you will need to enable the WiFi
connection first. Select WiFi in the Systems menu to go to the WiFi menus.
Use the slider switch to Enable WiFi.
Next select Network.
Now set the slider switch to Auto connect.
Next select Scan. A list of available WiFi networks should appear. Select your network
and on the next screen, select and enter your password for the WiFi network. Select
to accept the password and return to the network screen.
Now select Connect. A couple messages will appear showing that the connection is
being made and has been accepted. Press OK to clear the messages.
Now return to the network scan screen and enter a name for you bath system: you will use this to help connect
with your app(s). Select the blank white block then use the keyboard to enter the name (15 characters maximum
(longer names may not display properly)) then use to accept the name and return to the previous screen.
Make sure the Auto connect switch is still enabled (green) then return to the previous screen and make sure WiFi
is still enabled. Note: in this screen you can check to see all of the apps and Elite controls which are connected to
your system.
Now return to Tools then Home.
APPs
The Amerec apps are available free from the iTunes Store for iPhones and iPads and from Google Play for
Android phones. An app is also available for PC computers (contact Support to obtain the PC app). An app is not
yet available Macintosh computers. Android phones must be version 4.8 or higher.
The apps look and operate identically to the Elite control. The apps have fewer Tools available than the Elite.
There are risks when starting a bath while using a phone: you may not be near enough to know if something has
changed at the room, such as the door being left open, so the selections are reduced for safety.
To connect an app to the system, it must be connected to the same WiFi network and to the steamer system. You
will need to log in to the WiFi network first. Then, in the app, go to Tools then Network then set Auto connect on
(green). Select Find System. Your steam bath system name should be listed. Next select your system then select
Connect. Select Change PIN and enter the PIN code (0000 by default or the number you changed it to). then
enter the PIN code to. Save the PIN code. Now select Connect. A short time later Connect will change to
Disconnect, indicating you are connected to the steam system. If you ever want to disconnect from the system, go
here and select Disconnect.
Return to the Network screen and make sure the auto connect slider switch is on. You should see your system
name on the screen with a check mark in front of it. If you ever see the system name in parenthesis, it means you
are disconnected.
The PC app has many more selections available, assuming that with a PC you are more likely to be near enough
to the bath to be aware of changes. This is intended especially for use in light commercial areas, such as a spa.

ELITE OPERATING INSTRUCTIONS
4211-1460 08/21/19 4211-1460 Page 9 of 10
Available Languages in the Elite
Czech
Danish
German
English
Spanish
Dutch
Norwegian
Polish
Portuguese
Russian
Slavic
Finnish
Swedish
Warm Start: Is It Installed?
If you enable Warm Start on the Elite and you get a
steam tank temperature error when you try to turn on
Warm Start for the first time (see
Turning Things On
and Off
on page 2), you’ll need to remove the cover
from your steamer and see if the Warm Start option
is installed.
If warm start is installed, you’ll see a temperature
sensor on the side of the steam tank which connects
through a tube to the steamer’s circuit board.
If Warm Start is installed and you still get a sensor
error, first make sure the sensor is connected to both
pins on the steamer board (between the cable jacks
and the level probe wires). If it is connected, contact
Support for further assistance.

ELITE OPERATING INSTRUCTIONS
4211-1460 08/21/19 4211-1460 Page 10 of 10
Mounting the Control
Your Elite control comes with a chrome trim piece. Before mounting the control, slide
the plated trim piece over the back of the control. Mounting the control will keep the
trim in place. Other finishes are available (see below).
Surface mount the Elite control inside or outside the steam room. If mounting
to a smooth, flat wall, the adhesive pad provided will work well to mount the control
and seal the cable hole. The adhesive will stick to the wall quickly so be sure to accurately
place and level the control before attaching it to the wall!
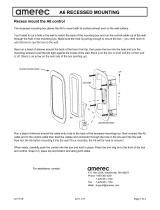
If the surface is uneven or has grout lines, we recommend using a small amount of silicone to
mount the Elite control. If using silicone, run a bead around the control’s cable end and another
bead around the back of the control as shown here. Then tape in place on the wall until the sili-
cone has set up.
Note: A cut mark on the back indicates the top of the control
The control’s cable end is at the bottom of the control.
Be sure to carefully level the control while mounting!
Trim Finishes Available:
• Chrome
• Polished Nickel
• Brushed Nickel
• Oil Rubbed Bronze
• Brushed Bronze
• Matte Black
Please contact Amerec Sales or Technical Support for further information and assistance.
For further assistance, contact
SILICONE
ADHESIVE
OR
P.O. Box 2258, Woodinville, WA 98072
Phone 1-800-363-0251
1-425-951-1120
Fax 1-425-951-1130
eMail Support@amerec.com
/