Page is loading ...

Installation and Operating Instructions for
Homeowner: Please retain for operational
and future maintenance instructions.
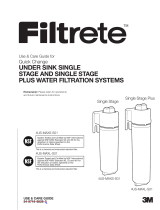
4US-MAXS-S01
4US-MAXL-S01
MANUAL
34-8709-5752-8
(0412)
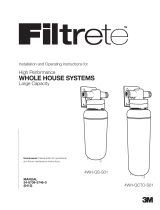
High Performance
DRINKING WATER SYSTEMS

2
•ReadandfollowUseInstructionsbefore
installation and use of this system.
•Installationmustcomplywithexistingstateor
localplumbingcodes.
•Installoncoldwaterlinesonly.
•Donotinstallonhotwatersupplylines.The
maximumoperatingwatertemperatureofthis
filter system is 100°F (38°C).
•Protectlterfromfreezing.Drainlterwhen
roomtemperaturedropsbelow40°F(4.4°C).
•Donotinstallwhereambienttemperaturesmaygo
above110°F(43°C).
•Donotinstallifwaterpressureexceeds125psi
(862kPa).Ifyourwaterpressureexceeds80psi,
youmustinstallapressurelimitingvalve.Contact
aplumbingprofessionalifyouareuncertainhow
tocheckyourwaterpressure.
•Donotinstallwherewaterhammerconditions
mayoccur.Ifwaterhammerconditionsexist
youmustinstallawaterhammerarrester.
Contactaplumbingprofessionalifyouare
uncertainhowtocheckforthiscondition.
•Donotinstallnearwaterpipeswhichwillbe
inpathofadrillingtoolwhenselectingthe
positiontomountthebracket.
•ThedisposablelterMUSTbereplacedatleast
everysixmonthsattherateofcapacityorsoonerif
anoticablereductioninowrateoccurs.
•Mountlterinsuchapositionastopreventit
frombeingstruckbyotheritemsusedinthe
areaofinstallation(wastebaskets,etc.).
•Ensurealltubingandttingsaresecureand
freeofleaks.
•Donotinstallindirectsunlightoroutdoors.
•Donotinstallunitifcolletismissing.Contact
3M Company if collets are missing from any fittings.
•Whereabackowpreventerisinstalledona
watersystem,adeviceforcontrollingpressuredue
tothermalexpansionmustbeinstalled.Contacta
plumbingprofessionalifyouare
uncertainhowtocheckforthiscondition
•Donotuseatorchorotherhightemperature
sources near filter or plastic fittings.
•Onplasticttings,neverusepipesealantorpipe
dope. Use thread sealing tape only.
•Takecarewhenusingpliersorpipewrenchesto
tightenplasticttingsasdamagemayoccurifover
tightening occurs.
•SHUTOFFFUELSUPPLYTOWATERHEATERif
mainhouseholdwaterisshutoff.
SAFETY INFORMATION
Read, understand, and follow all safety information contained in these instructions
prior to installation and use of the Filtrete
™
Single Stage and Single Stage Plus High
Performance Drinking Water Systems. Retain these instructions for future reference.
WARNING
WARNING
CAUTION
To reduce the risk associated with ingestion of contaminants:
•Donotusewithwaterthatismicrobiologicallyunsafeorofunknownqualitywithoutadequate
disinfectionbeforeorafterthesystem.Systemscertiedforcystreductionmaybeusedon
disinfectedwaterthatmaycontainlterablecysts.EPAEstablishment#10350-MN-005
To reduce the risk associated with choking:
•Donotallowchildrenunder3yearsofageaccesstosmallparts.
To reduce the risk of physical injury:
•Donotinstallnearelectricwiringorpipingwhichmaybeinthepathofadrillingtoolwhen
selectingthepositiontomountthelterbracket.
EXPLANATION OF SIGNAL WORD CONSEQUENCES
Indicatesapotentiallyhazardoussituation,which,ifnotavoided,could
result in death or serious injury and/or property damage.
Indicatesapotentiallyhazardoussituation,which,ifnotavoided,may
result in property damage.
Intended use:
TheFiltrete
™
SingleStageandSingleStagePlusHighPerformanceDrinkingWater
Systemsareintendedforuseinlteringpotablewaterinhomesandhavenotbeenevaluated
forotheruses.Thesystemistypicallyinstalledunderasink,andmustbeinstalledaccordingtothese
installationinstructions.Flowrateis0.75gallonsperminute.
CAUTION
To reduce the risk associated with property damage due to water leakage:

A. B.
C.
D.
F. G.
I.
J.
H.
E.
This system uses push-in fittings:
This easy-to-install system uses watertight, push-in fi ttings.
To Release Tubing:
Figure 1
Push in collet to
release tubing.
With collet held, pull
tubing straight out.
To Attach Tubing:
Push tubing in as far
as it will go. Tubing
must be inserted past
o-ring and hit backstop.
Pull tube to ensure it is secure.
IMPORTANT NOTES:
•Failuretofollowinstructionswillvoidwarranty.
•Allowaminimumof21/2"clearspaceunder filter to facilitate cartridge change.
•Installwiththeinletandoutletportsaslabeled.Makesurenottoreverseconnections.
3
PARTS AND MATERIALS: (included)
BEFORE YOU BEGIN:
• Remove items stored under the sink.
• Have a towel and bowl available in case dripping occurs.
TOOLS REQUIRED:
(Not included)
Two Adjustable wrenches
#2 Phillips head screwdriver
Drill
Pencil
Safety glasses
GETTING STARTED
• Filter (A)
• Filter head assembly (B)
• Faucet with tubing, nut (C)
• Coiled tubing (D)
• Water supply line adapter (E)
• Faucet mounting shim (F)
• Faucet gasket (G)
• Faucet spout (H)
• 2 mounting screws (I)
• Filter change indicator (J)

HOT
COLD
(Fig. 6)
(Fig. 8)
(Fig. 9)
2
1
/
2
"
(Fig. 10)
(Fig. 11)
(Fig. 7)
4
MOUNTING THE FILTER
HEAD ASSEMBLY:
You will need: Phillips screwdriver, drill, pencil,
safety glasses, lter, head assembly (B),
#2 mounting screws (I)
1. Choose a location to mount lter head assembly
(B). Keep in mind: Filter head should be in
a location that offers easy access for changing
lters. Leave 2 ½" of clearance below the installed
lter cartridge. (See Fig. 6)
2. Using the bracket on the head (B) as a guide,
mark the location of the two screw holes on the
wall with a pencil. (Fig. 7)
3. Fasten the head to the wall using a Phillips
screwdriver and the two mounting screws
included (L) (Fig. 8). (If preferred, use a drill
with a 1/8" size drill bit to make pilot holes
for the screws.)
4. Check to assure mounting bracket is
rmly installed.
(Fig. 2) (Fig. 3)
(Fig. 4)
(Fig. 5)
INSTALL FAUCET:
You will need: faucet with attached tubing, nut (C), faucet mounting shim (F), faucet gasket (G),faucet spout (H).
1. Place the faucet gasket (G) on the faucet and insert faucet tubing, shaft and nut (C) into pre-existing soap dispenser or sprayer
opening in sink. (If no opening exists, or installation is desired elsewhere, a 1 ¼" opening must be made.) (Fig. 2)
2. Install faucet mounting shim (F), onto faucet shaft (Fig. 3) and hand tighten nut. (Fig. 4)
3. Insert spout (H) into faucet body (C). Hand tighten faucet spout nut. (Fig. 5)
Faucet Opening Insert Shim
Tighten Nut Spout Insert

(Fig. 12)
(Fig. 13)
(Fig. 14)
HOT
COLD
(Fig. 6)
(Fig. 8)
(Fig. 9)
2
1
/
2
"
(Fig. 10)
(Fig. 11)
(Fig. 7)
ATTACH WATER
INLET/OUTLET HOSES:
You will need: 1 length of 1/4" tubing (D).
1. Insert one end of the length of 1/4" tubing (D) into
the push-in tting on the side of the water supply
line adapter (E) you just installed. Push the tubing
in rmly as far as it will go to ensure a watertight t.
(Fig. 12) Important Note: Water may leak if the tube
is not pushed in completely. (See “push-in fittings”
explanation on Pg. 3. Fig. 1)
2. Take the other end of the same 1/4" tubing (D)
and insert into the left (inlet) side of the lter
head assembly (B). (Fig. 13)
3. Insert the end of the faucet tubing into the right (outlet)
side of the lter head assembly (B). (Fig. 14)
5
ATTACH WATER SUPPLY
LINE ADAPTER:
You will need: Adjustable wrench (Note: Two
wrenches may be needed to adequately tighten
ttings when connecting the adapter to the
supply line), water supply line adapter (E)
1. Turn off the cold water supply at the shutoff
valve under the sink. (Fig. 9)
2. Place bowl under cold water connection.
Disconnect the cold water faucet hose from
the shutoff valve below using wrenches.
Leave the hose attached to the faucet
above. (Fig. 10)
3. Install water supply line adapter on water supply
shut-off valve. (Fig. 11)
4. Reconnect the cold water faucet hose onto threaded
portion of water supply line adapter. (Fig. 11)
Note: If the water supply line adapter (E)
does NOT t properly onto the end of your
shutoff valve, visit your local hardware store
to purchase the correct size.
hand should be on
left side
hand and tube
should be on right
side

(Fig. 15)
(Fig. 16)
6
ATTACH THE FILTER:
You will need: lter (A)
1. Insert the lter (A) into the lter head (B).
2. Push lter up, then turn one quarter
of a turn to the right until it stops.
(Fig. 15)
3. When properly attached, there will
be NO gap between the lter head (B)
and the lter (A).
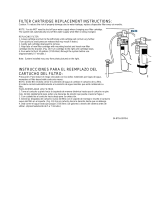
FILTER
REPLACEMENT
INSTRUCTIONS:
CAUTION
To reduce the risk of property damage due to
water leakage, replace filter every six months or sooner.
NOTE: You do NOT need to shut off your water supply
when changing your lter. The system will automatically
shut off the water supply while the lter is being changed.
REPLACING FILTER
1. Turn lter to the left until it releases from the lter head.
2. Gently pull lter down to remove.
3. Insert new lter into lter head, turn one quarter of a
turn to the right until it stops.
4. Open dedicated faucet to ush 2 gallons (approx. 4 minutes)
through the system before use. Water may start cloudy,
but will turn clear as the trapped air is released.
5. Activate lter change indicator according to instructions on page 8.
Replacement lters can be purchased at original point of sale.
Available lters include 4US-MAXS-F01 and 4US-MAXL-F01.
TURN WATER ON:
1. Turn the water back on at the
cold water shut-off valve. (Fig. 16)
2. Open dedicated faucet to ush 2 gallons
(approx. 4 minutes.) through the system
before use. Water may appear cloudy, but
will turn clear as the trapped air is released.
3. Check for leaks. If any dripping or leaking
occurs, turn cold water supply off, open both
faucets, tighten ttings and ensure that tubing is
pushed completely into ttings.
4. Activate lter change indicator according to
instructions on page 8.
YOUR SYSTEM IS NOW READY FOR USE.
tubing connections
should be reversed
tubing connections
should be reversed

7
Distributedby:
3M,HomeEnvironmentMarketsDivision
3MCenter,St.Paul,MN55144-1000
1-800-388-3458
TROUBLESHOOTING GUIDE
Water Leaks at Push-In Connections:
Push tubing in as far as it will go. If leaking continues, shut off water at
the shut off valve, depressurize and remove water line by pushing in on the connector
collar while pulling the tubing away. Inspect tubing for cracks and
scratches. If tubing is cracked or scratched, simply cut that portion away
and reinsert tubing into push-in tting.
Water Does Not Flow from the Drinking Water System Faucet:
Check to see if the main water line valve is open,
allowing water to ow to the lter.
Water Appears Cloudy or Air Comes Out of the Drinking Water System Faucet:
Flush lter for an additional full ve (5) minutes to remove any carbon nes or
trapped air in the lter and water lines.
For more information or questions
Visit www.ltrete.com/water or call 800-388-3458
Filtreteand3Maretrademarksof3MCompany.NSFisa
trademarkofNSFInternational.Timestripistheregistered
trademarkofTimestripUKLimited.Allothertrademarks
arethepropertyoftheirrespectiveowners.
©2012,3M.Allrightsreserved.
LIMITED WARRANTY:
3MwarrantsthisProductwillbefreefromdefectsinmaterialandmanufactureforone(1)yearfromthedateofpurchase.Thiswarrantydoesnotcoverfailures
resultingfromabuse,misuse,alterationordamagenotcausedby3Morfailuretofollowinstallationanduseinstructions.Nowarrantyisgivenastothe
servicelifeofanyltercartridgeormembraneasitwillvarywithlocalwaterconditionsandwaterconsumption.3MMAKESNOOTHERWARRANTIESOR
CONDITIONS,EXPRESSORIMPLIED,INCLUDING,BUTNOTLIMITEDTO,ANYIMPLIEDWARRANTYORCONDITIONOFMERCHANTABILITYORFITNESS
FORAPARTICULARPURPOSEORANYIMPLIEDWARRANTYORCONDITIONARISINGOUTOFACOURSEOFDEALING,CUSTOMERORUSAGEOF
TRADE.IftheProductfailstosatisfythisLimitedWarrantyduringthewarrantyperiod,3MwillreplacetheProductorrefundyourProductpurchaseprice.
Thiswarrantydoesnotcoverlabor.TheremedystatedinthisparagraphisCustomer’ssoleremedyand3M’sexclusiveobligation.
Thiswarrantygivesyouspeciclegalrights,andyoumayhaveotherrightswhichmayvaryfromstatetostate,orcountrytocountry.Foranywarrantyquestions,
pleasecall1-800-388-3458ormailyourrequestto:WarrantyClaims,3M,CustomerCareCenter,3MCenter225-3S-06,St.Paul,MN55144-1000.Proofof
purchase(originalsalesreceipt)mustaccompanythewarrantyclaim,alongwithacompletedescriptionoftheProduct,modelnumberandallegeddefect.
LIMITATION OF LIABILITY:
3Mwillnotbeliableforanylossordamagearisingfromthis3MProduct,whetherdirect,indirect,special,incidental,orconsequential,regardlessofthelegal
theoryasserted,includingwarranty,contract,negligenceorstrictliability.Somestatesandcountriesdonotallowtheexclusionoflimitationofincidentalor
consequentialdamages,sotheabovelimitationorexclusionmaynotapplytoyou.

8
Push to activate
Solid line will appear
and begin to ll within
a couple of minutes
6 months
Replace the lter
Mail Product Registration Form to:
3M, Customer Care Center
3M Center 225-3S-06
St. Paul, MN 55144-1000
Product Name: Model: Date Code:
Dr. □ Mr. □ Ms. □ Mrs. □ Miss □
First Name Last Name
Street Address Apt. #
City State Zip Code
Email Address
*
Phone Number
Date of Purchase
PRODUCT REGISTRATION FORM
3M, Home Environment Markets Division
3M Center, St. Paul, MN 55144-1000
1-800-388-3458
*Submitting your email address is optional. This information will be used only to provide you with information about 3M products and in
accordance with 3M’s privacy policy found at www.3M.com/privacy.
1.Presslterchangeindicatorbubblermlytoactivate.
2.Tapeorplacethelterchangeindicatoronthesystemhousingorinanoticeablelocation,suchasyourrefrigeratordoor.
3.Donotplacelterchangeindicatorinrefrigerator.
Activate Filter Change Indicator
Toreducetheriskassociatedwithchoking,donotallowchildrenunder
3 years of age access to the filter change indicator.
Toreducetheriskofpropertydamage,donotpuncturelterchange
indicatorbubble.Thenon-toxicuidmaystaincertainmaterials.
WARNING
CAUTION
/