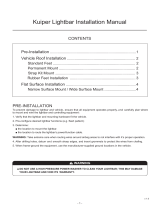
Page is loading ...

920-0060-00 Rev. B Page 1 of 3
IMPORTANT! Read all instructions before installing and using. Installer: This manual must be
delivered to the end user. This manual assumes installation by a suitably qualied Automotive Technician.
Mounting Instructions
10/12/15/20/30 Series Light Bars
WARNING!
Failure to install or use this product according to manufacturer’s recommendations may result in property
damage, serious bodily/personal injury, and/or death to you and those you are seeking to protect!
!
Important!
Mounting brackets are specic to the vehicle model. Please make sure the brackets are suitable for the vehicle before
installation.
1. Install the M6 cage nut to the mounting feet. Please see the diagram below for the correct locations and orientation of the cage nut.
2. Take the lightbar and place it upside down on a sturdy, non-marking surface. Attach the mounting feet as shown in the diagram unless
they are already installed. If not installed yet, please install them by rst inserting the heads of the M8 bolts into the openings at the end
of the slots on the base of the lightbar. Loosely fasten the mounting feet to the base using the M8 nuts, at washers, and lock washers.
Now the spacing between the mounting feet can be adjusted so that their pads will lay at on the roof of the vehicle. Tighten the M8
screws securely.
3. Loosely attach the mounting strap to each foot using the M6 bolts. Be careful to align the straps so that the vehicle attachment tabs will
be oriented downward when the lightbar is mounted on the vehicle.
4. Identify the area where the lightbar and mounting straps will be mounted on the vehicle. Now is a good time to readjust the feet if
necessary.
5. Take the mounting strap and use it as a template to mark where to drill the Ø1/8” holes see diagram below. These holes will go in the
gutter area and it may be necessary to pull back the door-sealing gasket. See diagram below.
6. Secure the straps with the stainless steel #10 sheet metal screws and external tooth lock washers. Tighten the screws between 5 and
10 inch-pounds. Apply some silicone sealant around the screw head and washer.
7. Make any adjustments now to the alignment of the lightbar and then tighten the M6 screws with thread locking sealant at the interface
with the cage nut.
8. The nal step is to make sure the lightbar is properly secured to the vehicle and that the doors close completely.

920-0060-00 Rev. B Page 2 of 3
1. Remove mounting foot. Position bracket onto knubs of the foot.
2. Holding the bracket and foot together, insert the cage nut as shown. The t will be snug under the mounting foot. Do not install it on the
outside face.
3. Install the mounting feet in reverse order of their removal. The metal bracket will be sandwiched between the lightbar and the composite
mounting foot. Adjust the spacing of the mounting feet before securely tightening the nuts.
4. Hand thread the M6 bolt through the star washer and mounting strap into the cage nut. Be careful not to cross thread the bolt, and
leave loose until later steps.
5. Once the bar is in position, use the strap as a template to drill Ø1/8” holes. It may be necessary to pull back the door sealing gasket or
trim. Apply silicone or sealant around the hole, behind the strap. Secure the straps with the provided #10 stainless steel sheet metal
screws with washers as shown. Screws should be tightened around 5-10 in-lb.
6. Tighten the M6 bolts evenly so that the bar is even and centered. Reinstall any removed trim and/or weather-stripping and close doors
to check secure t of the lightbar.
5/16” HEX BOLTS
M6 CAGE NUT
5/16” FLAT WASHERS
5/16” SPLIT LOCK WASHERS
5/16” HEX NUTS
MOUNTING FOOT
M6 STAR WASHER
M6 SCREW
MOUNTING
STRAP
SHEET METAL SCREWS
#10 STAR WASHERS
Ø1/8” HOLES
LIGHTBAR
VEHICLE ROOF
FOOT BRACKET
12-Series Lightbar Roof Mounting Kits

920-0060-00 Rev. B Page 3 of 3
Manufacturer Limited Warranty and Limitation of Liability:
Manufacturer warrants that on the date of purchase this product will conform to Manufacturer’s specications for this product (which are available
from the Manufacturer upon request), and Manufacturer further warrants that this product is free from defects in materials and workmanship. This
Limited Warranty extends for twenty-four (24) months from the date of purchase. Other warranties may apply, call Manufacturer for details. Manu-
facturer will, at its discretion, repair or replace any product found by the Manufacturer to be defective and subject to this Limited Warranty.
DAMAGE TO PARTS OR PRODUCTS RESULTING FROM TAMPERING, ACCIDENT, ABUSE, MISUSE, NEGLIGENCE, UNAPPROVED MODIFICA-
TIONS, FIRE OR OTHER HAZARD; IMPROPER INSTALLATION OR OPERATION; OR NOT BEING MAINTAINED IN ACCORDANCE WITH THE MAIN-
TENANCE PROCEDURES SET FORTH IN MANUFACTURER’S INSTALLATION AND OPERATING INSTRUCTIONS VOIDS THIS LIMITED WARRANTY.
ORAL STATEMENTS OR REPRESENTATIONS ABOUT THE PRODUCT WHICH MAY HAVE BEEN MADE BY SALESPEOPLE, DEALERS, AGENTS OR
OTHER MANUFACTURER’S REPRESENTATIVES DO NOT CONSTITUTE WARRANTIES. THIS LIMITED WARRANTY MAY NOT BE AMENDED, MODI-
FIED, OR ENLARGED EXCEPT BY A WRITTEN AGREEMENT SIGNED BY AN AUTHORIZED OFFICIAL OF MANUFACTURER WHICH EXPRESSLY
REFERS TO THIS LIMITED WARRANTY.
Exclusion of Other Warranties:
MANUFACTURER MAKES NO OTHER WARRANTIES, EXPRESS OR IMPLIED. THE IMPLIED WARRANTIES FOR MERCHANTABILITY OR FITNESS
FOR A PARTICULAR PURPOSE ARE HEREBY EXCLUDED AND SHALL NOT APPLY TO THE PRODUCT. BUYER’S SOLE AND EXCLUSIVE REMEDY
IN CONTRACT, TORT, OR UNDER ANY OTHER THEORY AGAINST MANUFACTURER REGARDING THE PRODUCT AND ITS USE SHALL BE THE
REPLACEMENT OR REPAIR OF THE PRODUCT AS DESCRIBED ABOVE.
Limitation of Liability:
IN THE EVENT OF LIABILITY FOR DAMAGES ARISING OUT OF THIS LIMITED WARRANTY OR ANY OTHER CLAIM RELATED TO THE MANU-
FACTURER’S PRODUCTS, MANUFACTURER’S LIABILITY FOR DAMAGES SHALL BE LIMITED TO THE AMOUNT PAID FOR THE PRODUCT AT
THE TIME OF THE ORIGINAL PURCHASE. IN NO EVENT SHALL MANUFACTURER BE LIABLE FOR LOST PROFITS, THE COST OF SUBSTITUTE
EQUIPMENT OR LABOR, PROPERTY DAMAGE, OR OTHER SPECIAL, CONSEQUENTIAL, OR INCIDENTAL DAMAGES BASED UPON ANY CLAIM
FOR BREACH OF CONTRACT, IMPROPER INSTALLATION, NEGLIGENCE, OR OTHER CLAIM, EVEN IF MANUFACTURER OR A MANUFACTURER’S
REPRESENTATIVE HAS BEEN ADVISED OF THE POSSIBILITY OF SUCH DAMAGES. MANUFACTURER SHALL HAVE NO FURTHER OBLIGATION
OR LIABILITY WITH RESPECT TO THE PRODUCT OR ITS SALE, OPERATION AND USE, AND MANUFACTURER NEITHER ASSUMES NOR AUTHO-
RIZES THE ASSUMPTION OF ANY OTHER OBLIGATION OR LIABILITY IN CONNECTION WITH SUCH PRODUCT.
This Limited Warranty denes specic legal rights. You may have other legal rights which vary from state to state. Some states do not allow the
exclusion or limitation of incidental or consequential damages.
833 West Diamond St
Boise, Idaho 83705
Customer Service
USA 800-635-5900
UK +44 (0)113 237 5340
AUS +61 (0)3 63322444
www.eccogroup.com
©2005 ECCO
/