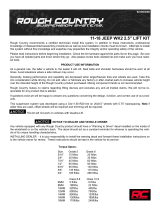
Jeep Patriot
Thank you for your Rocky Road,llc purchase! We value your business and appreciate any input you
might have on this product and/or its installation.
Your lift kit is one of the best off-road mods you can make to your Jeep. Read these instructions
thoroughly before installation. If you ever have any questions on this or other modifications to
your 4WD vehicles, please do not hesitate to give us a call on our tech line at 435-654-1149.
This suspension is an offroad suspension system. Modification of vehicles for off-road use, especially suspension modification &
oversized tires, will affect the center-of-gravity & steering or handling of your vehicle. By the sale of these products, we are
neither recommending that you modify your vehicle, nor are we assuming any responsibility for the consequences of such
modifications. Summit Off-road llc/Rocky Road Outfitters, has no control of how these component parts are installed or utilized in
the operation of a vehicle on which they are installed. We, therefore assume no liability for any circumstances connected with their
use. The purchaser of these parts should be aware that he or she acquires, installs and utilizes these parts at his or her own risk, and
agrees not to hold Rocky Road Outfitters/Summit Off-road llc, responsible. By installation of our products, you are agreeing to the
above. Particular interest should be paid to such infrastructure systems as brake lines, steering, shocks, drivelines, and other
components which may be affected by large amounts of wheel travel.
Before starting, please make sure that your kit is complete. You should have the following parts and hardware:
Parts List:
1 Package Camber bolts (PN 81260)
2 Front Spacers (3 studded spacer)
6 @ 10mm – 1.25 nylock nuts
6 @ 3/8” SAE flat washers
2 Rear Spacers (2 studded spacer)
4 @ 10 – 1.25 nylock nuts
4 @ 3/8” SAE flat washers
2 Swaybar brackets
2 @ 10-1.25 x 30mm bolt
2 @ 10-1.25 nylock nuts
4 @ 3/8” SAE flat washers
2 Rear Upper Control Arms
8 Bushings (pre-installed)
4 Sleeves (pre-installed)
You should plan on having the vehicle down for a day. Installation
really is straightforward and hopefully our instructions will make the
job flow more smoothly. Use your common sense as much as these
instructions for a successful installation. Items you'll probably want
to have on hand to complete the installation: A metric wrench set,
hand sledge, pry bar, grinder, vice-grips, floor jacks and stands.
ALIGNMENT IS CRITICAL on this vehicle. The vehicle may feel
unstable until you have a proper alignment performed, front
and rear. We cannot recommend driving without a proper
alignment. You should plan this in advance and have an
alignment scheduled with your local shop. Make sure they can
do a front and rear alignment and feel comfortable working on
the Patriot. Worst case, your Jeep dealer can do the job.
STEP1:
Disconnect battery. Organize your tools, jack, and jackstands.
STEP2:
Starting in the front, support the vehicle then remove your
tire. Once the vehicle is safely supported and the tire is

off, you can remove the nut that holds the sway bar in place. This is attached to the strut.
Unbolt the swaybar from the other side of the vehicle as well so it can be moved up and out of
the way. Support the axle assembly with the jack underneath, but not so much as to lift the
vehicle off the jackstand.
STEP3:
Inside the engine compartment you will notice that the top of the strut is held in place by 3
nuts. Remove these nuts. Now unbolt and remove the two large bolts holding the bottom of the
strut in place. These bolts are a press fit so you will have to tap them out. Don’t destroy the
threads. Put a nut on the bolt lightly so you can break the tension. Don’t worry, this assembly
is not under tension. With the two large lower bolts and the upper 3 nuts removed, the strut
assembly can now be removed from the vehicle.
STEP4:
The two strut spacers are identical. Use the factory nuts inside the engine compartment to hold
the strut assembly in place. Tighten the nuts. You will need to rotate the top slightly for the
holes in top to line up when the two large lower bolts are inserted.
STEP5:
Install your strut by reversing the removal procedure. Simply use our hardware to attach the
strut spacer to the top of your strut assembly as pictured. The top bolt of the lower two big
ones, is replaced with our adjustable cam bolt. The cam bolts have their own instructions and you
should provide these to your alignment shop. Sometimes moving the jack up or down slightly under
the axle assembly can allow the bolts to slip in easier. See alignment note above (before Step
1). Install the “L” shaped bracket to the swaybar hole on your strut. This mounts behind the tab
with the ‘L’ facing down. Use the 10x30 bolt to attach this bracket to your strut. Reference the
diagram to the left. Then attach your swaybar to this bracket. Tighten everything, then double
check. This front side is done. Repeat for the other side.
ADDITIONAL NOTES: We recommend to carefully bend the
factory mounting bracket with the brake lines out to
make sure they don’t get too tight when the steering is
fully turned. Check before you replace the front tire.
STEP6:
Move to the rear. Properly lift and support the vehicle
with jackstands. Remove the tire. Remove the strut. The
upper bolts are located inside the vehicle. Remove the
spare tire cover. The bolts are behind the plastic
cover as shown in the photo on the right (which is the
driver’s side rear of the Jeep). You may have to cut
little plastic tabs to allow enter into this panel. The bolts are
located in the panel.
STEP7:
The spacer will sit on top of the strut assembly. Attach the spacer
to the strut using the factory nuts. Then use our nylock nuts to
bolt the strut back into place on the vehicle. See picture at
bottom. BUT FIRST…
STEP8:
You will want to remove the upper control arm (radius arm) while the
strut is out. This is replaced with our new control arm. Your
alignment shop will set the exact length, but you can get it close
by adjusting
to about
1/8” shorter
than the stock arm. The adjustable end of
the new tube should face out… mounting
closest to the wheel. Reuse stock
hardware to mount this new tube.
We also highly recommend using liberal
amounts of anti seize on the bolts and
adjustable end of the control arm. No
warranties will be honored if parts are
not adequately lubed.
STEP9:
You are done with the one side. The other
is the same. Make sure to check and
double check tightness of all bolts.
STEP10:
Alignment is critical for safe operation
of this vehicle. If you must take the

vehicle to a different location for alignment, BE CAREFUL!!! The steering can wobble, pull, and
cause instability until the vehicle has been properly aligned front and rear. We cannot stress
this enough, to be careful and keep your speed waaay down until you have the alignment performed.
Retighten lug nuts after a couple hundred miles. Then go make those guys with stock Patriots feel
foolish with their little stock height Jeeps!
PLEASE NOTE: If and When you add larger tires, your alignment will change. You must have a re-
alignment after a change in tire or wheel size.
Any questions, please give us a call 435-654-1149, or email at
INSTALLERS, PLEASE NOTE:
We HIGHLY recommend installing these kits on the ground, NOT on a vehicle lift!
We recommend starting with the rear suspension first (can do this on a vehicle lift no problem),
then moving to the front and working on each side with the remaining 3 tires on the ground.
The nature of the Jeep IFS struts makes it nearly impossible to impose the leverage needed to
push & pull axles and knuckles on the front suspension unless the vehicle is on the ground.
Additionally, when the suspension is free-hanging parts will make contact and create additional
fitting difficulties. Installing on the ground will ease the installation and cut install time
over attempting the same installation on a full vehicle lift.
ADDITIONAL INSTALLATION NOTE:
We have had reports of people having vibration issues after installation on acceleration which is
typically a result of the front axle sliding its way out of the center section (differential).
You can reassemble the axle/knuckle/strut assembly an not notice that the axle hasn’t seated
fully, its not visibly noticeable at all.
As a precaution, we recommend to loosen the axle nut, straighten the CV axle, and use a rubber
mallet (or similar so as to not damage with metal to metal contact) and give it a few knocks to
full seat and imbed the front axle shafts.
Again this is to prevent vibration in the front axles after the installation as it is not
noticeable if those axles slip out a slight bit and ‘unseat’.
/