Page is loading ...

- 1 -
300002974-5 ISSUE: 5 Series: G.10
Quantum Series Heater
Models:
QM050RF / QM070RF / QM100RF
QM125RF / QM150RF
INSTALLATION and
OPERATING MANUAL
THESE INSTRUCTIONS SHOULD BE READ CAREFULLY
AND RETAINED FOR FUTURE REFERENCE.
Note also the information presented on the appliance
Technical Details
Model Identifi er(s): QM050RF QM070RF QM100RF QM125RF QM150RF
Input rating 230/240V~ 936/1020W 1435/1560W 2042/2220W 2540/2760W 3024/3300W
Max Storage Capacity 7.2kWh 10.9kWh 15.4kWh 19.3kWh 23.1kWh
Fan Wattage 11W 11W 11W 11W 11W
UI Wattage 0.5W 0.5W 0.5W 0.5W 0.5W
Sound Level dB
(measured in test chamber) 27 29 32 30 31
Energy Cell Packs Required (047243) 46 8 10 12
Height (mm) 730 730 730 730 730
Width (mm) 580 703 825 1069 1069
Depth (mm) 185 185 185 185 185
Battery (to backup real time clock) CR2032, 3.3V coin cell battery. Battery life > 5 years
This Heater is rated IPX4
Please scan this
QR code to view
detailed Installation
and Operating
Instructions on-line.

- 2 -
WARNING - In order to avoid overheating, do not cover or obstruct the heater.
Do not place material or garments on the heater, or obstruct the air circulation
around the heater, for instance by curtains or furniture, as this could cause
overheating and a fi re risk.
CAUTION - Some parts of this product can become very hot and cause burns.
Particular attention has to be given where children and vulnerable people are present.
CHILD SAFETY
This appliance can be used by children aged from 8 years and above and persons with
reduced physical, sensory or mental capabilities or lack of experience and knowledge if
they have been given supervision or instruction concerning use of the appliance in a safe
way and understand the hazards involved. Children shall not play with the appliance.
Cleaning and user maintenance shall not be made by children without supervision.
Children of less than 3 years should be kept away unless continuously supervised.
Children aged from 3 years and less than 8 years shall only switch on/o the appliance
provided that it has been placed or installed in its intended normal operating position
and they have been given supervision or instruction concerning use of the appliance in a
safe way and understand the hazards involved. Children aged from 3 years and less than
8 years shall not plug in, regulate and clean the appliance or perform user maintenance.
Operating Instructions
150
mm
150
mm
250 mm
300 mm
Product Clearances
WARNING: DO NOT PLACE
OBJECTS WITHIN 300mm OF
THE FRONT OF THE HEATER,
150mm AT EITHER SIDE OR
250mm FROM THE TOP
The controls are located on the top of
the heater consisting of a display screen
and three buttons and a Dial. Heating ON
1
5
MENU
BACK
ADVANCE
Out All Day
1 Display Screen
2 ‘Menu’ Button
3 ‘Back’ Button
4 ‘Selector Dial’
5 ‘Enter’ Button
6 ‘Advance’ Button
7 Heating Status
4
7
6
2
3
Operation

- 3 -
The heater is fi tted with an adjustable thermostat enabling the room temperature to be controlled.
The minimum room temperature is 7°C. The maximum temperature is set to 30°C by default.
A temperature of 21°C is a common comfortable room temperature.
The heater controls can be easily adjusted by using the Dial and buttons on the User Interface.
1. The Home Screen.
2. Menu - Displays the Main Menu; - Boost – Activate Boost Mode
- Modes - Set the mode of operation.
- Settings – Time/Date, Temperature units etc.
3. Back returns to the previous screen.
4. Rotate the Dial to navigate through the menus and adjust the required room temperature on the main screen.
The screen colour changes based on the temperature selected, showing deep blue through to bright red.
5. Press the Dial to enter sub menus and to confi rm actions.
6. The Advance button is only used when a Timer Mode is active, it allows the timer schedule to be changed
temporarily by forcing a ‘Heating On’ period to begin or end early.
• The outer case of the Quantum heater will be cooler to touch than a conventional storage heater. This is because less
heat is ‘lost’ through the case, making more heat available from the fan outlet when needed.
• Nothing may be placed in the 300mm (1 foot) in front of the heater at any time. This is to avoid items coming into
contact with the grille and the heated air which leaves it. Blocking some or all of this area could represent a fi re
hazard.
• You do not need to decide how much heat to store. Simply set the timer mode and the temperature to what suits
you and leave the heater to meet your requirements.
• Ensure that both supply switches next to the heater are turned on. During the summer when no heat is required, both
wall switches can be turned o . Remember to turn both of these back on in autumn when heat is required again.
How does the heater control work?
The heater control allows you to choose when you want the heating to be on, and at what temperature. To deliver the
required heat the control switches on and o a low speed fan that discharges stored heat from the core into the room.
The periods during which the heater is providing heat are called ‘Heating On’ (shown at the bottom of the screen).
Outside of these periods the heater will not deliver heat and these periods are called ‘Heating O ’. During the ‘Heating
On’ periods the low speed fan will run to maintain the temperature on the screen. During the ‘Heating O ’ periods it
will not.
Note: there is a delay of up to a minute on the fan operation when switching to ‘Heating On’ or ‘Heating o ’. This is
normal and does not represent a fault.
Quick Start Guide
Set the time
The time and date are set in the factory and should not need to be amended, however to check that they are correct
press Menu, then press the Selector Dial with Time / Date highlighted. Rotate the Selector Dial until the correct value
is shown, then press it down to confi rm and move on to the next value. Repeat until all details are correct and the main
menu screen is showing again, then press Back.
The time is automatically adjusted in spring and autumn at the changes between Greenwich Mean Time (GMT) and
British Summer Time (BST).
It is recommended to check the time every couple of months and adjust if necessary.
Set the temperature
The temperature shown on the display is the room temperature
setpoint. This is the temperature that the heater will maintain during
the ‘Heating On’ periods. If the room temperature is above this
temperature then the fan will not operate.
The heater leaves the factory with this temperature set at 21°C which
represents a typical, comfortable room temperature.
If you require a di erent room temperature then rotate the control
dial either clockwise or anticlockwise until the display shows the
temperature you require.
THERE IS NO NEED TO TURN THIS DOWN OVERNIGHT
NOTE: If you wish to change the temperature permanently, this will need to be done by modifying the room
temperature setpoint in your selected timer mode.
MENU
BACK
ADVANCE
21°C
Heating On

- 4 -
Set the timer mode
Note: The ‘Heating On’ times in all modes can be customised to suit your lifestyle, this includes adjusting
the room temperature setpoint.
Your Quantum
heater comes pre-
programmed with
four timer modes.
These modes defi ne
the periods when the
heater will operate in
‘Heating On’ mode.
Timer Mode Description
User Timer 11 hours heating in 4 periods across the day
06:30 - 09:30, 11:00 - 13:00, 15:00 - 17:00, 18:00 - 22:00
Out All Day 6.5 hours heating per day in two periods
07:00 - 08:30, 17:00 - 22:00
Home All Day 13 hours of continuous heating per day
08:00 - 21:00
Away Set the temperature and number of days for which you are on holiday
The four modes are:
Advance
Sometimes you may need to change the
way you use your heating temporarily. This is
achieved by using the Advance function.
If the heater is in ‘Heating O ’ mode and you
want heat – press the Advance button. If the
heater is in ‘Heating On’ mode and you don’t
want heat, press the Advance button. The
heater will go o until the beginning of the
next ‘Heating’ period, then go back to the timed heating periods.
Advance
21°C
Heating On
21°C
Heating Off
MENU
BACK
ADVANCE
MENU
BACK
ADVANCE
ADVANC
E
Press Advance
MENU
BACK
ADVANCE
Boost
A supplemental boost element controlled by the electronic thermostat is provided if additional room heating is
required, for example, due to unusually cold weather. You can select how long the boost will run for, from one to four
hours. Once the boost has run for the selected time it will automatically switch o .
Note: Boost element uses peak rate electricity and could lead to increased running costs.
21°C
Heating On
MENU
BACK
ADVANCE
MENU
BACK
ADVANCE
ADVANCE
Main Menu
Boost
Modes
Settings
Boost
Boost Temp
25 °C
Boost Time
0 Mins
Press Menu
Rotate dial to highlight Boost
and press dial
Rotate dial to highlight duration
required and press dial
Which timer mode is best for me?
The heater leaves the factory set in User Timer
mode, this mode will give you four periods of
heating split throughout the day.
If you are out during the day and only require
heat in the mornings and evenings then select
Out All Day mode, this mode will suit your
lifestyle and you won’t need to do anything.
If you are in during the day then you should
select the Home All Day mode.
If you are away for an extended period then you
can use the Away mode. This allows you to reduce
the heating during the period that you are away,
reverting to the previously selected mode on the
day you return.
Scan the QR code on the adjacent page to view
the full instruction booklet on-line.
21°C
Heating On
MENU
BACK
ADVANCE
M
EN
U
Press Menu
MENU
BACK
ADVANCE
Main Menu
Date / Time
Timer Mode
Boost
Options
Rotate dial to highlight Timer
Mode and press dial
MENU
BACK
ADVANCE
Timer Mode
Select
Preview
Modify
Rotate dial to highlight ‘Select’
and press dial
MENU
BACK
ADVANCE
Timer Mode
User Timer
Home All Day
Out All Day
Away
Rotate dial to highlight
Timer Mode option
required and press dial

- 5 -
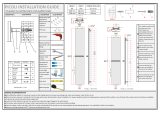
Installation Instructions
Please scan the QR code to access detailed Quantum Installation Instructions.
Included are a view of the product, how to unpack the unit, install exterior
components, install internal components, securing to the wall, sizing and fi tting
instructions, electrical connections and set up.
150
mm
150
mm
250 mm
300 mm
Product Clearances Fig. 1
Fig. 2
X
XY
Y
1. Place the heater fl at on the ground with arrows printed
on the base of the carton pointing upwards.
Open the carton at the bottom, slide the heater out of the
carton by at least 200mm exposing the feet and the fi xing
kit located within the packaging on the right hand side.
Remove the feet and the fi xing kit. (Fig. 2)
Note - Foot screws are in the fi xing kit.
Fig. 3
2. Secure the feet to the heater using all the screws
provided (4 per heater). For models QM050, QM070 and
QM100 two locations are possible indicated by X and Y
markings visible on the base of the heater.
Ensure the feet are fi xed at the location holes marked with
an ‘X’, (Fig. 3/3B).
However, if this is a replacement heater check the pitch of
the feet and choose the appropriate fi xing positions - either
X or Y.
NOTE:
Read these instructions carefully before proceeding any further with the installation
The appliance must be securely
fi xed to the wall. The installed
appliance could weigh up to
165kg and if it falls o the wall
it could cause severe personal
injury or death. It is the
responsibility of the installer
to ensure that the appropriate
wall fi xing is used and that the
fl oor is capable or bearing the
full weight.
WARNING
WARNING: DO NOT PLACE
OBJECTS WITHIN 300mm OF
THE FRONT OF THE HEATER,
150mm AT EITHER SIDE OR
250mm FROM THE TOP
Models Feet spacing in X Feet spacing in Y
QM 050 248 198
QM 070 306 370
QM 100 422 572
QM 125 & 150 532 n/a
The spacing between the feet when secured in location X
and Y is indicated in the table below.

- 6 -
Fig. 5
Fig
. Fig. 4
4. Remove the screws which hold the grille panel in
position.
Set the grille carefully to one side to ensure that it is not
damaged.
5. Remove the two screws located towards the bottom, at
either end of the heater, which retain the heater sides.
Push the left hand and right hand sides towards the top of
the heater to release each side from its securing points.
F
Fig. 6
6. Remove the two screws securing the front panel,
located at the upper sides of the heater, and swing the
upper edge of the front panel upwards and unhook it from
along the heater base.
NOTE:
Retain these
screws for
reassembly. If
misplaced,
M4 X 10 Tritap
screws must be
used
Fig. 7
7. Place the heater in its fi nal position and mark the location
holes visible through the back at either side of the heater.
Remove the wall fi xing bracket from the back of the heater.
FIXING THE HEATER TO THE WALL
The heater must be securely fi xed to a wall. Screws with suitable wall fi xings for solid walls
are provided. If other wall types are encountered it is the installer who must choose the
most suitable fi xing.
SUGGESTED FIXINGS
SOLID BRICK/BLOCK: No. 10 size high temperature resistant plastic inserts, 8mm drill bit.
Drill hole 15mm deeper than plastic insert length.
PLASTERBOARD - If possible locate studding and use No. 10 woodscrews directly into the
wood, otherwise M5 rawlplug intersets are suitable.
NOTE:
For other wall types (e.g. timber frame and hollow concrete), seek specialist
advice.

- 7 -
8. Six fi xing positions must be selected for ALL models
QM050RF, QM070RF, QM100RF, QM100RF, QM125RF and
QM150RF.
Common fi xing points for all heater sizes are shown, (Fig. 8).
Position the wall bracket on the location mark made
previously, drill the holes and fi t the wall fi xings best suited
to the application.
Secure the wall bracket using the correct quantity of screws
required per model, using the appropriate screw fi ttings.
Position the heater over the wall bracket and secure using a
screw at either side.
NOTE: DO NOT FULLY TIGHTEN THE SIDE FIXING
SCREWS UNTIL THE ENERGY CELLS ARE FULLY LOADED
TO ENSURE FULL WEIGHT IS ON THE FEET AND NOT ON
THE WALL FIXINGS.
Mains Cable
M
ains
C
abl
e
Fig. 9
9. The mains cable entry and terminal block will be visible
in the centre of the cavity at the right hand side. Insert the
mains cables through the cable gland at the bottom of the
heater in readiness for connection.
Cable Sizes
Peak mains cable 1.5mm
O -peak mains cable 2.5mm
Single Supply mains cable 2.5mm
Only heat resistant ordinary polyvinyl
chloride sheathed fl exible cord should
be used, the following codes apply;
IEC: 60227 IEC57 or CENELEC: H05V2V2-F
Fig. 8
QM070RF
QM100RF
QM125RF
QM150RF
QM050RF
x
x
xx
x
x
x
x
x
x
x
x
x
x
x
x
x
x
x
x
x
x
x
x
x
x
x
x
xx
CONNECTING MAINS SUPPLIES
WARNING - The electrical installation of this heater must be carried out by a suitably qualifi ed
or trained electrician, and be in strict accordance with current wiring Regulations.
The supply circuits to the heater must incorporate a double pole isolating switch having a
contact separation of at least 3mm.
The peak supply must be connected via a switched fused spur with a fuse rated suitably for
the appliances fl ex, the o -peak supply, via a 20A double pole switch. In both instances a
plug and socket arrangement MUST NOT be utilised.
• This heater must be earthed
• Do not locate the heater immediately above or below a fi xed electrical point i.e. socket
outlet.
This appliance is intended for installation to a single phase supply only and is not suitable for
connection to 3 phase supplies.

- 8 -
Electrical Connections
10. The heater leaves the factory confi gured to operate with two mains supplies, a 24 hour peak supply and an o peak
switched supply (see Fig 10a). The heater can also be operated with a single main supply (Fig. 10b).
Single Mains Supply Note! Do not connect to existing off peak wiring, unless the supply to
these circuits is permanently live!
IMPORTANT - This kind of installation relies on the property having a fi xed time period, o -peak energy tari with ‘whole
home switchover’ whereby all wiring in the property utilises the o -peak rate when available.
Available fi xed charge times must be manually programmed into the heater to tell it when to charge; no external timers
or contactors are needed. Up-to 4 digital charge times can be set.
Single Supply L = OFF-PEAK L Single Supply N = OFF-PEAK N
The brown wire connected to Live - L The blue wire connected to Neutral - N
The earth wire should be connected
into the earth terminal block marked E -
Mains Terminal Block
Two Mains Supplies Dual Supply - Storage / Fan circuit (Fig.10A)
24 hour / peak supply Fan Circuit L = PEAK L Fan Circuit N = PEAK N
O -peak supply Storage Circuit L = OFF-PEAK L Storage Circuit N = OFF-PEAK N
The brown wire connected to Live - L The blue wire connected to Neutral - N
The earth wire should be connected
into the earth terminal block marked E -
Mains Terminal Block
Fig. 10a
Rewire the link
wires as shown
in image
Fig. 10b
NOTE:
The property energy
supplier should be
consulted to confi rm
that the meter and tari
is suitable for single
supply storage heating
WARNING: Terminal block Minimum torque of 2Nm and Maximum torque of 2.2Nm
WARNING: Terminal block Minimum torque of 2Nm and Maximum torque of 2.2Nm

- 9 -
Fig. 14
Fig. 12
Fig. 13
Fig. 11
F
Fig.
F
Building the Heater Core
11. Remove the inner front and insulation to gain access to
the core of the heater.
Lay the inner front carefully to one side to ensure the
insulation is not damaged. (Fig. 11)
12. Remove the cardboard element support and dispose of.
(Fig. 12)
Energy Cells
The energy cells are supplied separately to the heater in packs of three. The item code is 047243.
Make sure that energy cells are kept dry. Energy cells should not be exposed to moisture and not installed if this
has occurred.
13. The energy cells have several grooves on one surface
for locating around the elements. The two slots through the
centre of the energy cell create the air passages within the
core.
Position the fi rst energy cell of the bottom row to the
right, fi rmly pressed against the side insulation with the
element grooves facing upwards and fi tting neatly under
the element.
Position the second energy cell in the row against the left-
hand insulation.
Fit the remaining energy cells to the bottom row, being
careful not to damage or dislodge the element.
14. Position the second row of energy cells on top of the
fi rst but this time the energy cells must be upside down
ensuring the grooves are positioned over the elements.
(Fig. 14)
NOTE:
The bends in the element locate around the grooves
in the energy cell to secure the element.
IMPORTANT:
The element tails must extend no further
than 30mm into the right hand chamber
30mm ±1mm

- 10 -
Fig. 18
Fig. 16
Fig. 17
Fig. 15
IMPORTANT
Double check all mains connections are secure and excess cable is restrained and not in
contact with any of the heater casing.
Reassembly
To replace the front panel, bottom grille and side panels, reverse steps Figs. 4, 5 & 6 (page
6) of these instructions under the section headed Preparation.
Ensure all fi xings are secure.
Once installed DO NOT attempt to reposition the heater without fi rst unloading the
energy cells.
F
i
g
.
1
Fig
.
1
Fi
g
.
1
Fi
g
.
15. The third row of energy cells is positioned in a manner
similar to the fi rst row. Again be careful not to damage
or dislodge the element. (Fig. 15)
16. Fit the fourth row of energy cells above the third row
in the upside position. (Fig. 16). Repeat for the fi fth and
sixth rows of energy cells built around the third element
to complete the core build.
17. Remember the top row of energy cells must be fi tted
upside down. (Fig. 17)
Check that all the energy cells are secure and evenly located.
18. Close the core by refi tting the inner front panel complete
with insulation. Ensure the bottom tabs are located inside
the chassis and that the screws are tightly secured down
each edge. (Fig. 18)
Ensure the screws retaining the heater to the wall are fully tightened, once the energy
retention cells are fully loaded. (Fig. 8, page 7)

- 11 -
Circuit Diagram - QM Series G.7
INDICATES WHITE WIRE INDICATES BLACK WIRE
LOWER
LEFT STAT
(145° BLUE)
LOWER
RIGHT STAT
(145° BLUE)
ROOM
THERMISTOR
FITTED
TO MAIN
CONTROLLER
MODULE
BOOST LIMIT
STAT (120° GREEN)
MANUAL CUTOUT
(140°)
USER INTERFACE
EARTH
EARTH / EARTH
BLANK
NEUTRAL (PEAK)
LIVE (PEAK)
LIVE (OFF-PEAK)
NEUTRAL (OFF-PEAK)
FAN
PCB
LIMIT STAT
(125° BLACK)
CORE THERMISTOR
MOUNTED TO INNER SIDE
(o/w PLASTIC HOUSING)
STORAGE ELEMENTS
Circuit Diagram - QM RF Series G.10

- 12 -
© Glen Dimplex. All rights reserved. Material contained in this publication may not be reproduced in whole or in part,
without prior permission in writing of Glen Dimplex.
www.dimplex.co.uk
Glen Dimplex Heating and Ventilation
Millbrook House, Grange Drive, Hedge End, Southampton, SO30 2DF
Glen Dimplex Europe, Airport Road, Cloghran, Co. Dublin K67 VE08
Products within the Quantum range are protected by one or more of the following patents:
Great Britain: GB2481048, GB2487147, GB2487148, GB2487781, GB2500736, GB2511538, GB2526552
International: EP2830832,EP2831688, EP2965166, EP3132324,WO2011154521, WO2013144170, WO2014135667,
WO2015181136
Your Guarantee
Your Product is manufactured by Glen Dimplex UK operating as Glen Dimplex Heating & Ventilation. GDHV designs and
manufactures products to ensure they deliver reliable service for normal use in domestic dwellings and, where specifi ed by
us, in light commercial premises.
GDHV products are individually tested before leaving the factory, Your product comes with a 2 year parts and labour guarantee
for repair or replacement of faulty goods and/or partial refund in the event that a repair or replacement is not available.
Your guarantee is provided by Glen Dimplex UK Ltd operating as Glen Dimplex Heating & Ventilation Ltd, Millbrook House,
Grange Drive, Southampton SO30 2DF. Terms and conditions apply.
The GDHV guarantee does not in any way diminish or a ect your statutory consumer rights in connection with your product.
If you experience a problem with your product during or after the guarantee period, visit our online help
centre:
support.dimplex.co.uk
Please note for support you will need the model and serial number of your product and a description
of the fault which has occurred.
To view the full guarantee terms and conditions scan this QR code using your smartphone or go to
https://www.gdhv.co.uk/guarantee-terms-and-conditions.
Important: For electrical products sold within the European Community. At the end of the electrical products
useful life it should not be disposed of with household waste. Please recycle where facilities exist. Check with
a Local Authority or retailer for recycling advice in your country. Batteries should be disposed of or recycled in
accordance with WEEE Directive 2012/19/EU. Packaging should be recycled where possible.
/