Page is loading ...

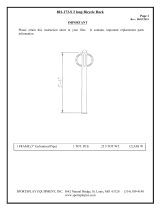
801-174-S 3 loop Bicycle Rack
Page 1
Rev: 08/02/2013
SPORTSPLAY EQUIPMENT, INC. 5642 Natural Bridge, St. Louis, MO 63120 (314) 389-4140
www.sportsplayinc.com
IMPORTANT
Please retain this instruction sheet in your files. It contains important replacement parts
information.
1 FRAME (5” Galvanized Pipe) 1 TOT. PCS. 25 # TOT WT. CLASS 70

801-174-S 3 loop Bicycle Rack
Page 2
Rev: 08/02/2013
SPORTSPLAY EQUIPMENT, INC. 5642 Natural Bridge, St. Louis, MO 63120 (314) 389-4140
www.sportsplayinc.com
GENERAL ASSEMBLY INSTRUCTIONS:
Check all the parts and hardware with the packing list to be sure you have received everything
needed to assemble this product. CONTACT YOUR LOCAL DISTRIBUTOR WITH
NOTIFICATION OF ANY MISSING OR DAMAGED PARTS. Contact must be made within ten
days of receipt of your order.
Only hand-tighten nuts & bolts on initial assembly. Final tightening should be done EVENLY
after final assembly when unit has been plumbed & leveled.
After assembly is complete, ANY ENDS OF BOLTS PROTRUDING BEYOND NUTS SHOULD
BE CUT OFF AND/OR PEENED OVER TO REMOVE ANY SHARP PROJECTIONS. Go over
entire unit to file smooth any sharp edges or projections that may have been caused by rough
handling in shipping or installation. T-Clamps are designed for both one and two bolt connections.
In many situations only one bolt is required. See specific assembly instructions.
On products with platforms install 1-2 degrees off level to facilitate water drainage.
SPECIFIC ASSEMBLY INSTRUCTIONS
1. Set bike rack in desired location and mark anchor location thru the holes in the 6” x 6” plates on the
bottom of the bike rack.
2. Use desired anchors for your surface application, and follow anchoring instructions provided with
your anchors.
/
