Page is loading ...

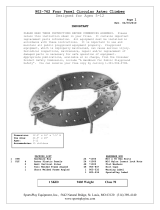
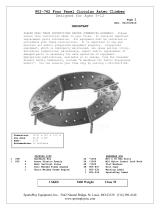
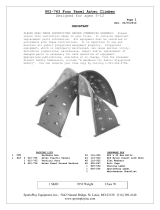
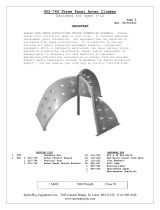
902-765 TWO PANEL Aztec Climber
Designed for ages 5-12
Page 1
Rev. 04/09/2010
SportsPlay Equipment, Inc., 5642 Natural Bridge, St. Louis, MO 63120 (314) 389-4140
www.sportsplayinc.com
IMPORTANT
PLEASE READ THESE INSTRUCTIONS BEFORE COMMENCING ASSEMBLY. Please
retain this instruction sheet in your files. It contains important
replacement parts information. All equipment must be installed in
accordance with these instructions. It is important to use and
maintain all public playground equipment properly. Playground
equipment, which is improperly maintained, can cause serious injury.
Periodical inspections, maintenance, repair and/or replacement of
damaged parts is necessary for safe operation of equipment.
Appropriate publications, available at no charge, from the Consumer
Product Safety Commission, include “A Handbook for Public Playground
Safety”. You can receive your free copy by calling 1-301-504-0708.
PACKING LIST
HARDWARE BOX
1
CTN
Hardware Box
12
116-924
M10 x 60 Hex Bolts
1
PLT
2
915-755
Aztec Plastic Panels
12
116-923
M10 Nylon Insert Lock Nuts
1
915-765
Vertical Post
24
116-925
Flat Washers
2
915-756
Aztec Panel Ground Anchors
24
905-847
Bolt Caps
1
805-532
Warning Label
1
805-534
SportsPlay Label
1
Maintenance Checklist
1 SKID 400# Weight Class 70

902-765 TWO PANEL Aztec Climber
Designed for ages 5-12
Page 2
Rev. 04/09/2010
SportsPlay Equipment, Inc., 5642 Natural Bridge, St. Louis, MO 63120 (314) 389-4140
www.sportsplayinc.com
GENERAL FOOTING RECOMMENDATIONS:
Diameter and depth of footings illustrated are satisfactory in most
applications for pipe sizes up to 4 1/2” diameter. Varying soil &
climatic conditions may require deeper and heavier footings in some
areas. Check local building codes.
Detail: Detail:
Permanent Installation Suggested Bracing Method
Aztec Panel
Qty – 2
915-755
Vertical Post
Qty – 1
915-765
Aztec Ground Anchor
Qty – 2
915-756

902-765 TWO PANEL Aztec Climber
Designed for ages 5-12
Page 3
Rev. 04/09/2010
SportsPlay Equipment, Inc., 5642 Natural Bridge, St. Louis, MO 63120 (314) 389-4140
www.sportsplayinc.com
* If resilient surfacing is to be less than 12”, then you need to dig a
deeper hole and additional pipe should be put in concrete to maintain
proper finish grade for equipment.
USE AREA & FOOTING LAYOUT:

902-765 TWO PANEL Aztec Climber
Designed for ages 5-12
Page 4
Rev. 04/09/2010
SportsPlay Equipment, Inc., 5642 Natural Bridge, St. Louis, MO 63120 (314) 389-4140
www.sportsplayinc.com
GENERAL MAINTENANCE INSTRUCTIONS:
Check MONTHLY for loose bolts, damaged or broken parts. Tighten and/or
replace immediately. Replace any parts that show a reduction of 25%
from the original size.
GENERAL ASSEMBLY INSTRUCTIONS:
Check all the parts and hardware with the packing list to be sure you
have received everything needed to assemble this product. CONTACT YOUR
LOCAL DISTRIBUTOR WITH NOTIFICATION OF ANY MISSING OR DAMAGED PARTS.
Contact must be made within ten days of receipt of your order.
Only hand-tighten nuts & bolts on initial assembly. Final tightening
should be done EVENLY after final assembly when unit has been plumbed &
leveled.
After assembly is complete, ANY ENDS OF BOLTS PROTRUDING BEYOND NUTS
SHOULD BE CUT OFF AND/OR PEENED OVER TO REMOVE ANY SHARP EDGES. Go
over entire unit to file smooth any sharp edges or projections that may
have been caused by rough handling in shipping or installation.
ASSEMBLY AND INSTALLATION:
NOTE:
All threaded ends of bolts protruding beyond nuts must be cut off
and/or peened to eliminate sharp edges. No more than two threads
should extend beyond face of nut. All washers, “T” nuts, and
other fastener hardware used on round pipe or tubing must be
hammered down to conform to the curved underlying surface to
eliminate catch points. All Bolts must be covered with Bolt Caps
and Covers
STEP #1:
Using Footing Diagram as a guide, mark and dig footing holes.
Footing holes are to be 12” in diameter and 1’-6” deep (6” of dry
concrete or other blocking material at the bottom of the hole
allowing 12 inches of the post to be put into the hole),
depending upon amount of resilient safety surfacing used, local
climate and soil structure, and topography of land.
Note: The slanted tabs on the ground anchor should slant in
towards the center post.
STEP #2:
Attach the Aztec Plastic Panel to the Aztec Panel Ground Anchor
by placing the Plastic Panels over the tabs of Ground Anchors.
Note: The King Figure must be on the lower left.
NOTE: King figure
should face away
from center post and
at lower left corner by
ground anchor.

902-765 TWO PANEL Aztec Climber
Designed for ages 5-12
Page 5
Rev. 04/09/2010
SportsPlay Equipment, Inc., 5642 Natural Bridge, St. Louis, MO 63120 (314) 389-4140
www.sportsplayinc.com
STEP #3:
Secure the Plastic Panel to the Ground Anchor by placing a bolt
and washer in a bolt cap and pushing through the aligned hole in
the Plastic Panel and Ground Anchor (see drawing at the bottom of
this page for bolt configuration). Fasten by placing a washer and
nut in a second bolt cap and securing to the bolt from the
opposite side.
STEP #4:
Repeat Steps 1 and 2 with other Ground Anchor and Plastic Panel.
STEP #5:
Attach the other side of the Aztec Plastic Panel to the Vertical
Connecting Post utilizing the same fastening technique as was
used in steps 1 and 2.
Note: The Dragon Figure must be at the top of the Panel
STEP #6:
Attach the other Aztec Panel to the Vertical connecting post and
ground anchor following the same steps.

902-765 TWO PANEL Aztec Climber
Designed for ages 5-12
Page 6
Rev. 04/09/2010
SportsPlay Equipment, Inc., 5642 Natural Bridge, St. Louis, MO 63120 (314) 389-4140
www.sportsplayinc.com
STEP #7:
Plumb and level the entire unit. Fully snug all fasteners and
push bolt caps into the bolt covers. Pour concrete with a slight
dome at the top to help keep water away from the post. Wait 48
hours before removing the braces. Install resilient safety
surfacing.
STEP #8:
Attach Warning Label and Manufacturer’s Identification Label to a
clean surface. The Labels should be attached in a location where
they are clearly visible and legible and away from normal hand
and foot placement areas. The Labels must be replaced if they
become illegible, destroyed or removed. Contact your distributor
for replacement Labels.
/
