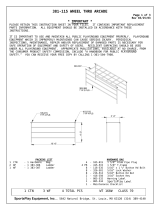
Page is loading ...

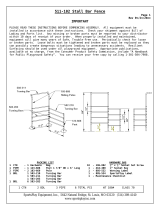
361-509H Wheelchair Accessible Sand Digger Page 1
Rev 07/31/2008
SportsPlay Equipment, Inc., 5642 Natural Bridge, St. Louis, MO 63120 (314) 389-4140
www.sportsplayinc.com
IMPORTANT
PLEASE READ THESE INSTRUCTIONS BEFORE COMMENCING ASSEMBLY. All equipment must be
installed in accordance with these instructions. Check your shipment against Bill of
Lading and Parts list. Any missing or broken parts must be reported to your distributor
within 10 days of receipt of your order. When properly installed and maintained,
equipment will give many years of Safe, Trouble-Free use. Periodically check for loose
or broken parts. Loose bolts must be tightened and broken parts must be replaced as they
can possibly create dangerous situations leading to unnecessary accidents. Resilient
Surfacing should be used under all playground equipment. Appropriate publications,
available at no charge, from the Consumer Product Safety Commission, include “A Handbook
for Public Playground Safety”. You can receive your free copy by calling 1-301-504-7908.
NOTE: Recommended for children ages 3 and up. Teaches hand and eye coordination
while providing hours of fun.
PACKING LIST HARDWARE BAG
1 CTN Hardware Bag 1 416-500 5/16” Hex Key
1 364-515 Center Post 1 365-514 ½” Ball Bearing
1 363-509H Digger Assembly 2 316-801 ½” Flat Washer
1 116-601 ½” x 2 ¾” B. H. Bolt
1 364-507 1” Spacer
1 805-532 Warning Label
1 805-534 SportsPlay Label
1 Maintenance Checklist
1 CTN 1 TOTAL PCS Weight 25# Class 70

361-509H Wheelchair Accessible Sand Digger Page 2
Rev 07/31/2008
SportsPlay Equipment, Inc., 5642 Natural Bridge, St. Louis, MO 63120 (314) 389-4140
www.sportsplayinc.com
GENERAL FOOTING RECOMMENDATIONS:
Detail: Detail:
Permanent Installation Suggested Bracing Method
USE AREA:
6-FOOT DIAMETER CIRCLE
GENERAL MAINTENANCE INSTRUCTIONS:
Check product periodically for loose bolts, and damaged or broken parts. Tighten
and/or replace immediately. Replace any parts that show a reduction of 25% or more
from their original size. Check product periodically for structural integrity. If
any defects are found discontinue use and contact your distributor.
ASSEMBLY AND INSTALLATION:
NOTE: All threaded ends of bolts protruding beyond nuts must be cut off and/or
peened to eliminate sharp edges. No more than two threads should extend
beyond face of nut. All washers, “T” nuts and other fastener hardware
used on round pipe or tubing must be hammered down to conform to the
curved underlying surface to eliminate catch points. DO NOT tighten nuts
more than hand-tight until entire assembly is completed.
STEP #1: Dig a 12” diameter footing hole at a depth that will place the top of the
post 12” above the level of the sand.
STEP #2: Place support post into the center of the footing. Pour concrete and plumb
and level the post.
STEP #3: Let Concrete Set for 72 Hours.
STEP #4: Place the Digger over the post, placing ½” washer on top of the post then
slide the digger over the post. Lift the digger up enough to place the ½”
ball bearing between the digger and the top of the post. Make sure the ball
bearing doesn’t fall in the hole for the bolt. Now take a ½” washer, a ½” x
2 ¾” button head bolt, the 1” spacer and the 5/16” hex key from the hardware
bag. (There should be a small space between the ½” washer and the top of the
sand digger to allow the digger to rotate.)

361-509H Wheelchair Accessible Sand Digger Page 3
Rev 07/31/2008
SportsPlay Equipment, Inc., 5642 Natural Bridge, St. Louis, MO 63120 (314) 389-4140
www.sportsplayinc.com
NOTE: Digger shipped assembled for ease of installation. Replacement parts list as
follows:
Part Number Part Description
365-510 Aluminum Shovel
116-601 ½” x 2 ¾” B. H. Bolt – To attach shovel
226-801 ½” Lock Nut – To attach shovel
326-801 ½” Lock Washer - To attach shovel
/
