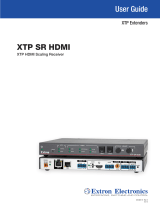
Extron electronics XTP SFR HD 4K User manual

Category
Video switches
Type
User manual
1
IMPORTANT:
Go to www.extron.com for the
complete user guide
, installation
instructions, and specifications.
XTP SFR HD 4K • Setup Guide
CLASS 1 LASER PRODUCT, see the XTP SFR HD 4K User Guide at www.extron.com
The Extron XTP SFR HD 4K is an XTP ber receiver that scales HDMI, DVI, RGB, HD component video, and standard denition
video to the optimal output resolution. This guide provides instructions for an experienced installer to install and connect the
XTP SFR HD 4K scaling receiver.
Installation
Rear Panel Features
Power and Throughput Connections Output Connections Control Connections and Reset
A
DC power connector and power LED
B
XTP input connector
C
LAN connector and LEDs
D
RS-232 and IR Over XTP connector
E
HDMI output connector and
corresponding HDMI audio switch
F
Analog audio output connector
G
S/PDIF digital audio output connector
H
Relay connectors
I
Remote RS-232 connector
J
Reset button
Figure 1. Rear Panel Features
Mounting and Cabling
Step 1 — Mount the device
Turn off or disconnect all equipment power sources and mount the XTP SFR HD 4K on a tabletop or in a rack.
Step 2 — Connect throughput devices
a. Connect an XTP transmitter or XTP matrix switcher to the XTP ber input connector (
B
).
WARNING: Potential risk of severe injury. The XTP SFR HD 4K outputs continuous invisible light (class 1 laser rated),
which may be harmful to the eyes; use with caution.
AVERTISSEMENT : Risque potentiel de blessure grave ou de mort. Le XTP SFR HD 4K émet une lumière invisible
en continu (conforme à la classe 1 laser) qui peut être dangereux pour les yeux, àutiliser avec précaution.
Do not look into the ber optic cable connector or into the ber optic cables themselves.
Ne regardez pas dans le connecteur de câble bre optique sur le ou dans les câbles bre optique euxmêmes.
Plug the attached dust caps into the connector when the ber optic cable is unplugged.
Branchez la protection contre la poussière dans le connecteur lorsque le câble bre optique est débranché.
Signal LED indicator — Lights green when it receives an active XTP input signal from a transmitter or matrix switcher.
Link LED indicator — Lights yellow when a valid link between an XTP input and output is established.
b. Connect a host device or control LAN or WAN to the LAN RJ-45 connector (
C
) for pass-through 10/100 Ethernet
communication. These are Ethernet pass-through ports with LEDs to indicate link and activity status.
c. To pass bidirectional serial, infrared, or other control signals, connect a control device or a device to be controlled to the
RS-232 and IR Over XTP connector (
D
). See RS-232 and IR Over XTP Wiring on page 2 for wiring details.
Step 3 — Connect outputs
a. Connect a digital video display to the HDMI output connector (
E
) on the receiver.
b. Connect a balanced or unbalanced stereo or mono audio device to the 3.5 mm, 5-pole captive screw connector (
F
) on the
receiver for 2-channel stereo analog audio (see Audio Wiring on page 2 for wiring details).
c. Connect an audio device to the female orange RCA connector (
G
) tor for digital S/PDIF audio output.
Step 4 — Connect control devices
a. Connect a host device, such as a computer, to the front panel female USB mini-B connector (see figure 2,
B
on page 2) to
congure the device or update rmware.
b. Connect equipment controlled via momentary or latching contact, like projector screens or lifts, to these normally open
relays (
H
). Do not exceed 24 V at 1 A for each port.
c. For serial control of the scaler, connect a host device to the Remote RS-232 3.5 mm, 3-pole captive screw connector (
I
).
Step 5 — Connect power
Connect the provided external power supply to the 2-pole captive screw connector (
A
).
POWER
12V
1.0 A MAX
HDMI
S/PDIF
AUDIOAUDIO
SIG LINK
LAN
RS-232 RS-232IR
L
Tx Rx Tx Rx
RESET
G
R12ON
OFF
XTP IN
OVER XTP
OUTPUTS
RELAYS
Tx Rx G
REMOTE
ABCD EFGH IJ
2
XTP SFR HD 4K • Setup Guide (Continued)
Connection Details
RS-232 and IR Over XTP Wiring
To pass bidirectional serial command signals between XTP-compatible devices, connect
a control device to the three leftmost poles (Tx, Rx, and G) of the 5-pole captive screw
connector. To transmit and receive IR signals, connect a control device to the three rightmost
poles (G, Tx, and Rx).
NOTE: RS-232 and IR data can be transmitted and received simultaneously.
Audio Wiring
Wire the audio output connector as
shown to the right. Use the supplied
tie wrap to strap the audio cable to the
extended tail of the connector.
ATTENTION: For unbalanced audio, connect the sleeves to the ground contact. DO NOT connect the sleeves to the
negative (–) contacts.
ATTENTION : Pour l’audio asymétrique, connectez les manchons au contact au sol. Ne PAS connecter les manchons aux
contacts négatifs (–).
NOTE: The length of exposed wires is critical. The ideal length is 3/16 inch (5 mm).
Operation
After all transmitters and connected devices are connected and powered on, the system is fully operational. If any issues arise,
verify that the cables are routed and connected properly.
NOTE: Use the Extron XTP System Conguration Software or Simple Instruction Set (SIS) commands to congure the scaler
(see the XTP SFR HD 4K User Guide on the Extron website).
Front Panel Overview
XTP SFR HD 4K
SIGNAL
ADJUST
Extron
HDCP
HBR
HDMI
BITSTREAM
S/PDIF
LPCM
MENUENTER
ANALOG
CONFIG
AUDIOXTP
BAC DEFG
Figure 2. Front Panel Features
A
Power LED indicator — Lights on the front and rear panels when power is applied to the device.
B
Configuration port — Connect a host device to the USB mini-B port for device configuration, control, and firmware upgrades.
C
XTP LED indicators
Signal LED — Lights when an active XTP video signal is received.
HDCP LED — Lights when the XTP input signal is encrypted.
D
Audio LED indicators
HBR LED — Lights when the embedded audio signal is high bit rate audio.
Bitstream LED — Lights when the embedded audio input signal is Dolby Digital, DTS audio format, and 2-ch Dolby.
LPCM LED — Lights when the embedded audio input signal is 2-channel LPCM.
HDMI LED — Lights when HDMI embedded audio output (HBR, bitstream, or LPCM) is enabled.
S/PDIF LED — Lights when S/PDIF audio output (multi-channel or LPCM) is enabled.
Analog LED — Lights when analog audio output is enabled.
E
Menu button — Press this button to access and navigate the on-screen display (OSD) menu system.
F
Enter button — Press this button to select submenus and submenu items.
G
Adjustment knobs — Rotate the horizontal and vertical knobs to navigate the on-screen display menu and to adjust settings.
Tx/Rx
Pins
RxTx
RS-232
RxTx
TxRx
RxTx
IR Device
RS-232 Device
G
G
G
IR
Do not tin
the wires!
Balanced Audio Output
Tip
Ring
Tip
Ring
Slee
ves
Unbalanced Audio Output
Tip
No Ground Here
No Ground Here
Tip
Sleeves
LR
LR
3
Front Panel Lockout Mode (Executive Mode)
The front panel security lock (executive mode) limits operation of the device from the front panel. While in executive mode, the
XTP SFR HD 4K can still be congured with SIS commands and the XTP System Conguration Software. To enable or disable
executive mode through the front panel, press and hold the Menu and Enter buttons simultaneously for 2 seconds or until the
power LED blinks. Executive mode can also be enabled or disabled using SIS commands (see the Advanced configuration
commands on the next page) or the XTP System Conguration Software.
HDMI Audio
The embedded audio on the HDMI output connector can be enabled or disabled by setting the HDMI audio switch next to the
connector (see figure 1,
E
on page 1). Move and hold the HDMI audio switch up (for about 1 second) to enable embedded audio
on the display connected to the HDMI output connector, or move and hold the HDMI audio switch down (for about 1 second)
to disable it. The switch returns to the middle position after it has been released. The associated LED lights when the audio is
enabled and remains unlit when audio is disabled.
Firmware Upgrades
The onboard rmware of the XTP SFR HD 4K can be upgraded via the XTP System Conguration Software or the Extron Firmware
Loader Program (available on the Extron website, www.extron.com).
Configuration
The XTP SFR HD 4K can be congured through front panel controls and the On-screen Display (OSD) menu, Simple Instruction
Set (SIS) commands, or the XTP System Conguration Software. To utilize SIS commands or access the XTP System
Conguration Software, connect a host device to the XTP SFR HD 4K through the front panel conguration port (see figure 2,
B
on page 2) or the rear panel Remote RS-232 connector (see figure 1,
I
on page 1). The conguration port supports SIS
commands and the XTP System Conguration Software while the Remote RS-232 connector supports only SIS commands.
On-Screen Display (OSD) Menu System
The OSD menu consists of six submenus that can be accessed using the front panel Menu button (see figure 2,
E
on page 2).
View the menu on a display connected to the HDMI output connector (see figure 1,
E
on page 1). The submenus are:
Image Reset — Use this submenu to perform a one-time Image Reset on the image. The image is centered and sized to ll
the output screen.
Picture Control — Use this submenu to adjust the horizontal and vertical position, horizontal and vertical size, brightness,
contrast, and detail of the image.
User Presets — Use this submenu to save or recall a user preset.
Input Configuration — Use this submenu to view the total pixels and horizontal and vertical active pixels of the input signal.
Output Configuration — Use this submenu to select an output rate from a list of common resolutions and refresh rates or
view color bit depth, and output format settings.
Advanced Configuration — Use this submenu to apply a test pattern, enable or disable a blank screen, freeze the output,
set the aspect ratio, or reset the receiver to factory default settings.
To adjust settings in the OSD menu:
1. Press the Menu button to access the main menu.
2. Rotate either adjustment knob to navigate to a desired submenu.
3. Press the Enter button to access the items of the selected submenu.
4. Rotate either adjustment knob to navigate to a desired submenu item.
5. Press the Enter button to select a submenu item for adjustment.
6. As required, rotate the adjustment knobs or press the Enter button to adjust submenu items.
7. Press the Menu button to return to the list of submenus or exit the OSD menu.
XTP System Configuration Software
The XTP SFR HD 4K can be congured by the XTP System Conguration Software when it is installed on a connected host
device, such as a PC, through the front panel USB port (see the XTP SFR HD 4K User Guide for more details).
4
68-2203-50 Rev. B
02 19
Basic SIS Commands
To use SIS commands, connect the XTP SFR HD 4K to a host device through the RS-232 or USB connector. Use the Extron
DataViewer utility or a control system to send SIS commands and receive responses. The following table identies a selection of
SIS commands (for a full list, see the XTP SFR HD 4K User Guide at www.extron.com).
Command ASCII Command
(Host to Device)
Response
(Device to Host)
Additional Description
Picture adjustments
Execute image reset
A
Img
]
Execute a one time image reset.
Mute video
1B
Vmt1
]
Mute video and display a black screen.
Mute video and sync
2B
Vmt2
]
Mute video and sync.
Unmute video
0B
Vmt0
]
Unmute the video.
Output configuration
Set scaler output rate
EX3$RATE} RateX3$]
Set the output resolution and refresh rate.
View scaler output rate
ERATE} RateX3$]
View the selected output resolution and refresh
rate.
Set a test pattern
X1!J TstX1!] Set the test pattern to X1!.
View the test pattern
J
Tst
X1!]
View the current test pattern status.
Audio configuration
Mute all audio
7Z
Amt7
]
Mute all audio outputs.
Unmute audio
0Z
Amt0
]
Unmute all audio outputs.
Set volume level
X1&V VolX1&] Set the output volume to X1&.
View volume level
V
Vol
X1&]
View the current volume setting.
Advanced configuration
Enable executive mode
1X
Exe1
]
Lock the front panel.
Disable executive mode
0X
Exe0
]
Unlock the front panel.
Set aspect ratio to Fill
E1ASPR} Aspr1]
Fill the entire output screen.
Set aspect ratio to Follow
E2ASPR} Aspr2]
Match the native value.
View aspect ratio setting
EASPR} AsprX2#]
View the current aspect ratio setting.
Reset
Reset to factory default
EZXXX} Zpx]
Resets all user settings back to factory defaults.
KEY:
X1! = Test pattern (0 = off [default], 1 = crop, 2 = alternating pixels, 3 = crosshatch, 4 = color bars, 5 = grayscale)
X1& = Volume (0-64, where 64 = default)
X2# = Input aspect ratio (1 = Fill [default], 2 = Follow)
X3$ = Output scaler resolution and refresh rate (see the table below for a selection of resolutions and refresh rates or the
XTP SFR HD 4K User Guide for a full list)
SIS Variable X3$ for Selected Output Resolution and Refresh Rate Combinations (Where X3$ = 1 through 68, 0)
Resolution 23.98 Hz 24 Hz 25 Hz 29.97 Hz 30 Hz 50 Hz 59.94 Hz 60 Hz
1024x768
3
1280x800
5
1280x1024
6
1680x1050
12
1920x1200
14
720p
23 24 25 26 27 28
1080p
32 33 34 35 36 37 38
39*
2K (2048x1080)
40 41 42 43 44 45 46 47
4K (3840x2160)
64 65 66 67 68
Bypass scaling
0
* = default
© 2016-2019 Extron Electronics — All rights reserved. www.extron.com
All trademarks mentioned are the property of their respective owners.
  • Page 1 1
  • Page 2 2
  • Page 3 3
  • Page 4 4

Extron electronics XTP SFR HD 4K User manual

Category
Video switches
Type
User manual

Ask a question and I''ll find the answer in the document

Finding information in a document is now easier with AI