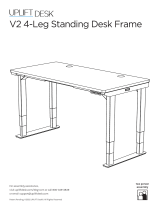
FRM415

UPLIFT Desk FRM415 User manual

  • Hello! I am an AI chatbot trained to assist you with the UPLIFT Desk FRM415 User manual. I’ve already reviewed the document and can help you find the information you need or explain it in simple terms. Just ask your questions, and providing more details will help me assist you more effectively!
  • What tools do I need to assemble the UPLIFT Desk FRM415?
    How many people are recommended for assembly?
    What is the recommended workspace for assembly?
    What are the dimensions of the UPLIFT Desk FRM415?
    What is the weight capacity of the UPLIFT Desk FRM415?
Seated Height O-Leg Table
FRM415
For assembly assistance,
visit upliftdesk.com/contact,
or call 800-349-3839,
Patented, ©2023 UPLIFT Desk®. All Rights Reserved.
Two person
assembly
Scan QR code for
product webpage
2
O-Leg
qty 2 Crossbar End
qty 2 Crossbar Rail
qty 2 Crossbar Brackets
qty 2 Logo Plate
qty 2
M6 x 10 Machine
Screw
qty 12
#10-24 x ¾" Machine Screw
#10 x ¾" Wood Screw
M4 x 8mm Machine Screw M4 Flat Washer
#10-24 x ¾" Machine Screw
M6 x 10 Hex Drive Flat Head Screw
M8 x 10 Machine Screw
M8 x 8 Set Screw
M6 x 10 Machine Screw
#10 Washer
M6 x 10 Hex Drive
Flat Head Screw
qty 4
M8 x 8 Set Screw
qty 8
#10-24 x ¾" Machine Screw
#10 x ¾" Wood Screw
M4 x 8mm Machine Screw M4 Flat Washer
#10-24 x ¾" Machine Screw
M6 x 10 Hex Drive Flat Head Screw
M8 x 10 Machine Screw
M8 x 8 Set Screw
M6 x 10 Machine Screw
#10 Washer
#10-24 x ¾
Machine Screw
qty 6
#10-24 x ¾" Machine Screw
#10 x ¾" Wood Screw
M4 x 8mm Machine Screw M4 Flat Washer
#10-24 x ¾" Machine Screw
M6 x 10 Hex Drive Flat Head Screw
M8 x 10 Machine Screw
M8 x 8 Set Screw
M6 x 10 Machine Screw
#10 Washer
#10 x ¾” Wood
Screw
qty 6
#10-24 x ¾" Machine Screw
#10 x ¾" Wood Screw
M4 x 8mm Machine Screw M4 Flat Washer
#10-24 x ¾" Machine Screw
M6 x 10 Hex Drive Flat Head Screw
M8 x 10 Machine Screw
M8 x 8 Set Screw
M6 x 10 Machine Screw
#10 Washer
#10 Washer
qty 6
#10-24 x ¾" Machine Screw
#10 x ¾" Wood Screw
M4 x 8mm Machine Screw M4 Flat Washer
#10-24 x ¾" Machine Screw
M6 x 10 Hex Drive Flat Head Screw
M8 x 10 Machine Screw
M8 x 8 Set Screw
M6 x 10 Machine Screw
#10 Washer
M8 x 10 Machine
Screw
qty 4
#10-24 x ¾" Machine Screw
#10 x ¾" Wood Screw
M4 x 8mm Machine Screw M4 Flat Washer
#10-24 x ¾" Machine Screw
M6 x 10 Hex Drive Flat Head Screw
M8 x 10 Machine Screw
M8 x 8 Set Screw
M6 x 10 Machine Screw
#10 Washer
4mm Allen Wrench 5mm Allen Wrench
Package Contents
P1
H1
H5
P2
H2
H6
P3
H3
H7
P4
H4a
H8
P5
H4b
Please read these instructions carefully. Inappropriate use of this table can cause property
damage and/or bodily injury.
Under no circumstances does the manufacturer accept warranty or liability claims for damages
caused from improper use of this table. Please provide these instructions to any new user or
owner of this table.
Safety and Warnings
Recommended Assembly Workspace and Practices
WARNING: Inspect the table regularly and stop using immediately if you notice any
damaged or loose parts. Only replace damaged parts with authorized UPLIFT Desk parts
and instructions.
Warning: The table is designed for use in dry environments, indoors only.
Place all parts on a clean surface such as a rug or carpet to keep organized and avoid scratches.
Two people are recommended for assembly.
Remove all packaging materials before beginning the assembly process.
3
© UPLIFT Desk • 800-349-3839 • info@upliftdesk.com • upliftdesk.com
Step 1 - Preparation
A. Before assembly, decide where you want the table to
be located and consider assembling nearby.
B. For ease and safety, we recommend using two people
for assembly.
C. To avoid any damage to your oor or tabletop, we
recommend assembling your table on a debris-free
carpet or blanket.
D. Ensure you have received all components and
hardware before disposing of any packing material.
Lay out the components from all boxes and make
sure the items and quantities match what is shown
in each of the package contents sections in these
instructions.
Component Diagram
Assembly Instructions
Logo Plate
Logo Plate
O-Leg
Crossbar Brackets
Crossbar Rail
M8 x 10 Machine Screw
M6 x 10 Hex Drive Flat Head Screw
Crossbar End
M8 x 8 Set Screw
M6 x 10 Machine Screw
O-Leg
M6 x 10 Machine
Screw
4
Step 2 - Attach Crossbar End
A. Place one of the O-Legs (P1) on the ground with the
two tabs facing up as shown.
B. Position one of the Crossbar Ends (P2) between the
tabs of the O-Leg so the holes in the O-Leg and the
holes in the Crossbar End are aligned.
C. Using the smaller 4mm Allen Wrench (H7), loosely
insert four M6 x 10 Machine Screws (H1) through
the holes on the inside tab of the O-leg and into the
Crossbar End as shown, but do not tighten them.
D. Using the same Allen Wrench, loosely insert two M6 x
10 Hex Drive Flat Head Screws (H2) through the holes
on the outside tab of the O-Leg and into the Crossbar
End as shown, but do not tighten them.
E. Rotate the Crossbar End and O-Leg assembly so the
Crossbar End is resting on the oor and the O-Leg is
pointing toward the ceiling.
F. Using the 4mm Allen Wrench, loosely insert two M6 x
10 Machine Screws through the two larger holes in the
outside face of the O-Leg and into the Crossbar End.
G. Completely tighten the two M6 x 10 Hex Drive Flat
Head Screws and six M6 x 10 Machine Screws from
the previous steps with the 4mm Allen Wrench.
H. When assembling the O-Legs in the orientation
shown, the Logo Plate will need to be attached upside-
down so it is right-side up when the table is ipped
over. Attach the Logo Plate (P5) by pressing the posts
on the Logo Plate rmly into the two smaller holes in
the outside face of the O-Leg. The Logo Plate conceals
the two screws in the face of the O-Leg.
I. Repeat this step for the second O-Leg and Crossbar
End assembly.
Tab
P1
P1
H1
H1
P5
H2
P2
5
© UPLIFT Desk • 800-349-3839 • info@upliftdesk.com • upliftdesk.com
Step 3 - Insert Crossbar Rails
A. Slide the Crossbar Rails (P3) into a Crossbar End
(P2) from the previous step as shown. Use either Leg
assembly in this step; they are the same.
Step 4 (if applicable) - Drill Frame Attachment Holes
A. If the bottom side of your tabletop has threaded metal inserts or pre-drilled holes (see diagram),
skip this step and proceed to Step 5.
Tabletop with pre-drilled holes Tabletop without pre-drilled holes
B. Select the side that will be the top surface of your
tabletop and make sure that side is facing down.
Make sure you only drill into the bottom surface of the
tabletop.
C. Place the Leg assembly from Step 3 onto the tabletop
as shown so the Leg assembly is centered between
the front and back edges of the tabletop and
approximately 1/4” in from the outside edge of the
tabletop.
P3
6
IMPORTANT: Don’t drill through your tabletop top
surface. DRILL NO DEEPER THAN 1/2”. To ensure this,
we recommend wrapping a piece of tape around your
drill bit 1/2” from the tip. Stop drilling just before the
tape touches the tabletop.
Move the leg assembly out of the way and drill pilot
holes at your pencil marks using a 1/8” drill bit.
E. Follow the same pre-drilling process with the other
leg assembly at the other end of the tabletop.
X
0.5”
Tape
Step 5 - Attach Leg Assembly to Table Top
A. Begin with the Leg assembly with the Crossbar Rails inserted into the Crossbar ends.
B. Align the holes in the O-Leg (P1) with the holes on the tabletop as shown. When adjusting the location of the Leg
assembly on the tabletop, lift it when moving instead of sliding to help protect the surface from scratches.
For 30” deep tabletops: align the holes with the
center slots as shown by the arrows in the 30” deep
tabletop image.
For 24” deep tabletops: align the metal inserts or
pre-drilled holes with the side slots that center the
tabletop as shown by the arrows in the 24” deep
tabletop image.
Machine screw: at end
C3 C4 C5
C9
H4a
H7
C6
H1 H2 H3 H5
H4b
H6
C7
Wood screw: pointy end
C3 C4 C5
C9
H4a
H7
C6
H1 H2 H3 H5
H4b
H6
C7
C. IMPORTANT: Determine the correct screws to use based on whether your tabletop has threaded metal inserts or
pre-drilled holes.
For tabletops with threaded metal inserts: Use the
#10-24 x 3/4” Machine Screws (H4a) and Washers
(H5) for the following steps. Do not use the Wood
Screws with the pointed end.
For tabletops without threaded metal inserts: Use the
#10 x 3/4” Wood Screws (H4b) and Washers (H5) for the
following steps.
30” deep tabletop
24” deep tabletop
D. Make a pencil mark in the center of each of the two
middle holes in the O-Leg indicated by arrows. You
can access the holes through the rectangular cutouts
in the inside face of the O-Leg.
7
© UPLIFT Desk • 800-349-3839 • info@upliftdesk.com • upliftdesk.com
30” deep tabletop screw locations: 24” deep tabletop screw locations:
D. Use a Phillips Head Screwdriver and the screws and
washers determined above to attach the O-Leg to the
tabletop, but do not tighten the screws completely
yet.
E. Position the other Leg assembly onto the Crossbar
Rails (P3) and repeat the steps above for attaching
the other O-Leg.
F. Tighten all of the screws that were started in this step. Take care when tightening not to strip the screws.
8
Step 6 - Position Center Rail
A. Slide each Crossbar Rail (P3) left or right until the
center indicator marks are approximately centered
between the two Crossbar Ends (P2).
Step 7 - Attach Crossbar Brackets
A. There is a left and a right Crossbar Bracket (P4).
Position them over the center threaded insert in the
desktop as shown, with the two-holed tabs pointing
in toward each other. Loosely attach them to the
Crossbar End (P2) in the orientation shown using four
M8 x 10 Machine Screws (H6), but do not tighten the
screws yet.
B. Insert four M8 x 8 Set Screws (H3) into each Crossbar
End and tighten using the 4mm Allen Wrench.
IMPORTANT: Ensure that all eight set screws make
contact with the Crossbar Rail inside the Crossbar Ends.
Center indicator mark
B. There are two sets of holes in the Crossbar Brackets to
align with both 24” and 30” deep tabletops.
If you have a tabletop with threaded metal
inserts or pre-drilled holes: use one of the screws
selected in Step 5 and one #10 Washer (H5) to
attach each bracket to the tabletop.
If you have a tabletop that does not have
threaded metal inserts or pre-drilled holes: follow
the instructions in Step 4 to pre-drill a hole in the
center of one of the two holes in each Crossbar
Bracket, then use one #10 x ¾” Wood Screw (H4b)
and one #10 Washer (H5) to attach each bracket to
the tabletop.
C. Tighten the four M8 x 10 Machine Screws that were
started in this step using the 5mm Allen Wrench (H8).
H3
P4
P2
H5
H6
9
© UPLIFT Desk • 800-349-3839 • info@upliftdesk.com • upliftdesk.com
Step 8 - Install Accessories
If you purchased any of the following accessories, we recommend installing them now.
Casters
A. Remove the pre-installed Leveling Glides from
the Feet by unscrewing them counterclockwise
from the mounting holes.
B. Install a Caster in each of the Leveling Glide
mounting holes by turning the stem of the
Caster clockwise. Use a at wrench to tighten
the hex nut on the Casters.
WMK008 Wire Management Tray
Most UPLIFT tabletops include two pre-drilled holes
about 12” apart located near the back of the tabletop.
If your tabletop includes grommets, these holes will
be located between them. These holes are meant for
attaching the WMK008 Wire Management Tray. If
you choose to place the Tray in a different location,
refer to Step 4 to make pre-drilled holes for the Wire
Management Tray attachment, and be careful not to drill
through your tabletop. Attach the tray to the tabletop
using two #10 x 5/8” Wood Screws.
Anchor Plates
Various UPLIFT Desk accessories were designed to attach
to the patented mounting points located along the sides
of the Crossbar Ends (P2) on the frame. Some of these
accessories require the use of the Anchor Plates. Refer to
the instructions provided with each accessory for specic
mounting instructions. If the Anchor Plates are required,
attach them using the M8 x 10 Machine Screws that came
with the Anchor Plate and tighten the screws using the
5mm Allen Wrench (H8).
10
Step 9 - Ensure All Screws are Tight
IMPORTANT: With the table upside down, take a moment to conrm all frame screws are tight using the Allen Wrench and
Phillips head screwdriver. This is an important step, and it is much easier to ensure the screws are tight before ipping the
table upright.
Frame screws include pre-applied Loctite to stay tight over time, so tightening thoroughly this one time is all you need.
Step 10 - Table Placement
When preparing to ip the table over, be aware of any
attached accessories, especially an accessory that might
move on a track like a Keyboard Tray or CPU Holder.
A. With one person located at each end of the table,
support the table frame and the tabletop equally and
begin to tilt it slowly toward the front or back side so
the O-Legs are touching the oor.
B. Adjust your grip and continue to rotate the table until
it is right-side up with both O-Legs completely on the
oor.
x1 x1
x1 x1
x1 x1
x1 x1x1 x1
x4 x4
x1 x1
x3 x3
x2 x2
11
© UPLIFT Desk • 800-349-3839 • info@upliftdesk.com • upliftdesk.com
C. Position your table where you would like it to be.
If your table has Casters: moving is easy! If your
Casters include locks, make sure they are unlocked
and roll the table to the desired location. Be sure to
relock the Casters to keep the table stationary.
If your table does not have Casters: do not drag the
table! Use two people to lift the table by holding
onto the tabletop and frame together. Never lift the
table by just the tabletop. This puts undue stress
on the attachment screws. Be sure to hold the
frame when lifting.
D. If your table does not have casters installed, adjust
the Leveling Glides as needed to level the table.
SAVE THIS MANUAL
Study this manual carefully. If this product is sold, please provide this
manual to the buyer, installers, or support personnel operating the product.
Work Better. Live Healthier
AI-FRM415-1.0
Copyright Notice: This manual is a component of this UPLIFT Desk product. This manual is a
part of the scope of delivery, even if the item is resold. This manual is also available on the
UPLIFT Desk website: upliftdesk.com. This manual is subject to United States copyright law.
©
upliftdesk.com
800-349-3839
512-614-3152
/