Page is loading ...

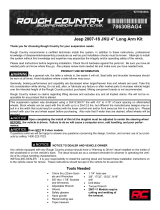
Thank you for choosing Rough Country for your Jeep JK needs.
Rough Country recommends a certified technician installs this system. In addition to these instructions, professional
knowledge of disassemble/reassembly procedures as well as post installation checks must be known. Attempts to install
this system without this knowledge and expertise may jeopardize the integrity and/or operating safety of the vehicle.
Please read all the instructions before beginning the installation. Check the kit hardware against the parts list. Be sure
you have all the needed parts and understand where they go. Also please review the tools needed list and make sure
you have needed tools.
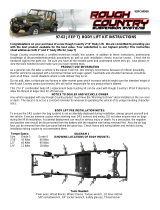
JEEP JK 1 1/4” 2 / 4 DOOR BODY LIFT KIT
92RC60000
KIT CONTENTS:
RC601:
12- RC Body Blocks (4 DOOR KIT)
1—Kit Bag Containing
24—3/8” x 2 1/4” Bolts
24—3/8” Nuts
48—3/8” Washers
Rear Bumper Brackets
RC600:
10- RC Body Blocks (2 DOOR KIT)
1—Kit Bag Containing
20—3/8”X 2 1/4” Bolts
20—3/8” Nuts
40—3/8” Washers
Rear Bumper Brackets
TOOLS NEEDED:
• 18mm Wrench
• 16mm Wrench
• 3/4” Wrench
• 9/16” Wrench & Socket
• Phillips Screw Driver
• Jack Stands
• Wood Block
• Hammer 2DR & 4DR BODY MOUNT LOCATIONS
4DR MODELS WILL
HAVE 12 MOUNTING
POINTS

INSTALLATION INSTRUCTIONS FOR JEEP JK 2 AND 4 DOOR BODY LIFT
1. Place Jeep on clean, dry, level surface. Installation is done one side at a time.
2. Raise hood. Using a Phillips screw driver, remove the (6) push pin inserts from grill on top side as shown. Retain for
re-use. See Photo 1.
3. Pull grill toward you to release the three lower clips. See Photo 2.
4. Disconnect the parking light electrical connecter and remove grill assembly. See Photo 3.
5. Using a 16mm wrench remove the 2 stud nuts from the stock body mounts as shown (12 mounts for 4 door and 8
mounts for 2 door), removing only the passenger side first. See Photo 4.
6. After completion of removing the stud nuts, remove the center stud bolt and washer from the passenger side body
mounts using a 18mm wrench . See Photo 5
7. After all isolator nuts and center mounting bolts are removed from the passenger side, position a wood block and (2)
jack stands under the body as shown. Lift the body upwards and begin removing the body mounts. See Photo 6.
PHOTO 1 PHOTO 2
PHOTO 3 PHOTO 4
PHOTO 6 PHOTO 5

8. After removing the stock body mounts from your vehicle, replace the nut on the stud and tighten the nut only until the
stud thread and nut are even. Using a 3/4” wrench and hammer, place the head side of the stud inside the wrench
and then place onto a flat surface. Strike the nut side of the stud until the stud releases. Proceed with stud removal
of all body mounts. See Photo 7.
9. After stud removal is complete, place the Rough Country body block onto the stock mount as shown. See Photo 8.
10. Re-install the body mount using the 3/8” x 2 1/4” bolt /
washers and nuts supplied. Secure these bolts into place
using a 9/16 wrench and tighten to 40ft/lbs. Note: The RC
block will mount towards the body on the front two
mounts. On the rear mounts, the RC block will mount to
the frame side. See Photo 9 & 10. With the addition of
the body spacer the factory body mount bolt washers
on the two rear-most body mounts may come in con-
tact with the supplied 3/8” hardware creating a
squeaking or popping. If needed slightly grind the
factory body mount washer to clear the supplied 3/8”
hardware. See Photo 11.
11. Lower the jacks so that body mount meets with the frame
mount and remove the jacks.
12. Using a 18mm wrench secure center mounting bolts, only
hand tight.
13. Repeat all above steps to driver side.
14. After completion of installing all body blocks and mounts, completely remove jacks and wood block. Using an 18mm
wrench torque center mounting bolts to 80 ft/lbs on all body mounts.
15. Reattach grill parking light electrical connectors. Snap grill into lower clips and using a Philips screw driver, secure
the grill with the factory pin fasteners (6) on the top side.
16. Close hood. Recheck torque after 500 miles on all bolts. The 3/8” bolts should be 40ft/lbs and the stock mounting
bolts should be at 80ft/lbs.
PHOTO 7 PHOTO 8
PHOTO 9
PHOTO 10
Front Corner Mount Shown
PHOTO 11
Grind Here

POST INSTALLATION
1. Check all fasteners for proper torque. Check to ensure there is adequate clearance between all rotating, mobile,
fixed and heated members. Check steering for interference and proper working order.
2. Re torque all fasteners after 500 miles. Visually inspect components and re torque fasteners during routine vehicle
service.
Thank you for choosing Rough Country for your Jeep off road needs.
1. Remove the stock bumper brackets from the frame rail and the bumper as shown in Photo 1 & 2 using a 16mm
socket.
2. Remove the inner brackets from the frame rail as shown in Photo 3 from the driver and passenger side. Retain the
hardware for reuse.
3. Remove the stock bumper from the vehicle.
4. Install the inner bumper brackets on the bumper as shown in Photo 4 using stock hardware. Do not tighten at this
time.
5. Install the bumper on the frame and install the outer bumper brackets with the stock hardware. Do not tighten at this
time. See Photo 5.
6. Align the bumper and tighten all hardware with a 16mm socket. See Photo 6.
REAR BUMPER BRACKET INSTALLATION INSTRUCTIONS
Photo 1 Photo 2
Photo 3 Photo 4
Photo 5 Photo 6
/