Page is loading ...

Installation Guide — MBD 249
(Continued on reverse side)
The Extron
®
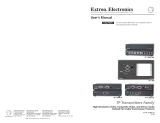
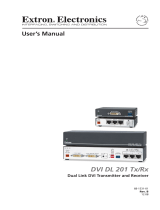
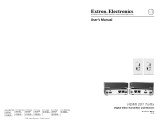
MBD 249 Under-Desk Mount Kit (part number 70-155-01) lets you attach an Extron
2U high device to an equipment rack or through a desk or table.
• Forrackmountinginstructions,seetheprocedurebelow.
• Forthrough-deskmountinginstructions,seethenextpage(reverseside).
Rack mounting
UL rack mounting guidelines
ThefollowingUnderwritersLaboratories(UL) guidelines pertain to the safe installation of
electronic equipment in a rack.
1. Elevated operating ambient temperature — If installed in a closed or multi-unit rack
assembly,theoperatingambienttemperatureoftherackenvironmentmaybegreaterthan
roomambienttemperature.Therefore,installtheunitinanenvironmentcompatiblewith
the maximum ambient temperature (Tma) specified by Extron.
2. Reduced air flow—Installtheequipmentinaracksothattheamountofairowrequired
for safe operation of the equipment is not compromised.
3. Mechanical loading — Mount the equipment in the rack so that a hazardous condition is
not achieved due to uneven mechanical loading.
4. Circuit overloading — Connect the equipment to the supply circuit and consider the
effectthatcircuitoverloadingmighthaveonovercurrentprotectionandsupplywiring.
Appropriateconsiderationofequipmentnameplateratingsshouldbeusedwhen
addressing this concern.
5. Reliable earthing (grounding) — Maintain reliable grounding of rack-mounted equipment.
Pay particular attention to supply connections other than direct connections to the branch
circuit(forexample,useofpowerstrips).
Instructions
Step 1 — Attach brackets to the device
Attach brackets to the device using eight machine
screwssuppliedwiththemountingkit.Usethe
bracket’s four lowerholes,asshowninthe
diagrambelow.
Step 2 —
Attach brackets to
the rack
Using four machine
screws,attachthe
brackets to the
mounting rack.
MBD 249
2U Rack Mount
Bracket (use four
lower holes)

Installation Guide — MBD 249 (cont’d)
Extron USA - West
Headquarters
+800.633.9876
Inside USA / Canada Only
+1.714.491.1500
+1.714.491.1517 FAX
Extron USA - East
+800.633.9876
Inside USA / Canada Only
+1.919.863.1794
+1.919.863.1797 FAX
Extron Europe
+800.3987.6673
Inside Europe Only
+31.33.453.4040
+31.33.453.4050 FAX
Extron Asia
+800.7339.8766
Inside Asia Only
+65.6383.4400
+65.6383.4664 FAX
Extron Japan
+81.3.3511.7655
+81.3.3511.7656 FAX
Extron China
+400.883.1568
Inside China Only
+86.21.3760.1568
+86.21.3760.1566 FAX
Extron Middle East
+971.4.2991800
+971.4.2991880 FAX
© 2009 Extron Electronics. All rights reserved.
68-620-01
Rev. C
09 09
Through-desk mounting
Step 1 — Attach brackets to the device
Attach brackets to the device using the bracket’s slotted holes and eight supplied machine
screwsandwashers(fourperside),asshowninthepicturebelow.
Step 2 — Mark
screw locations
Holdthedevicewithattached
brackets against the underside of
thefurniture,andmarkthescrewhole
locations(centersofthebrackets’screwslots).
Step 3 — Drill holes
Drillfourpilotholes,each3/32inches(2mm)in
diameter,¼inch(6mm)deep,atthelocationsmarkedinstep2.
Step 4 — Install screws
Usingthefourwoodscrews(provided),attachthebracketstothemountingsurfaceand
securelytightenallscrews.
Step 5 — Adjust device height
Ifdesired,loosenthescrewsinstalledinstep1andraiseorlowerthedeviceslightlytoadjust
itsheightwithinthefurniture,thentightenthescrewssnugly.
www.extron.com
1/2