Page is loading ...

Hubbell Premise Wiring, HUBBELL INCORPORATED (Delaware)
14 Lord's Hill Rd, Stonington CT 06378 (800) 626-0005, Fax (860) 535-8328
www.hubbell-premise.com
Control No. Page of
Rev. Date:
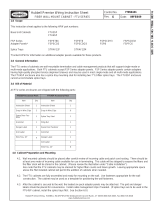
Hubbell Premise Wiring Instruction Sheet
®
Hubbell Premise Wiring, HUBBELL INCORPORATED (Delaware)
23 Clara Dr Suite 103 Mystic, CT 06355 (800) 626-0005, Fax (860) 535-8328
www.hubbell-premise.com
Using the supplied mounting screws and washers, mount the
patch panel to the desired position on a 19" relay rack.
1Mounting Panel To Rack
Place the 6 port adapter housing onto the panel opening edge
with the label eld on top. Rotate the adapter into the panel until
the snaps engage the metal.
Label eld up Rotate until snaps on adapter
fully engage panel
2Adapter Mounting
Note: Adapter housings can be installed with or without terminated
connectors installed in them.
1. Terminate individual jack, snapfits and
modules utilizing instruction sheets supplied
with those parts.
2. Insert all terminated jack, snapfits or
modules into unloaded panel adapter
housing as shown.
1. Install one end of the bar into the slot in the
bracket.
2. Slightly bend the other end inward while
engaging it into the slot in the opposing
bracket.
5Optional Cable Management Bar, P/N HPRCMB
Cable Manager Bracket
SPRING LATCH
FIXED LATCH
4
Paper label insert
Clear label cover
1. Use the provided paper label insert to identify the
ports on the panel.
Optional laser printable label bulk pack available.
P/N: HPJLBL4800
Labeling
3. Slide the clear label cover over paper label.
2. Starting from one end of the label eld, slide the paper label
insert into label eld under the retaining tabs.
Jack Termination & Assembly to Panel
3
HPJ SERIES UNLOADED PANEL ASSEMBLY INSTRUCTIONS
HWS77534801 11
7/12/161
/