The Westcott FJ400 Strobe 1-Light Backpack Kit offers a compact and portable lighting solution with a powerful 400Ws strobe, a long-lasting lithium-polymer battery, and a variety of modifiers for shaping and controlling light. With its rapid recycling time of less than one second at full power, you can capture multiple shots in quick succession without missing a beat. The FJ400 features TTL and HSS modes, enabling precise exposure control and high-speed sync with compatible cameras. Its intuitive menu system and LCD display provide easy access to various settings and functions.

The Westcott FJ400 Strobe 1-Light Backpack Kit offers a compact and portable lighting solution with a powerful 400Ws strobe, a long-lasting lithium-polymer battery, and a variety of modifiers for shaping and controlling light. With its rapid recycling time of less than one second at full power, you can capture multiple shots in quick succession without missing a beat. The FJ400 features TTL and HSS modes, enabling precise exposure control and high-speed sync with compatible cameras. Its intuitive menu system and LCD display provide easy access to various settings and functions.

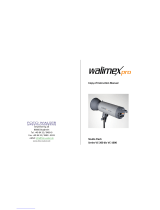
FJ400 AC/DC Strobe
User Manual
V1.0.5
7/14/2020
 
PLEASE READ THE INFORMATION ON PAGE 4 BEFORE USING FJ WIRELESS EQUIPMENT
Contents
Contents 1
Introduction 3
Components (Included) 3
Important things to know before starting… 4
Reviewing Firmware Files 4
TTL ±3 Flash Exposure Compensation (FJ400 & FJ-X2m) 4
Canon Continuous Mode 4
FJ400 Strobe: Overview 5
FJ400 Strobe: LCD Display & Menus 6
FJ400 Strobe: Warnings 7
FJ400 Strobe: Firmware Updates 8
Installing the Firmware 8
FJ400 Strobe: Getting Started 9
Charging the FJ400 AC/DC Lithium Polymer Battery 9
Attaching the FJ400 AC/DC Lithium Polymer Battery 9
Removing the FJ400 AC/DC Lithium Polymer Battery 9
AC Power Operation 9
DC Power Operation 9
FJ400 Strobe: Mounting 10
Mounting to a Light Stand 10
FJ400 Strobe: Attaching & Removing Modifiers 10
Connecting a Bowens Speedring & Modifier 10
Removing a Bowens Speedring & Modifier 10
Attaching an Umbrella-Based Modifier 10
Removing an Umbrella Based Modifier 10
FJ400 Strobe: Wireless Control 11
FJ400 Strobe: Exposure Modes 11
Enabling ‘TTL’ Mode Operation [Requires FJ2-Xm or compatible trigger] 11
Enabling ‘Manual’ Mode Operation 11
FJ400 Strobe: SYNC Functions 12
Enabling ‘Normal’ Sync 12
Enabling ‘HSS (High-speed Sync)’ 12
Enabling ‘Freeze Sync’ 12
Freeze Sync Flash Durations 12
1
FJ400 Strobe: Advanced Functions 13
Mask Function 13
Delay Function 14
Continuous Capture 14
FJ400: Menu [Expanded Look] 14
Menu Screen #1 14
Menu Screen #2 15
Menu Screen #3 15
Menu Screen #4 15
Menu Screen #5 16
Menu Screen #6 16
FJ400 Battery: Performance and Care 16
FJ400 Performance & Sleep Modes 16
FJ400 LED Battery Status Indicators 17
FJ400 Charging & Life Expectancy 17
FJ400 Strobe: Technical Specifications 17
Warranty Information 19
Legal Information 20
PLEASE READ THE INFORMATION ON PAGE 4 BEFORE USING FJ WIRELESS EQUIPMENT
2
Introduction
Thank you for purchasing the Westcott FJ400 Strobe. The FJ400 and FJ-X2m Wireless Flash Trigger
(sold separately
) are a photographer’s dream combination. The performance of the FJ400 is one of the
industry’s first compact, portable 400 watt-second strobes that are capable of recycling in less than
one-second at full-power so you don’t miss the shot. It offers the most full-power flashes at 480 bursts to
extend those on-location shoots when AC power isn’t an option and it has accurate color temperatures
throughout its entire 9-stop output range. When paired with the FJ-X2m Wireless Radio trigger, you can
say, “Goodbye,” to the need for multiple brand-specific triggers. The FJ400 and FJ-X2m have you
covered with its multi-brand compatibility. This versatile unit offers everything required by professional
photographers today to achieve lighting success - including TTL, HSS, Continuous Capture, Freeze
Function, and so much more. Enjoy!
Components (Included)
FJ400 Strobe
FJ400 AC/DC Lithium Polymer Battery
AC Power Adapter & Cord
Frosted Diffusion Dome
Magnetic Reflector (Bowens, 5.5")
Magnetic CC Gel Set
Magnetic Diffusion
USB-C to USB-A Cable
FREE: Rapid Box Switch Insert (Bowens)
PLEASE READ THE INFORMATION ON PAGE 4 BEFORE USING FJ WIRELESS EQUIPMENT
3
Important things to know before starting…
Reviewing Firmware Files
Firmware updates will be made available on the FJ400 product page (https://www.fjwestcott.com/4700)
to improve the performance of the FJ Wireless System. Please review ALL documentation that’s included
with each firmware download to ensure all of the necessary steps for preparation are complete before
installing the firmware.
TTL ±3 Flash Exposure Compensation (FJ400 & FJ-X2m)
±3 TTL Flash Exposure Compensation (FEC) on the FJ-X2m is independent of the Flash Exposure
Compensation (FEC) on the FJ400 Strobe. Meaning, a change of the FEC ±3 on the FJ-X2m will adjust
the light output in TTL mode, however, the FJ400 screen will not indicate the FEC changes made on the
FJ-X2m. The FJ400 FEC can be further adjusted ±3.
Set the strobe display to show both the FJ400 Strobe FEC (large letters
) and the FJ-X2m Wireless
Trigger FEC (small letters
) by turning the M->TTL setting to ON in MENU 6 on the FJ400. Learn more
about accessing the FJ400 Menu Settings in the section titled “Menu Screen #6
“.
Canon Continuous Mode
When photographing in Canon Continuous Mode, two overlapping-squares will be visible on the FJ400
screen and the FJ Wireless System will default to Manual Mode disabling TTL and HSS functionality. Exit
Continuous Mode on the Canon camera to resume TTL and HSS functionality.
4
FJ400 Strobe: Overview
5
FJ400 Strobe: LCD Display & Menus
6
FJ400 Strobe: Warnings
Caution
IMPORTANT: During operation, the flash tube, LED modeling lamp, and select components of
the FJ400 strobe temperatures will increase. Please use caution while using to avoid serious
burns or injuries.
Use only with the Westcott FJ400 AC/DC Lithium Polymer Battery and/or AC Power Adapter and
Cord.
Do not touch glass diffusion dome, flash tube, LED modeling lamp, or metal reflector after
immediate use to avoid potential injury.
Never leave unattended around children and/or pets.
Keep away from fire, water, and moisture.
Do not submerge in water.
Avoid drastic temperature changes before, during, or after use.
Avoid direct skin contact with the flash tube and LED modeling lamp when replacing the flash
tube.
Always remove the FJ400 AC/DC Lithium Polymer Battery from the FJ400 Strobe during
travel/storage to avoid accidental operation which could lead to overheating or permanent
damage.
Do not overtighten the tilter bracket tension knob or umbrella tension screw.
Ensure the FJ400 is securely mounted before use.
Only use compatible modifiers and accessories and ensure they are securely attached to the
FJ400 Strobe before use.
Do not attempt to modify any Westcott products. Contact Westcott for assistance.
The operating temperature range is 32-104°F(0-40°C).
Dual-Stage Heat Protection
The FJ400 is equipped with self-monitoring cooling fans to ensure safe operation. It is also equipped
with an automatic shutoff feature. In the rare event that the strobe has reached an unsafe operating
temperature, the screen will display OH (overheat). Once the unit has cooled, the OH will disappear from
the screen and it will then be safe to continue operation.
7
FJ400 Strobe: Firmware Updates
The FJ400 strobe is designed with a USB-C port to allow for firmware updates only. Future firmware
updates will result in performance enhancements, modified menu options, and improved menu layouts. It
is strongly suggested that you visit fjwestcott.com/4700 to confirm your strobe has the latest firmware.
Installing the Firmware
1. Visit fjwestcott.com/4700 and scroll to the Support
section. Find and download the latest
firmware ZIP file. (IMPORTANT: Various browsers may automatically unzip the ZIP file. In this
scenario, skip to step #3).
2. Unzip the file and open the extracted folder.
3. IMPORTANT
: Read ALL FILES located in the extracted folder (i.e. README, Changelog, etc).
4. Locate the .BIN file on your computer.
5. Ensure the FJ400 is OFF and cooled before removing the battery from the strobe.
6. Connect the USB-A to USB-C cable to the FJ400’s USB-C port.
7. Common operating systems will present the strobe as an external drive device.
8. Locate the .BIN file on your computer and drag the file to the FJ400 (external device).
9. Once the file has been completely copied to the FJ400, EJECT the FJ400 from the computer.
10. Remove the USB-C cable from the FJ400 and reattach the battery.
11. Press the Power | Model button on the FJ400 to initiate the firmware update.
IMPORTANT
It’s recommended that the firmware update installation process be completed only when the
connected computer’s power level is ≥ 50%. Loss of power of any type during this process could
render the FJ400 inoperable and require professional repair.
Removing the USB-C cable from the FJ400 without properly ejecting the FJ400 from your
computer could render the strobe inoperable and require professional repair.
Depending on the operating system and the applications running, copying the firmware from your
computer to the FJ400 may take a few minutes and/or halt the copying process. Should this
happen, close the copy progress window and try again. Further copying issues may require the
computer to be restarted.
8
FJ400 Strobe: Getting Started
Charging the FJ400 AC/DC Lithium Polymer Battery
The battery can be charged separately from the FJ400 or while attached to the FJ400. In both instances,
connect the power cord to the AC Adapter, connect the AC Adapter’s barrel plug to the battery AC
receptacle, and connect the power cord into a power outlet.
Attaching the FJ400 AC/DC Lithium Polymer Battery
Attach the FJ400 Battery to the strobe by aligning the silver connection points on the rear of the strobe
to the holes on the silver strips located on the back of the battery and slide the battery down until it locks
into place.
Removing the FJ400 AC/DC Lithium Polymer Battery
Ensure the FJ400 is OFF by long-pressing the Power | Model button until the LCD screen turns off. Then,
slide the release lock located on top of the battery away from the strobe, gently press the battery up and
away from the strobe to remove.
AC Power Operation
1. Ensure the battery charge level is ≥ 25%.
2. Ensure the battery is securely attached to the FJ400.
3. Plug the power cord into the AC Adapter.
4. With the strobe powered off, connect the AC Adapter’s barrel plug to the battery’s AC receptacle.
5. Plug the power cord into a dedicated power outlet.
6. Turn the strobe ON by pressing and holding the Power | Model button until the start-up screen
appears.
DC Power Operation
1. Ensure the FJ400 battery has been fully charged.
2. Ensure the battery is securely attached to the FJ400.
3. Turn the strobe ON by pressing and holding the Power | Model button until the start-up screen
appears.
9
FJ400 Strobe: Mounting
Mounting to a Light Stand
1. Rotate the tilter bracket’s handle counterclockwise until the light stand receptacle is
perpendicular to the strobe body.
2. Loosen the tension knob located lower on the tilter bracket.
3. Insert the light stand spigot into the FJ400’s 5/8"-16 mm tilter bracket receptacle.
4. Tighten the tension knob to secure the strobe to the light stand.
FJ400 Strobe: Attaching & Removing Modifiers
Connecting a Bowens Speedring & Modifier
1. Ensure the strobe is turned OFF and has cooled for five minutes.
2. Grasp the speedring attached to the modifier and align its three square mounting blocks with the
openings located on the face of the strobe.
3. Insert the speedring and turn clockwise until the speedring locks into place.
Removing a Bowens Speedring & Modifier
1. Ensure the strobe is turned OFF and has cooled for five minutes.
2. Grasp the speedring attached to the modifier.
3. Slide the strobe’s speedring release away from the modifier.
4. Rotate the modifier’s speedring counterclockwise until its three square mounting blocks align
with the openings. Pull the modifier away from the strobe to release.
Attaching an Umbrella-Based Modifier
1. Ensure the strobe is turned OFF and has cooled for five minutes.
2. Grasp the umbrella’s shaft and slide into the strobe’s umbrella receptacle.
3. Tighten the tension screw to secure the umbrella-based modifier (up to 8mm shaft).
Removing an Umbrella Based Modifier
1. Ensure the strobe is turned OFF and has cooled for five minutes.
2. Loosen the umbrella tension screw.
3. Grasp the umbrella’s shaft and gently slide the umbrella out of the FJ400 umbrella receptacle.
NOTE:
Never force entry or removal of speedring, umbrellas, or modifiers.
Use caution during the removal of modifiers to not damage the flash tube.
Octagonal umbrella shaft may not fit into the FJ400 umbrella receptacle.
10
FJ400 Strobe: Wireless Control
Fully maximize the performance and features of the FJ400 by using the FJ-X2m Wireless Radio Trigger.
Read more about the trigger in the
FJ-X2m Wireless Trigger: Overview
section.
FJ400 Strobe: Exposure Modes
Enabling ‘TTL’ Mode Operation [Requires FJ2-Xm or compatible trigger
]
Press Button 1 repeatedly until MENU 1 appears in the cyan square at the top right of the screen.
1. Press Button 2 until TTL appears just below the [CH] icon in the top left of the screen.
2. TTL mode is now enabled. While in TTL Mode, rotate the control dial to adjust the flash exposure
compensation of the strobe between -3.0 and +3.0 ( ±0.1 adjustments).
a. Press the Select button once to turn the flash exposure compensation value green and
have the ability to make an adjustment by ±1.0.
IMPORTANT
: The flash exposure compensation selected on the FJ400 strobe screen is independent of
the flash exposure compensation controlled by the FJ-X2m Wireless Radio Trigger and/or another
compatible triggering system.
Enabling ‘Manual’ Mode Operation 
1. Press Button 1 repeatedly until MENU 1 appears in the cyan square at the top right of the screen.
2. Press Button 2 until M appears just below the [CH] icon in the top left of the screen.
3. Manual mode is now enabled. 
a. NOTE
: Manual mode does not require the use of a compatible wireless triggering system
and can be used with wired, optical, or wireless triggers limited to flash triggering.
4. While in Manual Mode, rotate the control dial to adjust the power output of the strobe between
1.0 and 9.0 ( ±0.1 adjustments). 
a. Press the Select button once to turn the power output value green and have the ability to
make an adjustment by ±1.0.
11
FJ400 Strobe: SYNC Functions
Enabling ‘Normal’ Sync
Ideal in normal scenarios and when color consistency (5500°K ±150), full-power output (400 Ws), and the
fastest recycling is essential.
1. Press Button 1 repeatedly until MENU 1 appears in the cyan square at the top right of the screen.
2. Press Button 3 until the NOR icon appears in the bottom left of the screen.
NOTE
: Utilize HSS (see below) when choosing to use shutter speeds above your cameras maximum
normal sync speed (typically: 1/200s, 1/250s, or 1/320s ).
Enabling ‘HSS (High-speed Sync)’
Ideal for mixing a substantial amount available light and flash when proper exposure with a shallow
depth of field/wide aperture requires a flash sync speed above the camera’s maximum normal sync
speed (typically: 1/200s, 1/250s or 1/320s). HSS allows compatible cameras to achieve flash sync speed
up to 1/8000s.
1. Press Button 1 repeatedly until MENU 1 appears in the cyan square at the top right of the screen.
2. Press Button 3 until the High-speed Sync icon appears in the bottom left of the screen.
NOTE
: HSS requires FJ2-Xm or compatible trigger.
Enabling ‘Freeze Sync’
Ideal for freezing fast-moving objects lit by the strobe. [ Available in Manual Mode Only.]
1. Press Button 1 repeatedly until MENU 1 appears in the cyan square at the top right of the screen.
2. Press Button 2 (Mode) until the M (manual) icon appears in the upper left of the screen
3. Press Button 3 (Sync) until the FRE (freeze) icon appears in the bottom left of the screen.
The t0.5 flash duration time will be displayed in yellow when freeze sync is enabled.
Freeze Sync Flash Durations
Flash Duration (t0.1)
Normal: 1/280~1/3000s
Freeze: 1/280~1/7000s
Flash Duration (t0.5)
Normal: 1/800~1/8500s
Freeze: 1/800~1/19000s
12
FJ400 Strobe: Advanced Functions
Mask Function
Ideal for creating in-camera cutout masks of foreground objects for use with image editing software for
easy background replacement and compositing.
NOTE
: Available in Manual Mode Only. See section “Enabling ‘Manual’ Mode Operation
.
NOTE
: Optical Triggering is disabled in Mask Function.
IMPORTANT: A minimum of two FJ400 Strobes is required.
1. After setting Manual Mode on the FJ400 in MENU 1, press Button 1 repeatedly until MENU 4
appears in the cyan square at the top right of the screen.
2. Press Button 2 (Mask) to activate mask functionality which will turn Button Icons 3 and 4 from
disabled (gray) to enabled (black).
3. Press Button 3 (All) to highlight the total number of exposures to be taken in the masking
sequence (2-6). Rotate the control dial to the desired number and press the center button and/or
wait three seconds to engage your selection.
4. Press Button 4 (SEQ#) to highlight wherein the sequence of exposures this individual strobe will
fire. Rotate the Control Dial to the desired number and press the center button and/or wait three
seconds to engage your selection.
a. NOTE
: Your selection choices (1-6) will be limited to the number of exposures you set in
the “All” menu plus the number 1 for the first strobe(s) to fire in the exposure sequence of
2 or more. You can assign up to 20 individually programmed FJ400 strobes to a
sequence order number (1-6).
Here’s a method to create a simple mask to isolate an image from the background:
1. In Menu 4, Set Button 3 (All) to 2 on every strobe being used to create the two (2) masking
images.
2. Set Button 4 (SEQ#) on any strobe that’s lighting the foreground subject to the number 1 as they
will light the first exposure.
3. Set Button 4 (SEQ#) to number 2 on any strobe that’s lighting your white background. These
strobes will fire with your second exposure. Light from the strobe(s) that is set on No. 2 should
not spill onto the foreground subject to ensure a crisp mask.
NOTE
: Optimal Mask Function results are achieved utilizing a tripod and the FJ-X2m Wireless Radio
Trigger.
13
Delay Function
The Delay function will add a delay to the firing of the FJ400 by a custom set amount of time.
1. Press Button 1 repeatedly until MENU 5 appears in the cyan square at the top right of the screen.
2. Press Button 3 (DELAY) to engage the Delay function. A bright yellow “Delay” icon will appear in
the lower left of the screen. 
3. Press Button 4 to set the Delay timer. Repeatedly pressing Button 4 will cycle through the
number places on the display allowing the setting of the 1/10 or 1/100 second positions.
4. IMPORTANT: Turn off the Delay function by pressing Button 3 again to disengage the Delay and
return to standard strobe operation. The bright yellow “Delay” icon will disappear from the
screen. 
Continuous Capture
The FJ400’s incredibly fast recycling times allow for it to be used to fire up to 20fps (frames per second).
1. Press Button 1 repeatedly until MENU 1 appears in the cyan square at the top right of the screen.
2. Press Button 2 until M appears just below the [CH] icon in the top left of the screen.
3. Press the Center Button on the control dial and rotate the dial to select a power setting between 1
and 4. 
NOTE
: 20fps is camera model dependent.
FJ400: Menu [Expanded Look
]
Menu Screen #1
MENU 1 Button 1
MODE Icon Button 2
Pressing Button 2 switches between TTL (Through the Lens) and M (Manual) exposure
modes.
TTL Mode will allow for the flash exposure compensation value to be adjusted
between -3.0 and 3.0 in ±0.1 increments by turning the control dial.
MANUAL Mode will allow the power output to be adjusted between 1.0 and 9.0 in
±0.1 increments by turning the control dial.
SYNC Icon Button 3
Pressing Button 3 switches between NOR (Normal), “Lightning-H” Icon (High-Speed Sync),
and FRE (Freeze) sync functions.
NOR (Normal Sync) allows for a constant color temperature of 5500K (±150K)
“Lightning-H” Icon (High-Speed Sync) allows for shutter speeds up to 1/8000s.
FRE (Freeze Sync) allows for adjustments to the flash duration up to 1/19000s by
rotating the control dial to change the FJ400 power output.
Wireless” Icon Button 4
Pressing Button 4 switches between the following wireless connection protocols:
14
TTL-ALL - Wireless connection protocols when using the FJ-X2m to communicate
with compatible camera models. See
fjwestcott.com/4705
for a full list.
)
OFF - Disable wireless communication
Menu Screen #2
MENU 2 Button 1
CH Icon Button 2
CH - Wireless Channel selection between the values of [AU] and [01-31]. (AU locates the
most reliable 2.4GHz channel.)
Enable the [AU] “automatic channel” mode:
Set the FJ400 and FJ-X2m to channel [AU]
Long press the 2nd Menu Selection button on the FJ-X2m labeled CH until
the channel on the FJ400 displays [AU].
Note: The FJ-X2m trigger will continue to display [AU] in the channel
window.
GR Icon Button 3
GR - Wireless Group selection between the letters A-J.
ID/RT Icon Button 4
CanonRT ID values between 00-99.
Canon Radio Triggers and speedlites can be synchronized with the FJ400 by selecting
the same Channel, Group, and ID#.
Menu Screen #3
MENU 3 Button 1
“Audible Beep” Icon Button 2
Enables/Disables audible notifications for strobe recycling completion and menu
selections.
“Optical Sensor” Icon Button 3
Enables/Disables the optical sensor when wanting to trigger the FJ400 with another
flash-based light source (ie. 2nd strobe, speedlite, etc.) without utilizing a wireless radio
trigger or PC cord.
“Modeling Lamp” Icon Button 4
“Modeling Lamp” Icon + Off: Disables the modeling lamp.
“Modeling Lamp” Icon + Auto: Variable modeling lamp power output based upon the
FJ400’s power output.
“Modeling Lamp” Icon + “#”: Enables the modeling lamp.
Menu Screen #4
MENU 4 Button 1
MASK Icon Button 2
Enables/Disables MASK Function.
ALL Icon + “#” Button 3
15
Sets the number of exposures (minimum 2) to be made for the total sequence of masking
images. The same quantity must be set on each strobe used for the masking operation. 
SEQ# Icon + “#” Button 4
Sets the firing placeholder for the strobe in the sequence of (1-6) masking images.
Menu Screen #5
MENU 5 Button 1
Strobe Master Lock Icon Button 2
Locks the on-strobe settings and disables the ability to change strobe settings via the
trigger allowing only flash synchronization.
DELAY Icon Button 3 
Enables/Disables flash delay by the amount set with Button 4.
# Button 4
Rotate the command dial to set the time delay between 0.0 and 30.0 seconds.
Menu Screen #6 
Access Menu Screen #6
by long-pressing Button 1 on any menu screen.
MENU 6 Button 1
SET Icon Button 2
Toggles the available settings of the green highlighted menu selection.
[Screen] can be set to three levels; [MAX, MID and MIN].
[Auto-off] can be set to three durations; [15,30, or 60].
[M/TTL] can be set to two settings; [OFF, ON].
[Factory Setting] has two options; [YES, NO].
SELECT Icon Button 3
Toggles through the menu items.
FJ400 Battery: Performance and Care
FJ400 Performance & Sleep Modes
The FJ400 Lithium-Polymer Battery (14.8V 65Wh, 4400mAh) is capable of 480+ full-power flashes with
the modeling lamp disabled. In order to operate the FJ400 with the AC power supply, the FJ400 battery
must have a remaining charge of ≥ 25% capacity.
Auto-off engages at the following intervals:
DC Power: Off ~60min; Sleep ~30min.
AC Power: Off ~60min; Sleep ~30min.
16
FJ400 LED Battery Status Indicators
Press the Battery Status Button located on the FJ400 Battery to check the remaining charge capacity.
Illuminated LED Indicators reflect the following:
4 lights: 100% ~ 75%
3 lights: 74% ~ 50%
2 lights: 49% ~ 25%
1 light: 24% ~ 0%
0 lights: Detach battery and charge to full capacity.
FJ400 Charging & Life Expectancy
The average charge time is 2.5 hours from complete discharge. The FJ400 Lithium-Polymer Battery
(14.8V 65Wh, 4400mAh) will achieve at least 300 complete charge cycles. Continued usage beyond the
expected charge cycles will result in diminished performance and the ability to hold a charge. Avoid
charging and using the battery outside of the stated operating temperatures (32~104°F / 0~40°C) as it will
affect the overall performance of the battery and strobe. Preserve the longevity of the battery by storing
at roughly ~40% capacity at room temperature in a dry environment and recharge to this capacity at least
every 3 months when not being used. 
FJ400 Strobe: Technical Specifications
FJ400: Strobe
Maximum Power (Ws)
400 Ws
Energy Range (Power Output)
9 f-stop (1.56 - 400 Ws)
Flash Duration (t0.1)
Normal: 1/280~1/3000s
Freeze: 1/280~1/7000s
Flash Duration (t0.5)
Normal: 1/800~1/8500s
Freeze: 1/600~1/19000s
Recycle Time (DC/Battery Power)
0.05 - 0.9s
Color Temperature
5500°K ±150
Color Temp: 1/1 - 1/256, 5500° ± 150
Color Temp: <1 stop ±75k (Normal Sync)
Color Temperature Stability
Normal/TTL/HSS: 5500°K ±150°K
Freeze: 5500°K ±500°K (E.R. 5~9)
Mounting System
Bowens S-type
Auto Multi-Voltage
Yes
17
Flash Increments
1-stop and 0.1-stop
Flash Modes
Manual / TTL
Mask Function
Yes; Manual Mode
Delay Function
Yes
Continuous Capture
20 fps (Camera Model Dependent)
IGBT
Yes
Flash Exposure Compensation (FEC)
±3
Modeling Lamp (Output)
LED 20W (5600K)
Sync Functions
Normal, HSS, Freeze
Sync Speed
1/8000 Sec (High-Speed)
Wireless Radio Frequency
2.4 GHz
Wireless Channels
AU, 01-31
Wireless Groups
6 Trigger, 10 App
Wireless Range
985' (300m)
Power Source
FJ400 AC/DC Battery
Battery Type
Lithium Polymer
Battery Capacity
65Wh, 4400mAh
Voltage
14.8V
Output Current
20A Max
Charge Current
≤ 2A Max
Charge Temperature
50° to 113° F / 10° to 45° C
Discharge Temperature
14° to 122° F / -10° to 50° C
Flashes Per Charge
480+ at Full Power
Battery Indicators
LED
Recharge Time
2.5 hours
Battery Charge Cycles
300
AC Power Operation Requirement
Battery Level ≥ 20%
Sleep Mode
DC Power: Adjustable, Off ~60min;
Sleep~30min
AC Power: Adjustable, Off ~60min;
Sleep~30min
Charge Voltage
DC 16.8V
18
FJ400: AC Power Adapter
Input Range
100-240 VAC, 50/60 Hz, 1.6A
Output Range
DC 16.8V, 2A
Power Cable Length
7.7' (2.35 m)
AC Connection Point Type
5 mm
FJ400: General
Display
LCD Color Display
Mount
5/8" / 16 mm Receptacle
Auto-Dump
Yes
Fan Cooled
Self-Monitoring Cooling Fans
Voltage Stabilization
Yes
Firmware Port Type
USB-C (Firmware)
Auto Memory Recall
Yes
Test Button
Yes
Auto-Power Off
Yes
Audible Beep
Yes
Umbrella Receptacle
Yes
FJ400: Dimensions & Weight
Weight (Battery & Reflector)
5.37 lbs (2.44 kg)
Length
11.50 in (29.2 cm)
Height
7.25 in (18.4 cm)
Diameter
5.50 in (14.0 cm)
Operating Temp
32~104°F / 0~40°C
NOTE
: Strobe performance, available features, and menu items are subject to change without notice.
Warranty Information
Westcott’s warranty obligations for this product are limited to the following terms.
The F.J. Westcott Co. (“Westcott”) warrants this Westcott branded product against defects in materials
and workmanship under normal use for a period of ONE (1) YEAR from the date of retail purchase from
Westcott or an authorized retailer by the original end-user purchaser (“Warranty Period”). If a defect
arises and a valid claim is received within the Warranty Period, at its option and to the extent permitted
by law, Westcott will either (1) repair the defect at no charge, using new or refurbished replacement parts,
19
  • Page 1 1
  • Page 2 2
  • Page 3 3
  • Page 4 4
  • Page 5 5
  • Page 6 6
  • Page 7 7
  • Page 8 8
  • Page 9 9
  • Page 10 10
  • Page 11 11
  • Page 12 12
  • Page 13 13
  • Page 14 14
  • Page 15 15
  • Page 16 16
  • Page 17 17
  • Page 18 18
  • Page 19 19
  • Page 20 20
  • Page 21 21

The Westcott FJ400 Strobe 1-Light Backpack Kit offers a compact and portable lighting solution with a powerful 400Ws strobe, a long-lasting lithium-polymer battery, and a variety of modifiers for shaping and controlling light. With its rapid recycling time of less than one second at full power, you can capture multiple shots in quick succession without missing a beat. The FJ400 features TTL and HSS modes, enabling precise exposure control and high-speed sync with compatible cameras. Its intuitive menu system and LCD display provide easy access to various settings and functions.

Ask a question and I''ll find the answer in the document

Finding information in a document is now easier with AI