Page is loading ...

1
For more cool and exciting Wattage products, visit our website at http://watt-age.globalhobby.com
The Wattage Thermalaire EP RTF is distributed exclusively by Global Hobby Distributors 18480 Bandilier Circle, Fountain Valley, CA 92728
IMPORTANT
The Wattage Thermalaire EP RTF is intended for individuals 12 years of age or older. Children under
12 years of age should always be accompanied by an adult when either assembling or flying the
airplane.
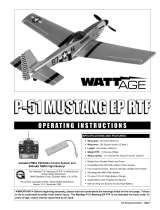
Specifications:
●
Wing Span: 72 inches
●
Wing Area: 505 square inches
●
Length: 34.5 inches
●
Weight Ready-to-Fly: 2.75 pounds
●
Wing Loading: 12.6 ounces per square foot
INSTRUCTION MANUAL
INSTRUCTION MANUAL
Includes Hitec Focus 3 Radio System and Wattage ESC Preinstalled!
Product Part Number 128424
All contents copyright © 2001, Global Hobby Distributors Version V1.0 November 2001
SAFETY WARNING
This R/C airplane is not a toy! If misused, it can cause serious bodily injury and/or damage to property. Fly only in open
areas and preferably at a dedicated R/C flying site. We suggest having a qualified instructor carefully inspect your
airplane before its first flight. Please carefully read and follow all instructions included with this airplane, your radio
control system and electronic speed control.

2
Need help or have any questions? Call us at 1-714-963-0329 or send us an email at service@globalhobby.net
Thank you for purchasing the new Wattage Thermalaire EP RTF and welcome to
the sport of radio control flying. Before completing the final assembly of your
new airplane, please carefully read through this instruction manual in its entirety.
Doing so will ensure success the first time around!
FOR YOUR INFORMATION
To make your modeling experience totally enjoyable, we recommend that you get experienced, knowledgeable help with
assembly and during your first flights. Your local hobby shop has information about flying clubs in your area whose
membership includes qualified instructors. If there is no hobby shop in your area, we recommend that you contact the
AMA at the address below. They will be able to help you locate a flying field near you.
Academy of Model Aeronautics
5151 East Memorial Drive
Muncie IN 47302-9252
(800) 435-9262
www.modelaircraft.org
When learning to fly model airplanes we strongly suggest seeking out a local model airplane flying
club in your area.
The Thermalaire EP RTF is the perfect airplane for both beginners and more experienced fliers alike. Beginners will
appreciate the Thermalaire's quick, easy assembly and forgiving slow-speed flight characteristics. More experienced
flyers will appreciate the Thermalaire's great flight qualities and quality balsa construction. Because of its size and
electric motor, the Thermalaire can be flown almost anywhere, too.
Thermalaire EP RTF Features:
●
All wood construction
●
Factory-covered in real iron-on covering material
●
Screwdriver-simple assembly - no glue required
●
Molded canopy is factory installed
●
Includes a factory-installed electric motor and low-drag folding propeller
●
Factory-installed Hitec Focus III AM radio system with Wattage IC-380 Super ESC
●
Final assembly is quick and easy. Only simple tools are required.
WARNING
The Hitec Focus III AM radio system (transmitter & receiver) included with the Thermalaire EP RTF operates on the
72Mhz frequency band for aircraft use only. By Federal FCC regulations it is illegal to use the included radio system
(transmitter & receiver) for any other use than operating R/C aircraft. Use in ground vehicles is strictly prohibited.
Each Hitec Focus III AM radio system comes with crystals and stickers on the back of the transmitter and on the
receiver showing which frequency the radio operates on within the 72Mhz band. No two radio systems can operate
nearby each other if they are on the same frequency.
The transmitter is a powerful device that transmits its signal farther than you can see your airplane. For this reason we
suggest checking around to make sure there are no other flyers or flying sites near you that you can't see. This will
prevent you from interfering with other flyers who might be on the same frequency as you. You can purchase transmit-
ter and receiver crystals separately and change them if someone else nearby is on the same frequency as you.

3
For more cool and exciting Wattage products, visit our website at http://watt-age.globalhobby.com
Section 1: Parts Identification
Before beginning assembly, remove the different parts from the box and use the photos below to verify that your kit
contains all of the correct parts. If your kit is missing a part, or if any parts appear to be damaged, please contact us
using the information below:
Wattage Customer Service
18480 Bandilier Circle
Fountain Valley CA 92728
Phone (714) 963-0329
Fax (714) 964-6236
Email: service@globalhobby.net
Wing Set
Fuselage Set
Horizontal & Vertical Tail Set
Transmitter
Decal Sheet
Clear Tape
Velcro
®
Steel Wing Joiners
Pushrod Set
Not Pictured: 2mm x 10mm Wood Screw (1)
Receiver

4
Need help or have any questions? Call us at 1-714-963-0329 or send us an email at service@globalhobby.net
If you should have any trouble with any of the steps listed in these instructions, we have provided a Troubleshooting
Guide on page # 25. The troubleshooting guide is provided to help you find a quick and immediate resolution to any
number of problems that might occur. If you cannot solve a problem using the troubleshooter, or if you have any other
questions or concerns, please contact us using the information below:
Wattage Customer Service
18480 Bandilier Circle
Fountain Valley, CA 92728
Phone (714) 963-0329
Fax (714) 964-6236
E-mail: service@globalhobby.net
FOR YOUR CONVENIENCE
We have included a glossary of terms on page # 25. Check it out if you come across any terms that are unfamiliar to you.
We know you're excited to get your new Thermalaire EP RTF flying, but take your time. Taking your time will ensure the
best possible success and fun.
Section 2: Our Recommendations
This section lists the items you will need to fly your new Thermalaire EP RTF. As you can see, there's not much to it!
●
Trinity "8 Pack" AA Alkaline batteries for the Transmitter - Part # 837801
●
Trinity 7 Cell Amp Max Sport Battery Pack - Part # 842010
●
Promax Black Widow AC/DC Peak Charger - Part # 350360
●
Large Flat Blade & Small Phillips Head Screwdrivers
●
Adjustable Wrench
●
Pair of Scissors
REPLACEMENT PARTS
Eventually you may need to purchase replacement parts for your airplane. For your convenience, we have listed on
page # 27 the replacement parts that are available for purchase.

5
For more cool and exciting Wattage products, visit our website at http://watt-age.globalhobby.com
Section 3: Assembling Your Thermalaire EP RTF
Step 1: Installing the Transmitter Antenna
❑ Line up the threaded end of the antenna with the
antenna mount in the top of the transmitter.
❑ Slide the end of the antenna down into the antenna
mount.
❑ Thread the antenna into the antenna mount and tighten
it very lightly.
Do not overtighten the antenna or you could damage
the transmitter.
Step 2: Installing the Transmitter Batteries
❑ Remove the battery cover from the bottom of the
transmitter by pushing out with your thumb at the mark
on the cover.

6
Need help or have any questions? Call us at 1-714-963-0329 or send us an email at service@globalhobby.net
❑ Carefully remove the battery holder from the
transmitter.
❑ Install 8 fresh AA Alkaline batteries into the battery
holder, being careful to watch that the polarity is correct
for each battery.
❑ Slide the battery holder back into the transmitter,
making sure that the electrical contacts on the end of the
battery holder match the contacts inside the transmitter.
❑ Push the battery cover back into place until you hear it "click" into position.

7
For more cool and exciting Wattage products, visit our website at http://watt-age.globalhobby.com
Step 3: Charging the Flight Battery
WARNING
Before charging the flight battery, please read and completely understand the operating instructions that were provided
with your battery charger. Failure to follow those guidelines could result in injury to yourself or damage the charger
and/or battery pack.
❑ Connect the power leads from your charger to its power source.
❑ Plug the flight battery connector into the battery
charger connector. When plugged in properly you should
hear the connectors "click" together.
Note that the plugs can be plugged in only one way.
IMPORTANT
We strongly suggest periodically checking the temperature of the flight battery during charging. If the battery gets hot, it
is fully charged and should be removed from the charger immediately.
❑ After charging is completed, remove the battery from the charger, then remove the charger from its power source.
You must squeeze the tab on the charger connector to be able to pull the two connectors apart.
Step 4: Assembling the Wing Panels
❑ Carefully line up one of the longer steel wing joiners
with the forward hole in one end of the center wing panel.
The center wing panel is the longest of the three wing
panels.

8
Need help or have any questions? Call us at 1-714-963-0329 or send us an email at service@globalhobby.net
❑ Push the wing joiner into the hole until it stops.
❑ Push one of the shorter wing joiners into the rear hole
using the same technique.
❑ Carefully line up the two holes in the matching outer
wing panel with the exposed ends of the wing joiners.
❑ Carefully push the two wing panels firmly together as shown.
The wing panels should fit tightly together.

9
For more cool and exciting Wattage products, visit our website at http://watt-age.globalhobby.com
❑ With both wing panels pushed firmly together, apply
a strip of clear tape to the top of the wing joint.
❑ Use scissors to trim the ends of the tape flush with
the wing, then turn the wing over and apply a strip to the
bottom of the joint.
The tape will keep the wing panels from pulling apart
during flight. Do not omit this procedure.
❑ Repeat the previous procedures to install the second outer wing panel to the center wing panel.
Step 5: Installing the Tail Assembly and Pushrods
❑ Insert the Z-Bend in one pushrod wire into the third
hole out from the base of the elevator control horn.
IMPORTANT
Install the Z-Bend so that the longer portion of the pushrod
wire faces toward the middle of the horizontal tail as
shown.
❑ Turn the horizontal tail right-side up and carefully
slide the plain end of the pushrod wire into the pushrod
exit hole in the right side of the fuselage.
❑ Push the stabilizer forward until it rests on top of the
mounting platform on the fuselage.
Fuselage shown upside down for photo clarity.

10
Need help or have any questions? Call us at 1-714-963-0329 or send us an email at service@globalhobby.net
❑ Push the horizontal tail back far enough to allow
room to slide the end of the pushrod wire through the
adjustable servo connector.
❑ Carefully slide the end of the pushrod through the
small hole in the side of the connector.
If the pushrod wire won't slide through, loosen the
set screw on top of the connector.
IMPORTANT
Don't tighten the set screw at this time.
❑ Remove the two hex nuts and two flat washers that are preinstalled on the vertical tail mounting studs.
❑ Remove the nylon rudder control horn using a phillips screwdriver to remove the two machine screws. Set the
control horn, backplate and screws aside for now.
IMPORTANT
The control horn must be removed to install the vertical tail.
❑ Line up the two tail mounting studs in the vertical
tail with the two holes in the horizontal tail.
❑ Line up the assembly and carefully push the vertical
tail down until the mounting screws extend out the bottom
of the fuselage.
You may have to move the horizontal tail slightly to
allow the mounting screws to pass through easily.

11
For more cool and exciting Wattage products, visit our website at http://watt-age.globalhobby.com
❑ Turn the fuselage upside down and slide one flat
washer onto each vertical tail mounting stud.
❑ Thread one hex nut onto each mounting stud and
tighten them both finger-tight.
❑ Use an adjustable wrench to tighten the hex nuts
firmly to draw the tail assembly down into place.
The tail assembly should be firmly tightened down
into place.
❑ Insert the Z-Bend in the remaining pushrod wire into
the third hole out from the base of the rudder control horn
that you removed previously.
IMPORTANT
Install the Z-Bend so that the longer portion of the pushrod
wire faces toward the right side of the control horn as
shown.
❑ Slide the plain end of the pushrod wire into the
pushrod exit hole in the left side of the fuselage.
❑ Slide the plain end of the pushrod wire through the
small hole in the side of the pushrod connector.
If the pushrod wire won't slide through, loosen the
set screw on top of the connector.
IMPORTANT
Don't tighten the set screw at this time.

12
Need help or have any questions? Call us at 1-714-963-0329 or send us an email at service@globalhobby.net
❑ Reinstall the control horn to the rudder using the two
machine screws and the nylon backplate you removed
previously. Tighten the machine screws snug, but not so
tight that you crush the wood.
Note that the longer portion of the pushrod wire
should come out on the top side of the control horn.
Step 6: Applying the Decals
❑ Using a pair of scissors, cut out each of the decals
along its outer edges.
❑ Remove the protective backing from the decals and
carefully apply the decals to the airframe.
Use the box cover photos as a reference for the decal
locations.

13
For more cool and exciting Wattage products, visit our website at http://watt-age.globalhobby.com
Step 7: Installing the Flight Battery
❑ Pull the two pieces of Velcro
®
apart.
❑ Remove the protective backing from one piece of
Velcro
®
.
❑ Apply that piece of Velcro
®
to the middle of the
battery as shown.
❑ Remove the protective backing from the remaining
piece of Velcro
®
.
❑ Apply the piece of Velcro
®
to the upper portion of
the battery tray as shown.
❑ Set the flight battery in place on top of the battery
tray.
The Velcro
®
should be facing down and the battery
plug should be toward the top of the fuselage.
❑ Push the flight battery down as far forward as it
will go. The Velcro
®
will keep it from sliding around
or backing out during flight.

14
Need help or have any questions? Call us at 1-714-963-0329 or send us an email at service@globalhobby.net
WARNING
Before proceeding, check to make sure the on/off switch
on the side of the fuselage is in the "off" position.
❑ Plug the connector on the flight battery into the
connector that is inside the fuselage. When plugged in
properly you should hear the connectors "click".
Note that the plugs can be plugged in only one way.
Step 8: Installing the Receiver
❑ Carefully remove the hatch cover from the bottom of
the fuselage by pulling up on the front of the cover.
❑ Plug the elevator, rudder and ESC leads into their proper slots in the receiver. The ESC plugs into slot 3, the rudder
plugs into slot 1 and the elevator plugs into slot 2.
❑ Push the wires down into the fuselage and set the
receiver on top of the preinstalled wooden rails inside
the hatch.
Make sure the receiver antenna is toward the back of
the fuselage.

15
For more cool and exciting Wattage products, visit our website at http://watt-age.globalhobby.com
❑ Push the end of the antenna through the predrilled
hole in the back of the hatch cover.
Push the antenna through from the bottom of the hatch
cover.
❑ Pull the antenna through the hole and set the hatch
cover back into place.
❑ Install and tighten the 2mm x 10mm wood screw to
secure the hatch cover to the fuselage.
IMPORTANT
The hatch cover will hold the receiver securely in place.
❑ Pull the antenna taut (but not overly tight) and use a small piece of clear tape to secure it to the back of the fuselage.
WARNING
Do not cut off the excess antenna. Let the excess hang behind the airplane. If you cut the antenna it will greatly reduce
the range of the receiver and you will lose control of the airplane.
Step 9: Connecting the Control Surfaces
❑ Turn on the transmitter. The green LED should light
up.
IMPORTANT
Before turning on the transmitter, check to make sure the
switch on the side of the fuselage is "off."
This will prevent unexpected radio signals from
interfering with your radio system.

16
Need help or have any questions? Call us at 1-714-963-0329 or send us an email at service@globalhobby.net
❑ Carefully adjust the left and right and the up and down
control trim levers until they are both centered as shown.
❑ Double check to make sure the throttle control lever
is in the "off" position as shown.
❑ Push the switch on the side of the fuselage to turn on
the airborne system (ESC, receiver and servos). You
should hear the servos center themselves.
Double-check that the throttle lever is set to "off."
This will prevent the propeller from spinning when you
turn on the airborne system.
WARNING
Keep clear of the propeller when turning on the airborne
system and when working the controls.
IMPORTANT
To prevent unwanted signals from interfering with the radio system, always turn on the transmitter first, followed by the
airborne system. When done flying, turn off the airborne system first, followed by the transmitter.

17
For more cool and exciting Wattage products, visit our website at http://watt-age.globalhobby.com
❑ While holding the horizontal control surface even with the
horizontal tail, use a phillips head screwdriver to tighten the set
screw in the top of the adjustable servo connector.
❑ While holding the vertical control surface even with the
vertical tail, use a phillips head screwdriver to tighten the set
screw in the top of the adjustable servo connector.
Step 10: Installing the Wing
❑ Set the wing into the wing saddle and align the brass insert in the leading edge of the wing with the pin in the
fuselage's forward bulkhead.
❑ Slide the wing forward completely, making sure the brass insert slides over the pin.
❑ Insert the two nylon bolts through the two predrilled
holes in the top of the wing and thread them into the
plywood mounting block preinstalled in the fuselage.
❑ Tighten the two screws using a large flat blade
screwdriver.
WARNING
Do not overtighten the screws or you may crush the wing.

18
Need help or have any questions? Call us at 1-714-963-0329 or send us an email at service@globalhobby.net
Step 1: Verifying Control Surface Direction
❑ Plug in and install the flight battery.
❑ Turn on the transmitter, then turn on the airborne system.
WARNING
During this step, make sure to keep the throttle control lever in the "off" position.
❑ Looking from the back of the airplane, move the transmitter
control stick completely to the left. The vertical control surface
should move left.
❑ Looking from the back of the airplane, move the transmitter
control stick completely to the right. The vertical control surface
should move right.
Section 4: Testing Your Thermalaire EP RTF

19
For more cool and exciting Wattage products, visit our website at http://watt-age.globalhobby.com
❑ Looking from the back of the airplane, move the transmitter
control stick completely back. The horizontal control surface
should move up.
❑ Looking from the back of the airplane, move the transmitter
control stick completely forward. The horizontal control surface
should move down.
Step 2: Testing the Motor
WARNING: During the motor test keep everything clear
of the propeller, especially fingers and loose clothing.
❑ While holding the airplane upright in the air with the
propeller pointing away from you, slide the throttle con-
trol lever completely to the right. The propeller should
spin at a high rate of speed.
❑ When finished with the test, slide the throttle control
lever completely to the left; the motor should turn off.
Turn off the airborne system, then turn off the transmitter.

20
Need help or have any questions? Call us at 1-714-963-0329 or send us an email at service@globalhobby.net
Step 2: Choosing a Day to Fly
❑ Until you become a proficient flyer you should always plan on flying your Thermalaire when there's no wind. We
strongly suggest waiting for a calm day.
❑ Snap the red flag to the end of the transmitter's antenna.
❑ Hold the transmitter up at an angle. If the flag hangs down,
go ahead and fly.
❑ If the flag hangs at a 45º angle or more, don't fly. Wait for
a calmer day.
Step 1: Choosing Your Flying Field
❑ The flying field you choose should be a large, open field with grass. There should not be any vehicles, buildings,
power lines, trees, large rocks - or anything else for your airplane to crash into.
There's no wind.
It's okay to fly.
There's too much wind.
Wait for a calmer day to fly.
Section 5: Getting Ready to Fly
/