Page is loading ...

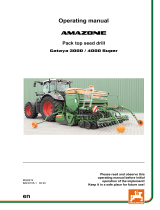
Original operating manual
Trailed seed drill
Primera DMC 6000-2
ISOBUS
SmartLearning
www.amazone.de

Please enter the identication data of the implement. The identication data can be found on
the rating plate.

TABLE OF CONTENTS
1 About this operating manual 1
1.1 Copyright 1
1.2 Diagrams 1
1.2.1 Warnings and signal words 1
1.2.2 Further instructions 2
1.2.3 Instructions 2
1.2.4 Lists 4
1.2.5 Item numbers in figures 4
1.2.6 Direction information 4
1.3 Other applicable documents 4
1.4 Digital operating manual 4
1.5 Your opinion is important 4
2 Safety and responsibility 5
2.1 Basic safety instructions 5
2.1.1 Meaning of the operating manual 5
2.1.2 Safe operating organisation 5
2.1.3 Knowing and preventing dangers 10
2.1.4 Safe operation and handling of the
machine 12
2.1.5 Safe maintenance and modification 14
2.2 Safety routines 17
3Intended use 19
4 Product description 20
4.1 Implement overview 20
4.2 Function of the implement 21
4.3 Special equipment 22
4.4 Protective equipment 23
4.4.1 Fan guard screen 23
4.4.2 Railing on the service platform 23
4.4.3 Guard screen over the metering units 24
4.5 Warning symbols 24
4.5.1 Positions of the warning symbols 24
4.5.2 Layout of the warning symbols 26
4.5.3 Description of the warning symbols 26
4.6 Rating plate on the implement 33
4.7 Additional rating plate 33
4.8 Brake systems 34
4.8.1 Dual-circuit pneumatic brake system 34
4.8.2 Single-circuit hydraulic brake system 34
4.9 Safety chain 35
4.10 Safety device against
unauthorised use 35
4.11 Rear lighting and identification
for road travel 36
4.12 Front lighting and identification 36
4.13 Additional license plate 37
4.14 Work lights 37
4.15 Camera system 37
4.16 On-board hydraulic system 38
4.17 TwinTerminal 39
4.18 mySeeder app 39
4.19 Radar sensor 40
4.20 Hopper 40
4.21 Fan 41
4.22 Metering system 42
4.22.1 Metering unit 42
4.22.2 Metering roller 42
4.22.3 Conveyor sections 42
4.22.4 Distributor head and tramline control 43
4.22.5 Assignment of the coulters to the
distributor heads 44
4.23 Chisel coulter 46
4.24 Exact following harrow 47
4.25 Track marker 48
4.26 Tramline marker 48
4.27 GreenDrill pack top seed drill 49
TABLE OF CONTENTS
MG7612-EN-II | A.1 | 02.11.2023 | © AMAZONE I

4.28 Micro plus micropellet spreader 49
5Technical data 50
5.1 Dimensions 50
5.2 Hopper volume 50
5.3 Micro plus hopper volume 50
5.4 Coulters 51
5.5 Mounting category 51
5.6 Permissible payload 51
5.7 Optimal working speed 51
5.8 Spread rate and area efficiency 52
5.9 Performance characteristics of
the tractor 52
5.10 Hydraulic oil for the on-board
hydraulic system 53
5.11 Noise development data 53
5.12 Drivable slope inclination 53
5.13 Soil properties 54
5.14 Lubricants 54
6Preparing the machine 55
6.1 Checking the tractor suitability 55
6.1.1 Calculating the required tractor
characteristics 55
6.1.2 Determining the required coupling
devices 58
6.1.3 Comparing the permissible DC
value with actual DC value 59
6.2 Coupling the implement 59
6.2.1 Removing the safety device against
unauthorised use 59
6.2.2 Driving the tractor towards the
implement 60
6.2.3 Fastening the safety chain 60
6.2.4 Coupling the hydraulic hose lines 60
6.2.5 Coupling the hydraulic pump 63
6.2.6 Coupling the power supply 63
6.2.7 Coupling the brake system 64
6.2.8 Coupling the ISOBUS or control
computer 65
6.2.9 Coupling on the lower link hitch 65
6.2.10 Coupling the ball hitch coupling or
drawbar eye 66
6.2.11 Removing the wheel chocks 68
6.2.12 Releasing the parking brake 68
6.3 Preparing the implement for
operation 68
6.3.1 Unfolding the implement 68
6.3.2 Adjusting the placement depth of
the chisel coulters 69
6.3.3 Adjusting the penetration angle of
the duckfoot chisels 70
6.3.4 Adjusting the pitch of the depth
control wheels 70
6.3.5 Adjusting the pitch of the exact
following harrow 71
6.3.6 Adjusting the working depth of the
exact following harrow 72
6.3.7 Moving the roller harrow into
working position or parking position 73
6.3.8 Repositioning the fill level sensor 73
6.3.9 Filling the hopper 74
6.3.10 Preparing for filling the GreenDrill
pack top seed drill 80
6.3.11 Preparing for filling the micropellet
spreader 80
6.3.12 Filling the hopper of the micropellet
spreader 80
6.3.13 Calibrating the metering unit of the
micropellet spreader 81
6.3.14 Adjusting the track marker 84
6.3.15 Adjusting the tramline marker 86
6.3.16 Preparing the metering unit for
operation 87
6.3.17 Operating the one-sided switching 95
6.3.18 Adjusting the fan speed 96
6.3.19 Adjusting the tramline rhythm 98
6.4 Preparing the machine for road
travel 103
6.4.1 Adjusting the brake power of the
dual-circuit pneumatic brake system 103
6.4.2 Putting the road safety bars on the
exact following harrow 104
6.4.3 Folding the implement 104
6.4.4 Locking the tractor control units 105
TABLE OF CONTENTS
MG7612-EN-II | A.1 | 02.11.2023 | © AMAZONE
II

6.4.5 Aligning the implement horizontally
with lower link hitch 105
7Using the machine 106
7.1 Moving the implement into
working position 106
7.2 Using the implement 107
7.3 Checking the placement depth 108
7.4 Cleaning the dust separator 108
7.5 Turning on the headlands 109
8 Eliminating faults 110
9Parking the machine 112
9.1 Emptying the hopper via the
quick emptying 112
9.2 Emptying the hopper 112
9.3 Emptying the metering unit 115
9.4 Emptying the metering unit and
hopper of the micropellet spreader 117
9.5 Preparing the implement for
parking 119
9.6 Applying the parking brake 120
9.7 Placing the wheel chocks 120
9.8 Uncoupling the lower link hitch 121
9.8.1 Swivelling down the jack 121
9.8.2 Uncoupling the tractor's lower link 121
9.9 Uncoupling the ball coupling or
drawbar eye 122
9.9.1 Lowering the jack 122
9.9.2 Uncoupling the drawbar eye 122
9.9.3 Uncoupling the ball hitch coupling 123
9.10 Driving the tractor away from the
implement 123
9.11 Uncoupling the power supply 123
9.12 Uncoupling the ISOBUS or
control computer 124
9.13 Uncoupling the brake system 124
9.13.1 Uncoupling the dual-circuit
pneumatic brake system 124
9.13.2 Uncoupling the single-circuit
hydraulic brake system 125
9.14 Disconnecting the hydraulic
hose lines 125
9.15 Uncoupling the hydraulic pump 126
9.16 Releasing the safety chain 126
9.17 Putting on the safety device
against unauthorised use 127
10 Repairing the machine 128
10.1 Maintaining the implement 128
10.1.1 Maintenance schedule 128
10.1.2 Checking the hydraulic hose lines 129
10.1.3 Checking the pneumatic brake
system 130
10.1.4 Checking the compressed air tank 130
10.1.5 Draining the compressed air tank 131
10.1.6 Cleaning the compressed air line
filter 132
10.1.7 Checking the brake pads 133
10.1.8 Checking the tyre inflation pressure 134
10.1.9 Checking the tightening torque of
the wheel nuts 135
10.1.10 Checking the lower link pins 135
10.1.11 Checking the lower link hitch 136
10.1.12 Checking the ball hitch coupling 136
10.1.13 Checking the drawbar eye 137
10.1.14 Checking the hydraulic oil filter for
soiling on implements without on-
board hydraulic system 138
10.1.15 Checking the oil filter of the on-
board hydraulic system for soiling 138
10.1.16 Checking the oil level of the on-
board hydraulic system 139
10.1.17 Changing the oil and filter for the
on-board hydraulic system 140
10.1.18 Checking the tightening torque for
the radar sensor bolts 141
10.2 Lubricating the implement 142
10.2.1 Overview of lubrication points 143
10.3 Cleaning the implement 145
10.3.1 Cleaning the implement 145
10.3.2 Cleaning the distributor head 145
TABLE OF CONTENTS
MG7612-EN-II | A.1 | 02.11.2023 | © AMAZONE III

10.3.3 Cleaning the hopper 146
11 Manoeuvring the implement 148
11.1 Manoeuvring the implement with
dual-circuit pneumatic brake
system 148
11.2 Manoeuvring an implement with
single-circuit hydraulic brake
system 149
12 Loading the implement 151
12.1 Lashing the implement 151
13 Disposing of the implement 152
14 Appendix 153
14.1 Bolt tightening torques 153
14.2 Other applicable documents 154
15 Directories 155
15.1 Glossary 155
15.2 Index 156
TABLE OF CONTENTS
MG7612-EN-II | A.1 | 02.11.2023 | © AMAZONE
IV

About this operating manual 1
1.1 Copyright
Reprinting, translation and reproduction in any form,
including excerpts, require the written approval of
AMAZONEN-WERKE.
1.2 Diagrams
1.2.1 Warnings and signal words
Warnings are marked with a vertical bar with a
triangular safety symbol and the signal word. The
signal words "DANGER", "WARNING" or "CAUTION"
describe the severity of the potential danger and have
the following meanings:
DANGER
Indicates a direct threat with high risk for
severe physical injury, such as loss of
limbs or death.
WARNING
Indicates a possible threat with moderate
risk for severe physical injury or death.
CAUTION
Indicates a threat with low risk for light or
moderately severe physical injuries.
CMS-T-00000081-I.1
CMS-T-00012308-A.1
CMS-T-005676-F.1
CMS-T-00002415-A.1
1 | About this operating manual
MG7612-EN-II | A.1 | 02.11.2023 | © AMAZONE 1

1.2.2 Further instructions
IMPORTANT
Indicates a risk for damage to the
implement.
ENVIRONMENTAL INFORMATION
Indicates a risk for environmental damage.
NOTE
Indicates application tips and instructions for
optimal use.
1.2.3 Instructions
1.2.3.1 Numbered instructions
Actions that have to be performed in a specific
sequence are represented as numbered instructions.
The specified sequence of the actions must be
observed.
Example:
1. Instruction 1
2. Instruction 2
1.2.3.2 Instructions and responses
Reactions to instructions are marked with an arrow.
Example:
1. Instruction 1
Reaction to instruction 1
2. Instruction 2
CMS-T-00002416-A.1
CMS-T-00000473-D.1
CMS-T-005217-B.1
CMS-T-005678-B.1
1 | About this operating manual
Diagrams
MG7612-EN-II | A.1 | 02.11.2023 | © AMAZONE
2

1.2.3.3 Alternative instructions
Alternative instructions are introduced with the word
"or".
Example:
1. Instruction 1
or
Alternative instruction
2. Instruction 2
1.2.3.4 Instructions with only one action
Instructions with only one action are not numbered,
but rather shown with a arrow.
Example:
Instruction
1.2.3.5 Instructions without sequence
Instructions that do not require a specific sequence
are shown as a list with arrows.
Example:
Instruction
Instruction
Instruction
1.2.3.6 Workshop work
WORKSHOP WORK
Identifies maintenance work that must be
performed at a workshop that is adequately
equipped in terms of agricultural technology,
safety and environmental technology by
specialist personnel with appropriate training.
CMS-T-00000110-B.1
CMS-T-005211-C.1
CMS-T-005214-C.1
CMS-T-00013932-B.1
1 | About this operating manual
Diagrams
MG7612-EN-II | A.1 | 02.11.2023 | © AMAZONE 3

1.2.4 Lists
Lists without an essential order are shown as a list
with bullets.
Example:
Point 1
Point 2
1.2.5 Item numbers in figures
A framed number in the text, e.g. a
1
, indicates an
item number in an adjacent figure.
1.2.6 Direction information
Unless otherwise specified, all directions are always
seen in the direction of travel.
1.3 Other applicable documents
A list of other applicable documents can be found in
the Appendix.
1.4 Digital operating manual
The digital operating manual and e-learning can be
downloaded from the Info Portal on the AMAZONE
website.
1.5 Your opinion is important
Dear reader, our documents are updated on a regular
basis. Your suggestions for improvement help us to
create ever more user-friendly documents. Please
send us your suggestions by post, fax or email.
AMAZONEN-WERKE H. Dreyer & Co. KGSE
Technische Redaktion
Postfach 51
D-49202 Hasbergen
Fax: +49 (0) 5405 501-234
E-Mail: tr[email protected]
CMS-I-00000638
CMS-T-000024-A.1
CMS-T-000023-B.1
CMS-T-00012309-A.1
CMS-T-00000616-B.1
CMS-T-00002024-B.1
CMS-T-000059-D.1
1 | About this operating manual
Other applicable documents
MG7612-EN-II | A.1 | 02.11.2023 | © AMAZONE
4

Safety and responsibility 2
2.1 Basic safety instructions
2.1.1 Meaning of the operating manual
Observe the operating manual
The operating manual is an important document and a part of the implement. It is intended for the user and
contains safety-related information. Only the instructions provided in the operating manual are reliable. If
the operating manual is not observed, it can result in serious injury or death.
The safety section must be completely read and observed before initial operation of the implement.
Before starting work, also read and observe each section of the operating manual.
Keep the operating manual in a safe place.
Keep the operating manual available.
Hand over the operating manual to the subsequent user.
2.1.2 Safe operating organisation
2.1.2.1 Personnel qualification
2.1.2.1.1 Requirements for persons working with the implement
If the implement is used improperly, people can
be injured or killed: To prevent accidents due
to improper use, every person who works with
CMS-T-00010771-B.1
CMS-T-00010772-B.1
CMS-T-00006180-A.1
CMS-T-00002302-D.1
CMS-T-00002306-B.1
CMS-T-00002310-B.1
2 | Safety and responsibility
MG7612-EN-II | A.1 | 02.11.2023 | © AMAZONE 5

the implement must meet the following minimum
requirements:
The person is physically and mentally capable of
checking the implement.
The person can safely perform work with the
machine within the scope of this operating
manual.
The person understands the functioning of the
machine within the scope of their work and can
recognise and prevent dangers arising during
operation.
The person head understood the operating
manual and can implement the information that is
conveyed in the operating manual.
The person must be familiar with safe driving of
vehicles.
For road travel, the person knows the relevant
road traffic regulations and has the prescribed
driving permit.
2.1.2.1.2 Qualification levels
For working with the machine, the following
qualification levels are provided:
Farmer
Agricultural helper
As a matter of principle, the activities described in this
operating manual can be performed by persons with
the qualification level "Agricultural helper".
2.1.2.1.3 Farmer
Farmers use agricultural implement to cultivate fields.
They decide on the use of an implement for a specific
purpose.
Farmers are basically familiar with working with
agricultural implements and can instruct agricultural
helpers in how to use the implements if necessary.
They can perform odd tasks and simple maintenance
and repair work on agricultural implements
themselves.
CMS-T-00002311-A.1
CMS-T-00002312-A.1
2 | Safety and responsibility
Basic safety instructions
MG7612-EN-II | A.1 | 02.11.2023 | © AMAZONE
6

Farmers can be e.g.:
Farmers with higher education or training from a
technical college
Farmers by experience (e.g. inherited farm,
comprehensive practical knowledge)
Contractors who work by order of farmers
Activity example:
Safety training for agricultural helpers
2.1.2.1.4 Agricultural helpers
Agricultural helpers use agricultural implements by
order of the farmer. They are instructed on the use of
the implement by the farmer, and work independently
according to the work assignment from the farmer.
Agricultural helpers can be e.g.:
Seasonal workers and labourers
Prospective farmers in training
Employees of the farmer (e.g. tractor driver)
Family members of the farmer
Activity examples:
Driving the machine
Adjusting the working depth
2.1.2.2 Workplaces and passengers
Passengers
Passengers can fall, be run over and severely injured or killed due to machine movements. Ejected objects
can hit and injure passengers.
Do not let anybody ride on the machine.
Do not let anybody climb onto the driving machine.
CMS-T-00002313-A.1
CMS-T-00002307-B.1
2 | Safety and responsibility
Basic safety instructions
MG7612-EN-II | A.1 | 02.11.2023 | © AMAZONE 7

2.1.2.3 Danger for children
Danger for children
Children cannot assess dangerous situations and can behave unpredictably. As a result, children are at a
higher risk.
Keep children away.
When you drive out or actuate machine movements,
make sure that there are no children in the danger area.
2.1.2.4 Operational safety
2.1.2.4.1 Perfect technical condition
Only use properly prepared machines
Without correct preparation according to this operating manual, operational safety of the machine is not
ensured. This can result in accidents and serious personal injury or even death.
Prepare the machine according to this operating manual.
Danger due to damage to the machine
Damage to the machine can impede the operational safety of the machine and cause accidents. This can
result in serious injury or death.
If you suspect or observe damage:
Secure the tractor and machine.
Repair safety-relevant damage immediately.
Fix the damage according to this operating manual.
If you are not able to the damage according to this operating manual yourself:
Have the damage repaired by a qualified specialist workshop.
Observe the technical limit values
Non-observance of the technical limits values of the machine can result in accidents and serious personal
injury or even death. Moreover, the machine can be damaged. The technical limit values can be found in
the Technical Data.
Comply with the technical limit values.
CMS-T-00002308-A.1
CMS-T-00002309-D.1
CMS-T-00002314-D.1
2 | Safety and responsibility
Basic safety instructions
MG7612-EN-II | A.1 | 02.11.2023 | © AMAZONE
8

2.1.2.4.2 Personal protective equipment
Personal protective equipment
Wearing personal protective equipment is an important safety element. Missing or unsuitable personal
protective equipment increases the risk of damage to health and personal injury. Personal protective
equipment includes: work gloves, safety shoes, protective clothing, breathing protection, hearing protection,
face protection, and eye protection
Determine the personal protective equipment required for each job and have it ready.
Use only protective equipment that is in proper condition and offers effective protection.
Adjust the personal protective equipment to the person, e.g. the size.
Observe the manufacturer's instructions regarding operating materials, seed, fertiliser, crop protection
products, and cleaning agents.
Wear suitable clothing
Loosely worn clothing increases the risk of getting caught or entangled on rotating parts and getting stuck
on protruding parts. This can result in serious injury or death.
Wear close-fitting, snag-free clothes.
Never wear rings, necklaces and other jewellery.
If you have long hair,
wear a hairnet.
2.1.2.4.3 Warning symbols
Keep warning symbols legible
Warning symbols on the machine warn you of risks in danger areas and are an important element of
the machine's safety equipment. Missing warning symbols increase the risk of serious and lethal personal
injury.
Clean dirty warning symbols.
Immediately replace any damaged and illegible warning symbols.
Put the intended warning symbols on spare parts.
CMS-T-00002316-B.1
CMS-T-00002317-B.1
2 | Safety and responsibility
Basic safety instructions
MG7612-EN-II | A.1 | 02.11.2023 | © AMAZONE 9

2.1.3 Knowing and preventing dangers
2.1.3.1 Safety hazards on the machine
Liquids under pressure
Escaping high pressure hydraulic fluid can penetrate into the body through the skin and cause serious
personal injuries. A hole the size of a needle can already result in serious personal injuries.
Before you uncouple the hydraulic hose lines or check for damage,
depressurise the hydraulic system.
If you suspect damage on a pressure system,
have the pressure system checked by a qualified specialist workshop.
Never look for leaks with your bare hands.
Keep your body and face away from leaks.
If liquids penetrate the body,
consult a doctor immediately.
CMS-T-00010773-A.1
CMS-T-00004924-B.1
2 | Safety and responsibility
Basic safety instructions
MG7612-EN-II | A.1 | 02.11.2023 | © AMAZONE
10

2.1.3.2 Danger areas
Dangers areas on the implement
The following basic dangers are encountered in
the danger areas:
The implement and its work tools move during
operation.
Hydraulically raised implement parts can descend
unnoticed and slowly.
The tractor and implement can roll away
unintentionally.
Materials or foreign objects can be ejected out of
or away from the implement.
If the danger area is not observed, it can result in
serious personal injury or death.
Keep people out of the danger area of the
implement.
If people enter the danger area,
immediately switch off the engines and
drives.
Before you work in the danger area of the
implement,
secure the tractor and implement. This also
applies for quick checking work.
CMS-I-00007445
CMS-T-00010774-A.1
2 | Safety and responsibility
Basic safety instructions
MG7612-EN-II | A.1 | 02.11.2023 | © AMAZONE 11

2.1.4 Safe operation and handling of the machine
2.1.4.1 Coupling implements
Coupling the implement on the tractor
Incorrectly coupling of the implement to the tractor results in hazards that can cause serious accidents.
There are crushing and shear points in the area of the coupling points between the tractor and the
implement.
If you couple or uncouple the implement to or from the tractor,
be very careful.
Use only suitable tractors for coupling and transporting the implement.
When the implement is coupled onto the tractor,
make sure that the tractor's connecting device meets the implement requirements.
Couple the implement properly to the tractor.
2.1.4.2 Driving safety
Risk when driving on roads and fields
Any mounted or towed implement as well as front or rear ballast weights on the tractor influence the driving
behaviour and the steering and braking power of the tractor. The driving characteristics also depend on
the operating condition, the fill level of the load, and on the ground. If the driver does not take account of
changing driving characteristics, he can cause accidents.
Always ensure that the tractor's steering and braking systems are operating correctly.
The tractor must provide the required brake lag for the tractor and mounted implement.
Check the function of the brakes before moving off.
The tractor front axle must always be loaded with at least 20 % of the empty tractor weight to
ensure steering power.
Use front ballast weights if necessary.
Always attach the front or rear ballast weights properly on the specified fixing points.
Calculate and observe the permitted payload for the mounted or towed implement.
Observe the permissible axle loads and drawbar loads of the tractor.
Observe the permissible drawbar load of the hitch device and drawbar.
Drive in such a way that you always have full control over the tractor with the mounted or towed
implement. In so doing, take your personal abilities into account, as well as the road, traffic, visibility
and weather conditions, the driving characteristics of the tractor, and the influence of the mounted
implement.
CMS-T-00002304-I.1
CMS-T-00002320-D.1
CMS-T-00002321-E.1
2 | Safety and responsibility
Basic safety instructions
MG7612-EN-II | A.1 | 02.11.2023 | © AMAZONE
12

When driving on roads, risk of accident caused by uncontrolled lateral motions of the implement
Lock the tractor lower links for road travel.
Preparing the machine for road travel
If the machine is not properly prepared for road travel, it can result in serious traffic accidents.
Check the lighting and identification for road travel for proper function.
Remove coarse dirt from the implement.
Follow the instructions in the section "Preparing the implement for road travel".
Parking the implement
The parked machine can tip over. People can be crushed and killed.
Only park the machine on stable and even ground.
Before you perform setting or maintenance work,
make sure that the implement is in a stable position. In case of doubt, support the implement.
Follow the instructions in the section "Parking the implement".
Unsupervised parking
Parked tractors with coupled implements that are insufficiently secured and unsupervised represent danger
for people and playing children.
Before you leave the machine,
shutdown the tractor and the implement.
Secure the tractor and machine.
2 | Safety and responsibility
Basic safety instructions
MG7612-EN-II | A.1 | 02.11.2023 | © AMAZONE 13

2.1.5 Safe maintenance and modification
2.1.5.1 Changes on the implement
Only authorised design changes
Design changes and extensions can impede the functioning and operational safety of the machine. This
can result in serious injury or death.
Have any design changes and extensions performed only by a qualified specialist workshop.
To ensure that the operating permit remains valid in accordance with national and international
regulations,
ensure that the specialist workshop only uses conversion parts, spare parts and special equipment
approved by AMAZONE.
2.1.5.2 Work on the machine
Only work on the machine when it is at a standstill
If the machine is not standing still, part can move unintentionally or the machine can be set in motion. This
can result in serious injury or death.
Before performing any work on the machine, shutdown and secure the machine.
To immobilise the machine,
perform the following tasks.
If necessary, secure the machine against rolling away with wheel chocks.
Lower lifted loads down to the ground.
Relieve the pressure in the hydraulic hose lines.
If you have to work on or under raised loads,
lower the loads or secure raised machine parts with a hydraulic or mechanical locking device.
Switch off all drives.
Actuate the parking brake.
Particularly on slopes, additionally secure the machine against rolling away with wheel chocks.
Remove the ignition key and carry it with you.
Remove the key from the battery circuit breaker.
Wait until all parts that are still running come to a stop and that hot parts cool down.
CMS-T-00002305-H.1
CMS-T-00002322-B.1
CMS-T-00002323-G.1
2 | Safety and responsibility
Basic safety instructions
MG7612-EN-II | A.1 | 02.11.2023 | © AMAZONE
14
/