Copyright © All Rights Reserved. P-MU-WLP-100 Published: 2022.05.13 2
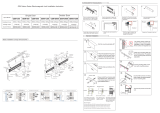
1. Door & Frame Inspection
Installation Steps
Installation &Wiring
Included in Package
Door Side Unit Frame Side Unit Door Side Template Frame Side Template
Wood Screws Metal Screws Mounting Tabs
Note: For optimal performance, it is recommended to minimize the door gap and use the supplied
templates. The WLP-100 allows for some horizontal and vertical misalignment. Tolerance for
minor misalignment will increase as door gap decreases.
After checking the door and frame conditions, apply the templates at the appropriate location.
The WLP-100 can be installed on the latch side, hinge side, or top of the door.
Washers
1a. Apply the door side template. 1b. Apply the frame side template. Make sure to
align the horizontal and vertical centerlines.
Align the centerline
on the template.
2. Metal Door Installation
2a. Center punch the screw locations for mounting
tabs and counter-sink for M5 screw.
2b. Cut out the main body on the door.


