Page is loading ...

30496, 50496, 80496
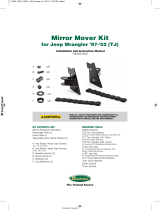
Stainless Steel E-Z Detach Mirrors
for Jeep® vehicles 1997 - current
REQUIRED TOOLS
T40 TORX BIT
5MM ALLEN KEY OR SOCKET
RATCHET
14MM WRENCH
13MM WRENCH
KIT CONTAINS
STAINLESS MIRROR HEADS AND HARDWARE
STAINLESS MIRROR ARM BRACKETS, BUSHINGS,
ADJUSTMENT KNOBS AND WASHERS
STAINLESS M8 BUTTON HEAD BOLTS (JK)
5/16” BUTTON HEAD BOLTS (TJ)
STAINLESS STORAGE WINGNUT
QTY
2 EACH
2 EACH
4
4
2

30496, 50496, 80496
Stainless Steel E-Z Detach Mirrors
for Jeep® vehicles 1997 - current
2
1) REMOVE HINGE BOLTS
Start on the passenger’s side by
removing the two Torx bolts with a T40
Torx bit.
2007-Current Wrangler JK, remove the 2
upper windshield bolts (figure 1).
1997-2006 Wrangler TJ, remove the 2
lower flush-mount bolts (figure 2).
2) IDENTIFY MIRROR SIDE
Identify the passenger’s side mirror.
When installed, the mirror arms should
point up upward.
3) INSTALL HINGE BRACKET
Remove the adjusting knob, washer,
mirror arm and bushing before installing
the mounting bracket on the vehicle.
When installing the bracket, ensure the
weldnut faces down as seen in figure 3.
Using the proper supplied hardware for
your model year, install two Allen head
bolts and tighten using a 5mm Allen
socket and a ratchet, or Allen key.
2007-Current JK - M8 bolts
1997-2006 TJ - 5/16” bolts
If bolts do not thread in easily, stop and
double check you’re using the correct
hardware.
Figure 1: JK - remove upper two T40 Torx bolts.
Figure 2: TJ - remove lower T40 Torx bolts.
Figure 3: Ensure weldnut is facing down.

30496, 50496, 80496
Stainless Steel E-Z Detach Mirrors
for Jeep® vehicles 1997 - current
3
4) INSTALL ARM TO BRACKET
Reinstall the mirror arm and bushing and
secure it using the threaded adjustment
knob and washer. Snug the knob so the
mirror arm is secure but still allows for
some adjustment.
Insert threaded part of mirror head in
mirror arm mounting hole. Tighten the
mirror head with a 13mm wrench (figure
5).
The tension of the mirror head can be
adjusted using the top phillips head
screw on the backside of the mirror
(figure 6). DO NOT OVER TIGHTEN. The
mirror should not be so tight that it
cannot be adjusted.
5) Final Adjustments
Adjust mirror then check and snug all
fasteners. Repeat steps for the
passenger side mirror.
6) Storage
When mirrors are not in use, such as
when doors and stock mirrors are
reinstalled, the provided stainless
wingnut should be used to keep mirror,
mirror arm, knob, and bushing together
for storage (figure 7).
Figure 4: Install mirror arm and bushing with knob and
washer.
Figure 5: Mirror head installed on mirror arm
assembly.
Figure 6: Mirror tension adjustment screw.
Figure 7: Install wingnut to keep assembly together
during storage.
/


