2007 JK Wrangler Mirror Relocation Kit
P/N: 11025.04 (Black) – 11026.04 (Stainless)
Applications: 2007-08 Wrangler 4dr and 2dr
PLEASE READ THESE INSTRUCTIONS prior to installing.
This kit requires you to remove your factory mirror from your 2007-2008 Wrangler front doors. In most
states it is required to maintain at least two rear facing mirrors at all time on any motor vehicle. With
your new Rugged Ridge mirror relocation kit the location of your factory mirror head is moved
forward, off the door, to the front A-pillar (windshield frame). Once relocated a special door filler plate
is supplied to cover the opening left on the factory half, or full doors. This plate will allow you remove
your doors at anytime for open air driving.
PLEASE NOTE: Due to the placement of the new mirror brackets, the passenger side mirror will be
partially blocked with full doors reinstalled. This is normal and is an unfortunate side effect of the
new mirror placement. With doors removed or the installation of factory half doors visibility will NOT
be blocked and function as intended.
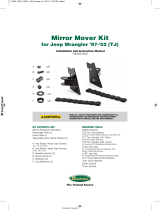
This Mirror Relocation bracket
includes:
(1) Left side mirror
relocation bracket
(1) Right side mirror
relocation bracket
(
2
)
Door filler Plates
1

11025.04 – 11026.04 JK Wrangler Mirror Relocation Kit
Installation Instructions
Step 3: Remove the front 2 torx head bolts from the
windshield retainer bracket.
(DO NOT DISCARD THESE BOLTS Both these bolts will be
reused to install the mirror relocation bracket in ste
p
4.
Step 1: Using a #40 torx head bit or socket, unscrew the
torx head bolt located under the head of the factory mirror.
DO NOT DISCARD THIS BOLT
It will be reused later for reassembly. Remove the mirror
head.
NOTE: Some force may be needed to remove the mirror
head from the bracket. Carefully work the mirror head
from side to side until it is free.
Step 2: With the mirror head removed, open the front door
and lower the window. Working through the window using
the same #40 torx, remove the 2 bolts located on the
inside in front of the door panel. Hold the mirror bracket to
keep it from falling and damaging the door or paint.
DO NOT DISCARD THESE BOLTS These will be reused
for installation of the door filler plates.
2

11025.04 – 11026.04 JK Wrangler Mirror Relocation Kit
Installation Instructions
Step 5: Install the door filler plate, again working through the
open window.
The Longer mounting tube needs to be placed at the bottom
and the shorter tube to the top. Alternate from top to bottom
while tightening to secure the door filler plate.
Step 4: Install the mirror relocation bracket using the 2 torx
head bolts removed in step 3. Alternate tightening of the upper
and lower bolts until secure.
NOTE: Adjust the bracket as you tighten to properly align it to
the top fender and door line.
3

11025.04 – 11026.04 JK Wrangler Mirror Relocation Kit
Installation Instructions
Step 6:Insert the mirror into the new relocation bracket as
shown in . Start the torx head bolt that was removed in step 1.
Tighten the bolt so that the mirror is snug but still movable inside
of the mirror relocation bracket. Open the door and adjust the
mirror parallel to the door or when there is no contact with the
door. After the mirror has been repositioned, tighten the bolt until
the breakaway feature works.
Caution: DO NOT OVERTIGHTEN The mirror head base is
made of aluminum and can easily be stripped.
Please note: Due to production changes made in late 2008 it is required that a plastic insert be used
when installing the mirror head into the mirror relocation bracket. The plastic inserts account for a
reduction made in the mirror head mounting shaft taper size. Late 2008 shafts are 2mm smaller than
earlier 2007-2008 Jeep® JK Wranglers. Inserts are required for proper fitment and operation of
mirrors. After insertion of the insert, refer to step 6 for proper installation of the mirror head.
NOTE: To ease installation of the mirror head the insert can be cut into two separate
halves.
Step 7: Repeat steps 1-6 for the opposite side.
4
/


