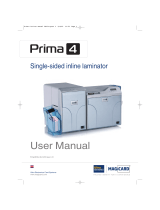
Zebra P640I User manual

Category
Plastic card printers
Type
User manual
980541-001 Rev. A
Zebra
®
P640i Card Printer
Card Printer
User Guide
ii P640i Card Printer User Guide 980541-001 Rev. A
© 2004 ZIH Corp.
The copyrights in this guide and the printers described therein are owned by Zebra Technologies Corporation. Un-
authorized reproduction of this manual or the software in the label print engine may result in imprisonment of up
to one year and fines of up to $10,000 (17 U.S.C.506). Copyright violators may be subject to civil liability.
Printer Software © ZIH Corp. All rights reserved worldwide.
Windows is a registered trademark of Microsoft Corporation. All other brand names, product names, or trademarks
belong to their respective holders.
Customer Order # 980541-001
Manufacturer Part # 980541-001 Rev. A
Caution labels on P640i Printers
Advisories used in this Guide
Pinch Hazard • Keep fingers away from printer cover hinges and back of cleaning
cassette
Hot surfaces • Danger of skin burns near laminator components
Important • Advises you of important information
Caution• Failure to follow instructions to the letter can cause malfunction, dam-
age to the printer, or personal injury.
980541-001 Rev. A P640i Card Printer User Guide iii
P640i Card Printer User Guide
Caution • The separate Quick Start Guide shows how to
set up the printer using the standard USB interface. If your
printer was configured for the optional Parallel or Ethernet
connections, refer to Technical Note 9 in Section 4 of this
Guide for instructions on driver installation.
iv P640i Card Printer User Guide 980541-001 Rev. A
WARRANTY INFORMATION
Printers
All Zebra Card Printers are warranted against defects in material or workmanship for twelve (12)
months from the purchase date.
Proof of purchase or shipment date is required to validate the warranty period. The warranty becomes
void if the equipment is modified, improperly installed or used, damaged by accident or neglect, or if
any parts are improperly installed or replaced by the user.
Note: Products must be packaged in the original or comparable packaging and shipping container. In
the event equipment is not so packaged, or if shipping damage is evident, it will not be accepted for
service under warranty. Surface transportation charges for return to customers in the continental Unit-
ed States is paid by Zebra. Otherwise, Zebra pays CPT (carriage paid to) nearest airport, customer
pays customs, duties, taxes and freight from airport to destination. If Zebra determines that the prod-
uct returned for warranty service or replacement is not defective as herein defined, the customer will
pay all handling and transportation costs.
Printheads
Since printhead wear is part of normal operation, the original printhead is covered by a twelve (12)
month warranty. Warranty period begins on purchase date.
To qualify for this warranty, the printhead must be returned to the factory or to an authorized service
center. Customers are not required to purchase Zebra supplies (media and/or ribbons) for warranty
qualification. However, if it is determined that the use of other manufacturer supplies has caused any
defect in the printhead for which a warranty claim is made, the user is responsible for Zebraís labor
and material charges required to repair the defect. The warranty becomes void if the printhead is
physically worn or damaged; also if it is determined that failure to follow the preventative maintenance
schedule listed in the Userís Guide has caused defect in the thermal printhead for which warranty
claim is made.
Software
Software is warranted to be free of defects in material and workmanship for 30 days from the date of
purchase. In the event of notification within the warranty period of defects, Zebra will replace the de-
fective CD or documentation.
Supplies
Supplies are warranted to be free from defect in material and workmanship for a period of six (6)
months for media and twelve (12) months for ribbon from the date of shipment by Zebra. This is pro-
vided the user has complied with storage guidelines, handling, and usage of the supplies in Zebra
printers.
Zebraís sole obligation under these warranties is to furnish parts and labor for the repair or possible
replacement of products found to be defective in material or workmanship during the warranty period.
Zebra may in its discretion issue a credit for any such defective products in such amount as it deems
reasonable.
Spare Parts
All parts, maintenance kits, options kits, and accessories are warranted to be free of defects in mate-
rial and workmanship for 90 days (except where otherwise denoted) from date of purchase. This war-
ranty becomes void if the item is modified, improperly installed or used, or damaged by accident or
neglect.
980541-001 Rev. A P640i Card Printer User Guide v
Warranty Exclusions and Conditions
The warranties provided above are the only warranties applicable. No other warranties, expressed or
implied, are given. Zebra does not make any IMPLIED WARRANTY OF MERCHANTABILITY OR
FITNESS FOR A PARTICULAR PURPOSE in connection with its sale of products or services. While
Zebraís desire is to be responsive to specific needs and questions, Zebra does not assume respon-
sibility for any specific application to which any products are applied including, but not limited to, com-
patibility with other equipment. All statements, technical information or recommendations relating to
Zebra products are based upon tests believed to be reliable yet do not constitute a guaranty or war-
ranty.
Zebraís maximum liability for warranty claims is limited to the invoice price of the product claimed de-
fective. Zebra does not assume responsibility for delays or replacement or repair of products. Zebra
shall not under any circumstances whatsoever be liable to any party for loss of profits, lost data, dim-
inution of good will, or any other special or consequential damages whatsoever with respect to any
claim made under agreement with Zebra. Specifically for software, Zebra is not liable for any inciden-
tal or consequential damages caused by abuse or misapplication of the software or by its use in vio-
lation of the U.S. copyright law or international treaty.
vi P640i Card Printer User Guide 980541-001 Rev. A
AGENCY APPROVALS
Product Disposal
Do not dispose of this product in unsorted municipal waste. This product is recyclable.
Please recycle according to your local standards. For more information, please see our
web site at: http://www.zebra.com/recycle
CONTACT INFORMATION
Zebra Technologies • Card Printer Solutions
www.zebracard.com
North America
1001 Flynn Road
Camarillo, CA 93012-8706 USA
Telephone: +1(805) 579 1800
Fax: +1(805) 579 1808
Toll free in the US: 800 452 4056
Europe, Middle East and Africa
The Valley Centre, Gordon Road
High Wycombe
Buckinghamshire HP13 6EQ, UK
Telephone: +44 870 241 1527
Fax: +44 870 241 0765
Asia Pacific
16 New Industrial Road
#05-03 Hudson TechnoCentre
Singapore 536204
Telephone: +65 6858 0722
Fax: +65 6885 0836
Latin America
9800 NW 41St Street, Suite 220
Doral, FL 33178
Telephone: +1(305) 558 3100
Fax: +1(805) 558 8485
980541-001 Rev. A P640i Card Printer User Guide vii
Table of Contents
Table of Contents . . . . . . . . . . . . . . . . . . . . . . . . . . . . . . . . . . . . . . . . . . . . . . . . . vii
1 • Introduction . . . . . . . . . . . . . . . . . . . . . . . . . . . . . . . . . . . . . . . . . . . . . . . . . . . . 1
Overview . . . . . . . . . . . . . . . . . . . . . . . . . . . . . . . . . . . . . . . . . . . . . . . . . . . . . . . . . . . . . . 2
Photo ID card printing . . . . . . . . . . . . . . . . . . . . . . . . . . . . . . . . . . . . . . . . . . . . . . . . . . . 2
Printing basics . . . . . . . . . . . . . . . . . . . . . . . . . . . . . . . . . . . . . . . . . . . . . . . . . . . . . . . . . 3
What makes the P640i a different kind of printer . . . . . . . . . . . . . . . . . . . . . . . . . . . . . 3
What to expect when you turn on the power . . . . . . . . . . . . . . . . . . . . . . . . . . . . . . . . 4
Test card. . . . . . . . . . . . . . . . . . . . . . . . . . . . . . . . . . . . . . . . . . . . . . . . . . . . . . . . . . . . 5
Push buttons and Indicator lights. . . . . . . . . . . . . . . . . . . . . . . . . . . . . . . . . . . . . . . . . . 5
PRINT button . . . . . . . . . . . . . . . . . . . . . . . . . . . . . . . . . . . . . . . . . . . . . . . . . . . . . . . . 5
RIBBON button. . . . . . . . . . . . . . . . . . . . . . . . . . . . . . . . . . . . . . . . . . . . . . . . . . . . . . . 6
LAMINATE button. . . . . . . . . . . . . . . . . . . . . . . . . . . . . . . . . . . . . . . . . . . . . . . . . . . . . 6
INDICATOR LIGHT SUMMARY. . . . . . . . . . . . . . . . . . . . . . . . . . . . . . . . . . . . . . . . . . . . . 7
A typical card production sequence . . . . . . . . . . . . . . . . . . . . . . . . . . . . . . . . . . . . . . . 8
2 • Media Handling . . . . . . . . . . . . . . . . . . . . . . . . . . . . . . . . . . . . . . . . . . . . . . . . 11
Loading cards . . . . . . . . . . . . . . . . . . . . . . . . . . . . . . . . . . . . . . . . . . . . . . . . . . . . . . . . . .11
Hot Loading . . . . . . . . . . . . . . . . . . . . . . . . . . . . . . . . . . . . . . . . . . . . . . . . . . . . . . . . 12
Loading the cleaning cassette. . . . . . . . . . . . . . . . . . . . . . . . . . . . . . . . . . . . . . . . . . . . 12
Why 10 cards is the normal clean frequency . . . . . . . . . . . . . . . . . . . . . . . . . . . . . . . 13
Loading the color ribbon . . . . . . . . . . . . . . . . . . . . . . . . . . . . . . . . . . . . . . . . . . . . . . . . 13
Laminating Station . . . . . . . . . . . . . . . . . . . . . . . . . . . . . . . . . . . . . . . . . . . . . . . . . . . . . 15
Laminate Cassettes . . . . . . . . . . . . . . . . . . . . . . . . . . . . . . . . . . . . . . . . . . . . . . . . . . 15
Main components of the laminating system . . . . . . . . . . . . . . . . . . . . . . . . . . . . . . . . 16
Removing the cassettes . . . . . . . . . . . . . . . . . . . . . . . . . . . . . . . . . . . . . . . . . . . . . . . 16
Loading the cassettes. . . . . . . . . . . . . . . . . . . . . . . . . . . . . . . . . . . . . . . . . . . . . . . . . 17
Installing the cassettes . . . . . . . . . . . . . . . . . . . . . . . . . . . . . . . . . . . . . . . . . . . . . . . . 18
Clearing the Laminate Channels . . . . . . . . . . . . . . . . . . . . . . . . . . . . . . . . . . . . . . . . 19
Laminating smart cards . . . . . . . . . . . . . . . . . . . . . . . . . . . . . . . . . . . . . . . . . . . . . . . 20
viii P640i Card Printer User Guide 980541-001 Rev. A 10/15/2004
Table of Contents
3 • Troubleshooting . . . . . . . . . . . . . . . . . . . . . . . . . . . . . . . . . . . . . . . . . . . . . . . 21
Image Adjustment. . . . . . . . . . . . . . . . . . . . . . . . . . . . . . . . . . . . . . . . . . . . . . . . . . . . . . 21
Troubleshooting quality problems . . . . . . . . . . . . . . . . . . . . . . . . . . . . . . . . . . . . . . . . 22
Poor color registration. . . . . . . . . . . . . . . . . . . . . . . . . . . . . . . . . . . . . . . . . . . . . . . . . 22
Examples of color mis-registration . . . . . . . . . . . . . . . . . . . . . . . . . . . . . . . . . . . . . . . 22
Poor color rendering. . . . . . . . . . . . . . . . . . . . . . . . . . . . . . . . . . . . . . . . . . . . . . . . . . 22
Faint, non-uniform image . . . . . . . . . . . . . . . . . . . . . . . . . . . . . . . . . . . . . . . . . . . . . . 22
Gaps in image at edges and corners . . . . . . . . . . . . . . . . . . . . . . . . . . . . . . . . . . . . . 22
Continuous white or black stripes on card’s longer dimension. . . . . . . . . . . . . . . . . . 23
Random occurences of white (unprinted) spots . . . . . . . . . . . . . . . . . . . . . . . . . . . . . 23
Image not centered on card . . . . . . . . . . . . . . . . . . . . . . . . . . . . . . . . . . . . . . . . . . . . 23
Image missing at top or bottom of card . . . . . . . . . . . . . . . . . . . . . . . . . . . . . . . . . . . 23
Consistent image defects, card after card . . . . . . . . . . . . . . . . . . . . . . . . . . . . . . . . . 24
Random colored patterns on image . . . . . . . . . . . . . . . . . . . . . . . . . . . . . . . . . . . . . . 24
Scratches/dings on long edges of card. . . . . . . . . . . . . . . . . . . . . . . . . . . . . . . . . . . . 24
Laminate not centered on card. . . . . . . . . . . . . . . . . . . . . . . . . . . . . . . . . . . . . . . . . . 24
Laminate not parallel with card edges . . . . . . . . . . . . . . . . . . . . . . . . . . . . . . . . . . . . 25
Laminate wrinkling . . . . . . . . . . . . . . . . . . . . . . . . . . . . . . . . . . . . . . . . . . . . . . . . . . . 25
Unusual Printer/Lmainator Events . . . . . . . . . . . . . . . . . . . . . . . . . . . . . . . . . . . . . . . . 25
Color ribbon runs for longer than 2 or 3 seconds when cover is closed (MEDIA
light stays on) . . . . . . . . . . . . . . . . . . . . . . . . . . . . . . . . . . . . . . . . . . . . . . . . . . . . 25
ALARM light stays ON after error condition is cleared . . . . . . . . . . . . . . . . . . . . . . . . 25
Card has both front and back images printed on same side . . . . . . . . . . . . . . . . . . . 25
MEDIA light ON steady, but no obvious visual problem . . . . . . . . . . . . . . . . . . . . . . . 25
Completely unexpected print results. . . . . . . . . . . . . . . . . . . . . . . . . . . . . . . . . . . . . . 26
YMC color panels stick to card. . . . . . . . . . . . . . . . . . . . . . . . . . . . . . . . . . . . . . . . . . 26
K (Black) panel sticks to card . . . . . . . . . . . . . . . . . . . . . . . . . . . . . . . . . . . . . . . . . . . 26
Loud rattling/screeching from card transport . . . . . . . . . . . . . . . . . . . . . . . . . . . . . . . 26
Brief rattling noise before every print job . . . . . . . . . . . . . . . . . . . . . . . . . . . . . . . . . . 26
Rattling noise every 10 cards . . . . . . . . . . . . . . . . . . . . . . . . . . . . . . . . . . . . . . . . . . . 26
Unusual events. . . . . . . . . . . . . . . . . . . . . . . . . . . . . . . . . . . . . . . . . . . . . . . . . . . . . . 27
Laminator spot check . . . . . . . . . . . . . . . . . . . . . . . . . . . . . . . . . . . . . . . . . . . . . . . . . 27
Additional help . . . . . . . . . . . . . . . . . . . . . . . . . . . . . . . . . . . . . . . . . . . . . . . . . . . . . . 27
Error messages. . . . . . . . . . . . . . . . . . . . . . . . . . . . . . . . . . . . . . . . . . . . . . . . . . . . . . . . 27
Table of Contents
980541-001 Rev. A 10/15/2004 P640i Card Printer User Guide ix
4 • Technical Notes . . . . . . . . . . . . . . . . . . . . . . . . . . . . . . . . . . . . . . . . . . . . . . . . 31
Technical Note 1 - General Information . . . . . . . . . . . . . . . . . . . . . . . . . . . . . . . . . . . . 32
P640i Specifications . . . . . . . . . . . . . . . . . . . . . . . . . . . . . . . . . . . . . . . . . . . . . . . . . 32
ID/Key . . . . . . . . . . . . . . . . . . . . . . . . . . . . . . . . . . . . . . . . . . . . . . . . . . . . . . . . . . . . 33
Printer Parameters in the Drivers . . . . . . . . . . . . . . . . . . . . . . . . . . . . . . . . . . . . . . . . 33
Password Protection . . . . . . . . . . . . . . . . . . . . . . . . . . . . . . . . . . . . . . . . . . . . . . . . . 34
Technical Note 2 - Card Transport . . . . . . . . . . . . . . . . . . . . . . . . . . . . . . . . . . . . . . . . 37
No-slip card transport . . . . . . . . . . . . . . . . . . . . . . . . . . . . . . . . . . . . . . . . . . . . . . . . 37
Card transport knob . . . . . . . . . . . . . . . . . . . . . . . . . . . . . . . . . . . . . . . . . . . . . . . . . . 37
Take care of the platen . . . . . . . . . . . . . . . . . . . . . . . . . . . . . . . . . . . . . . . . . . . . . . . . 37
Removing the platen. . . . . . . . . . . . . . . . . . . . . . . . . . . . . . . . . . . . . . . . . . . . . . . . . . 37
Truck interlock (arrowed) . . . . . . . . . . . . . . . . . . . . . . . . . . . . . . . . . . . . . . . . . . . . . . 38
Truck home sensor . . . . . . . . . . . . . . . . . . . . . . . . . . . . . . . . . . . . . . . . . . . . . . . . . . 38
Card presence sensor . . . . . . . . . . . . . . . . . . . . . . . . . . . . . . . . . . . . . . . . . . . . . . . . 38
Cleaning cassette . . . . . . . . . . . . . . . . . . . . . . . . . . . . . . . . . . . . . . . . . . . . . . . . . . . 39
Underside of hopper base molding . . . . . . . . . . . . . . . . . . . . . . . . . . . . . . . . . . . . . . 39
Transport Parameters in the Driver . . . . . . . . . . . . . . . . . . . . . . . . . . . . . . . . . . . . . . 39
Avoid These Problems . . . . . . . . . . . . . . . . . . . . . . . . . . . . . . . . . . . . . . . . . . . . . . . . 40
TEchnical Note 3 - Magnetic Stripe Encoder . . . . . . . . . . . . . . . . . . . . . . . . . . . . . . . . 41
Mag encoder installation . . . . . . . . . . . . . . . . . . . . . . . . . . . . . . . . . . . . . . . . . . . . . . 41
Mag encoder components . . . . . . . . . . . . . . . . . . . . . . . . . . . . . . . . . . . . . . . . . . . . . 41
Cleaning the read/write head . . . . . . . . . . . . . . . . . . . . . . . . . . . . . . . . . . . . . . . . . . . 41
Replacing the read/write head . . . . . . . . . . . . . . . . . . . . . . . . . . . . . . . . . . . . . . . . . . 41
Magnetic Encoding Functions in the Driver . . . . . . . . . . . . . . . . . . . . . . . . . . . . . . . . 41
Magnetic Encoding Preferences. . . . . . . . . . . . . . . . . . . . . . . . . . . . . . . . . . . . . . . . . 43
Techncial Note 4 - Print Station. . . . . . . . . . . . . . . . . . . . . . . . . . . . . . . . . . . . . . . . . . . 44
Examples of printhead problems . . . . . . . . . . . . . . . . . . . . . . . . . . . . . . . . . . . . . . . . 44
Cleaning the print head . . . . . . . . . . . . . . . . . . . . . . . . . . . . . . . . . . . . . . . . . . . . . . . 44
Print head attachment hardware . . . . . . . . . . . . . . . . . . . . . . . . . . . . . . . . . . . . . . . . 45
Replacing the print head . . . . . . . . . . . . . . . . . . . . . . . . . . . . . . . . . . . . . . . . . . . . . . 45
Print quality tests and adjustments . . . . . . . . . . . . . . . . . . . . . . . . . . . . . . . . . . . . . . 45
Print Station Parameters in the Driver . . . . . . . . . . . . . . . . . . . . . . . . . . . . . . . . . . . . 46
K (Black) Panel Printing . . . . . . . . . . . . . . . . . . . . . . . . . . . . . . . . . . . . . . . . . . . . . . . 47
Technical Note 5 - Flip Station . . . . . . . . . . . . . . . . . . . . . . . . . . . . . . . . . . . . . . . . . . . 50
How the flip station works . . . . . . . . . . . . . . . . . . . . . . . . . . . . . . . . . . . . . . . . . . . . 50
Flip station adjustment procedure . . . . . . . . . . . . . . . . . . . . . . . . . . . . . . . . . . . . . . . 51
Flip Station Routines in the Driver . . . . . . . . . . . . . . . . . . . . . . . . . . . . . . . . . . . . . . . 52
Carrier Motion. . . . . . . . . . . . . . . . . . . . . . . . . . . . . . . . . . . . . . . . . . . . . . . . . . . . . . . 53
x P640i Card Printer User Guide 980541-001 Rev. A 10/15/2004
Table of Contents
Techncial Note 6 - Laminator . . . . . . . . . . . . . . . . . . . . . . . . . . . . . . . . . . . . . . . . . . . . 55
Laminate position adjustments . . . . . . . . . . . . . . . . . . . . . . . . . . . . . . . . . . . . . . . . . 56
Laminator Parameters in the Driver . . . . . . . . . . . . . . . . . . . . . . . . . . . . . . . . . . . . . . 58
Correcting Laminator Problems . . . . . . . . . . . . . . . . . . . . . . . . . . . . . . . . . . . . . . . . . 59
Technical Note 7 - ID/Log . . . . . . . . . . . . . . . . . . . . . . . . . . . . . . . . . . . . . . . . . . . . . . . 61
Technical Note 8 - Using the Windows Printer Driver . . . . . . . . . . . . . . . . . . . . . . . . 62
Operator screens . . . . . . . . . . . . . . . . . . . . . . . . . . . . . . . . . . . . . . . . . . . . . . . . . . . . . . . . . . . . . . . . . . . . . . . . . . . . . .62
Printing Preferences . . . . . . . . . . . . . . . . . . . . . . . . . . . . . . . . . . . . . . . . . . . . . . . . . 62
What is black extraction? . . . . . . . . . . . . . . . . . . . . . . . . . . . . . . . . . . . . . . . . . . . . . . 63
Printer Properties . . . . . . . . . . . . . . . . . . . . . . . . . . . . . . . . . . . . . . . . . . . . . . . . . . . . 64
IDPrint Lite . . . . . . . . . . . . . . . . . . . . . . . . . . . . . . . . . . . . . . . . . . . . . . . . . . . . . . . . . 70
Card Setup . . . . . . . . . . . . . . . . . . . . . . . . . . . . . . . . . . . . . . . . . . . . . . . . . . . . . . . . . 72
Technical Note 9 - Installing the Windows Printer Driver . . . . . . . . . . . . . . . . . . . . . . 73
First things first . . . . . . . . . . . . . . . . . . . . . . . . . . . . . . . . . . . . . . . . . . . . . . . . . . . . . . 73
Driver CD . . . . . . . . . . . . . . . . . . . . . . . . . . . . . . . . . . . . . . . . . . . . . . . . . . . . . . . . . . 73
Download . . . . . . . . . . . . . . . . . . . . . . . . . . . . . . . . . . . . . . . . . . . . . . . . . . . . . . . . . . 73
Uninstalling the printer driver . . . . . . . . . . . . . . . . . . . . . . . . . . . . . . . . . . . . . . . . . . . 73
Windows file missing . . . . . . . . . . . . . . . . . . . . . . . . . . . . . . . . . . . . . . . . . . . . . . . . . 73
Installing the printer driver . . . . . . . . . . . . . . . . . . . . . . . . . . . . . . . . . . . . . . . . . . . . . 74
New Hardware Found Wizard. . . . . . . . . . . . . . . . . . . . . . . . . . . . . . . . . . . . . . . . . . . 74
Install using Zebra’s Printer Setup screen . . . . . . . . . . . . . . . . . . . . . . . . . . . . . . . . . 75
Install using “Add a Printer” . . . . . . . . . . . . . . . . . . . . . . . . . . . . . . . . . . . . . . . . . . . . 78
Firewall issues . . . . . . . . . . . . . . . . . . . . . . . . . . . . . . . . . . . . . . . . . . . . . . . . . . . . . . 79
Configuring the Ethernet option . . . . . . . . . . . . . . . . . . . . . . . . . . . . . . . . . . . . . . . . . 79
Technical Note 10 - Printer Pooling . . . . . . . . . . . . . . . . . . . . . . . . . . . . . . . . . . . . . . . 83
Set up the Printers individually . . . . . . . . . . . . . . . . . . . . . . . . . . . . . . . . . . . . . . . . . 83
980541-001 Rev. A P640i Card Printer User Guide 1
1
Introduction
Interlock actua-
Card hopper
cover
ID/Key (option-
Card
Hopper
Push
buttons
Indicator
Mag encod-
er (optional)
Cleaning
station
Print
station
Flip
station
Card transport
knob
For manual repo-
Laminating
station
Transfer toggle
Rotate clockwise
to separate trans-
Main cover
2 P640i Card Printer User Guide 980541-001 Rev. A
Introduction
Overview
Overview
The P640i Printer is a complete, fully automatic photo ID card fabricator. It comprises six
functional elements:
Card hopper
Magnetic (“mag”) encoder - optional feature
Cleaning station
Print station
•Flip station
Laminator
Because the P640i Printer is fully automatic, it requires no attention from the operator other
than media loading and an occasional vacuuming.
Although you don’t need a detailed knowledge of the printer to use the printer effectively, an
overall understanding of what goes on can help you troubleshoot effectively.
How you load the cards, color ribbon and laminate is important - see Section 2. Careful
attention to media handling takes care of most problems!
Photo ID card printing
The process used in the P640i Printer is known as digital thermal
transfer, a means of printing clean, durable images directly onto the
PVC surface of photo ID cards.
There are two different thermal transfer technologies, both used in the
P640i Printer: dye sublimation (“dye sub”), which uses the three
process colors Yellow/Magenta/Cyan for photos and graphics, and
mass transfer for machine-readable black text and bar codes.
Both types of printing are done with a single print head comprising a
row of tiny heating elements, 300 to the inch, each driven
independently by the printer controller. Sandwiched by spring pressure
between the print head and the card being printed is the color ribbon, usually a series of
process-color dye panels (Y, M and C) for dye sub, plus a panel of black resin (K) for mass
transfer.
Introduction
Printing basics
980541-001 Rev. A P640i Card Printer User Guide 3
Printing basics
This is the usual pattern for a P640i Printer
ribbon. Y, M and C are the three “dye sub”
process colors. The K panel is for infrared-
readable bar codes and other data, usually on
the back of the card. A second K panel
(YMCKK) is sometimes provided to allow
black resin printing on both sides of the card.
As the ID card is driven through the print
station, the color ribbon is metered out from
the supply roll at the same speed. Each color
reqires a separate “pass” of the card. The black
dots at the bottom edge of the print head depict
the heating elements - in practice, at 300 to the
inch, they are too small to be seen with the
naked eye.
Color migrates from the dye ribbon onto the ID card,
the spread of the dye depending on the amount of heat
applied by the print head element. Each time it comes to
a dye panel boundary, the print head lifts to allow the
card to back up, then lowers again to print the next
color.
The K (black) panel is a resin that “mass transfers”
onto the surface of the card, instead of migrating into
it. With mass transfer the printer has little control over
a pixel’s size or density - it’s either there or it isn’t. K
printing is used for bar codes because it is machine
readable, whereas YMC dyes are not.
What makes the P640i a different kind of
printer
The print station in the P640i has no pinch rollers that need cleaning to maintain accuracy
C
Cyan
Dye
M
Magen-
ta Dye
Y
Yellow
Dye
K
Black
Resin
Print
head
Color
ribbon
Card
Card
Print
head
Card
Print
head
4 P640i Card Printer User Guide 980541-001 Rev. A
Introduction
Printing basics
In the P640i the card is transported on a belt-driven truck that maintains precise registration
through the entire process of picking, cleaning, and
multi-pass printing. This means perfect color-to-color
registration time after time - no slippage, no
deterioration in print quality over time.
What to expect when you turn
on the power
1. Nothing happens for two or three seconds, then;
2. The READY light flashes yellow (indicating that
the laminator is warming up), and you will hear
the fan running , and a clicking sound inside the printer (the flip station resetting itself).
Finally;
3. After a few minutes (3 to 5), the READY light will show steady green, indicating that the
printer is ready to print.
The receiving tray for printed ID cards hooks onto the right side panel.
Power cord entry and ON-OFF switch are located on the rear
panel.
Card transport
knob
Transport
motor
Toothed blet
Card truck
Platen
Introduction
Push buttons and Indicator lights
980541-001 Rev. A P640i Card Printer User Guide 5
The P640i printer receives data through one
of three types of connector: Ethernet
(optional feature), USB (standard feature) or
Parallel (Centronics type, optional feature).
Test card
You may sometimes be asked to print a test
card. This is the pattern stored in the printers
memory (it has nothing to do with the
computer). If the printer is functioning
properly, it will be printed when the PRINT
button on the front panel is pressed following
power-up.
Push buttons and Indicator lights
PRINT button
Press the PRINT button to print the image
stored in the printers memory. When the
printer is powered up, the memory is loaded
with a checkerboard test pattern, above.
In regular on-line use, the PRINT button
reprints the last image downloaded from the
computer to the buffer memory.
If you press and hold the PRINT button for
more than two seconds, the printer will
continuously reprint the image in the buffer. Stop this action by pressing the button
momentarily while printing is in process.
Note that pressing the PRINT button will have no effect if any of the following applies: 1. An
error condition exists; 2. You have set up the print driver to print color on both sides of the
card, or; 3. The optional hardware lockout key, ID/Key, is missing (but this does not disable
the checkerboard printout available after power-up).
6 P640i Card Printer User Guide 980541-001 Rev. A
Introduction
Push buttons and Indicator lights
RIBBON button
This button is used to synchronize the ribbon – in other words,
to position it correctly under the print head.
In typical applications, the ribbon type is YMCK, and the back
of the card is printed first. In such cases, pressing the RIBBON
button will advance the color ribbon to bring the leading edge
of the next black panel under the print head.
If back side printing is not enabled, the printer will
synchronize on the next yellow panel when the RIBBON
button is pressed.
LAMINATE button
If either (or both) of the laminate transfer rollers is not loaded with a laminate patch, then
pressing the LAMINATE button will correct the condition, provided the cassette(s) is not out
of laminate. If both rollers are already loaded, the LAMINATE button has no effect.
A typical use of the LAMINATE button is in reloading a transfer roller after removing the first
hand-cut patch of laminate following installation of a fresh roll.
Figure 1 • Standard YMCK color ribbon
Introduction
INDICATOR LIGHT SUMMARY
980541-001 Rev. A P640i Card Printer User Guide 7
INDICATOR LIGHT SUMMARY
Depending on the condition they are reporting, the three indicator lights, READY, MEDIA and
ALARM, can be in one of three states: Off, On (steady), or Flashing.
The READY indicator is bi-colored. Its two color channels, green and yellow, function
independently.
READY indicator
Green = Ready to print, or printer busy.
Yellow = Laminator not at operating temperature.
MEDIA indicator
Normally Off.
On = Any media outage.
ALARM indicator
Normally Off.
What the Indicator Lights Tell You
READY MEDIA ALARM
Printer Status
GREEN YELLOW ORANGE RED
Ready to print
Printer busy
Laminator heating up, but not yet at operating temperature
Laminator heaters in sleep mode (when not in use, the heaters cool at 1oF per minute)
Printhead temperature error.
No cards in magazine, color ribbon out, cleaning tape out, laminator cassette(s) out.
Mag encoding write failure
Serious error conditions, including: MAIN COVER OPEN, Laminator too hot, card
transport stalled, card not seated properly, mag encoding verification error, head lift
failure, ribbon jam, card jam (any location), card missing (any location), no gap be-
tween laminator patches.
= light on = light flashing
8 P640i Card Printer User Guide 980541-001 Rev. A
Introduction
INDICATOR LIGHT SUMMARY
A typical card production sequence
Several variations are possible, such as multi-pass color printing on the back surface (instead
of the black-only printing shown here).
1. Blank cards are loaded face down in the hop-
per, with the mag stripe (if any) toward the
front.
2. The carriage pushes the bottom card out of
the deck, carrying it under the mag encoder.
3. After passing under the encoder, the card sur-
face is cleaned by a tacky roller (which is
itself decontaminated periodically by adhe-
sive tape in the cleaning cassette).
4. The carriage drives the card under the print
head, which transfers black characters and/or
bar code from the K panel onto the back sur-
face of the card.
5. The carriage pushes the back-printed card
into the flip station, which elevates the card
then flips it through 180o.
6. The card, now face up, is returned to the car-
riage, which is then reversed into position for
a second cleaning operation.
7. After its face cleaning the card is driven
under the print head again, this time to print a
yellow (Y) dye image - the first of three color
passes.
Introduction
INDICATOR LIGHT SUMMARY
980541-001 Rev. A P640i Card Printer User Guide 9
8. The carriage reverses the card into position
for the second color pass, magenta (M), fol-
lowed by another reverse-and-print cycle for
the third color pass, cyan (C).
9. Now fully printed, the card re-enters the flip
station, which this time acts only as an eleva-
tor (no flipping) to bring the card up to the
laminator level.
10. An ejector arm propels the card into the lami-
nator infeed rollers, which in turn drive the
card between the two white transfer rollers,
step 11.
11. Each transfer roller is “loaded” with a patch
of laminate, cut from the top and bottom cas-
settes shortly after the previous card passed
through the laminator.
12. As the card passes between the transfer rollers the laminate patches are rolled into place.
They are then permanently bonded to the card by a pair of heated rollers applying pressure
to the top and bottom surfaces.
Cutter
Upper
cassette
  • Page 1 1
  • Page 2 2
  • Page 3 3
  • Page 4 4
  • Page 5 5
  • Page 6 6
  • Page 7 7
  • Page 8 8
  • Page 9 9
  • Page 10 10
  • Page 11 11
  • Page 12 12
  • Page 13 13
  • Page 14 14
  • Page 15 15
  • Page 16 16
  • Page 17 17
  • Page 18 18
  • Page 19 19
  • Page 20 20
  • Page 21 21
  • Page 22 22
  • Page 23 23
  • Page 24 24
  • Page 25 25
  • Page 26 26
  • Page 27 27
  • Page 28 28
  • Page 29 29
  • Page 30 30
  • Page 31 31
  • Page 32 32
  • Page 33 33
  • Page 34 34
  • Page 35 35
  • Page 36 36
  • Page 37 37
  • Page 38 38
  • Page 39 39
  • Page 40 40
  • Page 41 41
  • Page 42 42
  • Page 43 43
  • Page 44 44
  • Page 45 45
  • Page 46 46
  • Page 47 47
  • Page 48 48
  • Page 49 49
  • Page 50 50
  • Page 51 51
  • Page 52 52
  • Page 53 53
  • Page 54 54
  • Page 55 55
  • Page 56 56
  • Page 57 57
  • Page 58 58
  • Page 59 59
  • Page 60 60
  • Page 61 61
  • Page 62 62
  • Page 63 63
  • Page 64 64
  • Page 65 65
  • Page 66 66
  • Page 67 67
  • Page 68 68
  • Page 69 69
  • Page 70 70
  • Page 71 71
  • Page 72 72
  • Page 73 73
  • Page 74 74
  • Page 75 75
  • Page 76 76
  • Page 77 77
  • Page 78 78
  • Page 79 79
  • Page 80 80
  • Page 81 81
  • Page 82 82
  • Page 83 83
  • Page 84 84
  • Page 85 85
  • Page 86 86
  • Page 87 87
  • Page 88 88
  • Page 89 89
  • Page 90 90
  • Page 91 91
  • Page 92 92
  • Page 93 93

Zebra P640I User manual

Category
Plastic card printers
Type
User manual

Ask a question and I''ll find the answer in the document

Finding information in a document is now easier with AI