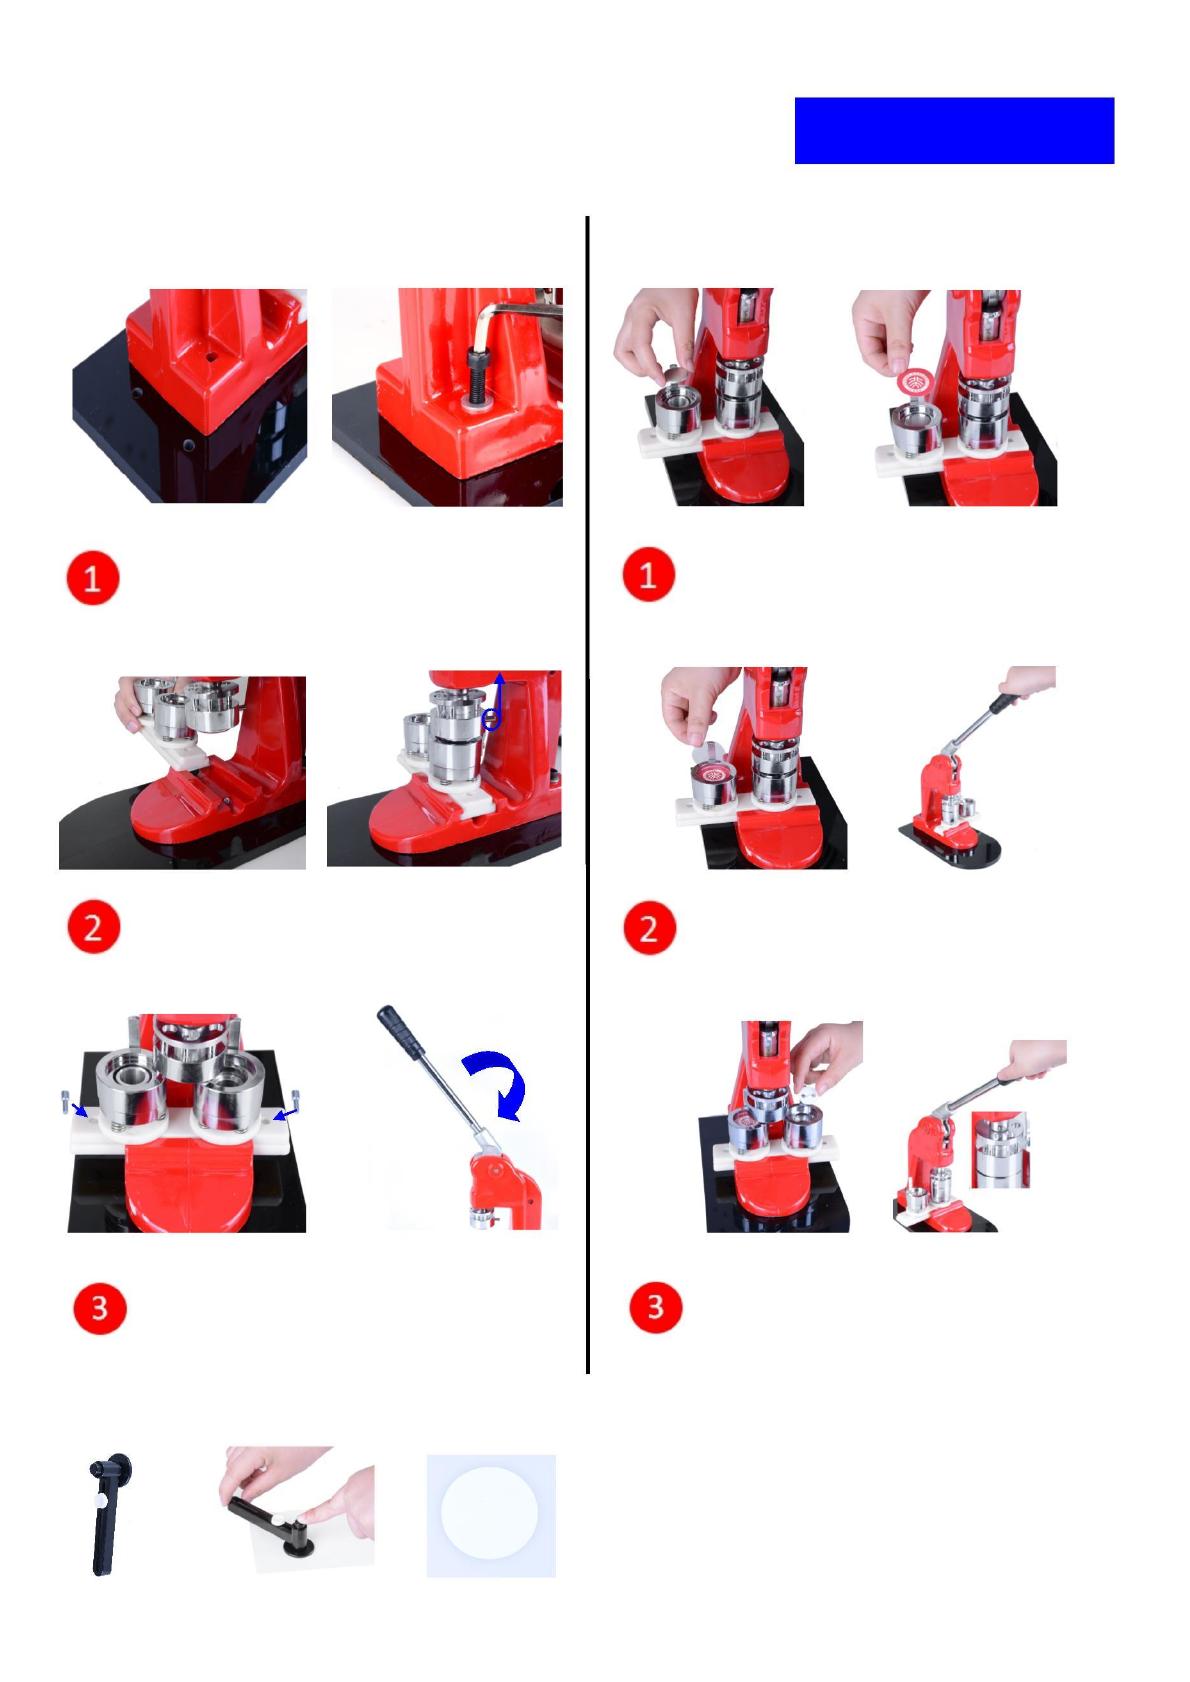
At first, remove the base plate
from packaging and then screw body
to it with a bolt and a washer.
Place metal badge top (rim down) in
left hand die in the circular slot.
Cover with cut out print (printed
side up) and one plastic film.
Press down the handle to complete
assembly. Be sure there will be some
gap in the top die when you press down
the handle.
Align die set into the body groove.
The top die may need to be lifted
before sliding die set.
Place pinned back (zigzag side of pin
showing) in right hand die. Press down the
handle to complete assembly. There must be
no gap in the top die when you press down
the handle.
Secure die set with two small nails.
Screw the handle to the body.
When cutting out your prints using the rotary
cutter, ensure that you cut out on a suitable
polypropylene. Any other surface used may
damage the blade on the cutter.
