Lutron Electronics Soil pH Meter Operating instructions
- Category
- Measuring, testing & control
- Type
- Operating instructions
This manual is also suitable for
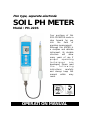
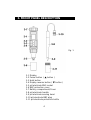
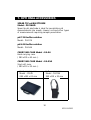
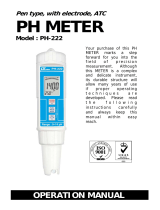
Lutron Electronics Soil pH Meter is a complete set including pen pH meter, soil pH electrode, pH 4.0 /pH 7.0 standard buffer solution. It has a separate soil pH electrode, easy for general purpose usage and remote measurement. The device enables auto calibration for pH 4, pH 7 or pH 10, auto power off, and is water resistant on the front panel. Equipped with a spear tip pH electrode, it is ideal for penetration pH measurement into soil, meats, cheese and other type of measurements requiring sample penetration.
Lutron Electronics Soil pH Meter is a complete set including pen pH meter, soil pH electrode, pH 4.0 /pH 7.0 standard buffer solution. It has a separate soil pH electrode, easy for general purpose usage and remote measurement. The device enables auto calibration for pH 4, pH 7 or pH 10, auto power off, and is water resistant on the front panel. Equipped with a spear tip pH electrode, it is ideal for penetration pH measurement into soil, meats, cheese and other type of measurements requiring sample penetration.


-
 1
1
-
 2
2
-
 3
3
-
 4
4
-
 5
5
-
 6
6
-
 7
7
-
 8
8
-
 9
9
-
 10
10
-
 11
11
-
 12
12


Lutron Electronics Soil pH Meter Operating instructions
- Category
- Measuring, testing & control
- Type
- Operating instructions
- This manual is also suitable for
Lutron Electronics Soil pH Meter is a complete set including pen pH meter, soil pH electrode, pH 4.0 /pH 7.0 standard buffer solution. It has a separate soil pH electrode, easy for general purpose usage and remote measurement. The device enables auto calibration for pH 4, pH 7 or pH 10, auto power off, and is water resistant on the front panel. Equipped with a spear tip pH electrode, it is ideal for penetration pH measurement into soil, meats, cheese and other type of measurements requiring sample penetration.
Ask a question and I''ll find the answer in the document
Finding information in a document is now easier with AI
Related papers
-
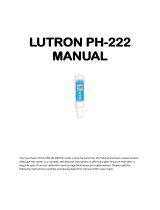
 Lutron Electronics PH-222 User manual
-
 Lutron Electronics PH-222 User manual
-
 Lutron Electronics PH-321M Operating instructions
-
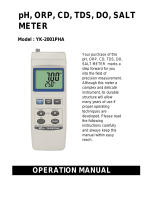 Lutron Electronics YK-2001PHA Operating instructions
-
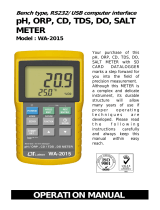 Lutron Electronics WA-2015 Operating instructions
-
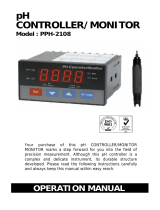 Lutron Electronics PPH-2108 Operating instructions
-
 Lutron Electronics PMS-713 Operating instructions


Other documents
-
Sceptre X195 User manual
-
ABB 2410 User manual
-
Oakton WD-35634-54 Owner's manual
-
Mettler Toledo MP120 Operating instructions
-
 JENCO VisionPlus 6177 Operating instructions
-
YSI 606075 User manual
-
PCE PCE-PH 22 Owner's manual
-
Apera PC60-Z User manual
-
 Hach H270G User manual
-
Extech Instruments PH210 User manual

